Microsoft Windows 8.1 Power User Guide for Business - Presented by Atidan
•
0 gefällt mir•2,180 views


Empfohlen
Weitere ähnliche Inhalte
Was ist angesagt?
Was ist angesagt? (17)
Ähnlich wie Microsoft Windows 8.1 Power User Guide for Business - Presented by Atidan
Ähnlich wie Microsoft Windows 8.1 Power User Guide for Business - Presented by Atidan (20)
Mehr von David J Rosenthal
Mehr von David J Rosenthal (20)
Kürzlich hochgeladen
Kürzlich hochgeladen (20)
Microsoft Windows 8.1 Power User Guide for Business - Presented by Atidan
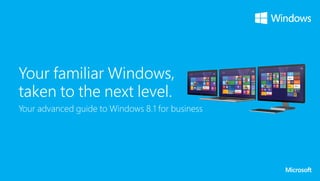
- 1. Your familiar Windows, taken to the next level. Your advanced guide to Windows 8.1 for business
- 2. The familiar, made better. With the new Windows, you have everything you need to work efficiently. Your familiar desktop is better than ever with advanced functionalities, like the new Task Manager and streamlined file management. Internet Explorer 11 gives you instant and fluid access to the world. And best of all, you can use all these features feeling confident that your important data is secure. Whether you are collaborating on a large project, preparing for an upcoming conference, or traveling for work, you can use touch, mouse, and keyboard together—seamlessly—to accomplish your every task. With the advanced features of Windows 8.1, you can get the most out of your device. Windows works the way you want it to.
- 3. Dive deeper into the desktop. From the Quick Link menu, you can accomplish traditional tasks (like signing out of the device), or you can tackle more advanced tasks in Task Manager and Control Panel. You can even access File Explorer to manage your files and folders with ease. To access the Quick Link menu: Press and hold the Start button. Right-click the Start button. Press + X. View the drivers installed on your device, update drivers, check to see if hardware is working properly, and modify hardware settings. View apps and programs currently running on your device. Adjust your device’s system and security settings, network preferences, hardware and sound, and more. Copy and paste, move files, rename files, and create new folders. * Microsoft Office may be sold separately
- 4. File Explorer just got handier. Whether you prefer a single-stuffed folder or various folders to keep you organized, File Explorer keeps your important documents accessible, searchable, and at your fingertips. To access File Explorer: Swipe in from the right edge of the screen. Tap Search. Start typing File Explorer in the search box, and then tap File Explorer. Use the address bar to enter or select a location. Use the preview pane to see a preview of your files. Enter a word or phrase to search for an item in the current folder. Point to the upper-right (or lower-right) corner of the screen, moving the mouse pointer down (or up), and then click Search. Enter File Explorer in the search box, and then click File Explorer. Press + E. Use the ribbon to accomplish common tasks, such as copying and moving, creating new folders, and changing the view. Use the back button to return to your last location or search results. Use the left pane to go to all kinds of locations: your SkyDrive, folders on your PC, devices and drives connected to your PC, and other PCs on your network. * Microsoft Office may be sold separately
- 5. Make the taskbar your own. The taskbar is your fully customizable command center on the desktop, housing the Start button, the notification area, and icons for all open apps and documents. You can make the taskbar your own by pinning frequently used applications, automatically hiding it when it’s not in use, and much, much more. To pin apps to the taskbar: Open the Search charm, and enter the name of the app you want to pin in the search box. In the search results, press and hold, or right-click, the desired app, and then tap or click Pin to Taskbar. Lock the taskbar in place. Automatically hide the taskbar when not in use. Reduce the size of the taskbar buttons. Select a taskbar location on the screen (Bottom, Left, Right, or Top). * Microsoft Office may be sold separately
- 6. Manage apps and services. Open Task Manager to see which apps and services are running on your device, as well as detailed info about performance, user accounts, network connections, and PC hardware. You can even use it to control which apps open automatically when you start Windows. To open Task Manager: Press and hold the Start button, and select Task Manager from the Quick Link menu. Tap More details to see detailed information on each app and process. Right-click the Start button, and select Task Manager. Click More details to see detailed information. Press Ctrl + Shift + Esc.
- 7. Work beautifully on the go. You can quickly access settings (for example, speaker volume, wireless network connection status, and display brightness) in Windows Mobility Center. All settings are in one location that is just a few clicks away. This is especially helpful when you need to quickly adjust laptop settings on the go—such as traveling from your desk to a meeting or going from home to the airport. To open Windows Mobility Center: Press and hold the Start button, and select Mobility Center. Right-click the Start button, and select Mobility Center. Press + X. and then select Mobility Center.
- 8. Understand Mobility Center options. Use the slider to adjust the device’s volume or mute the device. Click or tap the icon to open the Sound window to adjust playback and recording settings. Use the slider to adjust the display’s brightness. Click or tap the icon to open the Power Options window to choose or customize a power plan. View recent and active sync activity. Click or tap Sync settings for additional options. Disable the screen saver, screen blanking, or standby/sleep timer. Click or tap the icon to open the Presentation Settings window for additional options. View the current percentage of the remaining battery life. Use the drop-down menu to change power options plans, or click or tap the icon to open the Power Options window for additional options. See current status and resolution of the external display. Click or tap the icon to open the Screen Resolution window to change the appearance of the display.
- 9. Bring Windows with you. Windows To Go is your own fully manageable corporate image installed on a bootable certified USB drive. Simply insert the drive into a compatible device and boot into your personalized Windows 8.1 image (network connectivity not required). How to use Windows To Go: 1. Insert the Windows To Go into the USB port of a machine that is off. Turn on your device and boot it from the USB drive. 2. The very first run of the drive could take 10 to 15 minutes. Give it time. The drive will boot much more quickly after the first run. 3. When finished working on Windows To Go, turn off the device completely before removing the drive.
- 10. Internet Explorer 11: Fast, Fluid, Perfect for Touch. Experience a web browser that puts your focus where it should be—on the web, not your browser. Browser tabs and navigation controls appear only when you need them. The tabs bar shows sneak peeks of your open web pages, and with a single touch or click you easily open a new tab, close tabs, or switch between tabs. To open a new tab or switch between tabs: Swipe up from the bottom of the screen to display open tabs. Tap the New tab button. You can also switch between open tabs from there. Right-click anywhere on the screen to display the open tabs, and then click the New tab button. You can also switch between open tabs from there. To open a new tab, press Ctrl + T. To switch between tabs, press Ctrl + Tab. To select a top tab quickly, Press Ctrl + 1 for the first tab, Ctrl +2 for the second tab, and so on.
- 11. Flip ahead to the content you want. Whether you are reading the news or doing project research, you can turn on flip ahead to make going from page to page and article to article more fluid. With flip ahead, you can swipe across the page or click the Forward button on the right side of your screen to go to the next page of content. To turn on flip ahead with page prediction: Open the Settings charm, and then choose Privacy. Turn on Flip ahead with page prediction, which predicts the next page and loads it in the background. Now you can swipe to the left or right, or click the Forward button on the right side of your screen to navigate seamlessly between pages. From Privacy you can also customize your tracking settings, cookies, location, and other web services.
- 12. Miracast: Project to a wireless display. With new wireless display technology, you can project from your Windows 8.1 or Windows 8.1 RT device to a Miracast-enabled TV, projector, or streaming media player, in just a few clicks. You can use this to share what you’re doing on your device, present a slide show in a meeting, or even stream your favorite movie on a larger screen at home. The new Windows and Miracast help you work the way you want to. To add a wireless display to your PC: Open the Devices charm. Tap or click Project and then Add a wireless display. Choose the wireless display in the list of devices found, and follow the instructions on the screen. To project your screen to a wireless display: Open the Devices charm. Tap or click Project and then select the wireless display you want. * Miracast works with supported Windows 8.1 devices and Miracast-enabled displays. If your TV or projector doesn’t currently have Miracast support, you can easily use a Miracast receiver, like the ActionTec ScreenBeam Pro or Netgear Push2TV (PTV3000) to enable your display to use this technology.
- 13. Protect your device. Device encryption helps protect data on your Windows device by blocking malicious users from accessing your data even when the drive is physically removed from your PC and used on another. Encryption also prevents tampering with critical system files that could lead to access to personal information such as your password. Device encryption is activated by default on all InstantGo-certified devices. All you need to do is sign in to your device with a Microsoft account using administrator permissions so that Windows can automatically upload a recovery key to your Microsoft account. To verify that device encryption is enabled: Open the Settings charm and tap or click Change PC Settings. Select PC and devices, and then select PC info. In the Device encryption section, you can see that your device is currently encrypted.
- 14. Store your stuff in SkyDrive. With SkyDrive you get free storage in the cloud so you can organize your files and photos, sync across all your devices, and even edit and collaborate on Microsoft Office documents. You can access the latest version of your files from any device—no cables or USB drive necessary. To copy files to SkyDrive: From the SkyDrive app, tap or click the SkyDrive folders that will store your copied files. Swipe in from the top or bottom edge of the screen, or right-click, to open the app commands, and then tap or click Add files. Browse to the files you want to upload and select them. Tap or click Copy to SkyDrive. To share SkyDrive files or folders: Go to SkyDrive.com and sign in, if necessary. Pick the files or folders you want to share by selecting the check box in the upper-right corner of each item. Tap or click Share on the bar at the top of the page. Choose to invite people or get a link to share the files or folders. * Sign in your device with a Microsoft account to browse your SkyDrive and keep your files and settings in sync.
- 15. Work in the cloud with SkyDrive Pro. While SkyDrive is for your personal use, SkyDrive Pro is your online storage for business. But that doesn’t mean you’re limited to the cloud—you can sync SkyDrive Pro with your PC so you can work with files in your familiar File Explorer through single-instance cloud copies. Offline access allows you to make edits when you’re without Internet access, meaning that even though you made your revisions on the airplane, they’ll be synchronized with the single cloud copy as soon as you reconnect to the web. To add documents to SkyDrive Pro in Office 365: Sign in to Office 365 or go to your company SharePoint site. Near the top of the page, tap or click SkyDrive. Click or tap New Document, and then Upload Existing File. Browse to the document you want to upload, and click OK. To share documents from SkyDrive Pro in Office 365: In SkyDrive Pro, navigate to the folder that contains the document. Click the ellipsis (…) next to the document to open its callout window, and then click Share. In the Share dialog box, on the Invite people tab, type names or email addresses of people in your organization, or type Everyone. Select whether you want to grant editing or only viewing permission to invitees. Type a message to include with the invitation email. The message includes a link to the shared document. Click Share. *Microsoft SkyDrive Pro is cloud storage for employees as part of Office 365 or SharePoint Online business subscriptions.
- 16. Sync your settings. When you sign in to your PC with a Microsoft account, your PC is connected to Microsoft servers online, or “the cloud.” This means that your personal settings and preferences are stored in SkyDrive, and are synced to any PC that you sign in to. If you want to keep some of your personal settings more private you can turn off syncing for specific settings or turn off syncing entirely. To choose which settings to sync: Open the Settings charm. Click or tap Change PC settings. Tap or click SkyDrive, and then tap or click Sync settings. In the different settings categories, turn on the settings you want to sync. To stop syncing all settings: Open the Settings charm. Click or tap Change PC settings. Tap or click SkyDrive, and then tap or click Sync settings. Under the Sync settings with SkyDrive heading, turn off Sync your settings on this PC.
- 17. Get to know the power of touch. Press and hold the Start button. Access the Quick Link menu. Open the Search charm, and enter the name of the app you want to pin in the search box. In the search results, press and hold the desired app and then tap Pin to taskbar. Pin application to taskbar. Press and hold the Start button, and select Task Manager from the Quick Link menu. Tap More details to see detailed information. Open Task Manager. Press and hold the Start button, and select Mobility Center. Open Mobility Center. In Internet Explorer 11, swipe up from the bottom of the screen to bring up the tabs, and then tap the New tab button. Open a new tab in Internet Explorer 11. In Internet Explorer 11, swipe up from the bottom of the screen to bring up the tabs. Now you can switch between your open tabs. Switch between tabs in Internet Explorer 11. Open the Devices charm. Tap Project and then tap Add a wireless display. Add a wireless display to your PC. Open the Devices charm. Tap Project and then select the display you want. Project your screen to a wireless display. Open the Settings charm, and then tap Change PC Settings. Tap Accounts, Other accounts, then Add an account. Add an account.
- 18. What to do with your mouse. Right-click the Start button. Access the Quick Link menu. Open the Search charm, and enter the name of the app you want to pin in the search box. In the search results, right-click the desired app and then click Pin to taskbar. Pin application to taskbar. Right-click the Start button, and select Task Manager. Open Task Manager. Right-click the Start button, and select Mobility Center. Open Mobility Center. In IE 11, right-click anywhere on the screen to bring up the tabs, and then click the New tab button. Open a new tab in Internet Explorer 11. In IE 11, right-click anywhere on the screen to bring up the tabs. Now you can switch between your open tabs. Switch between tabs in Internet Explorer 11. Open the Devices charm. Click Project and then click Add a wireless display. Add a wireless display to your PC. Open the Devices charm. Click Project and then select the wireless display you want. Open the Settings charm, and click Change PC Settings. Click Accounts, Other accounts, then click Add an account. Project your screen to a wireless display. Add an account.
- 19. Use the keyboard to get places fast. +D Display and hide the desktop. + Start typing Search your device. +X Access the Quick Link menu. + Down arrow Close a modern app. +E Access File Explorer. + Tab Switch between recently used apps and the desktop. Ctrl + Shift + Esc Access Task Manager. + X + Down Arrow Open Mobility Center. Alt + Tab Switch between all apps, including desktop apps. + Shift + Tab Cycle through recently used apps (except desktop apps) in reverse order. In IE 11, Ctrl + T Open a new tab in Internet Explorer 11. +P Choose a presentation display mode. In IE 11, Ctrl + Tab Switch between tabs in Internet Explorer 11. + Spacebar Switch input language and keyboard layout. Ctrl+scroll wheel Zoom in or out to better view things like the apps pinned to the Start screen.
- 20. © 2014 Microsoft Corporation. All rights reserved. This material is provided “as-is”, and for informational purposes only. Microsoft makes no warranties, express or implied, and herby disclaims any and all such warranties to the maximum extent available by law.