SlideShare ist ein Scribd-Unternehmen logo
1 von 64
ONE POINT
      PERSPECTIVE


    Title a page in your sketchbook –
Skills Workshop: One Point Perspective’
ONE POINT PERSPECTIVE: What and Why?


                                  Pencil
                                  going
                                  back
                                   in
                                 space


Perspective is the way in which objects appear to the eye
  based on the way they go back into space. One point
perspective is used when we are facing an object from the
 front and want to draw how it disappears back in space.
BEFORE WE START: Helpful Hints

•  Materials – always use a ruler, pencil and a good
   eraser for perspective drawing
•  Draw lightly – you’ll need to erase part of your
   drawing so don’t press too hard with your pencil
•  Pay attention – perspective drawing is one of the
   more difficult concepts in Studio Art
•  Have patience – keep trying, even when you’re
   frustrated
•  Practice, Practice, Practice – it takes a long time
   to master a concept! Practice = knowledge
•  Color Coding Tutorial = vanishing point; red =
   a new line,       = a new piece we’ve added to the
   drawing. Watch for these arrows to help you along
   the way!
BEFORE WE START: Notes

•  Steps: – Save room at the top of your notes for
   writing down the steps (8 in all)
•  Definitions– Save room in your notes for
   definitions of the different perspective parts
•  Example– At the bottom of your notes, follow
   along to create an example. Number the parts to
   the example to correspond with the steps of the
   notes. This is your reference sheet for perspective
   drawing in 1 point perspective.
STEP 1: Draw the horizon line


   HORIZON
     LINE


Horizon Line: An imaginary horizontal line, sometimes referred
to as eye level, which divides your line of vision when you look
straight ahead. The place off in the distance where the sky
meets together with the earth.

Objects below this line are below your eye level, and objects
above this line are above your eye level. Artists draw horizon
lines to accurately establish perspective in their drawings.
STEP 2: Add a vanishing point


            Vanishing
              Point


Vanishing Point: the point on the horizon line where all of your
angular perspective lines will come together. For this tutorial,
place it slightly away from the middle of the paper so it looks like
our example.

Objects become smaller and smaller the closer they are to the
vanishing point and, at this point, seem to completely disappear
(or vanish).
ONE POINT PERSPECTIVE: What and Why?


                   Vanishing
                     Point


The vanishing point in Raphael’s School of Athens, fresco, 1509
ANOTHER NOTE ON PERSPECTIVE: Objects Above
      and Below The Horizon Line/Vanishing Point


    Below the Vanishing        Above the Vanishing
     Point/ Horizon Line        Point/ Horizon Line
    Use when you want to       Use when you want to
   make it look like you’re    make it look like you’re
  standing above an object    standing below an object
NEXT UP: Perspective lines


       Perspective
                                                 Perspective
          Line
                                                    Line


                     Perspective
                        Line


Perspective Lines: Straight lines, drawn at an angle from the
edges of objects, back into space, until they finally come
together at the vanishing point on the horizon line.
STEP 3: Draw in perspective lines


                         Top of
                         Object


                     Bottom of
                      Object


Start by making one line with your ruler from the vanishing point
outward. This line will be the bottom of your object
.
Next, make the top line. This will form the base of one side of
your object
STEP 4: Connect the perspective lines


                                              Vertical
                                             Connecting
                                               Lines


Use your ruler to draw 2 vertical lines that connect the bottom
and top perspective lines. This will complete one side of your
object.
A NOTE ABOUT PERSPECTIVE: Size and Depth


                     Shorter Line


                                                           Longer Line

Notice how the lines you just drew are not the same length? The
shorter line fools your eye into thinking that the object is moving back
into the 'space' of the page. Even though the page is flat, you've
created some artificial depth. This is the same kind of effect that you
see when you look at buildings outside. The further things are away
from you, the smaller they appear.
STEP 5: Create the Front of the Object


                                                      Horizontals


Use your ruler to create 2 horizontal lines of equal distance from
the top and bottom of the longer line.
STEP 6: Add in a Vertical Side Line


                                                        Vertical Line


Connect the 2 horizontal lines you just made with a vertical line.
This helps complete the front side of your object.
STEP 7: Erase the Extras


Erase all the extra lines that aren’t a part of your object. Carefully
erase the horizon line that goes through your object.
STEP 8: Congratulate Yourself!


You’ve drawn a box in one point perspective! You now have a
cube. Congratulations!
LET’S GO FURTHER: Adding a Roof


Let’s turn this cube into a building by adding a roof in perspective.
Start by drawing two diagonal lines from either side of the front of
the cube. Make them connect at the top.
LET’S GO FURTHER: Adding a Roof


Starting where the two diagonals you just drew came together,
draw a line that connects to the vanishing point.
LET’S GO FURTHER: Adding a Roof


Add in one last diagonal line that connects the far point of the box
with the line you just created.
LET’S GO FURTHER: Adding a Roof

                     These two lines
                       need to be
                        parallel


  Check to make sure that the last line you drew and the front
diagonal line are parallel. If they aren’t you might need to erase
   and start the roof over from the beginning. Remember -
                              Patience!
LET’S GO FURTHER: Adding a Roof


Erase the extra lines that aren’t in your roof or your cube.
LET’S GO FURTHER: Adding a Roof


Congratulations! You’ve just drawn a building in 1 point
                     perspective!
LET’S GO EVEN FURTHER: Adding Doors and
                                       Windows


Let’s make our building look even more realistic with doors and
                    windows in perspective
LET’S GO EVEN FURTHER: Adding Doors and
                                     Windows


Add in a top and bottom perspective lines for your window.
LET’S GO EVEN FURTHER: Adding Doors and
                                       Windows


Add in a two vertical side lines for your window. Check to make
sure one is slightly smaller than the other, giving the illusion of
                      going back in space.
LET’S GO EVEN FURTHER: Adding Doors and
                               Windows


 Erase the extras of your perspective lines.
LET’S GO EVEN FURTHER: Adding Doors and
                                      Windows


Insert a sash in your window to make it look realistic. Have it
  start at about the middle of the larger vertical side line and
              disappear into the vanishing point.
LET’S GO EVEN FURTHER: Adding Doors and
                                      Windows


Insert a vertical sash in your window to make it look realistic.
LET’S GO EVEN FURTHER: Adding Doors and
                                        Windows


Erase the extras of your sash’s perspective line. You now have a
               building with a roof and a window.
LET’S GO EVEN FURTHER: Adding Doors and
                                        Windows


To add a door to the front, draw 2 horizontal and 2 vertical lines.
LET’S GO EVEN FURTHER: Adding Doors and
                                       Windows


Add in a doorknob or a window to your door to make it look even
                        more realistic.
Name_____________________________
Directions: Finish the worksheet by turning the lines and squares into boxes in one point perspective. Some of
your boxes may overlap a bit. Turn it into your class INBOX when you finish to be graded.


                                                                  START HERE
Name_____________________________
Directions: Finish the worksheet by turning the lines and squares into boxes in one point perspective. Some of
your boxes may overlap a bit. Turn it into your class INBOX when you finish to be graded.
Name_____________________________
Directions: Finish the worksheet by turning the lines and squares into boxes in one point perspective. Some of
your boxes may overlap a bit. Turn it into your class INBOX when you finish to be graded.
Name_____________________________
Directions: Finish the worksheet by turning the lines and squares into boxes in one point perspective. Some of
your boxes may overlap a bit. Turn it into your class INBOX when you finish to be graded.
Name_____________________________
Directions: Finish the worksheet by turning the lines and squares into boxes in one point perspective. Some of
your boxes may overlap a bit. Turn it into your class INBOX when you finish to be graded.
Name_____________________________
Directions: Finish the worksheet by turning the lines and squares into boxes in one point perspective. Some of
your boxes may overlap a bit. Turn it into your class INBOX when you finish to be graded.
Name_____________________________
Directions: Finish the worksheet by turning the lines and squares into boxes in one point perspective. Some of
your boxes may overlap a bit. Turn it into your class INBOX when you finish to be graded.
Name_____________________________
Directions: Finish the worksheet by turning the lines and squares into boxes in one point perspective. Some of
your boxes may overlap a bit. Turn it into your class INBOX when you finish to be graded.
Name_____________________________
Directions: Finish the worksheet by turning the lines and squares into boxes in one point perspective. Some of
your boxes may overlap a bit. Turn it into your class INBOX when you finish to be graded.
Name_____________________________
Directions: Finish the worksheet by turning the lines and squares into boxes in one point perspective. Some of
your boxes may overlap a bit. Turn it into your class INBOX when you finish to be graded.
Video on One Point Perspective
CLASSWORK: Practice

•  Start with a horizon line near the middle of your
   paper.
•  Begin creating a city in 1 point perspective
•  Some buildings should overlap and be in front
   of other buildings
•  Add in details, windows, doors, trees, people,
   cars, etc.
•  You will turn it in at the end of class for a grade
   – so working during the entire class means
   you’ll receive a higher grade
Agenda and Due Dates
•  Portraits Due: Tuesday May 5th for BD;
   Wednesday May 6th for AC
•  If you have yours finished please turn it in
   on the front desk
•  Sketchbook #8 due: Thursday May 14th for
   BD; Friday May 15th for AC
•  Today: 2 point Perspective
•  Next Week: Perspective and Graffiti Art
•  You’ll need your sketchbook, ruler, eraser,
   pencil
CLASSWORK: Review


Without your notes answer the following
   questions:
•  In a cube drawn in perspective, floating above
   the horizon line you would see the front, side
   and _____________
•  In a cube drawn in perspective, floating below
   the horizon line you would see the front, side
   and __________.
•  Where would a cube be located if you could
   only see the front and the side?
•  Objects get ____________ as they approach
   the vanishing point
•  Draw a cube in 1 point perspective, ABOVE the
   horizon line
TWO POINT
PERSPECTIVE
TWO POINT PERSPECTIVE: What and Why?


Perspective is the way in which objects appear to the eye
based on the way they go back into space.
2 point perspective allows you to draw perspective objects at
an angle - not just straight on like one point perspective.
Mastering 2 point perspective drawing will give you the info
you need for drawing more interesting things.
BEFORE WE START: Helpful Hints

•  Materials – always use a ruler, pencil and a good
   eraser for perspective drawing
•  Draw lightly – you’ll need to erase part of your
   drawing so don’t press too hard with your pencil
•  Pay attention – perspective drawing is one of the
   most difficult concepts in Studio Art
•  Have patience – keep trying, even when you’re
   frustrated
•  Practice, Practice, Practice – it takes a long time
   to master a concept! Practice = knowledge
•  Color Coding Tutorial = vanishing point; red =
   a new line,       = a new piece we’ve added to the
   drawing. Watch for these arrows to help you along
   the way!
STEP 1: Draw the horizon line


   HORIZON
     LINE


Remember: Horizon Line: An imaginary horizontal line,
sometimes referred to as eye level, which divides your line of
vision when you look straight ahead. The place off in the
distance where the sky meets together with the earth.
ANOTHER NOTE ON PERSPECTIVE: Objects
            Above and Below The Horizon LINE


Below the Horizon Line      Above the Horizon Line
  Use when you want to       Use when you want to
 make it look like you’re    make it look like you’re
standing above an object    standing below an object
STEP 2: Add in 2 vanishing points


 Vanishing                                            Vanishing
  Point 1                                              Point 2


Vanishing Point: the point on the horizon line where all of your
angular perspective lines will come together. For this tutorial,
place your vanishing point on opposite sides of the horizon line.
STEP 3: Draw vertical guideline


Using your ruler, add in a vertical line that will help begin your
cube in 2 point perspective. For this tutorial, place yours above
the horizon line. This means we will be able to see 2 sides and
the bottom of the object.
STEP 4: Draw perspective lines


  Vanishing
   Point 1


Perspective Lines: Straight lines, drawn at an angle from the
edges of objects, back into space, until they finally come
together at one of the two vanishing points.

Remember, every non-vertical line must converge on one of the
two vanishing points
STEP 5: Add in vertical length and width lines
                                   Width
       Length
                                   Line
        Line


Vertical Length and Width Lines: Straight up-and-down lines
that define how long and how wide your object will be.
STEP 6: Draw in bottom perspective lines

   Start from                                Start from bottom of vertical
   bottom of                                   and extend to opposite
  vertical and                                      vanishing point
   extend to
   opposite
vanishing point


               Lines intersect, making the
              bottom, farthest away corner

Starting at the bottom point of the one of the vertical lines you just
added, draw a line that extends to the opposite vanishing point.
Repeat this same action, using the bottom point of the other vertical
line you just added, extending to the opposite vanishing point. The
lines should cross, making the furthest away corner of the underside
of your object.
STEP 7: Erase unnecessary lines


Erase all your perspective guidelines that are not part of your
                           object.
You’ve just made a cube in 2 point perspective!
STEP 8: Practice Makes Perfect


On your own, try making more cubes in 2 point perspective. Try
one on the horizon line, one below the horizon line and another
                     above the horizon line.
Name_____________________________
Directions: Finish the worksheet by turning the lines and squares into boxes in two point perspective. Some of
your boxes may overlap a bit. Turn it into your class INBOX when you finish to be graded.
                               DO THIS BOX AFTER FINISHING THE
                               FIRST


                                                               START HERE
Name_____________________________
Directions: Finish the worksheet by turning the lines and squares into boxes in two point perspective. Some of
your boxes may overlap a bit. Turn it into your class INBOX when you finish to be graded.
Name_____________________________
Directions: Finish the worksheet by turning the lines and squares into boxes in two point perspective. Some of
your boxes may overlap a bit. Turn it into your class INBOX when you finish to be graded.
Name_____________________________
Directions: Finish the worksheet by turning the lines and squares into boxes in two point perspective. Some of
your boxes may overlap a bit. Turn it into your class INBOX when you finish to be graded.
Name_____________________________
Directions: Finish the worksheet by turning the lines and squares into boxes in two point perspective. Some of
your boxes may overlap a bit. Turn it into your class INBOX when you finish to be graded.
Name_____________________________
Directions: Finish the worksheet by turning the lines and squares into boxes in two point perspective. Some of
your boxes may overlap a bit. Turn it into your class INBOX when you finish to be graded.

Weitere ähnliche Inhalte

Was ist angesagt?

Perspective drawing
Perspective drawingPerspective drawing
Perspective drawingshishir97
 
2 point perspective lesson
2 point perspective lesson2 point perspective lesson
2 point perspective lessontnicholem11
 
Perspective drawing
Perspective drawingPerspective drawing
Perspective drawingcequinn1
 
Perspective Drawings
Perspective DrawingsPerspective Drawings
Perspective DrawingsBruce Coulter
 
1 point perspective drawing
1 point perspective drawing1 point perspective drawing
1 point perspective drawingRajat Nainwal
 
Perspective drawing 1 point a
Perspective drawing 1 point aPerspective drawing 1 point a
Perspective drawing 1 point arangcapan
 
Three point
Three pointThree point
Three pointKeriC325
 
Perspective Presentation
Perspective PresentationPerspective Presentation
Perspective PresentationCiera_Johl
 
Perspective drawing techniques
Perspective drawing techniquesPerspective drawing techniques
Perspective drawing techniquesDania Abdel-aziz
 
Perspective Power Point
Perspective  Power PointPerspective  Power Point
Perspective Power Pointbambam242
 
3-Point Perspective
3-Point Perspective 3-Point Perspective
3-Point Perspective sfast08
 
One point perspective
One point perspectiveOne point perspective
One point perspectivecisenberg2
 
One and Two- Point Perspective
One and Two- Point PerspectiveOne and Two- Point Perspective
One and Two- Point PerspectiveEmily Valenza
 
Perspective art grade 9
Perspective art  grade 9Perspective art  grade 9
Perspective art grade 9Rojay Chambers
 
Linear Perspective
Linear PerspectiveLinear Perspective
Linear Perspectivemrsbauerart
 

Was ist angesagt? (20)

Perspective drawing
Perspective drawingPerspective drawing
Perspective drawing
 
2 point perspective lesson
2 point perspective lesson2 point perspective lesson
2 point perspective lesson
 
Perspective ppt
Perspective pptPerspective ppt
Perspective ppt
 
Perspective drawing
Perspective drawingPerspective drawing
Perspective drawing
 
Perspective Drawings
Perspective DrawingsPerspective Drawings
Perspective Drawings
 
1 point perspective drawing
1 point perspective drawing1 point perspective drawing
1 point perspective drawing
 
Composition Tips
Composition TipsComposition Tips
Composition Tips
 
Perspective drawing 1 point a
Perspective drawing 1 point aPerspective drawing 1 point a
Perspective drawing 1 point a
 
Three point
Three pointThree point
Three point
 
Perspective Presentation
Perspective PresentationPerspective Presentation
Perspective Presentation
 
Perspective drawing techniques
Perspective drawing techniquesPerspective drawing techniques
Perspective drawing techniques
 
Perspective Power Point
Perspective  Power PointPerspective  Power Point
Perspective Power Point
 
3-Point Perspective
3-Point Perspective 3-Point Perspective
3-Point Perspective
 
One point perspective
One point perspectiveOne point perspective
One point perspective
 
One and Two- Point Perspective
One and Two- Point PerspectiveOne and Two- Point Perspective
One and Two- Point Perspective
 
Perspective art grade 9
Perspective art  grade 9Perspective art  grade 9
Perspective art grade 9
 
What is Perspective
What is PerspectiveWhat is Perspective
What is Perspective
 
Linear Perspective
Linear PerspectiveLinear Perspective
Linear Perspective
 
Atmospheric Perspective
Atmospheric PerspectiveAtmospheric Perspective
Atmospheric Perspective
 
Elements of design
Elements of designElements of design
Elements of design
 

Ähnlich wie 1 point perspective

LESSON 4 - Flash Animation
LESSON 4 - Flash AnimationLESSON 4 - Flash Animation
LESSON 4 - Flash AnimationMarvin Bronoso
 
Hum1020 1030 brunelleschi alberti & perspective
Hum1020 1030 brunelleschi alberti & perspectiveHum1020 1030 brunelleschi alberti & perspective
Hum1020 1030 brunelleschi alberti & perspectiveProfWillAdams
 
KCC Art 141 Chapter 5 Space
KCC Art 141 Chapter 5 SpaceKCC Art 141 Chapter 5 Space
KCC Art 141 Chapter 5 SpaceKelly Parker
 
Perspective Drawings.ppt
Perspective Drawings.pptPerspective Drawings.ppt
Perspective Drawings.pptDrAlfia
 
1-and-2-point-perspective-x2-pp.ppt
1-and-2-point-perspective-x2-pp.ppt1-and-2-point-perspective-x2-pp.ppt
1-and-2-point-perspective-x2-pp.pptSelleAbayan2
 
one and two-point-perspective lesson for high school and college
one and two-point-perspective lesson for high school and collegeone and two-point-perspective lesson for high school and college
one and two-point-perspective lesson for high school and collegeMr_Saint
 
1-and-2-point-perspective-x2-pp.ppt
1-and-2-point-perspective-x2-pp.ppt1-and-2-point-perspective-x2-pp.ppt
1-and-2-point-perspective-x2-pp.pptregine_24
 
Assignment :1 point perspective
Assignment :1 point perspectiveAssignment :1 point perspective
Assignment :1 point perspectiveLaunchpad Academy
 
Draw one point perspective
Draw one point perspectiveDraw one point perspective
Draw one point perspectiveDMIS
 
DID Unit 2: Exercises
DID Unit 2: Exercises DID Unit 2: Exercises
DID Unit 2: Exercises MrLawler
 
Perspective Drawing - Lea Jean S. Suamayan
Perspective Drawing  - Lea Jean S. SuamayanPerspective Drawing  - Lea Jean S. Suamayan
Perspective Drawing - Lea Jean S. SuamayanLea Jean Sumayan
 
DID Unit 2 Exercises
DID Unit 2 ExercisesDID Unit 2 Exercises
DID Unit 2 ExercisesMrLawler
 
Journal 1 point perspective
Journal 1 point perspectiveJournal 1 point perspective
Journal 1 point perspectiveRiverwood HS
 
The Art of Portraiture
The Art of PortraitureThe Art of Portraiture
The Art of PortraitureBrian Anderson
 

Ähnlich wie 1 point perspective (20)

LESSON 4 - Flash Animation
LESSON 4 - Flash AnimationLESSON 4 - Flash Animation
LESSON 4 - Flash Animation
 
Hum1020 1030 brunelleschi alberti & perspective
Hum1020 1030 brunelleschi alberti & perspectiveHum1020 1030 brunelleschi alberti & perspective
Hum1020 1030 brunelleschi alberti & perspective
 
KCC Art 141 Chapter 5 Space
KCC Art 141 Chapter 5 SpaceKCC Art 141 Chapter 5 Space
KCC Art 141 Chapter 5 Space
 
Perspective Drawings.ppt
Perspective Drawings.pptPerspective Drawings.ppt
Perspective Drawings.ppt
 
1-and-2-point-perspective-x2-pp.ppt
1-and-2-point-perspective-x2-pp.ppt1-and-2-point-perspective-x2-pp.ppt
1-and-2-point-perspective-x2-pp.ppt
 
one and two-point-perspective lesson for high school and college
one and two-point-perspective lesson for high school and collegeone and two-point-perspective lesson for high school and college
one and two-point-perspective lesson for high school and college
 
1-and-2-point-perspective-x2-pp.ppt
1-and-2-point-perspective-x2-pp.ppt1-and-2-point-perspective-x2-pp.ppt
1-and-2-point-perspective-x2-pp.ppt
 
Assignment :1 point perspective
Assignment :1 point perspectiveAssignment :1 point perspective
Assignment :1 point perspective
 
Draw one point perspective
Draw one point perspectiveDraw one point perspective
Draw one point perspective
 
Drawing perspective
Drawing perspectiveDrawing perspective
Drawing perspective
 
Floating Boxes
Floating BoxesFloating Boxes
Floating Boxes
 
Perspective
PerspectivePerspective
Perspective
 
Draw 111- mechanical drawing and orthographic drawing
Draw 111- mechanical drawing and orthographic drawingDraw 111- mechanical drawing and orthographic drawing
Draw 111- mechanical drawing and orthographic drawing
 
DID Unit 2: Exercises
DID Unit 2: Exercises DID Unit 2: Exercises
DID Unit 2: Exercises
 
Perspective Drawing - Lea Jean S. Suamayan
Perspective Drawing  - Lea Jean S. SuamayanPerspective Drawing  - Lea Jean S. Suamayan
Perspective Drawing - Lea Jean S. Suamayan
 
DID Unit 2 Exercises
DID Unit 2 ExercisesDID Unit 2 Exercises
DID Unit 2 Exercises
 
Perspective
PerspectivePerspective
Perspective
 
Journal 1 point perspective
Journal 1 point perspectiveJournal 1 point perspective
Journal 1 point perspective
 
The Art of Portraiture
The Art of PortraitureThe Art of Portraiture
The Art of Portraiture
 
Final
FinalFinal
Final
 

Mehr von caitlin devendorf (20)

Art With A Heart.pptx
Art With A Heart.pptxArt With A Heart.pptx
Art With A Heart.pptx
 
Burlap wreaths
Burlap wreathsBurlap wreaths
Burlap wreaths
 
Monica's Paint Night
Monica's Paint NightMonica's Paint Night
Monica's Paint Night
 
Paint night colorful abstracts
Paint night colorful abstractsPaint night colorful abstracts
Paint night colorful abstracts
 
Before There Was You
Before There Was YouBefore There Was You
Before There Was You
 
Paint swatch portfolio online version for blog
Paint swatch portfolio online version for blogPaint swatch portfolio online version for blog
Paint swatch portfolio online version for blog
 
Quick Fire 2: Store floor plan
Quick Fire 2: Store floor planQuick Fire 2: Store floor plan
Quick Fire 2: Store floor plan
 
Scale models
Scale modelsScale models
Scale models
 
Concept board rubric
Concept board rubricConcept board rubric
Concept board rubric
 
Roman city tunnel book
Roman city tunnel bookRoman city tunnel book
Roman city tunnel book
 
Caitlindevendorf
CaitlindevendorfCaitlindevendorf
Caitlindevendorf
 
Account setup
Account setupAccount setup
Account setup
 
Color theory
Color theoryColor theory
Color theory
 
Medieval art
Medieval artMedieval art
Medieval art
 
Art rx weeks 10 to 15
Art rx weeks 10 to 15Art rx weeks 10 to 15
Art rx weeks 10 to 15
 
Roman city grid
Roman city gridRoman city grid
Roman city grid
 
Stage 1 planning directions
Stage 1 planning directionsStage 1 planning directions
Stage 1 planning directions
 
Stage 1 planning directions
Stage 1 planning directionsStage 1 planning directions
Stage 1 planning directions
 
Roman city tunnel book stage 1 planning directions
Roman city tunnel book stage 1 planning directionsRoman city tunnel book stage 1 planning directions
Roman city tunnel book stage 1 planning directions
 
Illuminated letter process
Illuminated letter processIlluminated letter process
Illuminated letter process
 

Kürzlich hochgeladen

AMERICAN LANGUAGE HUB_Level2_Student'sBook_Answerkey.pdf
AMERICAN LANGUAGE HUB_Level2_Student'sBook_Answerkey.pdfAMERICAN LANGUAGE HUB_Level2_Student'sBook_Answerkey.pdf
AMERICAN LANGUAGE HUB_Level2_Student'sBook_Answerkey.pdfphamnguyenenglishnb
 
Proudly South Africa powerpoint Thorisha.pptx
Proudly South Africa powerpoint Thorisha.pptxProudly South Africa powerpoint Thorisha.pptx
Proudly South Africa powerpoint Thorisha.pptxthorishapillay1
 
How to do quick user assign in kanban in Odoo 17 ERP
How to do quick user assign in kanban in Odoo 17 ERPHow to do quick user assign in kanban in Odoo 17 ERP
How to do quick user assign in kanban in Odoo 17 ERPCeline George
 
GRADE 4 - SUMMATIVE TEST QUARTER 4 ALL SUBJECTS
GRADE 4 - SUMMATIVE TEST QUARTER 4 ALL SUBJECTSGRADE 4 - SUMMATIVE TEST QUARTER 4 ALL SUBJECTS
GRADE 4 - SUMMATIVE TEST QUARTER 4 ALL SUBJECTSJoshuaGantuangco2
 
How to Add Barcode on PDF Report in Odoo 17
How to Add Barcode on PDF Report in Odoo 17How to Add Barcode on PDF Report in Odoo 17
How to Add Barcode on PDF Report in Odoo 17Celine George
 
ECONOMIC CONTEXT - PAPER 1 Q3: NEWSPAPERS.pptx
ECONOMIC CONTEXT - PAPER 1 Q3: NEWSPAPERS.pptxECONOMIC CONTEXT - PAPER 1 Q3: NEWSPAPERS.pptx
ECONOMIC CONTEXT - PAPER 1 Q3: NEWSPAPERS.pptxiammrhaywood
 
ISYU TUNGKOL SA SEKSWLADIDA (ISSUE ABOUT SEXUALITY
ISYU TUNGKOL SA SEKSWLADIDA (ISSUE ABOUT SEXUALITYISYU TUNGKOL SA SEKSWLADIDA (ISSUE ABOUT SEXUALITY
ISYU TUNGKOL SA SEKSWLADIDA (ISSUE ABOUT SEXUALITYKayeClaireEstoconing
 
Grade 9 Q4-MELC1-Active and Passive Voice.pptx
Grade 9 Q4-MELC1-Active and Passive Voice.pptxGrade 9 Q4-MELC1-Active and Passive Voice.pptx
Grade 9 Q4-MELC1-Active and Passive Voice.pptxChelloAnnAsuncion2
 
Roles & Responsibilities in Pharmacovigilance
Roles & Responsibilities in PharmacovigilanceRoles & Responsibilities in Pharmacovigilance
Roles & Responsibilities in PharmacovigilanceSamikshaHamane
 
Influencing policy (training slides from Fast Track Impact)
Influencing policy (training slides from Fast Track Impact)Influencing policy (training slides from Fast Track Impact)
Influencing policy (training slides from Fast Track Impact)Mark Reed
 
ACC 2024 Chronicles. Cardiology. Exam.pdf
ACC 2024 Chronicles. Cardiology. Exam.pdfACC 2024 Chronicles. Cardiology. Exam.pdf
ACC 2024 Chronicles. Cardiology. Exam.pdfSpandanaRallapalli
 
Like-prefer-love -hate+verb+ing & silent letters & citizenship text.pdf
Like-prefer-love -hate+verb+ing & silent letters & citizenship text.pdfLike-prefer-love -hate+verb+ing & silent letters & citizenship text.pdf
Like-prefer-love -hate+verb+ing & silent letters & citizenship text.pdfMr Bounab Samir
 
Judging the Relevance and worth of ideas part 2.pptx
Judging the Relevance  and worth of ideas part 2.pptxJudging the Relevance  and worth of ideas part 2.pptx
Judging the Relevance and worth of ideas part 2.pptxSherlyMaeNeri
 
MULTIDISCIPLINRY NATURE OF THE ENVIRONMENTAL STUDIES.pptx
MULTIDISCIPLINRY NATURE OF THE ENVIRONMENTAL STUDIES.pptxMULTIDISCIPLINRY NATURE OF THE ENVIRONMENTAL STUDIES.pptx
MULTIDISCIPLINRY NATURE OF THE ENVIRONMENTAL STUDIES.pptxAnupkumar Sharma
 
Q4 English4 Week3 PPT Melcnmg-based.pptx
Q4 English4 Week3 PPT Melcnmg-based.pptxQ4 English4 Week3 PPT Melcnmg-based.pptx
Q4 English4 Week3 PPT Melcnmg-based.pptxnelietumpap1
 
THEORIES OF ORGANIZATION-PUBLIC ADMINISTRATION
THEORIES OF ORGANIZATION-PUBLIC ADMINISTRATIONTHEORIES OF ORGANIZATION-PUBLIC ADMINISTRATION
THEORIES OF ORGANIZATION-PUBLIC ADMINISTRATIONHumphrey A Beña
 
ENGLISH 7_Q4_LESSON 2_ Employing a Variety of Strategies for Effective Interp...
ENGLISH 7_Q4_LESSON 2_ Employing a Variety of Strategies for Effective Interp...ENGLISH 7_Q4_LESSON 2_ Employing a Variety of Strategies for Effective Interp...
ENGLISH 7_Q4_LESSON 2_ Employing a Variety of Strategies for Effective Interp...JhezDiaz1
 
Choosing the Right CBSE School A Comprehensive Guide for Parents
Choosing the Right CBSE School A Comprehensive Guide for ParentsChoosing the Right CBSE School A Comprehensive Guide for Parents
Choosing the Right CBSE School A Comprehensive Guide for Parentsnavabharathschool99
 

Kürzlich hochgeladen (20)

AMERICAN LANGUAGE HUB_Level2_Student'sBook_Answerkey.pdf
AMERICAN LANGUAGE HUB_Level2_Student'sBook_Answerkey.pdfAMERICAN LANGUAGE HUB_Level2_Student'sBook_Answerkey.pdf
AMERICAN LANGUAGE HUB_Level2_Student'sBook_Answerkey.pdf
 
Proudly South Africa powerpoint Thorisha.pptx
Proudly South Africa powerpoint Thorisha.pptxProudly South Africa powerpoint Thorisha.pptx
Proudly South Africa powerpoint Thorisha.pptx
 
How to do quick user assign in kanban in Odoo 17 ERP
How to do quick user assign in kanban in Odoo 17 ERPHow to do quick user assign in kanban in Odoo 17 ERP
How to do quick user assign in kanban in Odoo 17 ERP
 
GRADE 4 - SUMMATIVE TEST QUARTER 4 ALL SUBJECTS
GRADE 4 - SUMMATIVE TEST QUARTER 4 ALL SUBJECTSGRADE 4 - SUMMATIVE TEST QUARTER 4 ALL SUBJECTS
GRADE 4 - SUMMATIVE TEST QUARTER 4 ALL SUBJECTS
 
How to Add Barcode on PDF Report in Odoo 17
How to Add Barcode on PDF Report in Odoo 17How to Add Barcode on PDF Report in Odoo 17
How to Add Barcode on PDF Report in Odoo 17
 
ECONOMIC CONTEXT - PAPER 1 Q3: NEWSPAPERS.pptx
ECONOMIC CONTEXT - PAPER 1 Q3: NEWSPAPERS.pptxECONOMIC CONTEXT - PAPER 1 Q3: NEWSPAPERS.pptx
ECONOMIC CONTEXT - PAPER 1 Q3: NEWSPAPERS.pptx
 
ISYU TUNGKOL SA SEKSWLADIDA (ISSUE ABOUT SEXUALITY
ISYU TUNGKOL SA SEKSWLADIDA (ISSUE ABOUT SEXUALITYISYU TUNGKOL SA SEKSWLADIDA (ISSUE ABOUT SEXUALITY
ISYU TUNGKOL SA SEKSWLADIDA (ISSUE ABOUT SEXUALITY
 
Grade 9 Q4-MELC1-Active and Passive Voice.pptx
Grade 9 Q4-MELC1-Active and Passive Voice.pptxGrade 9 Q4-MELC1-Active and Passive Voice.pptx
Grade 9 Q4-MELC1-Active and Passive Voice.pptx
 
Roles & Responsibilities in Pharmacovigilance
Roles & Responsibilities in PharmacovigilanceRoles & Responsibilities in Pharmacovigilance
Roles & Responsibilities in Pharmacovigilance
 
Influencing policy (training slides from Fast Track Impact)
Influencing policy (training slides from Fast Track Impact)Influencing policy (training slides from Fast Track Impact)
Influencing policy (training slides from Fast Track Impact)
 
OS-operating systems- ch04 (Threads) ...
OS-operating systems- ch04 (Threads) ...OS-operating systems- ch04 (Threads) ...
OS-operating systems- ch04 (Threads) ...
 
ACC 2024 Chronicles. Cardiology. Exam.pdf
ACC 2024 Chronicles. Cardiology. Exam.pdfACC 2024 Chronicles. Cardiology. Exam.pdf
ACC 2024 Chronicles. Cardiology. Exam.pdf
 
Like-prefer-love -hate+verb+ing & silent letters & citizenship text.pdf
Like-prefer-love -hate+verb+ing & silent letters & citizenship text.pdfLike-prefer-love -hate+verb+ing & silent letters & citizenship text.pdf
Like-prefer-love -hate+verb+ing & silent letters & citizenship text.pdf
 
Judging the Relevance and worth of ideas part 2.pptx
Judging the Relevance  and worth of ideas part 2.pptxJudging the Relevance  and worth of ideas part 2.pptx
Judging the Relevance and worth of ideas part 2.pptx
 
MULTIDISCIPLINRY NATURE OF THE ENVIRONMENTAL STUDIES.pptx
MULTIDISCIPLINRY NATURE OF THE ENVIRONMENTAL STUDIES.pptxMULTIDISCIPLINRY NATURE OF THE ENVIRONMENTAL STUDIES.pptx
MULTIDISCIPLINRY NATURE OF THE ENVIRONMENTAL STUDIES.pptx
 
Q4 English4 Week3 PPT Melcnmg-based.pptx
Q4 English4 Week3 PPT Melcnmg-based.pptxQ4 English4 Week3 PPT Melcnmg-based.pptx
Q4 English4 Week3 PPT Melcnmg-based.pptx
 
Raw materials used in Herbal Cosmetics.pptx
Raw materials used in Herbal Cosmetics.pptxRaw materials used in Herbal Cosmetics.pptx
Raw materials used in Herbal Cosmetics.pptx
 
THEORIES OF ORGANIZATION-PUBLIC ADMINISTRATION
THEORIES OF ORGANIZATION-PUBLIC ADMINISTRATIONTHEORIES OF ORGANIZATION-PUBLIC ADMINISTRATION
THEORIES OF ORGANIZATION-PUBLIC ADMINISTRATION
 
ENGLISH 7_Q4_LESSON 2_ Employing a Variety of Strategies for Effective Interp...
ENGLISH 7_Q4_LESSON 2_ Employing a Variety of Strategies for Effective Interp...ENGLISH 7_Q4_LESSON 2_ Employing a Variety of Strategies for Effective Interp...
ENGLISH 7_Q4_LESSON 2_ Employing a Variety of Strategies for Effective Interp...
 
Choosing the Right CBSE School A Comprehensive Guide for Parents
Choosing the Right CBSE School A Comprehensive Guide for ParentsChoosing the Right CBSE School A Comprehensive Guide for Parents
Choosing the Right CBSE School A Comprehensive Guide for Parents
 

1 point perspective

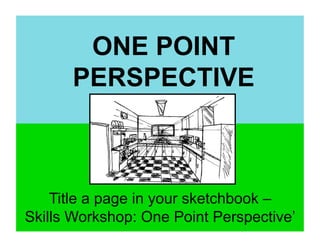
  • 1. ONE POINT PERSPECTIVE Title a page in your sketchbook – Skills Workshop: One Point Perspective’
  • 2. ONE POINT PERSPECTIVE: What and Why? Pencil going back in space Perspective is the way in which objects appear to the eye based on the way they go back into space. One point perspective is used when we are facing an object from the front and want to draw how it disappears back in space.
  • 3. BEFORE WE START: Helpful Hints •  Materials – always use a ruler, pencil and a good eraser for perspective drawing •  Draw lightly – you’ll need to erase part of your drawing so don’t press too hard with your pencil •  Pay attention – perspective drawing is one of the more difficult concepts in Studio Art •  Have patience – keep trying, even when you’re frustrated •  Practice, Practice, Practice – it takes a long time to master a concept! Practice = knowledge •  Color Coding Tutorial = vanishing point; red = a new line, = a new piece we’ve added to the drawing. Watch for these arrows to help you along the way!
  • 4. BEFORE WE START: Notes •  Steps: – Save room at the top of your notes for writing down the steps (8 in all) •  Definitions– Save room in your notes for definitions of the different perspective parts •  Example– At the bottom of your notes, follow along to create an example. Number the parts to the example to correspond with the steps of the notes. This is your reference sheet for perspective drawing in 1 point perspective.
  • 5. STEP 1: Draw the horizon line HORIZON LINE Horizon Line: An imaginary horizontal line, sometimes referred to as eye level, which divides your line of vision when you look straight ahead. The place off in the distance where the sky meets together with the earth. Objects below this line are below your eye level, and objects above this line are above your eye level. Artists draw horizon lines to accurately establish perspective in their drawings.
  • 6. STEP 2: Add a vanishing point Vanishing Point Vanishing Point: the point on the horizon line where all of your angular perspective lines will come together. For this tutorial, place it slightly away from the middle of the paper so it looks like our example. Objects become smaller and smaller the closer they are to the vanishing point and, at this point, seem to completely disappear (or vanish).
  • 7. ONE POINT PERSPECTIVE: What and Why? Vanishing Point The vanishing point in Raphael’s School of Athens, fresco, 1509
  • 8. ANOTHER NOTE ON PERSPECTIVE: Objects Above and Below The Horizon Line/Vanishing Point Below the Vanishing Above the Vanishing Point/ Horizon Line Point/ Horizon Line Use when you want to Use when you want to make it look like you’re make it look like you’re standing above an object standing below an object
  • 9. NEXT UP: Perspective lines Perspective Perspective Line Line Perspective Line Perspective Lines: Straight lines, drawn at an angle from the edges of objects, back into space, until they finally come together at the vanishing point on the horizon line.
  • 10. STEP 3: Draw in perspective lines Top of Object Bottom of Object Start by making one line with your ruler from the vanishing point outward. This line will be the bottom of your object . Next, make the top line. This will form the base of one side of your object
  • 11. STEP 4: Connect the perspective lines Vertical Connecting Lines Use your ruler to draw 2 vertical lines that connect the bottom and top perspective lines. This will complete one side of your object.
  • 12. A NOTE ABOUT PERSPECTIVE: Size and Depth Shorter Line Longer Line Notice how the lines you just drew are not the same length? The shorter line fools your eye into thinking that the object is moving back into the 'space' of the page. Even though the page is flat, you've created some artificial depth. This is the same kind of effect that you see when you look at buildings outside. The further things are away from you, the smaller they appear.
  • 13. STEP 5: Create the Front of the Object Horizontals Use your ruler to create 2 horizontal lines of equal distance from the top and bottom of the longer line.
  • 14. STEP 6: Add in a Vertical Side Line Vertical Line Connect the 2 horizontal lines you just made with a vertical line. This helps complete the front side of your object.
  • 15. STEP 7: Erase the Extras Erase all the extra lines that aren’t a part of your object. Carefully erase the horizon line that goes through your object.
  • 16. STEP 8: Congratulate Yourself! You’ve drawn a box in one point perspective! You now have a cube. Congratulations!
  • 17. LET’S GO FURTHER: Adding a Roof Let’s turn this cube into a building by adding a roof in perspective. Start by drawing two diagonal lines from either side of the front of the cube. Make them connect at the top.
  • 18. LET’S GO FURTHER: Adding a Roof Starting where the two diagonals you just drew came together, draw a line that connects to the vanishing point.
  • 19. LET’S GO FURTHER: Adding a Roof Add in one last diagonal line that connects the far point of the box with the line you just created.
  • 20. LET’S GO FURTHER: Adding a Roof These two lines need to be parallel Check to make sure that the last line you drew and the front diagonal line are parallel. If they aren’t you might need to erase and start the roof over from the beginning. Remember - Patience!
  • 21. LET’S GO FURTHER: Adding a Roof Erase the extra lines that aren’t in your roof or your cube.
  • 22. LET’S GO FURTHER: Adding a Roof Congratulations! You’ve just drawn a building in 1 point perspective!
  • 23. LET’S GO EVEN FURTHER: Adding Doors and Windows Let’s make our building look even more realistic with doors and windows in perspective
  • 24. LET’S GO EVEN FURTHER: Adding Doors and Windows Add in a top and bottom perspective lines for your window.
  • 25. LET’S GO EVEN FURTHER: Adding Doors and Windows Add in a two vertical side lines for your window. Check to make sure one is slightly smaller than the other, giving the illusion of going back in space.
  • 26. LET’S GO EVEN FURTHER: Adding Doors and Windows Erase the extras of your perspective lines.
  • 27. LET’S GO EVEN FURTHER: Adding Doors and Windows Insert a sash in your window to make it look realistic. Have it start at about the middle of the larger vertical side line and disappear into the vanishing point.
  • 28. LET’S GO EVEN FURTHER: Adding Doors and Windows Insert a vertical sash in your window to make it look realistic.
  • 29. LET’S GO EVEN FURTHER: Adding Doors and Windows Erase the extras of your sash’s perspective line. You now have a building with a roof and a window.
  • 30. LET’S GO EVEN FURTHER: Adding Doors and Windows To add a door to the front, draw 2 horizontal and 2 vertical lines.
  • 31. LET’S GO EVEN FURTHER: Adding Doors and Windows Add in a doorknob or a window to your door to make it look even more realistic.
  • 32. Name_____________________________ Directions: Finish the worksheet by turning the lines and squares into boxes in one point perspective. Some of your boxes may overlap a bit. Turn it into your class INBOX when you finish to be graded. START HERE
  • 33. Name_____________________________ Directions: Finish the worksheet by turning the lines and squares into boxes in one point perspective. Some of your boxes may overlap a bit. Turn it into your class INBOX when you finish to be graded.
  • 34. Name_____________________________ Directions: Finish the worksheet by turning the lines and squares into boxes in one point perspective. Some of your boxes may overlap a bit. Turn it into your class INBOX when you finish to be graded.
  • 35. Name_____________________________ Directions: Finish the worksheet by turning the lines and squares into boxes in one point perspective. Some of your boxes may overlap a bit. Turn it into your class INBOX when you finish to be graded.
  • 36. Name_____________________________ Directions: Finish the worksheet by turning the lines and squares into boxes in one point perspective. Some of your boxes may overlap a bit. Turn it into your class INBOX when you finish to be graded.
  • 37. Name_____________________________ Directions: Finish the worksheet by turning the lines and squares into boxes in one point perspective. Some of your boxes may overlap a bit. Turn it into your class INBOX when you finish to be graded.
  • 38. Name_____________________________ Directions: Finish the worksheet by turning the lines and squares into boxes in one point perspective. Some of your boxes may overlap a bit. Turn it into your class INBOX when you finish to be graded.
  • 39. Name_____________________________ Directions: Finish the worksheet by turning the lines and squares into boxes in one point perspective. Some of your boxes may overlap a bit. Turn it into your class INBOX when you finish to be graded.
  • 40. Name_____________________________ Directions: Finish the worksheet by turning the lines and squares into boxes in one point perspective. Some of your boxes may overlap a bit. Turn it into your class INBOX when you finish to be graded.
  • 41. Name_____________________________ Directions: Finish the worksheet by turning the lines and squares into boxes in one point perspective. Some of your boxes may overlap a bit. Turn it into your class INBOX when you finish to be graded.
  • 42. Video on One Point Perspective
  • 43. CLASSWORK: Practice •  Start with a horizon line near the middle of your paper. •  Begin creating a city in 1 point perspective •  Some buildings should overlap and be in front of other buildings •  Add in details, windows, doors, trees, people, cars, etc. •  You will turn it in at the end of class for a grade – so working during the entire class means you’ll receive a higher grade
  • 44. Agenda and Due Dates •  Portraits Due: Tuesday May 5th for BD; Wednesday May 6th for AC •  If you have yours finished please turn it in on the front desk •  Sketchbook #8 due: Thursday May 14th for BD; Friday May 15th for AC •  Today: 2 point Perspective •  Next Week: Perspective and Graffiti Art •  You’ll need your sketchbook, ruler, eraser, pencil
  • 45. CLASSWORK: Review Without your notes answer the following questions: •  In a cube drawn in perspective, floating above the horizon line you would see the front, side and _____________ •  In a cube drawn in perspective, floating below the horizon line you would see the front, side and __________. •  Where would a cube be located if you could only see the front and the side? •  Objects get ____________ as they approach the vanishing point •  Draw a cube in 1 point perspective, ABOVE the horizon line
  • 47. TWO POINT PERSPECTIVE: What and Why? Perspective is the way in which objects appear to the eye based on the way they go back into space. 2 point perspective allows you to draw perspective objects at an angle - not just straight on like one point perspective. Mastering 2 point perspective drawing will give you the info you need for drawing more interesting things.
  • 48. BEFORE WE START: Helpful Hints •  Materials – always use a ruler, pencil and a good eraser for perspective drawing •  Draw lightly – you’ll need to erase part of your drawing so don’t press too hard with your pencil •  Pay attention – perspective drawing is one of the most difficult concepts in Studio Art •  Have patience – keep trying, even when you’re frustrated •  Practice, Practice, Practice – it takes a long time to master a concept! Practice = knowledge •  Color Coding Tutorial = vanishing point; red = a new line, = a new piece we’ve added to the drawing. Watch for these arrows to help you along the way!
  • 49. STEP 1: Draw the horizon line HORIZON LINE Remember: Horizon Line: An imaginary horizontal line, sometimes referred to as eye level, which divides your line of vision when you look straight ahead. The place off in the distance where the sky meets together with the earth.
  • 50. ANOTHER NOTE ON PERSPECTIVE: Objects Above and Below The Horizon LINE Below the Horizon Line Above the Horizon Line Use when you want to Use when you want to make it look like you’re make it look like you’re standing above an object standing below an object
  • 51. STEP 2: Add in 2 vanishing points Vanishing Vanishing Point 1 Point 2 Vanishing Point: the point on the horizon line where all of your angular perspective lines will come together. For this tutorial, place your vanishing point on opposite sides of the horizon line.
  • 52. STEP 3: Draw vertical guideline Using your ruler, add in a vertical line that will help begin your cube in 2 point perspective. For this tutorial, place yours above the horizon line. This means we will be able to see 2 sides and the bottom of the object.
  • 53. STEP 4: Draw perspective lines Vanishing Point 1 Perspective Lines: Straight lines, drawn at an angle from the edges of objects, back into space, until they finally come together at one of the two vanishing points. Remember, every non-vertical line must converge on one of the two vanishing points
  • 54. STEP 5: Add in vertical length and width lines Width Length Line Line Vertical Length and Width Lines: Straight up-and-down lines that define how long and how wide your object will be.
  • 55. STEP 6: Draw in bottom perspective lines Start from Start from bottom of vertical bottom of and extend to opposite vertical and vanishing point extend to opposite vanishing point Lines intersect, making the bottom, farthest away corner Starting at the bottom point of the one of the vertical lines you just added, draw a line that extends to the opposite vanishing point. Repeat this same action, using the bottom point of the other vertical line you just added, extending to the opposite vanishing point. The lines should cross, making the furthest away corner of the underside of your object.
  • 56. STEP 7: Erase unnecessary lines Erase all your perspective guidelines that are not part of your object.
  • 57. You’ve just made a cube in 2 point perspective!
  • 58. STEP 8: Practice Makes Perfect On your own, try making more cubes in 2 point perspective. Try one on the horizon line, one below the horizon line and another above the horizon line.
  • 59. Name_____________________________ Directions: Finish the worksheet by turning the lines and squares into boxes in two point perspective. Some of your boxes may overlap a bit. Turn it into your class INBOX when you finish to be graded. DO THIS BOX AFTER FINISHING THE FIRST START HERE
  • 60. Name_____________________________ Directions: Finish the worksheet by turning the lines and squares into boxes in two point perspective. Some of your boxes may overlap a bit. Turn it into your class INBOX when you finish to be graded.
  • 61. Name_____________________________ Directions: Finish the worksheet by turning the lines and squares into boxes in two point perspective. Some of your boxes may overlap a bit. Turn it into your class INBOX when you finish to be graded.
  • 62. Name_____________________________ Directions: Finish the worksheet by turning the lines and squares into boxes in two point perspective. Some of your boxes may overlap a bit. Turn it into your class INBOX when you finish to be graded.
  • 63. Name_____________________________ Directions: Finish the worksheet by turning the lines and squares into boxes in two point perspective. Some of your boxes may overlap a bit. Turn it into your class INBOX when you finish to be graded.
  • 64. Name_____________________________ Directions: Finish the worksheet by turning the lines and squares into boxes in two point perspective. Some of your boxes may overlap a bit. Turn it into your class INBOX when you finish to be graded.