
Empfohlen
Weitere ähnliche Inhalte
Kürzlich hochgeladen
Kürzlich hochgeladen (20)
Empfohlen
Empfohlen (20)
Google Calendar
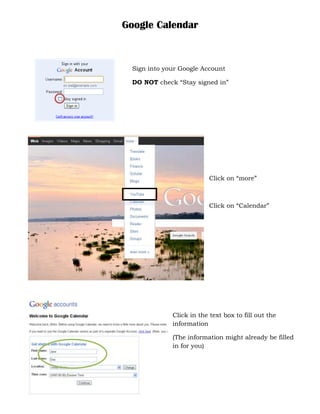
- 1. Google Calendar Sign into your Google Account DO NOT check “Stay signed in” Click on “more” Click on “Calendar” Click in the text box to fill out the information (The information might already be filled in for you)
- 2. Click on the “Create” Click inside the first box to name the event Click inside the beginning date box A calendar will show up and click on the date that you want the event to begin (Use these steps to fill out the end date box also)
- 3. Click inside the beginning time box A list of times will show up and click on the time that you want the event to begin (Use these steps to fill out the end time box also) Or if you would like the event to be All Day, click on the box next to “All day” 1 2 3 4 c 5 a b 6 7 1. Click inside the box to type in where you want the event to be held. 2. Under “Calendar” there is a drop box, you may choose which calendar you want your event to be under (by default it will show your name). 3. Click inside the box to type in the description of the event. 4. If you would like, choose a color to represent this event from other by clicking on the desired color 5. You may use the Reminders option a. Choose if you would like an e-mail/pop-up sent to you b. Type in how many minutes/hours/days etc. c. Choose what form you would like i.e. minutes/hours/days etc. 6. Choose if you want to be shown “Available” or “Busy” on that day 7. Choose who will get to see your event
- 4. Click inside the text box to type in the e-mail address of those who you want to be guests You can also click on the checkboxes under “Guests can…” to allow them to do certain things for this event Click on “Save” when you have finished and made sure the information for your event is correct If you have added guests to your event, click “Send” so they can receive a notification for this event You should now see your event on your calendar If you need to change the view of your calendar to see it by individual days, weeks, months, etc. You can click on the different views above your calendar