Hello, Git!
•Download as PPTX, PDF•
11 likes•1,697 views

Git explained, for absolute beginners. How to setup Git in windows, configuring, basic git commands, working with Github, Team-work etc explained in details with a lots of screen-shots! You can also download it from: https://dl.dropbox.com/s/3ph3mvt3pi2yt1r/Hello%2C%20Git%21.pptx?dl=1

Recommended
More Related Content
What's hot
What's hot (20)
Similar to Hello, Git!
Similar to Hello, Git! (20)
Recently uploaded
Recently uploaded (20)
Hello, Git!
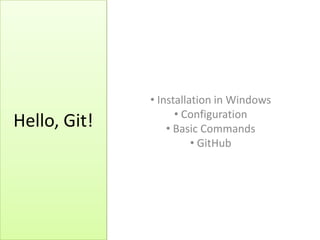
- 1. • Installation in Windows • Configuration Hello, Git! • Basic Commands • GitHub
- 2. • Distributed SCM (source code management) system – Look at the word Distributed – Everyone will have a complete copy of all history of the project in their local computers. What’s – That is, everyone has a repository in Git? their own computers. • Repository, or “Repo” is where Git stores all necessary information. It’s usually a folder with name “.git”
- 3. • Store a complete history of your project • Whenever you want to record a snapshot of your project, simply “commit” – Snapshot is nothing but the current situation of all files & folders of your project • Easily “merge” codes with your team-mates. • Secured backup of your project. Since Git is Why Git? distributed, every team-mate has complete record of the project, and it’s unlikely that everyone’s computer will crash at the same time!
- 4. • Download msysgit from Windows – http://code.google.co setup m/p/msysgit/download s/list?q=full+installer+o fficial+git
- 6. Make sure you tick these...
- 7. Go on…
- 9. • You’ve successfully installed Git in your Windows. Done • Now what? Installing! • Create a new project?
- 10. Go to the folder you want to start your project. Look, I’ll have my project in this location: G:WSLap-ProgGit-Practice
- 11. Right click on this folder and click “Git Bash here” Every time you want to do something with Git, you will need to do this.
- 12. Say hello to the “Git Bash” Yes, it’s a command-prompt interface. Don’t get worried…
- 13. New Command: “git init” • Type “git init” in Git Bash (the command- prompt window) to initiate your repository. • You’ll see that a “.git” hidden folder is created. This folder is the Repository!!!
- 14. Congratulations! • You’ve successfully created your Git Repo. • Each time you want to use Git, you’ll need to:
- 15. Tell Git who you are… • Type in Git Bash following 2 commands: – git config --global user.name "Your Name" – git config --global user.email your- email@yahoo.com • Congratulations, you’ve completed configuring your Git Bash.
- 16. Basic Commands
- 17. Create a New File in your project • I’ve created a new Readme.txt file in my project’s location…
- 18. New Command: “git status” This command shows current status of your Repository, i.e. which files are Modified, which files are not yet tracked by Git etc… It shows that, Readme.txt is an “Untracked” file. That is, Git does not know Anything about this file. You should type git add –A to start tracking All untracked files.
- 19. New Command: “git commit” • Use git add -A to add start tracking all Untracked files. • Then use git commit -m “Message telling what you did” command to actually Commit your changes. – Whenever you commit, you store a complete history/snapshot of your project. Later anytime, you may view the snapshots of your project wherever you made commit.
- 20. Add & Commit • Whenever you wish to record snapshot of your project: – git add -A command in Git Bash will add all new & modified files for commit-list. – Then, git commit -m “custom message” command will actually do the commit. • Use a message telling what you’ve done, say, “removed database dependancy”
- 21. New Command: “git log” • Displays a list of all commits you’ve made so far. – Tips: You want to go back to some previous commit? Hmm… you will need a list of all commits made in your project, and here git log command comes! • Food for brain: how does Git uniquely identify each commit? It should assign each commit some number or Id…
- 22. Back to our example scenario • After creating the Readme.txt file, we executed following commands in Git Bash, sequentially: – git status – git add -A – git commit -m “My First Commit” – git log • Output window looks like the image of next slide…
- 24. Now make some changes in Readme.txt
- 25. And create another file main.cpp or anything…
- 26. Now type git status in Git Bash • Two types of status for files: – Changed (modified) file: Readme.txt (already tracked) – Totally Untracked file: main.cpp - because we’ve just created it and haven’t told Git yet to start tracking it.
- 27. Add, Commit, and View log… • Execute following commands in Git Bash, sequentially: – git add -A – git commit -m “My second Commit” – git log • Output window is on next slide…
- 29. Commit IDs • When we execute git log this time we see two commits! • Each commit is identified by a string of 40 characters (say “7db40dfe28a9c1fb829a628048dcfc9c80589eec” from our 1st commit example) – The strings are underlined using red color in the image of the previous slide. • We will use these strings to uniquely refer any particular commit of our project.
- 31. Teamwork with GitHub
- 32. Working in a team • You and your team-mates. • Everyone has their own local Git repo in their personal computers, and everyone is committing in their local repos (Local repo is the Git repo in someone’s own computer). • How will you get the commits made by your team-mates merged in your local Repo? – And vice versa, how will your team-mates get the commits made by you merged in their local repo? • To get others’ commits merged in your local repo, you pull from their repo. – And you push to their repo so that their local repo is merged with your commits! Making sense, right?
- 33. You’ll probably need a server… • So to get the commits made by others, you should pull from their local repos i.e. their computers. • But wait… what if their computer has no Real IP? Then you can not send/receive network packets to/from it. Most of us don’t have real IP. • So we use a server which has a Real IP. Say, GitHub.com or Assembla.com – they provide us free Git hosting. • They are nothing but Git repos like the repos in our local machine. But since they have real IP, we can directly push from & pull to it. – All team-mates including me push to the repo located in a server – All team-mates including me pull from the repo located in that server. • This repo is commonly addressed as “origin”
- 34. Another problem… how will the server authenticate the team-mates? • Common approach: Username-Password system. • But typically Git allows using Public & Private keys to authenticate someone. – Think of “public key” as your username. You can safely supply anyone your public key. – Think of “private key” as your password. You should NEVER provide anyone your private key! • Keys are nothing but some text/characters. LONG stream of characters!
- 35. Generate Public & Private keys • Type following commands in Git Bash: – cd ~ – ssh-keygen.exe -t rsa -C "youremail@google.com"
- 36. • Press <enter> in all prompts. • Note the directory where the keys are created (red colored underlined)
- 37. Open the directory (red colored underlined in previous slide’s image)
- 38. You can open the files with Notepad++ • If you open them with Notepad++/Text Editor, you can find the keys.
- 39. Now you can open a free account at http://github.com • After completing registration, add your PUBLIC key…
- 40. Copy and Paste your PUBLIC key
- 41. • Cool! You’ve successfully provided you PUBLIC key at GitHub.com. Now you can create your project. 1. Provide a Name 2. Don’t check this! 3. Click to Create Repository.
- 42. You’ll be given URL to your Repo. For our example, the URL is: git@github.com:bsadd/My-Cool-Project.git
- 43. Let’s Push to GitHub’s repo! • Start Git Bash like usual…
- 44. Our First Push • Type following command in Git Bash: – git remote add origin git@github.com:bsadd/My-Cool- Project.git – git push origin master
- 45. Verify in GitHub’s Website
- 46. New Command: “git clone” • Now you’ve pushed the initial repo to GitHub. • Then, your team-mates should know about this repo and grab the code from it for the first time. – All of your team-mates should issue this command in their Git Bash: – git clone git@github.com:bsadd/My-Cool- Project.git • Remember: they should not create Git repo in their computer. Only one person in the team should create the repo using git init command – Then he should push it to a server using git push command – And all other team mates should Clone the repo to their local computers using git clone command. • Note: You should add your team-members in the Project Admin area. Otherwise they will not have access to push in the GitHub repo (see image in next slide)
- 47. Adding team members I’ve added “shafiul” in my project. This is the username of Shafiul Azam (my team-mate ) in GitHub.com
- 48. Cloning • When Shafiul will clone using git clone command, a new project will be created for him. • Then he will be able to push/pull/add/commit whatever…
- 49. Shafiul, who is using Linux (another kind of operating system like Windows), cloned my Repo. Wow! Git has created the repo for him with my codes “Readme.txt” & “main.cpp” Note that this is his own local repo in his computer. He can do whatever he wants..
- 50. Shafiul will Push… • When Shafiul will finish editing, he will eventually type following commands in his Git Bash: – git add -A – git commit -m “some message” – git push origin master • When he pushes, GitHub’s repo will be updated with his changes.
- 51. And I will Pull! • To get the changes made by shafiul automatically merged in my local computer, I will need to use command git pull – git pull origin master • Now my local repo will be updated with Shafiul’s changes. • Similarly I can push and Shafiul will need to pull…
- 52. Thank You