Weitere ähnliche Inhalte
Mehr von Sarah Bombich (12)
Kürzlich hochgeladen (20)
Powerpoint 2007: Tips, Tricks, and New Features
- 1. ©Olin Library Arc Page 1 of 5
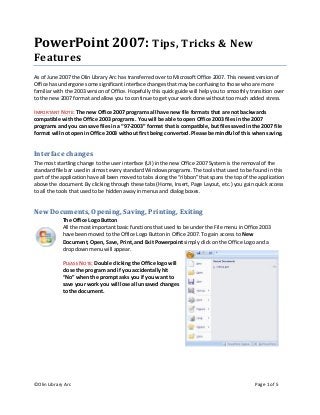
PowerPoint 2007: Tips, Tricks & New
Features
As of June 2007 the Olin Library Arc has transferred over to Microsoft Office 2007. This newest version of
Office has undergone some significant interface changes that may be confusing to those who are more
familiar with the 2003 version of Office. Hopefully this quick guide will help you to smoothly transition over
to the new 2007 format and allow you to continue to get your work done without too much added stress.
IMPORTANT NOTE: The new Office 2007 programs all have new file formats that are not backwards
compatible with the Office 2003 programs. You will be able to open Office 2003 files in the 2007
programs and you can save files in a “97‐2003” format that is compatible, but files saved in the 2007 file
format will not open in Office 2003 without first being converted. Please be mindful of this when saving.
Interface changes
The most startling change to the user interface (UI) in the new Office 2007 System is the removal of the
standard file bar used in almost every standard Windows programs. The tools that used to be found in this
part of the application have all been moved to tabs along the “ribbon” that spans the top of the application
above the document. By clicking through these tabs (Home, Insert, Page Layout, etc.) you gain quick access
to all the tools that used to be hidden away in menus and dialog boxes.
New Documents, Opening, Saving, Printing, Exiting
The Office Logo Button
All the most important basic functions that used to be under the File menu in Office 2003
have been moved to the Office Logo Button in Office 2007. To gain access to New
Document, Open, Save, Print, and Exit Powerpoint simply click on the Office Logo and a
drop down menu will appear.
PLEASE NOTE: Double clicking the Office logo will
close the program and if you accidentally hit
“No” when the prompt asks you if you want to
save your work you will lose all unsaved changes
to the document.
- 2. ©Olin Library Arc Page 2 of 5
Starting a New Slide Show
Home: This is where you will find the old “Edit” menu with Cut, Copy, and Paste options. This is also where
the controls for Slides, Fonts, Alignment, Spacing, Drawing, and Editing will be.
PLEASE NOTE: Some sections in each tab also have arrows in the
bottom right hand corner that offer additional options in that
particular section. For example, if you want to change the
alignment, indentation, or spacing of your paragraph, you will
not find those options in the menu above. If you click on the
arrow in the “Paragraph” section, however, you will find them.
Customizing a Slide
Insert: This is where you will find controls for inserting Pictures, Movies, Tables, Word Art, Sounds, and
Links.
Inserting Illustrations, Links, and Media Clips
Click on the “Insert” button. In the Illustrations section, you will find picture, clip art, photo album, shapes,
smart art, and chart. To insert a picture of something that is already saved on your computer, click
“Picture”. A window will pop up under My Pictures for you to choose from.
When you click on Clip Art, a window on the right hand side of the screen will show up, which will allow you
to search for a specific topic. Type in “birthday” in the search box and then click “go”. You will find your
choices below in the window.
You can create a photo album by clicking on the “Photo Album” button and choosing pictures from your
documents.
New in 07: Smart Art
Smart Art offers a number of ready to use graphics in which you can easily edit content.
Click on the SmartArt button. A window will pop up showing your choices: List, Process, Cycle, Hierarchy,
Relationship, Matrix, and Pyramid. Click on the Cycle button, then the Radial Cycle choice, and then “ok”.
You can now type in what would fit in the circles. You will find the SmartArt options now available on the
top of your screen. Click on the Insert tab to return to your menu.
- 3. ©Olin Library Arc Page 3 of 5
Click on the Hyperlink button in the Links section. In order to add a hyperlink, you can search through your
documents. Once you have found what you are looking for, double click on it, and a hyperlink will appear
on the screen.
To add a movie or sound, click on the respective buttons and search through your documents. You may also
select a movie or sound that is already part of the PowerPoint program. Just click on the downward
pointing arrow located below the word Movie or Sound and choose Movie/Sound from Clip Organizer. A
menu of choices will appear on your right hand side. Again, you can search for a specific topic, for example,
birthday.
Design: This tab contains options for Page Setup, Margins, Page Orientation, Theme, and Background.
PLEASE NOTE: You can view how your new slide would look with the change by holding your mouse over the
option you are contemplating.
New in 07: Themes
Themes allow you to quickly change the look and feel of an entire presentation with a single click. You can
change aspects of a theme and save the new theme for future use.
Slide Master View
Use slide masters to make design changes that affect each slide in your Microsoft Office PowerPoint 2007
presentation. When you start with a blank presentation, you can add a consistent look to your slides by
customizing the slide master, instead of customizing each slide individually. To customize a slide master,
you specify the placements of text and on a slide. You also specify placeholder sizes, text styles,
backgrounds, theme colors, graphics, effects, and animations.
First go to View>Slide Master. This gives you a “behind the scenes” look at the slide. You will notice that
there is now a tab in the upper left entitled “Slide Master.” Click on this tab and select Insert Placeholder.
Select which kind of placeholder you’d like to put in this master slide, and then click and drag to place it in
the slide. You can then replace the default text for the place holder with whatever text (prompt) you’d like.
To save the slide layout, select Rename, from the grouping on the left.
Viewing Your Progress
View: Under this tab, you will be able to change Presentation Views, Zoom, Color Scale, and Window,
which allows you to see your slides one at a time or in a cascade.
- 4. ©Olin Library Arc Page 4 of 5
Connecting Individual Slides into a Slide Show
Animations: Under this tab, you will find your options for Transitions.
PLEASE NOTE: You can preview each transition by placing your mouse over the particular transition you
want to see. To see all your transition options, click on the bottom arrow located on the right of the
transition options. You can either choose different transitions for each slide, in which you will have to
physically change the transition after you click on an individual slide, or you can apply one transition option
to all your slides by clicking the Apply To All button in the Transition to This Slide section. You can also
choose when the slide will transition by either choosing the On Mouse Click option or setting a time for
when it will automatically transition.
Choosing Transitions
Click on the Home tab and create a new slide. Now go back to the Animations tab. Click on the slide on your
screen. Now scroll down Animate, located in the Animations section. Click Fly In, As One Object. For the
transition, click on the third arrow on the right hand side of the transitions options. Choose Wipe Right
under the Wipes section. For the transition sound, choose Bomb. Then set the transition speed to fast. Click
on the Mouse Click option for when to transition. Now Click on the Slide Show tab and choose From current
Slide in the Start Slide Show section. You can now see how your transition will look.
Reviewing a Slide Show
Slide Show: Here, you can Start Slide Show from either the beginning or the current slide, Set Up your slide
by recording a narration and time the show, or change the Monitors option by setting up resolution and
which monitor you are using.
Review: Here, you will find your basic proofreading options: Spell Check, Research, Thesaurus, Translator,
Language Check, leave Comments, and Protect Presentation.
Features that change when you open a PowerPoint 2007 presentation in an
earlier version of PowerPoint
- 5. ©Olin Library Arc Page 5 of 5
Office PowerPoint 2007 feature What happens to the feature when you open an
Office PowerPoint 2007 presentation in an earlier
version of PowerPoint
Charts (except Microsoft Graph charts) Charts are converted to OLE (OLE: A program‐
integration technology that you can use to share
information between programs. All Office
programs support OLE, so you can share
information through linked and embedded
objects.) objects, which you can edit. However, a
chart may appear differently if you edit it in an
earlier version of PowerPoint and then reopen it in
Office PowerPoint 2007.
Custom slide layouts Custom slide layouts that have specific
backgrounds, unique slide transitions, and more
are represented as multiple masters (master: A
slide view or page on which you define formatting
for all slides or pages in your presentation. Each
presentation has a master for each key
component: slides, title slides, speaker's notes,
and audience handouts.).
Drop shadows Soft outer shadows are converted to hard shadows
that you can edit.
Heading and body fonts Heading and body fonts are converted to static
formatting. If you then reopen the file in Office
PowerPoint 2007 and use a different style, heading
and body fonts do not automatically change.
Shapes, pictures, objects (object: A table, chart,
graphic, equation, or other form of information.
Objects created in one application, for example
spreadsheets, and linked or embedded in another
application are OLE objects.), animations, and new
effects, including the following:
• Two‐dimensional (2‐D) or three‐
dimensional (3‐D) text
• Gradient outlines on shapes or text
• Strikethrough and double‐strikethrough on
text
• Gradient, picture, and texture fills on text
• Shadows, soft edges, reflections, and most
3‐D effects on any kind of object
New visual features or effects that are available in
Office PowerPoint 2007 are converted to
uneditable pictures in earlier versions of
PowerPoint.
SmartArt graphics SmartArt graphics are converted to uneditable
pictures in earlier versions of PowerPoint.