2. Non-Point Source Pollution
Storm drain collects
water from parking lot
Storm Water Pipe
Opportunity for on site treat-
ment with rain gardens
Downspout
Wastewater Treatment Plant
Sanitary Line
Untreated storm water Industrial Discharge
Wastewater treatment overflow
Why Rain Gardens ? Do Drops
Õ Impervious surfaces associated with development, such
as rooftops, driveways and roads, are areas that shed rainwater.
Õ Impervious surfaces increase storm water runoff.
Õ Construction activity on development sites usually compacts the soil,
limiting the ground’s capacity to absorb water. These factors reduce the
ability of our landscape to absorb and filter storm water.
Õ Pollution enters our waterways through our storm drainage systems,
including sewers and open ditches, which flow untreated to our streams and
lakes.
Õ Studies by the United States Environmental Protection Agency (USEPA) have shown
that a substantial amount of the pollution in our streams, rivers and lakes is carried
there by runoff from our own yards, driveway, and rooftops. An easy way to help keep
these pollutants out of our local waterways is to install a rain garden!
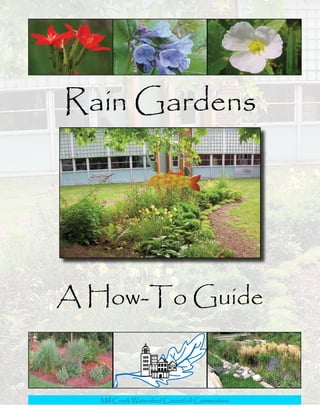
Rain Gardens
3. How a Rain Garden Works
Flow
Gutter
Rock Gravel swale to
rain garden
Berm to hold water
Locate rain garden 10’
during heavy rains
from building
Soil amendments to
Choose plants that are
allow water to percolate Size of rain garden native, drought tolerant,
into ground corresponds to roof size and non evasive
Benefits of Rain Gardens
Do Drops
Õ Helps keep water clean by
filtering storm water runoff
before it enters local waterways
Õ Helps alleviate problems associated with
flooding and drainage
Õ Enhances the beauty of individual yards and
communities
Õ Provides habitat and food for wildlife including
birds and butterflies
Õ Recharges the ground water supply
Rain barrels can also
be incorporated into
Do Drops your rain garden
plans. They can
hold a set amount of
rain water which could
be used at a later time,
while the overflow can
be directed to your rain
Vegetated Swale, garden. Rain barrels can
“Thinking Outside the Pipe” also be customized to suit
Landscape Architecture Magazine your taste.
February 006
Mill Creek Watershed Council of Communities
4. Finding the Right Location for Your Rain Garden
Õ Locate rain garden so that there is minimal disturbance to nearby tree roots.
Do Drops Õ Sunny or partly sunny locations are best for rain gardens, but shade gardens are
possible.
Õ Rain gardens should be integrated with your landscape.
Õ Place rain gardens up-slope of excessively wet areas to reduce the amount of water that flows
into them. Because these areas are already poorly drained, rain gardens should not be placed
in an area of your yard where water collects.
Õ Rain gardens should not be placed over or near the drain field of a septic system.
Rain Gardens
5. Determining Drainage Area of Roof
In order to estimate the size of your roof, you will need to measure the footprint, or the
outside dimension of your building. Your building’s footprint will be relatively equal to
the area of your roof, which can be determined by multiplying the width of your building
(in feet) by its length (in feet).
Estimating Roof Drainage Area Drainage Area Calculations
Roof drainage area Wid
th
h
n gt
Downspout Le
Rain Garden
Location Roof Drainage Area
Length ft X Width ft = Square Feet ft
Dividing Roof Area into Sections
To estimate your drainage area, count the number
of downspouts and then divide the number of 40 f
t
downspouts that drain to your area by the total ft
60
number of downspouts
40 f
t
ft
60
Downspout Directed Roof Drainage Area
to Rain Garden 60 ft X 0 ft = 2400 ft2
Downspouts
Percentage of
directed to garden
X 00 = roof area that Contributing
Total Number Total Roof Roof
drains to garden Roof
of downspouts Drainage X Area =
Drainage
Area %
Area
X 00 = 33%
00 ft X % = 800 ft2
Mill Creek Watershed Council of Communities
6. Determining the Size
Finding the Slope and Depth
. Set one stake at the uphill side of your
rain garden and another stake at the
downhill side.
. Tie a string at ground level to the uphill
stake.
. Secure the other end of the string to the
downhill stake, ensuring that the string
is level.
. Measure the length (in inches) between
Length the two stakes. Next, measure the
height (in inches) between the ground
Height
and the string of the downhill stake.
slope
Slope Depth
% to inches
Height 5% - 7% 6 to 7 inches
X 00 = % Slope
Length 8% - % 8 inches max
Example . Use Slope table above to determine the
9 in depth of rain garden. For example,
X 00 = 5% Slope with a slope of 5% the depth will be 6
80 in
inches.
Calculating the Size
. Using the Rain Garden Size Factor Tables on Rain Garden Size Factor Table
the right, determine your garden size based on (less than 30 feet from downspout)
your soil type, garden depth and distance from
4 in. 6 in. 8 in.
downspout.
. For help determining your soil type see the Do Sandy Soil 0.9 0.15 0.08
Drops box on the next page. Silty Soil . 0. 0.06
3. For example, if you have Sandy Soils with a Clayey Soil 0. 0. 0.0
depth of 6 in, the size factor will be 0.15.
. Multiply the size factor by the drainage area to
find the square feet (ft) of the rain garden. Rain Garden Size Factor Table
Drainage Size Square Feet (more than 30 feet from downspout)
Area X Factor = (Ft) of Size Factor, all depths
Rain Garden Sandy Soil 0.0
800 ft
X 0. = 120 ft2 Silty Soil 0.06
Clayey Soil 0.0
Rain Gardens
7. Determining the Shape
The longer side of the rain garden
should face up-slope; that is, the
length of the rain garden should be
Width perpendicular to the slope and the downspout.
This allows the garden to catch as much water as
possible.
However, the rain garden should still be wide
enough for the water to spread evenly over the
Length whole bottom and to provide the space for a
Area of Rain
Garden variety of plants. A good rule of thumb is that
the rain garden should be about twice as long
(perpendicular to the slope) as it is wide.
Rain Garden
Area Square Feet (ft)
For Example, if you take your rain garden = Length in Feet
Width in
square footage, 120 ft2, and you want an 8-foot
Feet
wide garden, the length would be 15 feet.
0 ft ft in
=
8 ft Length
Determining Soils Types Do Drops -0% organic matter derived from yard waste
In general, if your soil profile is compost. If you would like a more exact soil
sandy (coarse textured soils), you mix, contact your local SWCD for a list of local
may be able to simply loosen the soil and improve suppliers who will be able to provide you with a
it with some yard waste compost to prepare your bio-retention soil mix.
rain garden for planting. Silty soils (intermediate
textured soil) drain better than clayey soils (fine Basic Soil Tests
textured soils), but both types may need help to Feel Test - Rub moist soil between your finger
function properly. If you are unsure of your soil tips. Sandy soil feels gritty, silty soil feels smooth,
type you can contact your local Soil and Water and clayey soils feel sticky.
Conservation District (SWCD).
Ribbon Test - Moisten soil to a putty like
There may be extra considerations in planning consistency. Make a soil ribbon by squeezing the
and building rain gardens containing silty, moist soil between your thumb and forefinger.
clayey, or compacted soils. These soils Sandy soils will not form a ribbon. Silty soils
reduce the ability of rain water to percolate, will make a short, weak ribbon. Clayey soils will
the downward movement of water through the form a long, strong ribbon.
soil. Consequently, you can increase the size
of your rain garden and/or completely replace Dry Test - Mold soil into a ball and allow it to air
the soil to help combat the slow percolation dry for several hours. Once the soil is dry, crush
of clayey and compacted soils in that area. A it between your thumb and forefinger. Sandy
recommended soil mix is 0-60% sand, 0-0% soils will crumble easily, while silty soils will be
loamy topsoil (which can be purchased from moderately resistant and firm. Clayey soils will
local garden stores or landscape suppliers) and be very difficult, if not impossible, to crush.
Mill Creek Watershed Council of Communities 6
8. Plant Selection and Layout
Native plants are adapted to living in our local weather, soil, Plant spacing guide
and ecosystems. Invasive exotic plants are plants that have
been introduced to a habitat in which they did not evolve, and
they persistently encroach upon native flora. When choosing
native plants for the garden, it is important to consider the
height of each plant, bloom time and color, and its overall
es
12
texture. Use plants that bloom at different times to create a ch
in
in
ch
2
es
1
long flowering season. Mix heights, shapes, and textures to
give the garden depth and dimension. This will keep the rain
garden looking interesting even when few wildflowers are in
bloom.
Mix sedges, rushes, and grasses
with your flowering plants
Group like species together in odd
groups of 3 - 9 plants
Mix heights, shapes, and textures
Follow this link www.millcreekwatershed.org to the The Mill Creek Watershed Council
Do Drops of Communities web page for a gridded design layout template and other example
layouts. Also on this web page is an extensive plant list for rain gardens in your
area, complete with pictures and descriptions, and a table of plants that can be sorted
by various characteristics. If you are having trouble unleashing your creative juices contact a
landscape architect for help in designing your rain garden.
Rain Gardens
9. Construction and Building
Garden Layout
Preparing the site
When preparing the site, take into consideration the
amount of time it takes to acquire the materials needed
for the construction of the rain garden.
• Place materials needed for the site as close to the
site as possible. This will minimize the time and
effort to move the soil and plants to the desired
location of the rain garden.
Layout the perimeter of • Use garden hose or spray paint to mark the
the rain garden perimeter of your rain garden.
Digging and leveling Make sure your rain garden is level so that the
water spreads out evenly.
• When your rain garden is excavated to the
appropriate depth, lay a board in the rain garden
Berm Location with a carpenter’s level on it. Correct the spots
that aren’t level by adding soil to the low places
and by removing soil from the high places. Move
the board to different places throughout the rain
garden, filling and digging as necessary to level
the bottom of the rain garden.
Take care to avoid disturbing
• Use the excavated soil to form the berm on the
the root systems of trees
down-slope side of the rain garden. The berm
Make sure that the rain garden is will need to be compacted and either planted with
level before adding soil amendments grass, or incorporated into the planting plan of the
rain garden.
Back filling with topsoil
Once the rain garden has been leveled, you can then
start adding topsoil and composted organic matter
as needed. Refer to page regarding soils and soil
composition for more information on soils. Also,
shape the berm so that it ties back into the existing
landscape and rake the entire rain garden so that it is
ready for planting.
Mill Creek Watershed Council of Communities 8
10. Planting
Make sure to have at least a rough plan for
which plants will be planted where. Lay out
the plants as planned one
foot apart in a grid pattern,
Crown keeping them in containers, if
possible, until they are planted
to prevent drying out before
they get in the ground.
Root Ball Dig each hole twice as wide
as the root ball and deep enough to keep the crown of the young plant
w level with the existing grade. Make sure the crown is level and then fill
2xw the hole and firmly tamp around the roots to avoid air pockets. Refer to
the planting diagram on the left.
Stick plant labels next to each individual grouping. This will help identify
the young native plants from non-desirable species (weeds) as you
weed the garden. An additional idea to help in the planting and layout
of the rain garden is to use string to separate the bed into different
zones of plant color, height, and species.
Plant List (for more information go to www.millcreekwatershed.org)
Common Name Color Bloom Time Height Sun
Dry Areas
Asters Varies by Species Spring - Fall Varies by Species F, P
Little bluestem grass Foliage Summer - feet F, P
Butterfly Milkweed Orange Summer - 8 inches F, P
Sand Coreopsis Yellow Spring - Summer - 8 inches F
Purple Coneflower Purple Spring - Summer - 0 inches F
Blazing Stars Purple Summer - Fall Varies by Species F, P
June Grass Foliage Spring - Summer - 8 inches F, P
Prairie Dropseed Foliage Summer - Fall - feet F, P
Moist Areas
Aster Varies by Species Spring - Fall Varies by Species F, P
Blazing Stars Purple Summer - Fall Varies by Species F, P
Carex Foliage Spring - Summer Varies by Species F, P, S
Ironweed Purple Summer - Fall Varies by Species F
Wet Areas
Aster Varies by Species Spring - Fall Varies by Species F, P
Carex Foliage Spring - Summer Varies by Species F, P, S
Joe-Pye Weed Pink Summer - 6 feet P, S
Common Rush Foliage Summer - 8 inches F, P
Cardinal Flower Red Summer - Fall - feet F, P
Iris Blue Spring - Summer - feet F, P
Queen of the Prairie Pink Summer - 6 feet F
* F = Full Sun, P = Partial Sun, S = Shade
9 Rain Gardens
11. Maintenance
Maintaining the Rain
Garden
Weeding will be needed the first couple
of years. Remove by hand only those
plants you are certain are weeds. Try
to get out all the roots of the weedy
plants. Weeds may not be a problem in
the second season, depending on the
variety and tenacity of weeds present.
In the third year and beyond, the native
grasses, sedges, rushes, and wildflowers
will begin to mature and will out-compete
the weeds. Weeding isolated patches
might still be needed on occasion.
After each growing season, the stems and seed heads can be left for winter interest, wildlife cover
and bird food. Once spring arrives and new growth is to 6 inches tall, cut all tattered plants back.
If the growth is really thick, hand-cut the largest plants and then use a string trimmer to mow the
planting back to a height of six to eight inches. Dead plant material can also be removed with a
string trimmer or weed whacker (scythe) and composted or disposed of as appropriate.
What does a Rain Garden Cost?
The cost of the rain garden will vary depending on who does the work and where the plants come
from. If you grow your own plants or borrow plants from neighbors there can be very little cost
or no cost at all. If you do all the work, but use purchased native plants, a rain garden will cost
approximately $ to $ per square foot. If a landscape professional does everything, it will cost
approximately $0 to $ per square foot.
Hilltop’s Cost for building their rain garden
$6 Topsoil, mulch and delivery charges
$00 for 9 plants (perennials in gallon pots)
$0.00 Labor was donated
$66 Total spent on rain garden
Do Drops Additional ways to save costs are to contact your local municipality for equipment and
grants to help with construction. The Soil and Water Conservation District (SWCD),
National Resource Conservation Services (NRCS), Landscape Architecture firms, and
local environmental groups can provide help with grants, equipment, and volunteers needed to
help design and build a rain garden.
Mill Creek Watershed Council of Communities 0
12. Final Thoughts: This document has been produced to support the Mill Creek Watershed
Council of Communities vision statement and the restoration of the Mill Creek Watershed. Rain
gardens can be applied anywhere there is runoff and a place to catch the runoff. Parking lots,
city parks, your home, roadways, and places of business can all benefit from rain gardens. The
application of rain gardens is almost limitless. Rain gardens can limit the amount of pollutants
entering our waterways and help recharge our ground water.
Vision Statement
“Mill Creek Watershed is a sought-after location to live, work, and play.”
Acknowledgments
Õ Funding for the printing of the brochure was provided by the Hamilton County Storm Water
District.
Õ CDP Engineers, Inc. (www.cdpengineers.com) for their donation of time and resources in
providing the design, development and layout of this brochure.
Õ JF New Native Plant Nursery for providing plant list.
6 Luschek Drive, Cincinnati, OH .
P: .89.0, F: .89.0, www.jfnew.com.
Õ As a part of JF New’s community support and outreach they will offer a 0% discount on plant
material when you mention this brochure.
Õ City of Reading, Ohio (www.readingohio.org) provided their assistance and input.
Õ Geauga Soil and Water Conservation District, Rain Garden Manual for Homeowners, provided
information used in portions of this brochure
Õ University of Wisconsin - Extension Environmental Resources Center and the Wisconsin
Department of Natural Resources, Rain Gardens: A How-to Manual for Homeowners, provided
information used in portions of this brochure.
Õ Thanks to the 6th grade gifted students at Hilltop
Elementary in Reading, Ohio, along with Bruce
Koehler and Nancy Ellwood, for choosing a rain
garden as a solution to improve the water quality
of Mill Creek. We also want to thank them for
being the pilot project of the rain garden featured
in this brochure and providing an example for this
Rain Garden How-To brochure.
Õ Cindy Snodgrass for the artwork displayed in the
rain garden.
Õ Mill Creek Watershed Council of Communities, Nancy Ellwood, Executive Director, One North
Commerce Park Drive, Suite , Cincinnati, OH . P. .6.8800