unwanted pregnancy Kit [+918133066128] Abortion Pills IN Dubai UAE Abudhabi
F5 m instruction manual
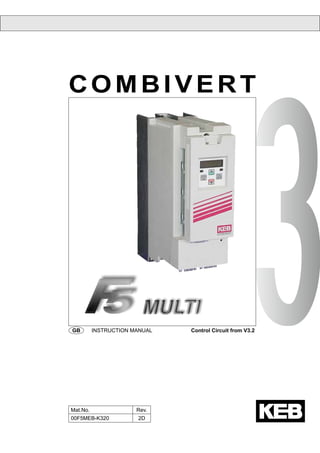
1. COMBI VERT
GB INSTRUCTION MANUAL Control Circuit from V3.2
Mat.No. Rev.
00F5MEB-K320 2D
2. This Instruction Manual describes the control circuit of the KEB COMBIVERT F5 - Series. It is only
valid together with the Instruction Manuals Part 1 and Part 2. Both Instruction Manuals must be
madeavailabletotheuser.Priortoperforminganyworkontheunittheusermustfamiliarizehimself
with the unit. This includes especially the knowledge and observance of the safety and warning
directions of Part 1. The pictographs used in this instruction manual have following meaning:
GB - 3.......GB
- 40
GB
Information
Help
Tip
Danger
Warning
Caution
Attention,
observe at
all costs
3. GB - 3
Inhaltsverzeichnis
1. General.............................................................4
2. Installation and Connection...........................5
2.1 Summary.......................................................................5
2.1.1 Housing Size D - E.........................................................5
2.1.2 Housing Size >= G..........................................................5
2.2 Control Circuit MULTI...................................................6
2.2.1 Assignment of Terminal Strip X2A..................................6
2.2.2 Connection of the control circuit.....................................7
2.2.3 Digital Inputs...................................................................7
2.2.4 Analog Inputs..................................................................7
2.2.5 Voltage Input / External Power Supply...........................8
2.2.6 Digital Outputs................................................................8
2.2.7 Relay Outputs.................................................................8
2.2.8 Analog Outputs...............................................................8
2.2.9 Voltage Output................................................................8
2.3 Operator.........................................................................9
3. Operation of the Unit.....................................10
3.1 Keyboard.....................................................................10
3.2 Parameter description................................................11
3.2.1 Password Input.............................................................12
3.2.2 Operating Display.........................................................12
3.2.3 Basic Adjustment of the Drive.......................................14
3.2.4 Special Adjustments.....................................................17
3.3 Factory Settings..........................................................23
3.4 The drive mode...........................................................24
3.4.1 Start / stop drive.............................................................24
3.4.2 Changing the direction of rotation.................................24
3.4.3 Presetting the setpoint..................................................24
3.4.4 Leaving the drive mode................................................24
4. Error Assistance............................................25
5. Initial Start-up................................................31
6. Adjustment Speed Controller.......................32
7. Quick Reference............................................33
8. Passwords......................................................34
4. GB - 4
General
1. General
The frequency inverter KEB COMBIVERT F5 is a drive component, which is intended for installation in electrical
systems or machines. The frequency inverter is exclusively for stepless speed control / regulation of three-phase
motors. The operation of other electrical consumers is not permitted and can lead to the destruction of the unit.
KEB COMBIVERT F5 has very extensive programming options. To make the operation and start-up simpler for
the user, a special operator level was created in which the most important parameters are found. However, if the
parameters pre-defined by KEB are not sufficient for your application an application manual is available.
5. GB - 5
Installation and Connection
2. Installation and Connection
2.1 Summary
2.1.1 Housing Size D - E
Optional Operator
with 9-pole Sub-D Socket
Parameter Interface
Not
forPC
C
O
M
B
IV
E
R
T
STOP
SPEEDFUNC.
F/R
START
ENTER
X2A
Connection
Connection of control terminal
X3B
9-pole Sub-D Socket
OPTION
X3A
15-pole Sub-D Socket
Connection of incremental encoder
2.1.2 Housing Size >= G
Optional Operator
with 9-pole Sub-D Socket
Parameter Interface
DieKondensa
torentl
ze
itbetrÌgt5min.!
EinFehlerstromsc
hu
sc
halteristalsallei
Sch
utzmaBnahmeni
zu
lÌssig!
W
arn
ung:
C
O
M
B
IV
E
R
T
STOP
SPEEDFUNC.
F/R
START
ENTER
X3B
9-pole Sub-D Socket
OPTION
X3A
15-pole Sub-D Socket
Connection of incremental encoder
X2A
Connection
Connection of control terminal
Observe the maximal width of
connectors for X3A and X3B
max. 34
6. GB - 6
Installation and Connection
2.2 Control Circuit MULTI X2A
2.2.1 Assignment of
Terminal Strip X2A
1 2 3 4 5 6 7 8 9 10 11 12 13 14 15 16 17 18 19 20 21 22 23 24 25 26 27 28 29
PIN Function Name Description
Analog inputs
1 + Set value input 1 AN1+
0...±10 VDC ^ 0...±CP.22
Resolution 12 Bit
Scan time 1 ms
2 - Set value input 1 AN1-
3 + Analog input 2 AN2+
0...±10 VDC ^ 0...±100 %
4 - Analog input 2 AN2-
Analog outputs 5 mA; Ri=100 Ω
Resolution 12 Bit
PWM frequency 3,4 kHz
Limiting frequency
Filter 1. Harmonic 178 Hz
5 Analog output 1 ANOUT1
Analog output of the real speed
0…±10 VDC ^ 0…±3000 rpm
6 Analog output 2 ANOUT2
Analog output of the apparent current
0…10 VDC ^ 0…2 x IN
Voltage supply
7 +10 V Output CRF Reference voltage for setpoint potentiometer +10 VDC +5% / max. 4 mA
8
Analog Mass COM Mass for analog in- and outputs
9
Digital inputs
10 Fixed Speed 1 I1 I1+I2 = fixed speed 3 (default: 0 rpm)
no input = analog set value
13…30 V DC ±0 % stabilized
Ri=2,1 kΩ
Scan time 1 ms
11 Fixed speed 2 I2
12 External fault I3 Input for external fault stopping mode 1)
13 - I4 No function deposited in the CP-Mode
14 Limit switch forward F
Software limit switch 1)
15 Limit switch reverse R
16 Control release / Reset ST
Power modules are enabled;
Error Reset at opening
17 reset RST Reset; only when an error occurs
Transistor outputs
18 Speed dependent O1 Transistor output switched at actual speed = set speed
19 Ready signal O2 Transistor output switched, as long as no error occurs
Voltage supply
20 24 V-Output Uout Approx. 24V output (max.100 mA))
21 20...30 V-Input Uin Voltage input for external supply
22
Digital Mass 0V Potential for digital in-/outputs
23
Relay Outputs
24 NO contact 1 RLA
Fault relay (default);
Function can be changed with CP.33 at maximum
30 V DC
0.01…1 A
25 NC contact 1 RLB
26 Switching contact 1 RLC
27 NO contact 2 FLA
Run-Signal (default);
Function can be changed with CP.34
28 NC contact 2 FLB
29 Switching contact 2 FLC
1) The reaction can be adjusted with CP.35 and CP. 36.. If the unit is defective there is no
guarantee that the software protective function will work.
7. GB - 7
Installation and Connection
2.2.2 Connection of the control circuit
In order to prevent a malfunction caused by interference voltage supply on the control inputs, the following
directions should be observed:
EMC
• Use shielded / drilled cables
• Lay shield on one side of the inverter onto earth potential
• Lay control and power cable separately (about 10...20 cm apart); Lay crossings in a right angle (in
case it cannot be prevented)
2.2.3 Digital Inputs
Using of the internal voltage supply
10 11 12 13 14 15 PEX2A 16 17 20 21 22 23
Using of an external voltage supply
10 11 12 13 14 15 PEX2A 16 17 23
+
13…30 V DC ±0 %
stabilized
Ri = 2,1 kΩ
20…30 V DC
2.2.4 Analog Inputs
Connect unused analog inputs to common, to prevent set value fluctuations !
Analog set value setting in speed regulated operation (CP.10 = 4):
external internal
X2A 1 2 3 4 5 6 7 8 9 PE
0...±10 VDC
Ri = 55 kW
+
*)
X2A 1 2 3 4 5 6 7 8 9
R = 3...10 kW
PE
Analog set value setting in torque regulated operation (CP.10 = 5) and reference source CP.28 = 1:
X2A 1 2 3 4 5 6 7 8 9 PE
0...±10 VDC
Ri = 55 kW
+
*)
*) Connect potential equalizing line only if a potential difference of >30 V exists between the controls.
The internal resistance is reduced to 30 kΩ.
8. GB - 8
2.2.5 Voltage Input / External Power Supply
The supply of the control circuit through an external voltage source keeps the control in operational condition even
if the power stage is switched off. To prevent undefined conditions at external power supply the basic procedure
is to first switch on the power supply and after that the inverter.
10 11 17 18 19 20 PEX2A 21 22 23
+
20…30 V ±0 % / 1 A DC
stabilized
2.2.6 Digital Outputs
10 18 19 20 PEX2A 21 22 23
max. 50 mA DC
for both outputs
2.2.7 Relay Outputs
In case of inductive load on the relay outputs a protective wiring must be provided (e.g. free-wheeling diode)!
24 25 26 PEX2A 27 28 29
max. 30 VDC / 1 A
2.2.8 Analog Outputs
Uout: 0...±10VDC
Imax: 10mA
X2A 1 2 3 4 5 6 7 8 9 PE
2.2.9 Voltage Output
The voltage output serves for the setting of the digital inputs as well as for the supply of external control elements.
Do no exceed the maximum output current of 100 mA.
10 18 19 20 PEX2A 21 22 23
+ -
ca. 24VDC / max. 100 mA
Installation and Connection
9. GB - 9
Installation and Connection
2.3 Operator
As an accessory to the local or external (option: cable 00.F5.0C0-1xxx) operation an operator is necessary. To
prevent malfunctions, the inverter must be brought into nOP status before connecting / disconnecting the operator
(open control release terminal). When starting the inverter, it is started with the last stored values or factory
setting.
Digital operator (part number 00.F5.060‑1000)
Interface operator (part number 00.F5.060‑2000)
x x 5-digit LED Display
START
FUNC.
SPEED
ENTER
F/R
STOP
C O M B I V E R T
X6C X6D
X6B
x x Operating-/Error display
Normal "LED on"
Error "LED blinks"
- x Interface control
Transmit "LED on"
x x Double function keyboard
- x X6B HSP5 programming and diagnostic
interface
- x X6C RS232/RS485
Only use the operator interface for the serial data transfer to RS232/485. The
direct connection, PC to the inverter is only valid with a special cable (part number
00.F5.0C0‑0001), otherwise, it would lead to the destruction of the PC-interface !
X6C PIN RS485 Signal Meaning
5 4 3 2 1
9 8 7 6
5 4 3 2 1
9 8 7 6
1 - - reserved
2 - TxD transmission signal RS232
3 - RxD receive signal RS232
4 A‘ RxD-A receive signal A RS485
5 B‘ RxD-B receive signal B RS485
6 - VP Voltage supply +5 V (Imax=50 mA)
7 C/C‘ DGND Data reference potential
8 A TxD-A transmission signal A RS485
9 B TxD-B transmission signal B RS485
RS 232 cable
Part number
00.58.025-001D
Length 3 m
9-pole Sub-D socket 9-pole SUB-D connector
2
3
5
2
3
7
OperatorPC
Housing (PE)
10. GB - 10
Operation of the Unit
3. Operation of the Unit
3.1 Keyboard
When switching on KEB COMBIVERT F5 the value of parameter CP.1 appears (see Drive mode to switch the
keyboard function).
Thefunctionkey(FUNC)changesbetweentheparameter
value and parameter number.
With UP (▲) and DOWN (▼) the value of the parameter
number is increased/decreased with changeable
parameters.
Principally during a change, parameter values are immediately accepted and stored non-volatile. However, with
some parameters it is not useful that the adjusted value is accepted immediately. In these cases (CP.28, CP.32,
CP.33, CP.34) the adjusted value is accepted and stored non-volatile by pressing ENTER.
If a malfunction occurs during operation, then the actual display is overwritten by the alarm message. The alarm
message in the display is reset by ENTER.
== Error ==>
With ENTER only the error message in the display is reset. In the inverter status display (CP.3) the
error is still displayed. In order to reset the error itself, the cause must be removed or a power-on
reset must be made.
11. GB - 11
Parameter description
3.2 Parameter description
Parameter Setting range Resolution Default ↵
CP.00 Password Input 0…9999 1 –
CP.01 Encoder 1 speed – 0,125 1rpm –
CP.02 Setpoint display – 0,125 1rpm –
CP.03 Inverter state – 1 –
CP.04 Apparent current – 0.1 A –
CP.05 Peak apparent current – 0.1 A –
CP.06 Actual torque – 0.01 Nm –
CP.07 Actual DC voltage – 1 V –
CP.08 Peak DC voltage – 1 V –
CP.09 Output voltage – 1 V –
CP.10 Speed control configuration 0 (off)…5 1 0 (off)
CP.11 DASM rated speed 0…64000 rpm 1 rpm LTK 2)
CP.12 DASM rated frequency 0.0…1600.0 Hz 0.1 Hz LTK 2)
CP.13 DASM rated current 0.0…710.0 A 0.1 A LTK 2)
CP.14 DASM rated voltage 120…500 V 1 V LTK 2)
CP.15 DASM rated cos (phi) 0.50…1.00 0.01 LTK 2)
CP.16 DASM rated power 0.35…400.00 kW 0.01 kW LTK 2)
CP.17 Load motor dependent parameter 0…2 1 0
CP.18 Boost 0.0…25.5 % 0.1 % 2 %
CP.19 Rated frequency 0…400 Hz 0.0125 Hz 50 Hz
CP.20 Encoder 1 (inc/r) 1…16383 inc. 1 inc. 2500 inc.
CP.21 Encoder 1 rotation 0…19 1 0 x
CP.22 Maximum speed 0…4000 rpm 0.125 rpm 2100 rpm
CP.23 Step value 1 +4000 rpm 0.125 rpm 100 rpm
CP.24 Step value 2 +4000 rpm 0.125 rpm -100 rpm
CP.25 Acceleration time 0.00…300.00 s 0.01 s 5.00 s
CP.26 Deceleration time -0.01…300.00 s 0.01 s 5.00 s
CP.27 S-curve time 0.00 (off)…5.00 s 0.01 s 0.00 s (off)
CP.28 Torque reference source 0…5 1 2 x
CP.29 Absolute torque reference +10000.00 0.01 Nm LTK 2)
CP.30 KP speed 0…32767 1 300
CP.31 KI speed 0…32767 1 100
CP.32 Switching frequency 2/4/8/12/16 kHz – – 2)
x
CP.33 Relay output 1 / Function 0…84 1 4 x
CP.34 Relay output 2 / Function 0…84 1 2 x
CP.35 Reaction to limit switch 0…6 1 6
CP.36 Reaction to external fault 0…6 1 0
2)
depending on size (see 3.3 "Factory Settings")
Due to the calculation / measuring accuracies, tolerances with the current and torque displays as well
as with the switching levels and limitations, must be taken into consideration. The given tolerances
(see parameter description) refer to the respective maximum values with the dimensioning KEB
COMBIVERT : Motor = 1 : 1.
Dependent on the data from the motor manufacturer, larger tolerances at the torque displays are
possible, due to the usual variations in the machine parameters and temperature drifts.
12. GB - 12
Parameter description
3.2.1 Password Input
CP.00 Password Input
Ex works the frequency inverter is supplied without password protection, this means that all changeable parameters
can be adjusted. After parameterizing the unit can be barred against unauthorized access (Passwords: see last
but one page). The adjusted mode is stored.
Barring the CP-Parameter
FUNC
ENTER
UP
Password
Enabling the CP-Parameter
Password
FUNC
ENTER
UP
3.2.2 Operating Display
The parameters below serve for the controlling of the frequency inverter during operation.
CP.01 Encoder 1 speed
Co-domain Description
0…±4000 rpm Display of actual motor speed ( incremental encoder 1). For control reasons the set speed
is displayed, even if the control release or direction of rotation are not switched. A counter-
clockwise rotating field (reverse) is represented by a negative sign. Precondition for the
correct display value is the in-phase connection of the motor and the correct setting of the
encoder line number (CP.20) as well as the direction of rotation (CP.21).
CP.02 Setpoint display
Co-domain Description
0…±4000 rpm Display of actually set value. For control reasons the set speed is displayed, even if the
control release or direction of rotation are not switched. If no direction of rotation is set,
the set speed for clockwise rotation (forward) is displayed.
CP.03 Inverter status
The status display shows the actual working conditions of the inverter. Possible displays and their meanings are:
„no Operation“ control release not bridged; modulation switched off; output voltage = 0 V; drive
is not controlled.
„Low Speed“ no direction of rotation preset; modulation switched off; output voltage = 0 V; drive
is not controlled.
"Forward Acceleration" drive accelerates with direction of rotation forward.
„Forward Deceleration“ drive decelerates with direction of rotation forward.
further on next side
13. GB - 13
Parameter description
"Reverse Acceleration" drive accelerates with direction of rotation reverse.
"Reverse Deceleration" drive decelerates with direction of rotation reverse.
"Forward Constant" drive runs with a constant speed and direction of rotation forward.
"Reverse Constant" drive runs with constant speed and direction of rotation reverse.
Other status messages are described at the parameters, where they occur (see chapter 4 „Error diagnosis“).
CP.04 Apparent current
Co-domain Description
0…±6553.5 A Display of the actual apparent current in ampere.
CP.05 Apparent current / peak value
Co-domain Description
0…±6553.5 A CP.5 makes is possible to recognize the max. apparent current. For that the highest value
of CP.4 is stored in CP.5 . The peak value memory can be cleared by pressing the UP,
DOWN or ENTER key or over bus by writing any value you like to the address of CP.5.
The switch off of the inverter also clears the memory.
CP.06 Actual torque
Co-domain Description
0.0…±10000.00 A The displayed value corresponds to the actual motor torque in Nm. The value is calculated
from the active current. Because of normal type differences and temperature deviations of
the motors, tolerances of up to 30 % are possible in the base speed range (see reference
at 3.2).
Requirement for the torque display is the adjustment of the motor data (CP.11...CP.16).
If the real motor data deviate strongly from the data on the name plate the operating
performance can be optimized by entering the real data. The adjustment of the name
plate data is sufficient for a start-up.
CP.07 Intermediate circuit voltage
Display Description
0…1000 V Display of actual DC-link voltage in volt. Typical values:
V-class Normal operation Overvoltage (E.OP) Undervoltage (E.UP)
230 V 300…330 V DC approx. 400 V DC approx. 216 V DC
400 V 530…620 V DC approx. 800 V DC approx. 240 V DC
CP.08 DC-link voltage / peak value
Display Description
0…1000 V CP.8 makes it possible to recognize short-time voltage rises within an operating cycle. For
that the highest value of CP.7 is stored in CP.8. The peak value memory can be cleared
by pressing the UP, DOWN or ENTER key or over bus by writing any value you like to the
address of CP.8. The switch off of the inverter also clears the memory.
14. GB - 14
Parameter description
CP.09 Output voltage
Co-domain Description
0…778 V Display of the actual output voltage in volt.
3.2.3 Basic Adjustment of the Drive
The following parameters determine the fundamental operating data of the drive and must be adjusted for the
initial commissioning (see chapter 5 "Start-up" ). They should be checked and/or adapted to the application.
CP.10 Speed control configuration
Input Setting Function Description
0 x off (open loop operation)
With this parameter the basic setting of
the speed controller is determined.
1 -reserved-
2 -reserved-
3 off (open loop operation)
4 Speed control (closed loop operation)
5 Torque control (closed loop operation)
6 Torque-/speed control (closed loop
operation)
7…127 off (open loop operation)
CP.11 DASM rated motor speed
Co-domain Setting Description
0…64000 rpm see 3.3 Adjustment of rated motor speed according to the name plate. The factory
setting depends on the unit size ( see 3.3 „Factory Settings“).
CP.12 DASM rated frequency
Co-domain Setting Description
0.0…1600.0 Hz see 3.3 Adjustment of the rated motor frequency according to the name plate. The
factory setting depends on the unit size ( see 3.3 „Factory Settings“).
CP.13 DASM rated current
Co-domain Setting Description
0.0…710.0 A see 3.3 Adjustment of the rated motor current according to the name plate and the
connection (Y / ∆). The factory setting depends on the unit size (see 3.3
„Factory Settings“).
CP.14 DASM rated voltage
Co-domain Setting Description
120…500 V see 3.3 Adjustment of the rated motor current according to the name plate and the
connection (Y / ∆). The factory setting depends on the unit size (see 3.3
„Factory Settings“).
CP.15 DASM cos (phi)
Co-domain Setting Description
0.50…1.00 see 3.3 Adjustment of the motor cos(phi) according to the name plate. The factory
setting depends on the unit size ( see 3.3 „Factory Settings“).
15. GB - 15
Parameter description
CP.16 DASM rated power
Co-domain Setting Description
0.35…400 kW see 3.3 Adjustment of the rated motor power according to the name plate. The factory
setting depends on the unit size ( see 3.3 „Factory Settings“).
CP.17 Load motor dependent parameter
The basic settings of the inverter correspond to the size of the unit and the respective motor (see 3.3 „Factory
Settings“). If the motor data in CP.11…16 are changed, then CP.17 must be activated once. This re-adjusts the
current controller, torque curve and torque limit. With this, the torque limit is set at the value, that is maximally
possible in the speed range (depending on inverter rated current), but not above the rated motor torque x 3.
Co-domain Setting Description
1 x Pre-adjustment of the motor-dependent control-parameters.
The voltage class of the inverter is taken as input voltage.
2 Pre-adjustment of the motor-dependent control-parameters.
The measured DC-link voltage divided by √2 measured at switch on is taken
as input voltage. Thus the frequency inverter can be adapted to the actually
available mains voltage (e.g. USA with 460 V).
When control release is active the adjustment was not completed. „nco“ appears in the
display.
CP.18 Boost
Co-domain Setting Description
0.0…25.5 % 2 % In the lower speed range a large part of the motor voltage decreases on the
stator resistance. So that the breakdown torque of the motor remains nearly
constant in the controlled operation over the entire speed range, the voltage
drop can be compensated by the Boost. During regulated operation (CP.10
= 4 or 5) this parameter has no function.
Adjustment:
• Determine the rate of utilization in no-load operation with rated speed
• Preset about 300 rpm and adjust the boost, so that about the same rate of
utilization is reached as with the rated speed.
When the motor, during continuous operation, drives with low speed and too high voltage
it can lead to an overheating of the motor.
16. GB - 16
Parameter description
CP.19 rated frequency
Co-domain Setting Description
0.00…400.00 Hz 50 Hz With the adjusted frequency the inverter reaches in controlled operation a
maximal output voltage. The adjustment of the rated motor frequency is typical
in this case.
UA
f
100%
CP.19
Motors can overheat when the rated frequency is incorrectly adjusted. During regulated
operation (CP.10 = 4 or 5) this parameter has no function.
CP.20 Encoder line number 1
Co-domain Setting Description
1…16383 inc 2500 inc With this parameter the encoder line number is adjusted to the encoder that
is connected to channel 1. Check the set and actual speed displays during
controlled operation and compare. The correct settings must be actual speed
= set speed - slip.
The co-domain can vary due to different encoder identifiers.
CP.21 Encoder 1 rotation
Bit Value Function Description
0 Encoder rotation If you find that during start-up in controlled operation
the actual and setpoint speed have different signs it
can be an indication for a wrong connection of the
incremental encoder. If possible the wiring should be
corrected. Should this involve too much effort then
you can achieve a rotation reversal of encoder 1 by
means of this parameter. The effect corresponds to
a change of the A and B tracks of the incremental
encoder.
A system inverting can be adjusted with bit 4. With
this it is possible to run the motor with positive setting
counter-clockwise at the shaft.
0 no modification (default)
1 inverted
1 0 -reserved-
2 0 -reserved-
3 0 -reserved-
4 system inverting
0 no modification (default)
16 inverted
The bit values are to be added up and confirm by "ENTER".
17. GB - 17
Parameter description
3.2.4 Special Adjustments
The following parameters serve for the optimization of the drive and the adaption to certain applications. These
adjustments can be ignored at the initial start-up.
CP.22 Maximum speed
Co-domain Setting Description
0…4000 rpm 2100 rpm In order to limit the setpoint value a maximum speed must be preset. This limit
value is the basis for further setpoint calculations and for the determination
of setpoint characteristics. The maximum speed limits the setpoint speed
only. Because of speed ripples, speed overshoot or hardware defects (e.g.
defective encoder) the actual speed may exceed these limits.
CP.23 Fixed speed 1 (input 1)
CP.24 Fixed speed 2 (input 2)
Co-domain Setting Description
CP.23
0…±4000 rpm
100 rpm Two fixed speeds can be adjusted. The selection is made by the
inputs I1 and I2. If adjustments are made that are outside the fixed
limit of CP.22, then the speed is internally limited.CP.24 -100 rpm
Input I1 + input I2 = fixed speed 3 (factory setting = 0 rpm)
The Step speed 3 cannot adjusted in the CP-mode.
CP.25 Acceleration time
Co-domain Setting Description
0.00…300.00 s 5.00 s Defines the time needed to accelerate from 0 to 1000 rpm. The actual
acceleration time is proportional to the speed change (∆n).
∆n Speed change
t [s]
CP.25
n [rpm]
1000
800
300
0
0,5 1 1,5 2
∆t
∆n
∆t Acceleration time for ∆n
Example The drive should accelerate from 300 rpm auf 800 rpm in 1 s.
∆n = 800 rpm - 300 rpm = 500 rpm
∆t = 1 s
∆t 1 s
CP.25 = –––– x 1000 rpm = –––––––– x 1000 rpm = 2 s
∆n 500 rpm
18. GB - 18
Parameter description
CP.26 Deceleration time
Co-domain Setting Description
-0.01…300.00 s 5.00 s Defines the time needed to accelerate from 1000 to 0 rpm. The actual
deceleration time is proportional to the speed change (∆n). At a
deceleration time of -1 the value from CP.25 is used (Display „=Acc“) !
∆n Speed change
t [s]
CP.26
n [rpm]
1000
800
300
0
0,5 1 1,5 2
∆ t
∆ n
∆t Deceleration time for ∆n
Example The drive should decelerate from 800 rpm to 300 rpm in 1 s.
∆n = 800 rpm - 300 rpm = 500 rpm
∆t = 1 s
∆t 1 s
CP.26 = –––– x 1000 rpm = –––––––– x 1000 rpm = 2 s
∆n 500 rpm
CP.27 S‑curve time
Co-domain Setting Description
0.00 (off)…5.00 s 0.00 s (off) For some applications it is of advantage when the drive starts and stops
jerk-free. This is achieved through a straightening of the acceleration and
deceleration ramps. The straightening time, also called S-curve time, can
be adjusted with CP.27.
t1 S-curve time (CP.27)
t2 Acceleration time (CP.25)
t3 Deceleration time (CP.26)
t1 t1 t1 t1
t2 t3
+n [rpm]
-n [rpm]
t [s]
t1 t1 t1 t1
t2 t3
In order to drive defined ramps with activated S‑curve time, the acceleration and deceleration times
(CP.25 and CP.26) must be adjusted higher than the S‑curve time (CP.27).
19. GB - 19
Parameter description
CP.28 Torque reference source
Value Source Setting range Description
0 AN1+ / AN1- 0 %…±100 % = 0…±CP.29
With this parameter the required setpoint source
for torque control can be adjusted.
1 AN2+ / AN2- 0 %…±100 % = 0…±CP.29
2 digital absolute CP.29
3…5 only application mode
The values must be confirm by „ENTER“.
CP.29 Absolute torque reference
Co-domain Setting Description
+10000.00 Nm see 3.3 The absolute torque reference of the drive is adjusted with parameter CP.29 in
torque controlled operation (CP.10 = 5) and with digital setpoint setting (CP.28
= 2). The sign stands for direction of rotation to be active.
In speed controlled operation (CP.10 = 4) the parameter works as torque limit
in all quadrants. The sign has no effect at that.
The factory setting depends on the unit size (see 3.3 „Factory Settings“).
During controlled operation (CP....10) this parameter has no function.
Because of normal type differences and temperature deviations of the motors, tolerances
of up to 30% are possible in the base speed range (see reference on page 13).
CP.30 KP speed
Co-domain Setting Description
0…32767 300 The proportional factor of the speed controller is adjusted in these parameters
(see chapter 5 „Start-up“).
CP.31 KI speed
Co-domain Setting Description
0…32767 100 The integral factor of the speed controller is adjusted in these parameters (see
chapter 5 „Start-up“).
CP.32 Switching frequency
Co-domain Setting Description
2 / 4 / 8 / 12 / 16 kHz dep. of
the power
circuit
The switching frequency with which the power modules are clocked can be
changed depending on the application. The employed power stage determines
the maximum switching frequency as well as the factory setting (see manual:
part 2). The values must be confirm by „ENTER“.
Refer to following list to learn
about influences and effects of
the switching frequency.
low switching frequency high switching frequency
less inverter heating less noise development
less discharge current improved sine-wave simulation
less switching losses less motor losses
less radio interferences improved controller characteristics
improved concentricity with low
speed (only open loop!)
At switching frequencies above 4 kHz pay absolute attention to the max. motor line length
in the technical data of the power circuit manual (Part 2).
20. GB - 20
Parameter description
CP.33 Relay output 1 / function
CP.34 Relay output 2 / function
CP.33 and CP.34 determine the function of the two relay outputs (terminals X2A.24…26 and X2A.27…29). The
values must be confirm by „ENTER“.
Value Function
0 No function (generally off)
1 Generally on
2 Run signal; also by DC-braking
3 Ready signal (no error)
4 Fault relay
5 Fault relay (not at under voltage error)
6 Warning or error message at abnormal stopping
7 Overload alert signal
8 Overtemperature alert signal power modules
9 External overtemperature alert signal motor
10 Only application mode
11 Overtemperature alert signal interior OHI
12…19 Only application mode
20 Actual value = set value (CP.3 = Fcon; rcon; not at noP, LS, error, SSF)
21 Accelerate (CP.3 = FAcc, rAcc, LAS)
22 Decelerate (CP.3 = FdEc, rdEc, LdS)
23 Real direction of rotation = set direction of rotation
24 Utilization > switching level 1)
25 Active current > switching level 1)
26 Only application mode
27 Real value (CP.1) > switching level 1)
28 Setpoint (CP.2) > switching level 1)
29…30 Only application mode
31 Absolute setpoint at AN1 > switching level 1)
32 Absolute setpoint at AN2 > switching level 1)
33 Only application mode
34 Setpoint at AN1 > switching level 1)
35 Setpoint at AN2 > switching level 1)
36…39 Only application mode
40 Hardware current limit activated
41 Modulation on-signal
42…46 Only application mode
47 Ramp output value > switching level 1)
48 Apparent current (CP.4) > switching level 1)
49 Forward running (not at nOP, LS, abnormal stopping or error)
50 Reverse running (not at nOP, LS, abnormal stopping or error)
51 Warning E.OL2
52 Current regulator limit reached
53 Speed regulator limit reached
54…62 Only application mode
63 Absolute value ANOUT1 > switching level 1)
64 Absolute value ANOUT2 > switching level 1)
65 ANOUT1 > switching level 1)
66 ANOUT2 > switching level 1)
67…69 Only application mode
70 Driving current active (safety relay)
further on next side
21. GB - 21
Parameter description
Value Function
71…72 Only application mode
73 Absolut active power > switching level 1)
74 Active power > switching level 1)
75…79 Only application mode
80 Active current > switching level 1)
81 Real value channel 1 > switching level 1)
82 Real value channel 2 > switching level 1)
83 HSP5 bus synchronized
84 Only application mode
1) Switching level of CP.33 = 100; switching level of CP.34 = 4
22. GB - 22
Parameter description
CP.35 Limit switch / stopping mode
This parameter determines the reaction of the drive, to terminal X2A.14 (F) and/or X2A.15 (R). These terminals
are programmed as limit switches. The reaction of the drive is shown in the table below.
Value Setting Display Reaction Restart
0 E.PRx Immediate disabling of modulation
Remove fault,
reset
1 A.PRx
Quick stopping / disabling of modulation after reaching
speed 0
2 A.PRx Quick stopping / holding torque at speed 0
3 A.PRx Immediate disabling of modulation
Autoreset, if no fault
is present
4 A.PRx
Quick stopping / disabling of modulation after reaching
speed 0
5 A.PRx Quick stopping / holding torque at speed 0
6 x — No effect to the drive, fault is ignored ! —
CP.36 Reaction to external fault
With the external error monitoring external units can take direct influence on the drive. This parameter determines
the response of the drive to a signal at terminal X2A.12 (I3) according to following table.
Value Setting Display Reaction Restart
0 x E.PRx Immediate disabling of modulation
Remove fault,
reset
1 A.PRx
Quick stopping / disabling of modulation after reaching
speed 0
2 A.PRx Quick stopping / holding torque at speed 0
3 A.PRx Immediate disabling of modulation
Autoreset, if no fault
is present
4 A.PRx
Quick stopping / disabling of modulation after reaching
speed 0
5 A.PRx Quick stopping / holding torque at speed 0
6 — No effect to the drive, fault is ignored ! —
24. GB - 24
3.4 Drive mode
The Drive Mode is an operating mode of KEB COMBIVERT that permits the manual starting of the drive by the
operator (with exception of the LCD Operator). After switching the control release the set value and rotation setting
are effected exclusively over the keyboard. In order to activate the drive mode the corresponding password (see
last but one page) must be entered in CP. 0. The display switches over as follows:
Direction of rotation
F = clockwise rotation
r = counter clockwise rotation
Status
noP = no control release
LS = neutral position
3.4.1 Start / stop drive Modulation blocked
Drive not controlled
Drive decreases to 0
rpm and switches the
modulation off
Drive accelerates onto the
adjusted set value
Drive operates with
adjusted set value
3.4.2 Changing the
direction of
rotation
Drive changes
direction of rotation
3.4.3 Presetting the
setpoint
Display changes when
key is pressed to set value
display/presetting
Set value can be changed
with UP/DOWN at pressed
FUNC/SPEED key
3.4.4 Leaving the drive
mode
To exit the drive mode the inverter must be in status “stop” (Display noP or LS).
Press the FUNC and ENTER keys simultaneously for about 3 seconds to leave the
drive mode. The CP-parameters appear in the display.
+ for 3 seconds
Drive mode
25. GB - 25
Error Assistance
4. Error Assistance
At KEB COMBIVERT error messages are always represented with an "E." and the appropriate error in the
display. Error messages cause the immediate deactivation of the modulation. Restart possible only after reset or
autoreset.
Malfunction are represented with an „A.“ and the appropriate message. Reactions to malfunctions can vary. In the
following the display and their cause are described.
Display COMBIVIS Value Meaning
Status Messages
bbL base block 76 Power modules for motor de-excitation locked
bon close brake 85 Brake control, brake engaged (see chapter 6.9)
boFF open brake 86 Brake control, brake released (see chapter 6.9)
Cdd calculate drive 82 Measurement of the motor stator resistance.
dcb DC brake 75 Motor is decelerated by a DC-voltage at the output.
dLS low speed / DC brake 77
Modulation is switched off after DC-braking (see chapter 6.9 "DC-
Braking“).
FAcc forward acceleration 64 Acceleration with the adjusted ramps in clockwise direction of rotation.
Fcon forward constant 66
Acceleration / deceleration phase is completed and it is driven with
constant speed / frequency in clockwise direction of rotation.
FdEc forward deceleration 65
It is stopped with the adjusted ramp times in clockwise direction of
rotation.
HCL hardware current limit 80
The message is output if the output current reaches the hardware
current limit.
LAS LA stop 72
This message is displayed if during acceleration the load is limited to the
adjusted load level.
LdS Ld stop 73
This message is displayed if during deceleration the load is limited to the
adjusted load level or the DC-link current to the adjusted voltage level.
LS low speed 70 No direction of rotation pre-set, modulation is off.
nO_PU power unit not ready 13 Power circuit not ready or not identified by the control.
noP no operation 0 Control release (terminal ST) is not switched.
PA positioning active 122 This message is displayed during a positioning process.
PLS low speed / power off 84 No modulation after Power-Off.
PnA position not reachable 123
The specified position cannot be reached within the pre-set ramps. The
abort of the positioning can be programmed.
POFF power off function 78
Depending on the programming of the function (see chapter 6.9 „Power-
off Function) the inverter restarts automatically upon system recovery or
after a reset.
POSI positioning 83 Positioning function active (F5-G).
rAcc reverse acceleration 67
Acceleration with the adjusted ramp times in anti-clockwise direction of
rotation.
rcon reverse constant 69
Acceleration / deceleration phase is completed and it is driven with
constant speed / frequency in clockwise direction of rotation.
rdEc reverse deceleration 68
It is stopped with the adjusted ramp times in anti-clockwise direction of
rotation.
rFP ready for positioning 121 The drive signals that it is ready to start the positioning process.
SLL stall 71
This message is displayed if during constant operation the load is limited
to the adjusted current limit.
SrA search for ref. active 81 Search for reference point approach active.
SSF speed search 74
Speed search function active, that means that the inverter attempts to
synchronize onto a running down motor.
STOP quick stop 79
The message is output if as response to a warning signal the quick-stop
function becomes active.
further on next side
26. GB - 26
Error Assistance
Display COMBIVIS Value Meaning
Error Messages
E. br Error ! brake 56
Error: can occur in the case of switched on brake control (see chapter
6.9.5), if
the load is below the minimum load level (Pn.43) at start up or the
absence of an engine phase was detected
the load is too high and the hardware current limit is reached
E.buS Error ! Watchdog 18
Adjusted monitoring time (Watchdog) of communication between
operator and PC / operator and inverter has been exceeded.
E.Cdd Error ! calc. drive data 60 Error: During the automatic motor stator resistance measurement.
E.co1 Error ! counter overrun 1 54 Counter overflow encoder channel 1.
E.co2 Error ! counter overrun 2 55 Counter overflow encoder channel 2.
E.dOH Error ! drive overheat 9
Error: Overtemperature of motor PTC. Error can only be reset at E.ndOH,
if PTC is again low-resistance. Causes:
resistance at the terminals T1/T2 >1650 Ohm
motor overloaded
line breakage to the temperature sensor
E.dri Error ! driver relay 51
Error: Driver relay. Relay for driver voltage on power circuit has not
picked up even though control release was given.
E.EEP Error ! EEPROM defective t 21
After reset the operation is again possible (without storage in the
EEPROM)
E. EF Error ! external fault 31
Error: External error. Is triggered, if a digital input is being programmed
as external error input and trips.
E.EnC Error ! Encoder cable 32 Cable breakage at the resolver or incremental encoder
E.Hyb Error ! hybrid 52 Invalid encoder interface identifier.
E.HybC Error ! hybrid changed 59
Error: Encoder interface identifier has changed, it must be confirmed
over ec.0 or ec.10.
E.iEd Error ! input error detect 53
Hardware failure at the NPN/PNP change-over or at the start/stop
measurement.
E.InI Error ! initialisation MFC 57 MFC not booted.
E.LSF Error ! load shunt fault 15
Load-shunt relay has not picked up. occurs for a short time during the
switch-on phase, but must automatically be reset immediately. If the
error message remains the following causes may be applicable:
load-shunt defective
input voltage wrong or too low
high losses in the supply cable
braking resistor wrongly connected or damaged
braking module defective
E.ndOH no ERROR drive overheat 11
Motor temperature switch or PTC at the terminals T1/T2 is again in the
normal operating range. The error can be reset now.
E.nOH no E. over heat pow.mod. 36
Temperature of the heat sink is again in the permissible operating range.
The error can be reset now.
E.nOHI no ERROR overheat int. 7
No longer overheating in the interior E.OHI, interior temperature has
fallen by at least 3°C
E.nOL no ERROR overload 17
No more overload, OL-counter has reached 0%; after the error E.OL a
cooling phase must elapse. This message appears upon completion of
the cooling phase. The error can be reset now. The inverter must remain
switched on during the cooling phase.
E.nOL2 no ERROR overload 2 20 The cooling time has elapsed. The error can be reset.
further on next side
27. GB - 27
Error Assistance
Display COMBIVIS Value Meaning
E. OC Error ! overcurrent 4
Occurs, if the specified peak current is exceeded. Causes:
acceleration ramps too short
the load is too big at turned off acceleration stop and turned off constant
current limit
short-circuit at the output
short-circuit at the output
deceleration ramp too short
motor cable too long
EMC
DC brake at high ratings active (see 6.9.3)
E. OH Error ! overheat pow.mod. 8
Error: Overtemperature of power module. Error can only be reset at
E.nOH. Causes:
insufficient air flow at the heat sink (soiled)
ambient temperature too high
ventilator clogged
E.OH2 Error ! motor protection 30 Electronic motor protective relay has tripped.
E.OHI Error ! overheat internal 6
Error: Overheating in the interior: error can only be reset at E.nOHI, if
the interior temperature has dropped by at least 3 °C.
E. OL Error ! overload (Ixt) 16
Error: Overload error can only be reset at E.nOL, if OL-counter reaches
0% again. Occurs, if an excessive load is applied longer than for the
permissible time (see technical data). Causes:
poor control adjustment (overshooting)
mechanical fault or overload in the application
inverter not correctly dimensioned
motor wrongly wired motor wrongly wired
encoder damaged
E.OL2 Error ! overload 2 19
Occurs if the standstill constant current is exceeded (see technical data
and overload characteristics). The error can only be reset if the cooling
time has elapsed and E.nOL2 is displayed.
E. OP Error ! Overvoltage 1
Voltage in the DC-link circuit too high. Occurs when the DC bus voltage
rises above the permissible value. Causes:
poor controller adjustment (overshooting)
input voltage too high
interference voltages at the input
deceleration ramp too short
braking resistor defective or too small
E.OS Error ! over speed 58 Real speed is bigger than the max. output speed.
E.PFC Error ! Power factor control 33 Error in the power factor control
E.PrF Error ! prot. rot. for. 46
The drive has driven onto the right limit switch. Programmed response
„Error, restart after reset” (see chapter 6.7 „Response to errors or
warning messages”).
E.Prr Error ! prot. rot. rev. 47
The drive has driven onto the left limit switch. Programmed response
„Error, restart after reset” (see chapter 6.7 „Response to errors or
warning messages”).
E. Pu Error ! power unit 12 Error: General power circuit fault
E.Puci Error ! Unknown power unit 49
Error: During the initialization the power circuit could not be recognized
or was identified as invalid.
further on next side
28. GB - 28
Error Assistance
Display COMBIVIS Value Meaning
E.Puch Error ! power unit changed 50
Error: Power circuit identification was changed; with a valid power circuit
this error can be reset by writing to SY.3. If the value displayed in SY.3
is written, only the power-circuit dependent parameters are reinitialized.
If any other value is written, then the default set is loaded. On some
systems after writing Sy.3 a Power-On-Reset is necessary.
E.PUCO
Error ! Power unit
communication
22
Error: Parameter value could not be written to the power circuit.
Acknowledgement from LT <> OK
E.PUIN Error ! Power unit invalid 14
Error: Software version for power circuit and control card are different.
Error cannot be reset (only at F5-G B-housing)
E.SbuS Error ! bus synchron 23
Sychronization over sercos-bus not possible. Programmed response
„Error, restart after reset”.
E.SEt Error ! set 39
It has been attempted to select a locked parameter set. Programmed
response „Error, restart after reset”.
E.SLF
Error ! Software limit switch
forward
44
The target position lies outside of the limit defined with the right software
limit switch. Programmed response „Error, restart after reset”.
E.SLr
Error ! Software limit switch
reverse
45
The target position lies outside of the limit defined with the left software
limit switch. Programmed response „Error, restart after reset”.
E. UP Error ! underpotential 2
Error: Undervoltage (DC-link circuit) Occurs, if DC-link voltage falls
below the permissible value. Causes:
input voltage too low or instable
inverter rating too small
voltage losses through wrong cabling
the supply voltage through generator / transformer breaks down at very
short ramps
at F5-G housing B E.UP is also displayed if no communication takes
place between power circuit and control card.
jump factor (Pn.56) too small
if a digital input was programmed as external error input with error
message E.UP (Pn.65).
E.UPh Error ! Phase failure 3 One phase of the input voltage is missing (ripple-detection)
Warning Messages
A.buS Warning ! Watchdog 93
Warning: Watchdog for communication between operator/control card
or operator/PC has responded. The response to this warning can be
programmed.
A.dOH Warning ! drive overheat 96
The motor temperature has exceeded an adjustable warning level.
The switch off time is started. The response to this warning can be
programmed. This warning can be generated only with a special power
circuit.
A. EF Warning ! external fault 90
This warning is triggered via an external input. The response to this
warning can be programmed.
A.ndOH All-clear ! drive overheat 91
The motor temperature is again below the adjusted warning level. The
switch off time is stopped.
A.nOH
All-clear ! overheat pow.
mod.
88 The heat sink temperature is again below the adjusted warning level.
A.nOHI All-clear ! overheat internal 92
The temperature in the interior of the inverter is again below the warning
threshold.
A.nOL All-clear ! overload 98 OL counter has reached 0 %, the warning “overload“ can be reset.
A.nOL2 All-clear ! overload 2 101
The cooling time after “Warning ! Overload during standstill" has elapsed.
The warning message can be reset.
A. OH
Warning ! overheat pow.
mod.
89
A level can be defined, when it is exceeded this warning is output. The
response to this warning can be programmed.
further on next side
29. GB - 29
Error Assistance
Display COMBIVIS Value Meaning
A.OH2 Warning ! motor protection 97
Warning: electronic motor protective relay has tripped. The response to
this warning can be programmed.
A.OHI Warning ! overheat internal 87
The temperature in the interior of the inverter lies above the permissible
level. The switch off time was started. The programmed response to this
warning message is executed.
A. OL Warning ! overload 99
A level between 0 and 100 % of the load counter can be adjusted, when
it is exceeded this warning is output. The response to this warning can
be programmed.
A.OL2 Warning ! overload 2 100
The warning is output when the standstill continuous current is exceeded
(see technical data and overload characteristics). The response to this
warning can be programmed. The warning message can only be reset
after the cooling time has elapsed and A.nOL2 is displayed.
A.PrF Warning ! prot. rot. for. 94
The drive has driven onto the right limit switch. The response to this
warning can be programmed.
A.Prr Warning ! prot. rot. rev. 95
The drive has driven onto the left limit switch. The response to this
warning can be programmed.
A.SbuS Warning ! synchron 103
Sychronization over sercos-bus not possible. The response to this
warning can be programmed.
A.SEt Warning ! set 102
It has been attempted to select a locked parameter set. The response to
this warning can be programmed.
A.SLF
Warning ! Software limit
switch forward
104
The target position lies outside of the limit defined with the right software
limit switch. The response to this warning can be programmed.
A.SLr
Warning ! Software limit
switch reverse
105
The target position lies outside of the limit defined with the left software
limit switch. The response to this warning can be programmed.
31. GB - 31
5. Initial Start-up
For the initial start-up of KEB COMBIVERT F5-M do the following:
1. Open control release (terminal X2A.16). => frequency inverter in status „noP“
2. Select open loop operation => Parameter CP.10 = 0
3. Enter motor data => Parameter CP.11…CP.16
4. Activate load motor dependent parameter => Parameter CP.17 = 1 or 2
5. Enter necessary boost => Parameter CP.18
6. Enter encoder line number => Parameter CP.20
7. Observe cut-off frequency of encoder => See encoder specification
8. Startup in controlled operation => See the following flow chart
Start
│
Preset positive setpoint speed
REF 1 (terminals X2A.1 / X2A.2) ◄────── Remove cause of error
┐
│
│
Activate control release
(terminal X2A.16)
├◄────────────────────────────┐
Direction of rotation of
the motor (forward)
correct ?
─ no──► Exchange motor phases
Yes
├◄────────────────────────────┐
Sign of the
actual speed display (CP.1) positive ? ─ no──►
Exchange encoder tracks
(Parameter CP.21)
Yes
├◄────────────────────────────┐
Actual speed (CP.1) equal to setpoint speed
(CP.2)
minus slip ?
─ no──►
Possible causes: encoder defective,
interface defective, EMC-problems, cut-
off frequency of the encoder is too small,
wrong encoder line number (CP.20)
│
│
┘
Yes
│
Initial start-up successful !
Start-up
32. GB - 32
Start-up
6. Adjustment Speed Controller
1. Open control release (terminal X2A.16). => frequency inverter in status „noP“
2. Select closed loop operation => Parameter CP.10 = 4
Problem Very long transient process Problem Very long speed overshoot
Solution Increase KP speed (CP.30); eventually
reduce KI speed (CP.31)
Solution Increase KP speed (CP.30);
eventually reduce KI speed (CP.31)
Problem Sustained oscillation short billowy,
noises, vibes
Problem Transient too slow / remaining system
deviation
Solution Decrease KP speed (CP.30) Solution Increase KI speed (CP.31)
Problem Overshoot too long, strong speed
decreases at load change
Problem Sustained oscillation long billowy
Solution Increase KI speed (CP.31) Solution Reduce KI speed (CP.31) and / or
reduce KP speed (CP.30)
33. GB - 33
Quick Reference
7. Quick Reference
Parameter Setting range Resolution ↵ Customer setting
CP.00 Password Input 0…9999 1 —
CP.01 Encoder 1 speed — 0.125 rpm —
CP.02 Setpoint display — 0.125 rpm —
CP.03 Inverter state — 1 —
CP.04 Apparent current — 0.1 A —
CP.05 Peak apparent current — 0.1 A —
CP.06 Actual torque — 0,01 Nm —
CP.07 Actual DC voltage — 1 V —
CP.08 Peak DC voltage — 1 V —
CP.09 Output voltage — 1 V —
CP.10 Speed control configuration 0 (off)…5 1
CP.11 DASM Rated speed 0…64000 rpm 1 rpm
CP.12 DASM rated frequency 0.0…1600.0 Hz 0.1 Hz
CP.13 DASM rated current 0.0…710.0 A 0.1 A
CP.14 DASM Rated voltage 120…500 V 1 V
CP.15 DASM Rated cos (phi) 0.50…1.00 0.01
CP.16 DASM Rated power 0.35…400.00 kW 0.01 kW
CP.17 Load motor dependent parameter 0…2 1
CP.18 Boost 0.0…25.5 % 0.1 %
CP.19 rated frequency 0…400 Hz 0.0125 Hz
CP.20 Encoder 1 (inc/r) 1…16383 inc. 1 inc.
CP.21 Encoder 1 rotation 0…19 1 x
CP.22 Maximum speed 0…4000 rpm 0.125 rpm
CP.23 Step value 1 +4000 rpm 0.125 rpm
CP.24 Step value 2 +4000 rpm 0.125 rpm
CP.25 Acceleration time 0.00…300.00 s 0.01 s
CP.26 Deceleration time -0.01…300.00 s 0.01 s
CP.27 S-curve time 0.00 (off)…5.00 s 0.01 s
CP.28 Torque reference source 0…5 1 x
CP.29 Absolute torque reference +10000.00 Nm 0,01 Nm
CP.30 KP speed 0…32767 1
CP.31 KI speed 0…32767 1
CP.32 Switching frequency 2/4/8/12/16 kHz — x
CP.33 Relay output 1 / Function 0…84 1 x
CP.34 Relay output 2 / Function 0…84 1 x
CP.35 Reaction to limit switch 0…6 1
CP.36 Reaction to external fault 0…6 1