1. An Ultra-Simple Receiver For 6 Meters
Here is a simple VHF receiver you can build without any special components or test
equipment.
By Charles Kitchin, N1TEV
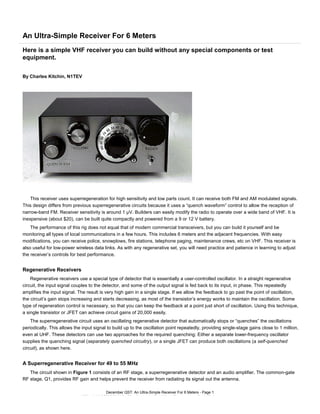
This receiver uses superregeneration for high sensitivity and low parts count. It can receive both FM and AM modulated signals.
This design differs from previous superregenerative circuits because it uses a “quench waveform” control to allow the reception of
narrow-band FM. Receiver sensitivity is around 1 µV. Builders can easily modify the radio to operate over a wide band of VHF. It is
inexpensive (about $20), can be built quite compactly and powered from a 9 or 12 V battery.
The performance of this rig does not equal that of modern commercial transceivers, but you can build it yourself and be
monitoring all types of local communications in a few hours. This includes 6 meters and the adjacent frequencies. With easy
modifications, you can receive police, snowplows, fire stations, telephone paging, maintenance crews, etc on VHF. This receiver is
also useful for low-power wireless data links. As with any regenerative set, you will need practice and patience in learning to adjust
the receiver’s controls for best performance.
Regenerative Receivers
Regenerative receivers use a special type of detector that is essentially a user-controlled oscillator. In a straight regenerative
circuit, the input signal couples to the detector, and some of the output signal is fed back to its input, in phase. This repeatedly
amplifies the input signal. The result is very high gain in a single stage. If we allow the feedback to go past the point of oscillation,
the circuit’s gain stops increasing and starts decreasing, as most of the transistor’s energy works to maintain the oscillation. Some
type of regeneration control is necessary, so that you can keep the feedback at a point just short of oscillation. Using this technique,
a single transistor or JFET can achieve circuit gains of 20,000 easily.
The superregenerative circuit uses an oscillating regenerative detector that automatically stops or “quenches” the oscillations
periodically. This allows the input signal to build up to the oscillation point repeatedly, providing single-stage gains close to 1 million,
even at UHF. These detectors can use two approaches for the required quenching: Either a separate lower-frequency oscillator
supplies the quenching signal (separately quenched circuitry), or a single JFET can produce both oscillations (a self-quenched
circuit), as shown here.
A Superregenerative Receiver for 49 to 55 MHz
The circuit shown in Figure 1 consists of an RF stage, a superregenerative detector and an audio amplifier. The common-gate
RF stage, Q1, provides RF gain and helps prevent the receiver from radiating its signal out the antenna.
December QST: An Ultra-Simple Receiver For 6 Meters - Page 1
ARRL 1997 QST/QEX/NCJ CD C i ht (C) 1997 b Th A i R di R l L I
2. Figure 1—Schematic of the VHF receiver. Unless otherwise specified, use 1/4 W, 5%-tolerance carbon composition or film
resistors. Equivalent parts may be substituted. Digi-Key Corp, 701 Brooks Ave S, PO Box 677, Thief River Falls, MN
56701-0677; tel 800-344-4539 (800-DIGI-KEY), fax 218-681-3380; URL http://www.digikey.com/
C2—Gimmick capacitor (see text)
C3C—50 pF variable
C7, C12—50 mF, 16 V electrolytic
C10—33 mF, 16 V electrolytic
C11—10 mF, 16 V electrolytic
C16—200 mF, 16 V electrolytic
L1—7 turns, (air-core) #14 AWG solid copper wire space wound 3/4 inch long on a 0.25 inch form (a pencil).
R6—10 kW, 10-turn pot
RFC1, RFC2—33 mH (Digi-Key M7330-ND)
The detector, Q2, operates as a grounded- gate oscillator. C4 applies in-phase feedback between the JFET’s source and drain.
RFC2 raises Q2’s source above ground (at RF) enough for oscillation to take place.
R3 provides bias for the JFET and, together with an RC network, provides the necessary quenching oscillations. The time
constant set by C8A, C8B, R7 and bias resistor R3 is deliberately made long enough so that the dc-bias level across R3 increases
until it inhibits the oscillating detector. The bias voltage then discharges through the network until the bias is low enough for
oscillations to start again. This creates the necessary quenching action that produces the superregenerative effect.
The received signal from the RF stage couples to the detector through a small “gimmick” capacitor made by twisting together two
one-inch-long pieces of #20 AWG insulated hook-up wire. You can also use a 1 or 2 pF mica capacitor in place of the gimmick.
The detector’s operating voltage is set by the 10 kΩ REGENERATION CONTROL. This control affects both sensitivity and
selectivity. Because the detector is a modulated oscillator, it generates a double-sideband signal. Increasing regeneration (more
voltage applied to the detector) increases sensitivity but also generates greater sidebands that reduce selectivity (the sidebands
interfere with a narrow-band signal).
The QUENCH-WAVEFORM-ADJUST potentiometer, R7, adds a small resistance in series with C8 that changes the quench
waveform from its normal sawtooth shape to a sine wave. A sine wave is a much cleaner waveform (with fewer harmonics) than a
sawtooth, so the sidebands are smaller and selectivity is much better. The oscilloscope photos of Figure 2 show the quenched RF
envelope of the receiver with and without R7.
December QST: An Ultra-Simple Receiver For 6 Meters - Page 2
ARRL 1997 QST/QEX/NCJ CD C i ht (C) 1997 b Th A i R di R l L I
3. December QST: An Ultra-Simple Receiver For 6 Meters - Page 3
ARRL 1997 QST/QEX/NCJ CD C i ht (C) 1997 b Th A i R di R l L I
4. Figure 2—The effect of QUENCH WAVEFORM ADJUST control on the shape of the detector’s oscillation waveform. A shows
the test arrangement. The oscilloscope was coupled to the receiver by connecting the probe’s ground clip to its tip and
placing the probe tip near the receiver’s main tuning coil. B, C and D show the waveforms with R7 set to 0, 250 and 500 W,
respectively.
A simple low-pass filter (R4 and C9) removes the quench voltage from the detector’s audio output. The output of the detector
drives an LM386 audio-amplifier IC.
The receiver can be connected to a discone or other 75 Ω antenna via coax cable, or you can use TV twinlead cable to make a
folded-dipole antenna. For a 6 meter dipole, use a nine-foot length of 300 Ω twinlead for the antenna. Solder the two wires at each
end of the twinlead together, then cut one of the two twinlead wires in the center of its length. Solder the transmission line, a second
piece of twinlead, to the cut ends at that point (solder two places). A good antenna greatly increases the number of narrow-band
stations you can receive.
Construction
Stray circuit capacitances and multiple ground paths can prevent the detector from oscillating. It is vitally important that the
detector’s tuning coil (L1) be located away from other conductive objects—particularly chassis ground, the bottom and sides of the
equipment box and any other metal object.
Avoid mounting the tuning coil on a printed circuit board: This loads the detector so that it fails to oscillate properly, if at all. A
hand-wired universal breadboard works fine as long as the detector coil mounts well above it, or you can just use a piece of
copper-clad board and some terminal strips (ie, solder lugs). Suspend the components above the board on the lugs, or you can use
the parts that have grounded leads as standoffs to hold the other components above the board. (Some call this “dead bug” or “ugly”
construction.)
Put the completed circuit inside a small box or use a block of wood and a piece of metal for the front panel. If you plan to place
the entire receiver inside a closed metal box, build the circuit outside the box first, and be sure it oscillates properly before placing it
inside.
It is very important to mount the TUNING capacitor, C3C, directly onto the board and pass its shaft through an oversized hole in
the front panel: Avoid mounting it directly to a metal front panel. If the capacitor’s frame contacts both the front panel and the ground
plane, it creates a multiple ground path (ground loop), which usually prevents the detector from oscillating. Mount all other controls
directly on the front panel and connect them to the board using the shortest leads possible. Use shielded wire to connect the
VOLUME and QUENCH WAVEFORM ADJUST controls to the PC board. You can connect the REGENERATION CONTROL to the circuitry
December QST: An Ultra-Simple Receiver For 6 Meters - Page 4
ARRL 1997 QST/QEX/NCJ CD C i ht (C) 1997 b Th A i R di R l L I
5. with a twisted pair of wire leads. Connect C13 directly to U1, pin 8.
I recommend a 10-turn potentiometer for the REGENERATION CONTROL and a reduction drive for the TUNING capacitor. These
make the receiver much easier to operate.
Always build receiver circuits backwards. Start with the audio stage. Build the circuitry from the speaker to the VOLUME control.
Then test the stage by turning the VOLUME control to midrange and placing your finger on the wiper (listen for a buzz). (In this test,
your body serves as an antenna for the radio to pick up the noise from surrounding ac wiring. If you have no ac power, the test won’t
work. Then you’ll need an audio signal source.—Ed.) If there’s no sound, recheck the wiring or use a voltmeter to troubleshoot the
problem. Be sure the supply voltage is present and that the voltage on pin 5 of the LM386 is half of the supply voltage.
After the audio stage is working, wire the detector, but leave out C2. Now, with no load on the detector, set R7 to midrange and
turn-up the REGENERATION CONTROL, R6, until oscillation starts. (You should hear a loud rushing noise that indicates that the
detector is superregenerating.)
RFC2 is the only component in the receiver that is at all critical. Since individual component layouts (and RF chokes) will vary,
you may need to do some experimentation to get the detector oscillating properly. With a 5 pF value for C4 and the 33 µH RF choke
specified (Digi-Key part number M7330-ND), the detector should oscillate strongly. If it doesn’t, check the wiring very carefully. If the
wiring is okay, try changing the value of the RF choke.
Here’s how to do it with an RS 273-102C RFC: First, unsolder one end of the choke winding from its lead. Remove (unwind)
about 15 turns. Connect this unwound end to Q2’s source and the other end to the junction of R3 and R4. Switch the radio on. Does
it oscillate? If not, unwind more turns with the set operating, a few at a time, until there’s a strong oscillation. Then, kill the power.
Bend the coil’s free end over to its lead, solder it in place and cut-off the extra wire. Connect the lead to Q2 and do a final test.
Miscellaneous
For optimum sensitivity from this receiver, use a fresh battery. A 9 V transistor radio battery is fine for portable use. Two
series-connected 6 V lantern batteries will operate this receiver for many months.
You can expand or reduce the receiver’s tuning range by varying the values of C3A and C3B. C3B sets the total tuning range, so
you can use different values of tuning capacitor other than the 50 pF specified. Make C3A’s value greater to lower the tuning range.
Likewise, you can compress or expand the turns on the main tuning coil for the same effect.
Operation
For the best performance, this receiver needs to have its regeneration level reset every time its tuning changes. The
REGENERATION CONTROL changes the voltage that powers the detector. Higher detector voltages increase sensitivity but they
broaden the selectivity.
In these self-quenched circuits, the REGENERATION CONTROL also varies the quench frequency. For AM and wide-band FM
reception, set R7 (QUENCH WAVEFORM ADJUST) for minimum resistance and simply increase the REGENERATION CONTROL past
the detector’s oscillation threshold to a point where the background (mush) noise suddenly begins to increase rapidly. Then
decrease the REGENERATION CONTROL setting slightly.
For narrow-band FM reception, set R7 (QUENCH WAVEFORM ADJUST) at mid-scale, adjust the REGENERATION CONTROL for
strong oscillation (high sensitivity) and tune in the carrier of the desired station. After tuning to the center frequency of the carrier,
decrease the regeneration level until the audio level increases sharply. (If you decrease the level too much, the detector will squeal.)
Adjusting R7 (QUENCH WAVEFORM ADJUST) creates a narrow-band window on the REGENERATION CONTROL between the point
where the detector first begins to oscillate and the point where (narrow-band) audio begins to drop off rapidly. Increasing R7’s
resistance widens this region but decreases detector sensitivity. Because of their interaction, the REGENERATION CONTROL and the
QUENCH WAVEFORM ADJUST control need repeated adjustment for narrow-band FM reception.
You can copy CW and SSB with this receiver. Set the REGENERATION CONTROL to a low point, where the detector stops
superregenerating, but where it is still oscillating. The receiver now operates as a straight regenerative set.
You can easily convert this receiver to operate on other bands. For 2 meters, make the following component changes: Omit C8A
and C3A, change C3B to approximately 15 pF, change C3C to a 25 pF variable capacitor, change C4 to 2 pF, and change RFC1
and RFC2 to 15 µH; L1 is 3 turns, 1 inch long. Add a 1 kΩ resistor and 6.8 V Zener diode before the REGENERATION CONTROL (see
Figure 1 inset) for increased stability on the higher bands, but that’s not needed at 6 meters.
Charles Kitchin is a hardware applications engineer at Analog Devices Semiconductor Division in Wilmington, Massachusetts,
December QST: An Ultra-Simple Receiver For 6 Meters - Page 5
ARRL 1997 QST/QEX/NCJ CD C i ht (C) 1997 b Th A i R di R l L I
6. where he has been employed for the past 21 years. His main responsibilities include customer applications support and writing
technical publications such as application notes and data sheets. He has published over 50 technical articles and two applications
booklets. Chuck graduated with an ASET from Wentworth Institute in Boston, and afterward spent many years studying electrical
engineering at the University of Lowell’s evening division. Chuck has been an avid radio builder and shortwave listener since
childhood and a licensed radio amateur (Tech Plus) for two years. His other hobbies include astronomy, beer brewing and oil
painting. You can reach Chuck at 804 Woburn St, Wilmington, MA 01887; tel 781-937-1665, fax 781-937-2019; e-mail
Charles.Kitchin@analog.com.
December QST: An Ultra-Simple Receiver For 6 Meters - Page 6
ARRL 1997 QST/QEX/NCJ CD C i ht (C) 1997 b Th A i R di R l L I