The secerts to great sounding samples.txt
•Als DOC, PDF herunterladen•
0 gefällt mir•502 views


Empfohlen
Weitere ähnliche Inhalte
Was ist angesagt?
Was ist angesagt? (17)
Andere mochten auch
Andere mochten auch (7)
Ähnlich wie The secerts to great sounding samples.txt
Ähnlich wie The secerts to great sounding samples.txt (20)
Mehr von 23rd Street Productions Group
Mehr von 23rd Street Productions Group (20)
Kürzlich hochgeladen
Kürzlich hochgeladen (20)
The secerts to great sounding samples.txt
- 1. The Secrets of Great Sounding Samples Give your home made samples professional quality by Rich the TweakMeister Sony SoundForge Stereo Editing Software (Windows) Tweak: This is the pro version I use See my review This is my audio editor of choice. PC Only. Its great for mastering, sampling, effects. It's 2 track only, so don't think you'll be overdubbing Bias Peak 2-Track Editing Software (Macintosh) Peak, the world's most popular editing/processing/mastering application for the Mac,is now fully OS X native - and includes support for BIAS� new SoundSoap� noise reduction plug-in. Peak 3.2 is still fully compatible with Apple's latest OS upgrade - Mac OS X v10.2 Jaguar and the OS 10.2.3 update. Tweak: Perhaps the fastest audio editor on the Mac. Works well with Waves and other plugins. Has its own convolution type reverb and some unusal effects. Bias Peak LE 2-Track Editing Software (Macintosh) Impressively powerful, with all of Peak's essential tools � at an amazingly affordable price. Lots of companies offer "lite" versions of their flagship programs but you usually wind up with a bare-bones, stripped-down shell of the real thing. Peak LE 3 is much more than bare-bones. Simply, it gives you pro-caliber editing, processing and power at a price anyone can afford. Whether you're burning audio directly to CD-R, or encoding your audio files in mp3 format for the Internet, Peak LE 3 is a great way to discover Peak power basics. . Propellerheads Recycle Loopists, groovists, samplists! A new world is about to open up before your very ears! New and improved ReCycle 2.0 solves all your groove related problems � and lets you get truly creative in the process. Tweak: Works withEmu samplers, soundfonts, Akai, and even some sequencers. If you have Reason, and want to get the most out of the Dr Rex Loop/Beat creator, you need this! Bias SoundSoap Audio Cleaning Software (Macintosh and Windows) Easily and instantly reduces noise from your digital video or digital audio files -- whether you're shooting videos, building websites, creating presentations, or making music, you probably care about your audio. Now, there's an easy-to-use tool that will make your work sound better than ever.
- 2. Samplers Mark of the Unicorn (MOTU) MachFive Universal Sampler Plug-In (MAS, RTAS, HTDM, VST) The most critical thing you need from a sampler is easy access to your sounds. MachFive (tm) offers unprecedented sound bank management, helping you concentrate on the music � not file handling chores on your hard disk. MachFive always remembers where your sounds are located, and it has been optimized for browsing and loading libraries. Even multi-gigabyte libraries are quickly and efficiently scanned. Native Instruments Kontakt (Macintosh and Windows) IK Multimedia Sampletank XL Sampler/Synth Plug-In SampleTank 2 is the ultimate sample workstation. For the first time in a sample-based instrument, 3 synth engines can be switched on the fly to provide more sound flexibility than ever before: traditional Resampling (the conventional method of playback most samplers use Pitch-Shift/Time-Stretch and the all new STRETCH engine.Priced from Tascam GVI Giga Virtual Instrument Plug-In (Windows) Tascam's new GVITM is the ultimate sampler -- the power of GigaStudio 3 in an easy-to-use plug-in for Windows VSTi and RTAS workstation software. It's the sampler for all musicians, composers and producers, with unobstructed access to the best sound libraries ever produced. GVI shares much of the feature set that makes GS3 the go-to sampler for power users in every style of music. 1. A Hardware or Software Sampler.If it's hardware, then the sampler should be well endowed with memory. 32 Megs or better is good. Any of the Emus, like the Ultras and Esi series are up to the task. The Akai's S2000 and above are good too. And if you are using a virtual sampler like Gigasampler, Kontakt, Intakt, the EXS, or the like, these tips still apply. I use an emu e5000, esi 32, all the NI soft samplers, EXS and soundfonts. 2. If you are using a software sampler you can ignore this next requirement. With an older hardware sampler you need a SCSI Connection properly configured between your computer and sampler. This is to allow you to transfer samples over SMDI, a protocol that uses the SCSI connection. Go here for Problems with SCSI Thankfully, some newer hardware samplers have USB transfer capability. 3. A Waveform editor that supports your sampler. This is important if you have an older SCSI sampler and need to do SMDI sample dumps. Always check before you buy. The companies might not tell you. Go to the forums supporting your sampler and find out what most use successfully. One company, Propellerheads, has dropped hardware sampler support with Recycle 2.1 4. A good quality Audio card that ideally can playback at different sample rates (i.e., 44.1k, 22.050k, 11.025k and ideally at odd rates like 30k, 20k, and 44.099 that developers use sometimes.) With a hardware sampler the Audio card is less important, it just has to work well enough to audition from the waveform editor. With a software sampler, you have to find the card recommended by the manufacturer.
- 3. 5. A storage medium. For hardware sampler's, floppy's aren't going to cut it. Removable storage is used by many pros and of course nothing is better than a large and small dedicated, scsi hard drives, backed up to a scsi CDR. For those running software samplers, get the largest ive you can afford and dedicate it to samples. Avoid running a virtual sampler from your "C: drive" Ok, if you've jumped through the hoops, you're ready! The Sampling process Sample to a Waveform Editor Rather than sample direct into the sampler, it is far more efficient to sample into a waveform editor on the computer. Why? In an editor, you can record several variations of the sound you want, all at once. There's no starting and stopping, putting down the instrument to press a button on the sampler. Say for example, you want to samplea flute. Rather than record each single note in the sampler, simply record yourself playing the chromatic scale on the flute 3 or 4 times. This gives you a large source file. In the waveform editor, look at the notes and find the best ones. Perhaps your G3 note was bad but the F# was great. Grab the F# and all the othe choice notes and cut and paste them into their own individual files. Using a sample editor lets you see a number of samples at one time. You can move your better ones to one side of the screen as you delete the ones you don't want. You can also see which ones have the best gain characteristics, something not always obvious by just listening and hitting the audition button on a sampler. Sample editors save time, and generally can process audio faster, giving you more of a chance to add eq, and other fine processes that make for better samples. Trim, Rough Loop, Optimize with Compression With each individual file, optimize the sample. Use the trim command to locate the exact start and end points, then move on to looping. Don't strive for the perfect loop yet, just get an approximation so you know how much to cut off at the end. Personally, I find that fine looping is best done in the sampler itself and not in the editor. Optimize the volume. Don't normalize yet, look at the sample window. If the waveform "off center" with the body tending towards the top or bottom of the window? Use the "DC Offset" to correct that. Now look at it again. If the waveform is too "spiky", you need to use a compression plugin to balance the sound. A spiky waveform will sound lifeless in the mix as the body of the sound will get lost. We want a balanced waveform with a defined attack and a strong trunk. Run the compression on it and undo the results until you get exactly what you want. Obtaining Clarity and Crispness: A Cool little trick. Our ears are very sensitive to the attack portion of a sound, and if we take strides to clarify the attack of a sound, often it will stand out in a mix. Many samplers have an 'exciter' function that can be used to boost the definition of the first 10-20 samples. Just the
- 4. initial milliseconds will go a long way here to add the polish of a great sample. Sometimes you want to excite the whole sample, but be careful as it's easy to wash it out and make it too bright. Drums are often candidates for 'total' excitement. You'll note that the more you excite a sample, though, the less you can use it at lower pitches, unless you like hearing a whine running through it. Exciters work by adding an ultra hi frequency harmonic outside the range of your hearing and as you pitch it down you start hearing it's nastiness. EQ: Accentuate the Uniqueness of instruments with EQ. many things we sample have unwanted bass frequencies. These tend to muddy the sound in a mix, even if they are not predominant. You do want to emphasize the 'character' of the instrument with EQ. Again, we want to hear the nasality of an oboe, for example, in the mix. EQ works well, and unlike when you EQ a mix, when EQ-ing a sample you often should get radical. Cut out big chunks of sound, like all the bass below 500 khz, or completely remove the "tin" frequency at 1000, to 2000 Hz so the high frequencies stand out. These days you have to get radical to get interesting sounds. Of course, if you are sampling a pristine vintage cello, you are going to want to tread lightly. This is obviously a job for a software editor here you can instantly tell if you eq'd too much, too little, or made it worse. You can eq in the sampler, but its not so easy. Rule of thumb: make them as hot as possible. Normalize the Sample Cool, you made it this far. Now you Normalize as this is the fina time you'll mess with gain. Now if you initial gain level was good, you should have a clean sample that is perfect for the sampler. If the original file was recorded at too low a level, you are undoubtedly hearing some hiss. You can either scrap the sample at this point, do something creative with the noise (which can be very cool!) or go all the way back to before you trimmed the sample (now aren't you glad you have multiple undo?) and run a noise reduction plugin. I use Sonic Foundry's and it works well. You basically grab a little piece of the waveform before the instrument sounded to capture the noise or 'noiseprint', which the plugin will search for and destroy inside your sample leaving all the other frequencies alone. For sampling its a must-have tool. OK, you killed the noise, redid the trims and crops, redid compression and eq and viola, you have a perfect, clean, sample. Now send it over SMDI to the sampler. Looping Secret Loop in the Sampler. There is one big reason to do the looping in the sampler that no editor can do. As you adjust the loop length you will hear audible feedback coming from the sampler in real time. Hold down a note on the keyboard and spin the dial. Start with the whine of the sample oscillating and gradually turn the dial. Also most samplers have auto loop locators and crossfade functions that work better than they do in software editors. The only exception might be the really long loops that are often considered 'unloopable', like complex ensembles. Anything can be looped. Just a matter of talent, tools and persistence.
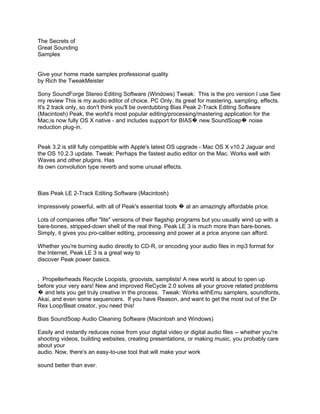
- 5. Example of a single cycle loop on a full bodied bass tone from my Korg MS20, made for Ice Kold Tekno. Though this is a tiny sample, it has a big deep sound. The sustaining portion must be set exactly to one cycle of the waveform or it will fall out of tune Small Single Cycle "Tuned" Loops: Want to know how the pros get so many samples into an 8 meg synth? They use 'tuned" loops with extremely short cycles. Works great with synths, winds, voxs, even guitars and basses.You go to the point where the attack has calmed down and make a loop as small as your sampler allows. You should hear a nasty whine coming from your sampler. Slowly increase the loop length and you will hear the whine lower in pitch. When it is almost in tune with the rest of the sample, start incrementing by single samples till the pitch locks in. Now, lock the loop length and move the loop till you hear the absolute perfect, seamless loop with no pops or clicks. Sometimes the tuned loop will be just a tiny bit sharp or flat, or it will buzz unmercifully. You can usually get rid of buzzing by moving the loop a few ticks, but with the tuning problem, if it won't go away by movingthe loop, then try multiplying the loop length by 2x, 4x, or 8x. If this doesn't workthere is a good chance your sample is so far out of tune that it will not lock to pitch no matter what you do, so you have to retune it. Tuning the Sample You should always painstakingly tune instruments before sampling to avoid what you have to do now. You can retune in the sampler if you have a good ear. If you do not, then you should go back to the waveform editor and use a tuning plugin like Antares Auto-Tune, which will work with some samples, but not all. Otherwise, you can get a guitar tuner with a digital readout to tell how far off you are. For hardcore tweaks, here's the most pain free method to tune using your ears. Reference a sine wave from one of your synths and figure out if you are sharp or flat. Here's how I do it. You have both the synth and the sampler playing from the same keyboard trigger (if your controller is a synth, just put it in local on mode). You should hear both the sine wave and the sample simultaneously. Now go to the master tune parameter (i.e., fine tuning) on the SYNTH and raise and lower it slowly. You'll hear the two tones start "Beating" or wavering as they get closer in pitch. As they get in tune the beating will slow and finally stop. Read the display on the synth. if it says "+33" for example, you are 33 cents SHARP. if it says -21, you are 21 cents FLAT. Now simply go to the sampler and dial up a pitch change and add or subtract the number. Now you are in perfect tune, right? Cool. Now you can do your single cycle sample and it will work! We hope! There's always possibilities of other problems when you are dealing with such nano bits of samples, but if you followed my guidelines above, you just eradicated about 95% of the problems. If there is pitch modulation in a sample, like the vibrato of a violin, the single cycle method will not sound right, same with any sound that starts flat and ends sharp, like your significant other's "ahhhh" you recorded the night you brought home your sampler. Also, there is a small minority of buzzy synth tones that will not single cycle loop--these are typically a combination of detuned waveforms that rapidly rise and fall in pitch so fast that it sounds like an even tone. Look for a longer loop for those. And by using stereo waveforms, single cycle looping is more difficult, but certainly not impossible. But why waste time. Do it in
- 6. mono and combine them in the sampler. But the good thing is this: By using single cycle loops can often fit up to 1000 samples into 32 megs of Ram, even into 16 megs if you resample most of them down a bit to 22,050 or 29,000 khz, whatever you can get away with. Go into one of your synths and listen for the loop points in the raw samples. Looping Complex Material Four ways I like to use Mountains and Valleys Method: Look carefully at the waveform's overall mountains and valleys. Even with a complex orchestra ensemble, you should see a "pattern" that repeats. Like one giant mountain (call it Mount Everest) and several smaller hills and mountains interspersed with valleys and dips. When you see a repeating pattern trim and crop the sample to where there are 2 or three instances of this pattern. Set your loop points, at the same point in the different instances "after valley 3 and halfway up Mount Everest" for example. Now Zoom in X4. Look for the repeating pattern at that level. Fine tune the loop. Sometimes you will get lucky and it will loop perfect the 1st time using this method. My success rate is good. This is a long string ensemble sample from my Ensoniq VFX. Note that the samples after the start and end points look similar Clicks and Pops are a Roadmap: A poorly looped sample will click loudly and deeply. The more bass in the click the farther out you are. Right before a loop "locks in" the clicks often raise in pitch till they are just a light ticking at a high frequency. If you get it at least this close you can use other tools, like crossfade looping at a very narrow bandwidth, and may even be able to draw in the loop with a pencil tool. Generally, though, Its much easier to do this in the sampler. Sometimes a click is "masked" at a certain pitch and you won't know it till you play it on the keyboard. I usually get it close in the waveform editor and fine tune it in the sampler and do the crossfade there. The Reversed Section Method: Do the best you can by getting the body of the sound as close as you can. Copy this section and paste it at the end of the loop. While the section you just pasted is still highlighted, reverse the pasted section. This gives you the back and forth loop and often gives the seamless, popless ensemble loop. Lots of synths use this method. You have to watch out for phasing on stereo samples. Its often best to do this in mono, then copy the mono sample to both sides of a new stereo sample, adding a slight delay to one side, or altering the volume envelopes for each side to give the sound a subtle l/r movement--very good for ensembles. Or you can EQ each side differently, perhaps a +3 boost at 4k on one side and a +3 boost at 500hz on the other. Crossfade Looping Method: Find your best loopable segment--it should have a start time close to the beginning and an end time close to the end. Make the loop. Then, use the crossfade looping function on your editor. Then hit the trim command so your sample loops seamlessly from beginning to end. Crossfade Looping like this will often leave a "pop" at sample start, even though it loops perfectly. With acid loops the solution here is to go to the beginning and end of the loop and fade in and out from and to 0db very quickly,
- 7. with the smallest part of the sample you can manipulate. Your ears will not detect it if you do it right. If you are doing Acid Loops, this is the only way to go and it gets rid of all those nasty pops at the sample start. If its a string ensemble, just leave the pop in and use the "sample start" parameter at the program level of your sampler to get rid of it. Often there is an option to compress the audio material inside the crossfade. If there is a volume difference at the start and end points you should use it. This will minimize the "wow and flutter" problem this method often introduces as you play a sample up the keyboard. To Keep a Tail or Not: First, consider if you ever will want to play the unlooped version of the sample. You might. If so, keep a tail on the sample that is not objectionable. if you doubt you will ever want an unlooped version of a particular sample, truncate it a few samples after the end loop. Keep a few extra samples than you need in case you have tuning problems and have to micro-adjust the loop later by a tick or two. If you know it is in perfect tune, lop it all off. You'll save memory that way. Drums 'N Stuff Making Drum Loops and Beats Drum Loops Are easy to loop if you have the right tools. Sound Forge is excellent here. Notice how the guides in the sample window line up with the beginning of each beat in the 4/4 drumpattern made while working on the Celestial Windowpane project. You can take a loop like the one below and put it in a sampler or drop it in a sequencer like Sonar, and it will stay in time and loop perfectly without a glitch. Of course these days we are adding "tasteful glitches" to make our beats stand out away from the rest. But before you get into that, learn how to get a standard 4-on-the-floor working and then experiment. Note how the loop guides perfectly match the beats in this standard trance drum loop. These loop guides are a great feature of Sound Forge--perfect for making Acid Loops. Compression and Drums So you've sampled your duff kit and your drums sound wimpy compared to your synths and stuff you may have bought. The trick is compression. Again, we have a matter of bringing up the body of the sound so it doesn't get lost in the mix. Apply 2:1 compression and listen to your cans acquire new life. Add a touch of reverb and then compress for some of those deep tom effects. Cut off the tail and you have a Gated Drum that will rival those on many
- 8. pop records. Cut it abruptly and you have a dance drum sound. You don't need the best drums to make really hot drum samples. Almost any kit will do. You DO need a great kit if you are trying to make a quality "dry" trap kit. But if you are mangling beats and hits just get your sound in the digital domain and experiment. Compression is the starting point. How to Lay out a Sampled Drum Kit There's some diverging opinions here, but let the TweakMeister set you straight. How you answer this question will shape the way your music will sound for as long as you use the kits. Most of us don't have enough time to sample a new kit for every song, so you want to map your drum samples in a way that they will be useful for many different songs. The answer is a modified GM like kit. Why? Simply because in the heat of creation, you aren't playing all over the keymap looking for things! Also, if you stick to some kind of spec, you can audition different drum kit programs from the same MIDI pattern. Kik is at C, Rim is at C#. Snare is at D. The Hats are at F#, G#, A# The toms are at F,G,A. The rest is up to you if you want to stick to the spec or not. I like to define the 1st two octaves of a kit, and then do variations of the kit on the 3rd, 4th, and 5th octaves. Why? So you can just hit the transpose button in a sequencer by octaves to get another kit. Using Multiple Outputs. If your sampler has multiple outs, here is where they come in handy. Assign at bare minimum, your snare to its own output. This will allow you to precisely balance and eq the sound at the mixing board. If you have an extra output, send the kik to its own. And if you can afford it, give the hat's their own too, which should be left dry in most musical applications. Panning and drums: Naturally, you center Kiks, and Snares. The rest is up to creative uses. There is a tendency among beginners to go real wide on the hats, like extreme L/R on the Open/Close. Try to avoid that. Ditto for the toms. 100% Left and Right may make the drums sound huge, but ask yourself if that's what you really want. Better to stay in the 20%-50% range. but of course there are no real rules, especially if you are not reinventing the rock band, I tend to center tambourines and cowbells, but let the other minor percussion have the periphery, like claves, shakers, and bells. These have such high harmonic content they are better out of the way of the main center mix. FX and PsychoAcoustics To Use FX or Not To tweak or not to tweak. That is the question! Conventonalwisdom says to leave your samples dry so you can add effects a board during mix. That way, you get more uses out of each sample. Pretty hard to argue with that logic, except when: 1.You have found something
- 9. beautiful and you may never again cross the path to obtaining such a wonderful audio result. 2. You re-routed your studio to make the patch happen and you can't reproduce it in a mix when things are normalled. 3. In order to make the sound you have to tie up multiple processors that you need to keep free for other things at mixdown. 4. You are just adding a touch of ambient reverb to warm the sound in a way that will unlikely cause complications in a mix. Tweak's rule of thumb, if you really like a sound, you better sample it, quick. Mono Panning vs. Stereo Localization Stereo samples are great. However, unless you make sure your stereo pans are hard/Left and Right, you could be inviting problems at other mix settings. The most obvious is the phase- cancellation problem where the sound entirely disappears from the mix when both sides are summed to mono (or panned center). Most of the time, your sound won't entirely disappear, but its volume will suddenly drop out and become lifeless or stressed. This never happens with mono samples, which can be panned anywhere with no signal loss. Mono samples are always safe. However, there are a number of tricks one can do with very small offsets in a stereo sample. You can, for example, make the sound seem to come from the ceiling, from behind you, from to the extreme far left or right, farther back than a mono sample panned 100%. You can also make the sound 'jump out' of the speakers and slap you in the face with stereo. All of the above stereo effects are achieved by hard panning a "similar" sound left and right, with small deviations in pitch, slow LFOs corded to volume and filters, and tiny delays added. Go ahead and take the same sample, hard pan L/R, then play with the attack offset, and detune a tiny bit. You will hear the stereo field jump out. Now do some micro-edits and listen to the field change. What was a simple static pad suddenly becomes an aural landscape with richness and texture. When you lock into something great, save the patch. Just remember to hard pan in the mix. When you are in a mix, the patch will either work or it won't. if it doesn't, there is little chance to make it work. With mono samples, making it fit in the mix is infinitely easier. For backing or supporting instruments, this may be the way to go. For the "signature" instrument in the mix, however, you may need stereo to give it more fullness and depth. Laying out a multisampled Instrument Just some suggestions here if you are just starting to build your library of samples. First, always always always make the root key part of the sample name, unless it's a C. That is, call it something like "hollow flute F#". You do not want to waste time figuring it out next time you want to map it do you? This will allow you to map sounds painlessly. Most people choose their breakpoints at C1, C2, C3 or C2, F2, A2 for a shorter spanning multisample. If you are doing acoustic instruments, it is good to put the breakpoint where the timbre changes naturally in the instrument. The most obvious is the acoustic guitar. If you have the open strings ringing at E,A,D,G,B,E it will sound more natural. Most instruments have timbral transformations as you go up in pitch, or play harder (or louder). It is quite easy to get completely lost in making an instrument sound realistic.
- 10. Often times however, after spending hours on a multisample, one tries to use it in a mix and lo and behold, it doesn't work. Why is that? We have a tendency to think outside the context after a while and make our transformations TOO dynamic. For example, when making an orchestral pad, you might think you'll do a velocity crossfade between the winds and strings so when you play lightly, you hear wispy winds and play hard it the marcato strings of death. Nice idea, but it will never work in a mix. Simply too dynamic. Use the rule of Similitude rather than Contrast when building multisamples. Crossfade between Hard Winds and Marcato Strings, then we may get a usable section, or Soft winds and soft strings. Things cannot be so different for them to work. Yet there must be some difference. You can learn a real lot about sampling by taking a decent sampleplayback synth, like a Proteus, and study the breakpoints. Why did they choose those points? When you begin to see the programmer's logic, you will see what an art multisampling truly is. Illusions Under the Microscope As a result of over a decade of listening to sampled musical instruments on TV, in movies, and on the radio, our culture has created an illusion of what a close miked orchestra, as if our ear was 5 inches from the bow on a cello, a foot from the bell of a clarinet, underneath a snare drum and a step away from the gong. This is what "sounds good" to our contemporary ear. When it comes to the mix, we add artificial ambience to restore some of the spaciousness of our ensemble. We came to the "close miked" ensemble forgood reasons--again the reason is The Mix. Unless your samples are recorded loud and a tad bright, with all of the upper harmonics present, your sound will get lost in the mix. Sometimes that great French horn pad you spent hours on will not even be heard in a mix of other instruments. You can always darken a sample in the mix but often cannot make it brighter without bringing in noise. Loudness, brilliance and timbral quality are virtues. What does this mean? It means make the samples as hot and crisp as possible. Get rid of muddy bassy overtones and sharpen the high end as much as you can, even if it brings in a little noise. I estimate that in a mix, we hear only 10-20% of the dynamics of any sample. Time spent on weaker subtleties may be lost. What may sound glaring and overstated in an individual sample often sounds perfect in the mix, because again, we are only hearing 10-20% of the sound. So, go ahead, exaggerate timbral qualities in your sample. Chances are in the mix you will at least hear them. Keep the Sequencer Fired Up The solution to these perceptual illusions is to keep your sequencer running as you sample and immediately audition the sample in an intended mix. This is the correct way to set envelopes, velocity to amplitude/filter, and resonance. Its a fatal mistake to make sounds out of their intended context. You could end up with days of work down the drain and a bank of largely unusable sounds. But lets look at
- 11. it from a positive side. You go through the final tweak-in-the-mix and you have sampled instruments you can go back to over and over again, and you know exactly how they respond to velocity, controllers, and note duration, so they become more and more useful to you as your library grows.