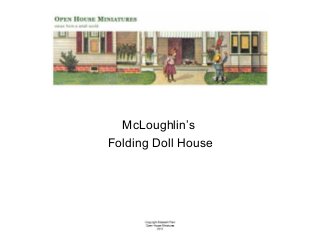
Miniature McLoughlin Folding Doll House
•
10 gefällt mir•245,758 views

http://openhouseminiatures.wordpress.com/2013/03/01/how-to-make-a-folding-dolls-house/

Empfohlen
Empfohlen
Weitere ähnliche Inhalte
Kürzlich hochgeladen
Kürzlich hochgeladen (20)
Empfohlen
Empfohlen (20)
Miniature McLoughlin Folding Doll House
- 2. Credit where it is due ! A couple of months ago I had the very good luck to come across a patent, dated Jan. 30th 1894. I don’t know if this design by Eleanor McCulloch Smith was created specifically for the McLoughlin Brothers company, or if they liked it and adopted it. Either way, all credit for original Folding Doll House is entirely theirs and not mine.
- 3. My version is 12th scale Each miniature wall is 1 inch (2.5cm) square.
- 4. Please bear in mind that I collected fragments from various houses over a number of years and used them to re-create a version of the original. I have had to make some adaptations to what must have been the assembly process, due to the size of my 12th scale version and the materials available to me. The edges of the pictures for the walls and floor of the original were folded neatly over the edge of very thick card. I do not have all the labels for the rooms, so none of them are named in my version. My version is bound with paper and not with cloth My version does not have instructions pasted on the front
- 5. Another thing The original houses were produced using the lithographic printing process. This means oil-based printing inks were used to make the decoative papers. A modern ink-jet printer cannot reproduce the quality and density of colour, or the texture, of a lithograph. The process is not the same, the ink is not the same, the result is not the same.
- 6. Is it possible to fake a lithographic finish? The closest I have ever come to reproducing an effect similar to lithography, involves applying a thin coat of satin-finish, waterbased varnish to a high quality print on matt, ink-jet paper. The Ronseal brand is my current favourite - for all sorts of varnish. However… The most important thing is – Use what you know will work for you. From past experience, I would say that most varnishes sold for “craft” purposes are utter rubbish and will ruin your work. However… The most important thing is – Use what you know will work for you.
- 7. In addition to which All the varnishes that I have so far tried – including the ones for varnishing paintings – react with ink-jet printer ink and either smear it, or make the it “yellower”. The varnish I used here doesn’t smear but (in daylight) I can see the difference in colour.
- 8. Another thing I have not yet found a varnish, or glue, that will bind the coated surface of an ink-jet paper to its backing paper. On the right is a sample house that I made using ink-jet paper pasted onto thin card. Even with very light handling the edges rubbed. This is, however, useful to know, if you are looking for a distressed finish ! The paper makes a HUGE difference to the finish !
- 9. So what do I do when I make a McLoughlin Folding Doll House?
- 10. I use • • • • • • • • • a sharp knife a blunt knife a metal ruler white, water-based wood glue, and a small paint brush 200 gsm cold pressed water colour paper 90 gsm plain paper 90 gsm coloured paper a pair of scissors a professional printing service This project needs clean, crisp edges. A “sharp” knife will cut a straight line without damaging the paper.
- 11. First I cut out all the walls and floors When I have a lot of small pieces to assemble I often find it useful to put them on a towel. This stops them moving about and getting muddled up. D A LAST B In the original houses, the papers for the walls and floors were printed on to paper. This was then pasted on to very thick cardboard. Mine are printed directly onto 200 gsm paper. C I printed the example in this slideshow at home, on my very basic home printer. This is not what I usually do !
- 12. Then I cut the binding paper To do this, I score a fold line, fold the paper over and then, using a steel ruler and a sharp knife, I cut along the edge. This means that I have a straight fold right in the middle of my strip of paper. I cut along here
- 13. Note I tried a variety of binding materials before I settled on paper. Close woven bias binding, looked authentic, but it was too thick. Silk was difficult to get in a suitable colour, and it was too loosely woven and did not hold its shape. Paper on the other hand is very tough, especially when it is coated with glue. So I use paper – and for a little added strength, I apply a little extra glue to the back of every strip, after I have glued it into place. It is almost impossible to see in the photograph, but it is there. My version is bound with paper and not with cloth.
- 14. NOTE I find it easier to glue the binding and then trim it to size, so I always cut each strip of binding paper a little bit longer than it needs to be.
- 15. When all the pieces are cut and ready I start gluing. The first room I assemble is marked D in the pdf. The straight fold in the binding paper fits against the straight edge of the floor, making them easy to match up.
- 16. Note I hold the floor and wall together, face to face, and glue the binding paper in place, over the two edges.
- 17. Then I unfold the wall and floor and check that there is a nice, straight gulley between them. And that, believe it or not, is the first room completed.
- 18. The next room (A) Is a little more complicated, but it starts in the same way. I glue the binding strip to the floor…
- 19. Then Just as before, I attach the wall to the binding strip, making sure that there is a clear, neat gulley between the wall and the floor.
- 20. Then I trim the excess from the ends of the first binding strip and attach another binding strip – to the left hand edge of the wall. NOTE – It is important that the end of the binding strip does not extend beyond the end of the wall.
- 21. Then (and this is IMPORTANT)I fold up the floor again. Then I apply glue the reverse side of the right hand edge of the second wall - the one that has the archway with the purple curtains. Then I put the second wall, face down, on top of the folded up floor. Then I carefully fold the binding strip over, so that it sticks to the gluey edge of the wall and then… This wall
- 22. I open the walls out And unfold the floor, and check that the gulley between the two walls is clean and straight.
- 23. After that I trim the binding paper. Then I am ready to glue the first room and the second room together. I do this before assembling the other rooms because I need the glue to dry, before cutting out the archway.
- 24. NOTE The result looks rather odd, when flattened out. BACK VIEW FRONT VIEW
- 25. Then I assemble the kitchen (B) and the bedroom (C). Following this pattern Attach floor to wall with binding strip Note: This wall is not attached to anything yet ! Fold up floor Attach second wall to first wall with binding strip Note: I have not cut out the archway yet. I want the glue to dry before I do this. B C
- 26. When the glue is perfectly dry I cut out the archway. To do this, I use a very sharp knife and I cut away from the corners, The thin strip that remains at the bottom of the archway, next to the binding paper, adds strength.
- 27. Then I assemble the house I glue the back of the wall, with the kitchen cupboard on it, to the back of the wall with the fireplace on it.
- 28. Then I glue the back of the bedroom wall, with the doors on it, to the back of the wall with the kitchen stove on it.
- 29. Finally I glue the last wall to the last blank page, at the back.
- 30. Then I check That everything is fairly square and neat.
- 31. Then I Cover the blank backs of the floors with the (90 gsm) paper with the Folding Doll House design on it.. My version does not have instructions pasted on the front. I do not have all the labels for the rooms, so none of them are named in my version.
- 32. And then I double check that everything is where it should be. When these are for sale on Etsy, anyone who buys a folding house – and points out the (deliberate) mistake in the photos there - has their postage refunded. B A C D
- 33. All done
- 34. Well, nearly all done I put the houses under a light weight, for at least 24 hours, before boxing them for sale. That way I feel certain that they are completely dry and flat.
- 35. Ah, yes, the box… My version of the McLoughlin Folding Doll House comes with a box The box is not exactly like the original box and it is not included in the downloadable pdfs