Deduplication without performance hits: Intel Xeon processor E5-2697v2-powered Dell PowerEdge R720xd

Backing up business data with deduplication has the potential to clog network resources and slow down performance for your customers. Servers with powerful processors are crucial to running an efficient and secure infrastructure. We found that a Dell PowerEdge R720xd server powered by the Intel Xeon processor E5-2600 v2 Series successfully overcame this hurdle in our tests. When we used NetVault Backup to dedupe and back up data while running database workloads, performance did not slow down. The Dell solution using source-based deduplication reduced backup storage space used by 39 times and reduced application server network traffic by 70.5 percent when compared with a traditional backup method. Strong processor and server combinations, such as the one we tested, can keep your business moving swiftly and save resources as you back up your data to keep it safe.

Recommended
Recommended
More Related Content
What's hot
What's hot (20)
Similar to Deduplication without performance hits: Intel Xeon processor E5-2697v2-powered Dell PowerEdge R720xd
Similar to Deduplication without performance hits: Intel Xeon processor E5-2697v2-powered Dell PowerEdge R720xd (20)
More from Principled Technologies
More from Principled Technologies (20)
Recently uploaded
Recently uploaded (20)
Deduplication without performance hits: Intel Xeon processor E5-2697v2-powered Dell PowerEdge R720xd
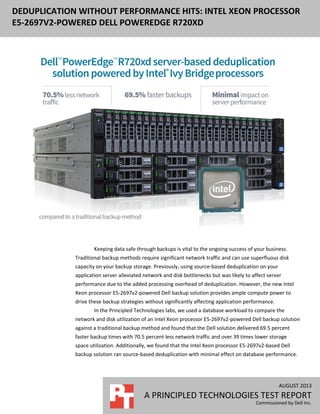
- 1. AUGUST 2013 A PRINCIPLED TECHNOLOGIES TEST REPORT Commissioned by Dell Inc. DEDUPLICATION WITHOUT PERFORMANCE HITS: INTEL XEON PROCESSOR E5-2697V2-POWERED DELL POWEREDGE R720XD Keeping data safe through backups is vital to the ongoing success of your business. Traditional backup methods require significant network traffic and can use superfluous disk capacity on your backup storage. Previously, using source-based deduplication on your application server alleviated network and disk bottlenecks but was likely to affect server performance due to the added processing overhead of deduplication. However, the new Intel Xeon processor E5-2697v2-powered Dell backup solution provides ample compute power to drive these backup strategies without significantly affecting application performance. In the Principled Technologies labs, we used a database workload to compare the network and disk utilization of an Intel Xeon processor E5-2697v2-powered Dell backup solution against a traditional backup method and found that the Dell solution delivered 69.5 percent faster backup times with 70.5 percent less network traffic and over 39 times lower storage space utilization. Additionally, we found that the Intel Xeon processor E5-2697v2-based Dell backup solution ran source-based deduplication with minimal effect on database performance.
- 2. A Principled Technologies test report 2Deduplication without performance hits: Intel Xeon processor E5-2697v2-powered Dell PowerEdge R720xd DEDUPLICATE YOUR DATA WITHOUT AFFECTING PERFORMANCE Backing up data is necessary for any business. While deduplication technologies help reduce these burdens, it takes a strong server/processor combination to ensure that backing up data does not hurt database performance for your customers or employees. The Intel Xeon processor E5-2697v2-powered Dell backup solution provides just that. Our Dell backup solution consisted of the following components: Application server: Dell PowerEdge R720xd server powered by two Intel Xeon E5-2697v2 processors running Microsoft® Windows Server® 2012 and Microsoft SQL Server® 2012 and NetVault Backup 9.2 client. Backup server: Dell PowerEdge R820 running Windows Server 2012 and NetVault Backup 9.2 server. Backup storage appliance: Dell DR4100 Disk Backup Appliance We used the Benchmark Factory® for Databases tool to generate our OLTP workload. Benchmark Factory reports results in transactions per second that a server handled. While older source-based deduplication technology taxed processors to the point of performance degradation, this solution did not. As Figure 1 shows, the database performance of the Intel Xeon processor E5-2697v2-powered Dell PowerEdge R720xd solution only decreased minimally while running a source-based deduplication backup. Figure 1: Using source-based deduplication with the Intel Xeon processor E5-2600v2 Series-powered Dell PowerEdge R720xd backup solution didn’t significantly affect database performance. For more information on the server we used, see Appendix A. For detailed steps on how we tested, see Appendix B. Reduce network traffic Traditional backup methods can clog your network sending unnecessary, duplicate copies of information that already exist on your backup storage. Network 96.7 98.2 0 20 40 60 80 100 120 Source-based deduplication backup No backup Transactionspersecond Database performance (higher is better) Deduplication, what is it? After an initial full backup, deduplication software compares data from the source and backup locations and backs up only blocks of data that are new or changed since the last backup. This prevents unnecessary wasting of bandwidth, time, and space, which maximizes your backup efficiency.
- 3. A Principled Technologies test report 3Deduplication without performance hits: Intel Xeon processor E5-2697v2-powered Dell PowerEdge R720xd congestion is made even worse by the fact that backup data has to go through a backup server before going to the storage. The Intel E5-2697v2-powered Dell backup solution sends only new or changed data directly to your backup storage, significantly reducing the amount of network traffic during a backup. As Figure 2 shows, the Intel E5-2697v2-powered Dell backup solution reduced network traffic by 70.5 percent average on the application server compared to the same in a traditional backup method. We used a heavy database workload during each simulated day, so that each source-based deduplication backup transferred an average of 94.32GB of new data, or 63.1 percent less than the 255.60GB full traditional backups to the storage each day. The averages are across 15 days of source-based deduplication backups or three days of traditional full backups, and includes only backup-specific network traffic. In the case of a database that experiences less change each day on average, one could expect source-based deduplication to reduce network traffic even further. Figure 2: The Intel Xeon processor E5-2600v2 Series- powered Dell PowerEdge R720xd backup solution reduced network traffic by 70.5 percent compared to the traditional backup method. 0.19 0.66 0 0.1 0.2 0.3 0.4 0.5 0.6 0.7 Source-based deduplication backup Traditional backup Gbps Average application server network throughput during a backup (lower is better) Additionally, the Intel Xeon processor E5-2697v2-powered Dell backup solution essentially halved the network traffic across the overall backup network. This is because NetVault Backup also enables the Dell DR Rapid Data Access (RDA) feature, which integrates NetVault Backup client with the DR4100 backup appliance. RDA allows for backup metadata to be transferred directly from the application server to the backup appliance without having to go through a designated backup server as would be required in a traditional backup method (see Figure 3).
- 4. A Principled Technologies test report 4Deduplication without performance hits: Intel Xeon processor E5-2697v2-powered Dell PowerEdge R720xd Figure 3: Dell NetVault Backup with RDA, as part of the Intel Xeon processor E5-2600v2 Series-powered Dell PowerEdge R720xd backup solution, further reduced network congestion by sending backup data directly to the backup appliance. This provides the Dell DR4100 Backup Appliance with the potential to back up as much as 5.38 TB of data per hour, as well as accelerate restore speeds. Additionally, the reduced traffic and bypassing of the backup server by using NetVault’s RDA feature in conjunction with the DR4100 appliance can mean that your business can assign many additional backup clients to a single backup server and reduce your overall backup hardware infrastructure needs. Decrease time to backup data When comparing the average backup time for a full backup of the Dell PowerEdge R720xd solution running source-based deduplication and RDA, to a traditional backup method, the Intel E5-2697v2-powered Dell backup solution was 69.5 percent faster when backing up a 255.60GB dataset. As Figure 4 shows, the Dell solution took 14 minutes 20 seconds on average to deduplicate and transfer an average of 94.32GB of new data per day, where the traditional backup took 46 minutes 59 seconds on average to back up the full 255.60GB data set each time.
- 5. A Principled Technologies test report 5Deduplication without performance hits: Intel Xeon processor E5-2697v2-powered Dell PowerEdge R720xd Figure 4: The Intel Xeon processor E5-2600v2 Series- powered Dell PowerEdge R720xd backup solution provided faster full backups. Additionally, full backups of the Intel E5-2697v2-powered Dell backup solution using source-based deduplication means that every backup is self-contained and does not require a previous backup data set for a restore. This is a benefit over alternative methods, such as differential backups, that can save time but require regular full backups to remain time-efficient and require multiple data sets for a restore. Lighten the load on backup storage Traditional backup methods can create a large storage demand for many businesses. These backups, which include unchanged data that already resides on the storage, quickly fill up available space. The Intel Xeon processor E5-2697v2-powered Dell backup solution provides a highly space-efficient backup strategy. In addition to source-based deduplication, the DR4100 backup appliance compresses its stored files, decreasing the actual space used by the backups. We compared the space required by 15 simulated days’ worth of backups after an initial backup using the Dell solution to the space that would be needed to store 15 days’ worth of full backups without compression or deduplication. For the RDA setup, the initial backup was for 255.60 GB of data. Each deduplicated backup transferred 94.32 GB of data on average as a result of the changes being made to the database with each simulated day. As Figure 5 shows, the Intel Xeon processor E5-2697v2-powered Dell backup solution, along with the additional compression of the Dell DR4100 Backup Appliance, reduced the required backup storage capacity by over 39 times when compared to the space that a traditional backup with no compression or deduplication would need to store an equivalent 255.60GB backup dataset. 0 5 10 15 20 25 30 35 40 45 50 Source-based deduplication backup Traditional backup Minutes Average backup time (lower is better)
- 6. A Principled Technologies test report 6Deduplication without performance hits: Intel Xeon processor E5-2697v2-powered Dell PowerEdge R720xd Figure 5: With source-based deduplication option enabled on the DR4100 using Dell NetVault Backup, the Dell PowerEdge R720xd backup solution reduced backup storage utilization by 39 times over the course of 15 simulated days. 101.83 4,089.60 0 500 1,000 1,500 2,000 2,500 3,000 3,500 4,000 4,500 Source-based deduplication backup Traditional backup GB Backup storage space usage (lower is better) As Figure 6 shows, the deduplication ratio of the RDA setup, which is a measure of disk savings as a result of deduplication, rose steadily. The amount of database change activity in between backups will greatly affect your deduplication ratio. In our tests, our daily workload generated heavy database change activity. A database with less daily changes will experience higher deduplication ratios and additional disk savings. Figure 6: With source-based deduplication enabled, the DR4100 backup appliance’s dedupe ratio increased from 12.39:1 to 40.16:1. WHAT WE TESTED We used Benchmark Factory® for Databases to create an OLTP workload. We performed tests under two conditions. The first was a traditional setup, wherein the Dell PowerEdge R720xd application server sent its data through the Dell PowerEdge R820 backup server, which acts as a gateway to the DR4100 storage appliance and used target-based deduplication. The second configuration used NetVault Backup software and source-based deduplication with the RDA plug-in using the same hardware, which 0 5 10 15 20 25 30 35 40 45 1 2 3 4 5 6 7 8 9 10 11 12 13 14 15 Deduperatio Backup day Dedupe ratio (higher is better)
- 7. A Principled Technologies test report 7Deduplication without performance hits: Intel Xeon processor E5-2697v2-powered Dell PowerEdge R720xd allowed the Dell PowerEdge R720xd application server to deduplicate and compress the backup data and send it directly to the DR4100 storage appliance. For the traditional backup method testing, we configured multiple CIFS containers on the DR4100 appliance to hold the full backups for our comparisons. We completed an initial backup, and then ran three simulated days’ worth of full backups to verify that each full backup was consistently the same. For the source-based deduplication testing, we configured an RDA container on the DR4100 appliance. We completed an initial backup, and then ran fifteen simulated days’ worth of full backups. We calculated the average network traffic used by the Dell PowerEdge R720xd application server and Dell PowerEdge R820 backup server combined for both configurations. This captures the additional network congestion caused when the traditional backup method pushes the backup data through the Dell PowerEdge R820 backup server before it transfers it to the backup storage. The full backups of the traditional setup used an average of 0.66 Gbps of bandwidth, while source-based deduplication with RDA averaged 0.19 Gbps. Source-based deduplication saves your network 70.5 percent of the network load that the traditional setup imposed. For our storage capacity comparison, we performed an initial backup to the DR4100 appliance and then ran 15 simulated days of activity. At the end of each simulated day, we performed a backup to the DR4100 appliance. It required a total actual storage space of 101.83 GB for 16 backups. Using the full backup size (255.60GB), uncompressed full backups would require 3.99 TB of space on a storage array that does not compress or deduplicate at the storage level (Note: The DR4100 Backup Appliance natively does both). About Benchmark Factory for Databases To measure database performance, we used the Benchmark Factory for Databases tool, which lets you conduct database workload replay, industry-standard benchmark testing, and scalability testing. It enables you to deploy changes to your database environment with confidence by reducing the risks associated with patches, upgrades, migrations, and adjustments to virtual machine configurations. With this workload replay and scheduling software, you can eliminate slow SQL database performance and dramatically simplify high-performance database management. We used an OLTP database test in Benchmark Factory to run a TPC-E-like workload consisting of approximately 90 percent reads and 10 percent writes. We created two heavy OLTP workloads that used a 255.60GB database. The first workload, which we call the accelerated workload, simulated a day’s worth of changes to the database by running at least 2,750,000 total transactions or approximately 32 transactions per second on average over the course of 24 hours. This created
- 8. A Principled Technologies test report 8Deduplication without performance hits: Intel Xeon processor E5-2697v2-powered Dell PowerEdge R720xd approximately 275,000 transactions resulting in writes to the database per day. We ran this workload in between each backup to demonstrate continued backup and deduplication performance over the course of the required days for each configuration. The second workload, which we call the real-world workload, generated a real-time workload and ran at just under 100 transactions per second to simulate a peak workload in our sample scenario. Although an IT admin would not typically schedule a backup during a period of increased database activity, we ran a heavier workload for the purposes of demonstrating that source-based deduplication would not significantly affect performance for the Dell solution. We ran this workload, first with no backup jobs ongoing, and then with source-based deduplication backups to measure any decreases in performance. For more information on Benchmark Factory, visit www.quest.com/benchmark- factory/. About the Dell PowerEdge R720xd According to Dell, the Dell PowerEdge R720xd rack server is designed for workloads that are require heavy storage and I/O performance. It combines highly expandable memory and improved I/O capabilities with large storage capacity. Powered by Intel® Xeon® E5-2600v2 Series processors and reinforced with reliability, availability, and serviceability (RAS) features like hot-plug fans, disks, and power supply units (PSUs), the Dell PowerEdge R720xd is designed to deliver strong performance and reliability. For more information about the Dell PowerEdge R720xd, visit www.dell.com/us/business/p/poweredge-r720xd/pd. About the Intel Xeon processor E5-2600v2 Series The Intel Xeon processor E5-2600v2 Series, also known as Intel Ivy Bridge, builds on the E5-2600 product family for even stronger processors. The new product family features increased core counts (up to 12 cores/24 threads) and up to 30M cache. Intel Xeon E5-2600v2 processors support larger memory DIMMS, up to 64GB, and faster memory, up to 1,866 MHz. This processor series also introduce new features to help protect your important data: Intel Secure Key, which provides faster and more secure encryption, and Intel OS Guard, which improves protection against malware. The Intel Xeon processor E5-2600v2 Series also features Advance Programmable Interrupt Controller virtualization (APICv), which can help improve virtualization performance. For more information on the Intel Xeon processor E5-2600v2 Series, visit www.intel.com. About NetVault Backup NetVault Backup is a backup and recovery software solution that utilizes disk- based data backup and deduplication to maximize storage efficiency. Administrators can
- 9. A Principled Technologies test report 9Deduplication without performance hits: Intel Xeon processor E5-2697v2-powered Dell PowerEdge R720xd perform backup operations for both bare-metal and virtual environments from a single console. NetVault Backup features bare metal recovery capabilities to help you recover servers faster through a heavily automated rebuilding process. With NetVault Backup, you can store your backups using disk-based devices, virtual tape libraries, third-party deduplication appliances, physical tape libraries, and more. For more information about NetVault Backup, visit www.quest.com/netvault-backup/. About the Dell DR4100 Disk Backup Appliance The Dell DR4100 Disk Backup Appliance is a backup and recovery solution that works in conjunction with Dell 12G servers. The DR4100 offers in-line deduplication, compression, and deduplicated replication to reduce backup storage space usage and network resources. It also offers the Rapid Data Access feature, increasing backup and restore speeds by enabling the application server to transfer metadata directly to and from the DR4100 backup appliance. The Dell DR4100 backup appliance can provide replication for up to 32 server nodes, and secures backup data with encrypted replication. According to Dell, the DR4100 can provide up to 27TB physical capacity and 405TB logical capacity per system. The DR4100 appliance also allows you to add expansion shelves as your business grows. For more information about the Dell DR4100 Disk Backup Appliance, visit http://www.dell.com/us/business/p/dell-dr4100/pd. IN CONCLUSION Backing up business data with deduplication has the potential to clog network resources and slow down performance for your customers. Servers with powerful processors are crucial to running an efficient and secure infrastructure. We found that a Dell PowerEdge R720xd server powered by the Intel Xeon processor E5-2600 v2 Series successfully overcame this hurdle in our tests. When we used NetVault Backup to dedupe and back up data while running database workloads, performance did not slow down. The Dell solution using source-based deduplication reduced backup storage space used by 39 times and reduced application server network traffic by 70.5 percent when compared with a traditional backup method. Strong processor and server combinations, such as the one we tested, can keep your business moving swiftly and save resources as you back up your data to keep it safe.
- 10. A Principled Technologies test report 10Deduplication without performance hits: Intel Xeon processor E5-2697v2-powered Dell PowerEdge R720xd APPENDIX A – SYSTEM CONFIGURATION INFORMATION Figure 7 provides detailed configuration information for the test systems, and Figure 8 provides detailed storage information. System Dell PowerEdge R720xd Dell PowerEdge R820 Power supplies Total number 2 2 Vendor and model number Dell E1100E-S0 Dell E750E-S0 Wattage of each (W) 1100 750 Cooling fans Total number 6 6 Vendor and model number AVC DBTC0638B2V San Ace 60 9GA0612P1J611 Dimensions (h x w) of each 2.5” x 2.5” 2.5" x 2.5" Volts 12 12 Amps 1.2 1.50 General Number of processor packages 2 4 Number of cores per processor 12 8 Number of hardware threads per core 2 2 System power management policy Default Default CPU Vendor Intel Intel Name Xeon Xeon Model number E5-2697v2 E5-2660 Socket type 2011LGA 2011LGA Core frequency (GHz) 2.70 2.20 L1 cache 32 KB I + 32 KB D (per core) 32 KB I + 32 KB D (per core) L2 cache 256 KB on chip (per core) 256 KB on chip (per core) L3 cache 30 MB 20 MB Platform Vendor and model number Dell PowerEdge R720xd Dell PowerEdge R820 Motherboard model number OM1GCR OX437F BIOS name and version 2.0.14 1.4.0 BIOS settings Default Default Memory module(s) Total RAM in system (GB) 64 256 Vendor and model number Micron Samsung M393B2G70BH0-YH9 Type PC3L-10600R PC3L-10600R Speed (MHz) 1,333 1,333 Speed running in the system (MHz) 1,333 1,333 Timing/Latency (tCL-tRCD-tRP- tRASmin) 9-9-9-32 9-9-9-32 Size (GB) 8GB 16GB
- 11. A Principled Technologies test report 11Deduplication without performance hits: Intel Xeon processor E5-2697v2-powered Dell PowerEdge R720xd System Dell PowerEdge R720xd Dell PowerEdge R820 Number of RAM module(s) 8 16 Chip organization Double-sided Double-sided Rank Dual Dual Operating system Name Windows Server 2012 Datacenter Windows Server 2012 Datacenter Build number 9200 9200 File system NTFS NTFS Kernel ACPI x64 based PC ACPI x64 based PC Language English English Graphics Vendor and model number Matrox® G200eR Matrox® G200eR Graphics memory (MB) 16 16 Driver Matrox Graphics, Inc 2.3.3.0 (8/19/2011) Matrox Graphics, Inc 2.3.3.0 (8/19/2011) RAID controller Vendor and model number Dell PERC H710P Mini Dell PERC H710 Firmware version 21.1.0-007 21.1.0-007 Cache size (MB) 1024 1024 Hard drives Vendor and model number Dell ST9900805SS Dell ST9900805SS Number of drives 8 8 Size (GB) 900 900 RPM 10k 10k Type SAS SAS Ethernet adapters First network adapter Vendor and model number Intel X520 Intel X520 Type PCIe PCIe Driver 3.5.21.0 3.5.21.0 Second network adapter Vendor and model number Intel Gigabit 4P I350-t rNDC Intel Gigabit 4P I350-t rNDC Type Internal Internal Driver 12.7.28.0 12.7.28.0 USB ports Number 4 external, 1 internal 4 external, 1 internal Type 2.0 2.0 Figure 7: System configuration information for the test systems.
- 12. A Principled Technologies test report 12Deduplication without performance hits: Intel Xeon processor E5-2697v2-powered Dell PowerEdge R720xd Storage array Dell DR4100 Backup Appliance Arrays 1 Storage controller Dell PERC H810 Firmware revision 2.1.0205.0 Switch Dell Force10 S4810P 10/40 GbE Disk type Disk vendor and model number Seagate ST3600057SS Disk size (GB) 600 Disk buffer size (MB) 16 Disk RPM 15k Disk type SAS Figure 8: Detailed configuration information about our test storage.
- 13. A Principled Technologies test report 13Deduplication without performance hits: Intel Xeon processor E5-2697v2-powered Dell PowerEdge R720xd APPENDIX B - HOW WE TESTED We installed NetVault Backup Client and SQL Server 2012 on a Dell PowerEdge R720xd, NetVault Backup Server on a Dell PowerEdge R820, and SQL Server 2012 Management Tools and Benchmark Factory for Databases on a Dell PowerEdge R710 for use as a stimulus client. We used a Force10 switch and SFP+ cables to connect the R720xd, R820, and DR4100, and connected all of these and the client R710 to another subnet that we could access remotely for maintenance and so the R710 could communicate with the SQL instance on the R720xd. We created a baseline pure SQL database on the R720xd, and created custom jobs on the R710 for simulating data changes and additions to the test database over various time periods. We tested 15 days’ worth of database changes and daily full backups with RDA and source-based deduplication, and 3 days’ worth with CIFS, without source-based deduplication to represent the traditional backup architecture. Note that the DR4100 Backup Appliance will natively deduplicate and compress data on the target level even when source- based deduplication and RDA are unavailable. Installing Windows Server 2012 on PowerEdge R710, R720xd, R820 Prior to these steps, we created virtual drives on each server in RAID 10. 1. Insert the installation media into the CD/DVD drive, and restart the server. 2. When the option appears, press F11 to enter the Boot Manager. 3. Select SATA Optical Drive, and press Enter. 4. When the installation prompts you to boot from DVD, press any key. 5. When the installation screen appears, click My language is English. 6. Leave language, time/currency format, and input method as default, and click Next. 7. Click Install now. 8. When the Windows Setup window appears and the installation prompts you to go online to install updates, click No thanks. 9. Select Windows Server 2012 Datacenter (Server with a GUI), and click Next. 10. Check I accept the license terms, and click Next. 11. Click Custom: Install Windows only (advanced). 12. Press Alt+A to open advanced partition options. Delete any partitions until there is only Drive 0 Unallocated Space. 13. Select Drive 0 Unallocated Space, and click Next, at which point Windows installation begins. After installation completes, Windows restarts automatically. 14. When the Settings page appears, fill in the Password and Reenter Password fields with the same password. 15. Log in with the password you set up earlier. Configuring DR4100 storage appliance for RDA Perform the following on both the PowerEdge R720xd and R820. 1. In a browser, enter the IP of the DL4100 appliance. 2. Enter appropriate credentials, and click Log in. 3. In the left pane, under Storage, click Clients. 4. Click the RDA tab.
- 14. A Principled Technologies test report 14Deduplication without performance hits: Intel Xeon processor E5-2697v2-powered Dell PowerEdge R720xd 5. Click the Download Plug-In link in the top right of the page. 6. Click the RDS Windows (64-bit) (Windows Server 2008 R2, Windows Server 2008 x64) link, and download the file to the server. Do the same with the 32-bit version. 7. In Windows, launch DellRDA64-2.1.0205.0-RDS.msi. 8. Click Run. 9. At the welcome screen, click Next. 10. Accept the terms of the license agreement, and click Next. 11. Click Install. 12. Click Finish. 13. In Windows Explorer, navigate to C:Program FilesDellRDAdynlib, copy librofsDell.dll, and paste the file in C:Program Files (x86)Quest SoftwareNetVault Backupdynlibbit64. Replace the existing file when prompted. 14. Launch DellRDA-2.1.0205.0-RDS.msi. 15. Click Run. 16. At the welcome screen, click Next. 17. Accept the terms of the license agreement, and click Next. 18. Click Install. 19. Click Finish. 20. In Windows Explorer, navigate to C:Program Files (x86)DellRDAdynlib, copy librofsDell.dll, and paste the file in C:Program Files (x86)Quest SoftwareNetVault Backupdynlib. Replace the existing file when prompted. Configuring DR4100 storage appliance for RDA and CIFS Perform the following steps once, from either the PowerEdge R720xd or R820. 1. In a browser, enter the IP of the DL4100 appliance. 2. Enter appropriate credentials, and click Log in. 3. In the left pane, under Storage, click Containers. 4. In the right pane, click Create. 5. In the Create New Container window, enter an appropriate Container Name and under Connection Type, select RDA. 6. In the bottom pane, select RDS for RDA type, and click Create a New Container. 7. In the right pane, click Create. 8. In the Create New Container window, enter an appropriate Container Name and under Connection Type, select NFS/CIFS. 9. Click the Enable CIFS checkbox, and click the Open Access (all clients have access) checkbox. 10. Click the Create a New Container button. 11. In the left pane, under System Configuration, click Local Workgroup Users. 12. In the right pane, click Create.
- 15. A Principled Technologies test report 15Deduplication without performance hits: Intel Xeon processor E5-2697v2-powered Dell PowerEdge R720xd 13. Enter a User Name that matches an administrator from one of the servers, and provide the same Password as that account’s password. Click Add CIFS User. Installing SQL Server 2012 on R720xd 1. Insert the DVD for SQL Server 2012 into the optical drive. 2. Click Run SETUP.EXE. If Autoplay does not begin the installation, navigate to the SQL Server 2012 DVD, and double-click it. 3. If the installer prompts you with a .NET installation prompt, click Yes to enable the .NET Framework Core role. 4. In the left pane, click Installation. 5. Click New SQL Server stand-alone installation or add features to an existing installation. 6. At the Setup Support Rules screen, wait for the rule check to complete. If there are no failures or relevant warnings, click OK. 7. Enter your product key, and click Next. 8. Click the checkbox to accept the license terms, and click Next. 9. If there are no failure alerts after the setup support files are installed, click Next. 10. At the Setup Role screen, choose SQL Server Feature Installation. 11. At the Feature Selection screen, select the features that your organization requires. We chose the following features for our test: Database Engine Services, Full-Text and Semantic Extractions for Search, SQL Server Data Tools, Client Tools Connectivity, Client Tools Backwards Compatibility, Management Tools – Basic, and Management Tools – Complete. Click Next. 12. At the Installation Rules screen, click Next after the check completes. 13. At the Instance configuration screen, enter the appropriate details for your configuration. For a default instance, leave the defaults selected. For a named instance, enter a new instance name and adjust the file paths as necessary. Click Next. 14. At the Disk Space Requirements screen, click Next. 15. At the Server Configuration screen, choose the service account, preferably an Active Directory domain account, fill in a password if necessary, and click Next. 16. At the Database Engine Configuration screen, choose Mixed Mode and enter the system administrator password. Click Add Current User. 17. Click Next. 18. At the Error reporting screen, click Next. 19. At the Installation Configuration Rules screen, check that there are no failures or relevant warnings, and click Next. 20. At the Ready to Install screen, click Install. 21. After installation completes, click Close. 22. Close the installation window. Creating a blank database on the PowerEdge R710 (client machine) 1. Use the SQL Server 2012 DVD to install Management Tools – Basic and Management Tools – Complete.
- 16. A Principled Technologies test report 16Deduplication without performance hits: Intel Xeon processor E5-2697v2-powered Dell PowerEdge R720xd 2. Launch Microsoft SQL Server Management Studio. 3. Log into the default instance using the appropriate credentials. 4. Right-click Databases, and select New Database. 5. Enter Testdb for the database name. 6. Set the Initial Size of the data file to 102,400 MB, and the log file size to 40,960 MB. 7. Click OK to begin the database creation. Installing and running Benchmark Factory for Databases on the PowerEdge R710 1. Navigate to the Benchmark Factory for Databases 6.9.1 installation media and launch the installer. 2. At the first screen of the install wizard, click Next. 3. At the License Agreement screen, accept the license terms, and click Next. 4. At the Destination Folder screen, select an installation path, and click Next. 5. At the Ready to Install the Program screen, click Install. 6. After the wizard completes, click Finish. 7. In Windows, launch Benchmark Factory for Databases. 8. If the User Experience Feedback window pops up, select the No, thank you radio button, and click OK. 9. When the Load Scenario Wizard screen pops up, click Next. 10. At the Select Load Scenario screen, select Industry standard benchmarks (TPC-C, TPC-E, TPC-H…), and click Next. 11. At the Select Benchmark screen, select TPC-E, and click Next. 12. At the Select Profile screen, click New. 13. At the Welcome screen, click Next. 14. At the Driver Selection screen, select Microsoft SQL Server (ODBC) from the drop-down menu, and click Next. 15. At the Connection Information screen, click Add DSN. 16. Select System Data Source, and click Next. 17. Select SQL Server Native Client 11.0, and click Next. 18. Click Finish. 19. For the file data source name, enter Test 20. For Which SQL Server do you want to connect to?, enter the name of the database server, and click Next. 21. For How should SQL Server verify the authenticity of the login ID?, select With SQL Server authentication using a login ID and password entered by the user, enter an appropriate login ID and password, and click Next. 22. At the next screen, check the Change the default database to checkbox and select Testdb from the drop- down menu. Click Next. 23. Click Finish. 24. Click Test Data Source… 25. Click OK.
- 17. A Principled Technologies test report 17Deduplication without performance hits: Intel Xeon processor E5-2697v2-powered Dell PowerEdge R720xd 26. Click OK. 27. Select Test from the drop-down menu for the Data Source Name. Enter the login ID and password specified earlier, and click Next. 28. Enter a Profile Name, and click Next. 29. Click Finish. 30. At the Select Profile screen, click Next. 31. At the Benchmark Scale screen, change Benchmark Scale to 12, and click Next. 32. At the Measurement Intervals screen, click Delete All to remove the default selected user loads, enter 100 under Add Single User Load, and click Add. Click Next. 33. At the Select new job to screen, select Create new Benchmark Factory Job, and click Next. 34. At the end of the Load Scenario Wizard, click Finish. 35. Right-click the newly created job, and click Copy. 36. Click the Paste button above the list of jobs. You should see identical copies of the newly created job. Rename the first to TPC-E Job – Create, and the second to TPC-E Job – Test. 37. On TPC-E Job – Create, right-click TPC-E Transaction Mix, and click Remove. Click Yes to confirm. 38. On TPC-E Job – Test, right-click Create Objects for TPC-E, and click Remove. Click Yes to confirm. 39. To populate the SQL test database with its initial data set, right-click TPC-E Job – Create, and click Run Job. Configuring OLTP jobs in Benchmark Factory for Databases 1. In Benchmark Factory for Databases, right-click TPC-E Job – Test, and click Copy. 2. Click the Paste button, and rename the first Test job’s workload OLTP Real-World Workload. 3. Rename the second Test job’s workload OLTP Accelerated Workload. 4. Select the OLTP Real-World Workload and for each element in the left pane, perform the following: a. Select the type of transaction. b. Click Latency. c. Click the Think Time checkbox, and enter an Absolute Value of 1000 ms. 5. For the Real-World Workload, click the Timing tab, and change the Pre-sampling time to 1 minute, and the Sampling time to 10 minutes. Use this timing for the RDA with Dedupe runs. Edit this later for the CIFS full runs to be 1 minute of Pre-sampling and 35 minutes of Sampling. 6. Select the OLTP Accelerated Workload and for each element in the left pane, perform the following: a. Select the type of transaction. b. Click Latency. c. Click the No Delay checkbox. 7. For the Accelerated Workload, click the Timing tab, and change the Pre-sampling time to 15 minutes, and the Sampling time to 45 minutes. Installing NetVault Backup Server and Client Repeat the following steps on each server, with the installation type changing depending on the server’s intended role (step 5). 1. Navigate to the NetVault Backup installation media.
- 18. A Principled Technologies test report 18Deduplication without performance hits: Intel Xeon processor E5-2697v2-powered Dell PowerEdge R720xd 2. Launch Setup.exe. 3. At the welcome screen, click Next. 4. At the License Agreement screen, select I Agree, and click Next. 5. At the Choose installation type screen, select Server for the backup server, in our case the PowerEdge R820, and select Client for the application server, in our case the PowerEdge R720xd. Click Next. 6. At the Machine Name, provide an appropriate name for the machine, and click Next. 7. At the Choose machine password screen, provide an appropriate password and retype it, and click Next. 8. At the Select Installation Folder screen, provide an appropriate path for the installation, and click Next. 9. Only in the Server installation, at the Select NetVault Backup Database Folder, provide an appropriate path for the database directory, and click Next. 10. At the Confirm Installation screen, click Next. 11. At the Installation Complete screen, click Close. 12. In Windows, hit the Windows key and search for services. 13. Launch Services. 14. Right-click NetVault Process Manager, and click Stop. 15. Right-click NetVault Process Manager, and click Properties. 16. In the Log On tab, select This account, and click Browse... 17. In the Enter the object name to select field, enter the administrator’s username, and click Check Names. Click OK. 18. Enter the appropriate password, confirm the password, and click OK. 19. Right-click NetVault Process Manager, and click Start. NetVault Backup Server configuration 1. In the server on which you installed the Server version of NetVault Backup, launch the NVBU Console. 2. In the NetVault Backup window, click Client Management. 3. In the Available NVBU Client Management window, locate the server on which you installed the Client version of NetVault Backup in the Available NVBU Machines list. 4. Right-click that server, and click Add As Client. 5. Enter the machine password in the Password Required window that pops up, and click OK. 6. Click OK in the System Access Passed window that pops up. 7. The Client server will now appear in the Clients list on the left, along with the Backup server. NetVault Backup Client Configuration 1. Navigate to the NetVault Backup directory in the Client server. For us, this was C:Program Files (x86)Quest SoftwareNetVault Backup. 2. Open the config folder. 3. Right-click gui.cfg, and click Open with. 4. Open the file with Notepad.
- 19. A Principled Technologies test report 19Deduplication without performance hits: Intel Xeon processor E5-2697v2-powered Dell PowerEdge R720xd 5. At the bottom of the document, find the section marked [servers] and next to names=, enter the name of the Backup server. For us, this was R820. 6. Save and close this file. 7. Launch the NVBU Console. 8. Enter the machine password in the Password Required window that pops up, click the Save Password checkbox, and click OK. Click OK in the System Access Passed window that pops up. 9. In the NVBU Logon window that pops up, leave default as the User and a blank Password, click the Use this login from now on checkbox, and click OK. 10. Acquire the SQL APM plugin for NetVault from Dell and make it available to the R720xd. For our testing, this file was sql-6-0-9-0.npk. 11. In NetVault Backup on the R720xd, launch NVBU Console. 12. Click Client Management. 13. Right-click R720XD in the list of clients, and select Install Software. 14. Navigate to the plugin’s directory, and click Open. 15. Click OK in the window that pops up to confirm the installation. Adding RDA device in NetVault 1. In the PowerEdge R720xd, launch the NVBU Console. 2. Click Device Management. 3. Click AddAdd Dell RDA Device. 4. Enter the IP of the DR4100 in the Host field. 5. Provide backup_user for the Username and St0r@ge! for the Password. 6. Change the LSU field to the name of the RDA container created earlier. 7. In the top left, click Save Details. Configuring RDA backup job in NetVault 1. In the R820, launch the NVBU Console. 2. Click Backup. 3. In the Selections tab, double-click R720XD. 4. Double-click SQL Server APM and click the All Instances checkbox. 5. On the Backup Options tab, slect Use Volume Shadow Copy Services (VSS) for the Backup Method. For the Backup Type, select Full Database. 6. On the Target tab, select Specify Device, and click the checkbox for the RDA drive added earlier. 7. In the Media Options section, select Any for Target Media By and select Any for Reuse Media. 8. On the Advanced Options tab, make sure the Enable Deduplication box is checked. Adding CIFS container in Windows 1. In the R720xd, launch Windows Explorer, right-click Computer in the left pane, and click Map network drive.
- 20. A Principled Technologies test report 20Deduplication without performance hits: Intel Xeon processor E5-2697v2-powered Dell PowerEdge R720xd 2. In the folder field, enter the full UNC path for the CIFS container created earlier. This path is displayed in the container’s Edit window in the DR4100’s Web GUI if you need to find it again. For us, this was 192.168.1.13NVContainer. 3. Click Finish. Configuring CIFS drive in NetVault 1. In the R820, launch the NVBU Console. 2. Click Device Management. 3. In the NVBU Device Management window, click AddAdd Standalone Drive. 4. In the Add Standalone Drive window, in the Choose Drives field, right-click the R820 and select Create virtual drive. 5. In the Add new virtual drive window, enter the full UNC path for the container created earlier in the Drive location field. In our case, this was 192.186.1.13NVContainer. 6. In the Drive name field, provide an appropriate name. 7. Provide an appropriate media capacity in MB. We used the maximum drive capacity of 819200 MB (equal to 800 GB). 8. Click OK. 9. Click OK. 10. Expand the R820, and double-click the drive we just created. 11. In the Device Name field in the top right, enter an appropriate name, and click the Save icon in the top left of the window. 12. Click OK in the popup that appears. 13. Repeat steps 3-12 for every two full backups you plan to perform into CIFS drives. Configuring the CIFS full backup job in NetVault 1. In the R820, launch the NVBU Console. 2. Click Backup. 3. In the Selections tab, double-click R720XD. 4. Double-click SQL Server APM and click the All Instances checkbox. 5. On the Backup Options tab, slect Use Volume Shadow Copy Services (VSS) for the Backup Method. For the Backup Type, select Full Database. 6. On the Target tab, select Specify Device, and click the checkbox for the CIFS drive created earlier. 7. In the Media Options section, select Any for Target Media By and select Any for Reuse Media. 8. On the Advanced Options tab, uncheck the Enable Deduplication checkbox. Note that the DR4100 Backup Appliance will run deduplication and compression at the target level. 9. Leave this window open, as you will need it to launch the job later. Testing procedure We created a database in SQL with initial data size 102.4 GB and initial log size 41.0 GB and populated it with a base set of data using Benchmark Factory for Databases’ Create Objects for TPC-E job, which had a scale factor of 12. We used Benchmark Factory’s OLTP Accelerated Workload to simulate a single day’s worth of activity in the database in
- 21. A Principled Technologies test report 21Deduplication without performance hits: Intel Xeon processor E5-2697v2-powered Dell PowerEdge R720xd question, using No Delay for the latency parameter. We also used Benchmark Factory’s OLTP Real-World Workload to simulate real-time load on a database, with a latency of 1000 ms for each transaction type. This OLTP workload outputs a transactions-per-second metric, which is a running average calculated throughout the test. In this test, we aimed for a realistic peak usage TPS measure for the real-world scenario, around 98 TPS. We used Windows Server 2012’s built-in Performance Monitor with a custom data collector set to keep counts of processor load, network traffic, disk access, and memory usage. 1. Detach all databases from the application server’s SQL Server 2012 instance. 2. Restore the clean database using WITH REPLACE on the application server. 3. Reboot the application server. 4. Take a full backup of the clean database through NetVault Backup onto the DR4100 storage appliance using deduplication if testing the RDA setup, and without deduplication if testing the traditional setup. 5. Run the accelerated OLTP workload to simulate a day’s worth of changes to the SQL database. 6. Run the real-world OLTP workload, simulating real-time peak conditions for the database 7. After the waiting period of the real-world test, begin a simultaneous full backup job through NetVault. 8. We allowed the OLTP workload to complete before the backup so the TPS reading would be representative of the time during which the backup was running. 9. Steps 5 through 8 were repeated for every day of subsequent simulated activity and backups we tested, with a total of 15 times for the RDA with source-based deduplication, three times for the CIFS full backups without source-based deduplication. 10. Whenever we switched to a different test setup, we deleted the container we had just used in the previous setup. 11. Steps 1 through 9 were performed separately for the traditional setups and the RDA setup.
- 22. A Principled Technologies test report 22Deduplication without performance hits: Intel Xeon processor E5-2697v2-powered Dell PowerEdge R720xd ABOUT PRINCIPLED TECHNOLOGIES Principled Technologies, Inc. 1007 Slater Road, Suite 300 Durham, NC, 27703 www.principledtechnologies.com We provide industry-leading technology assessment and fact-based marketing services. We bring to every assignment extensive experience with and expertise in all aspects of technology testing and analysis, from researching new technologies, to developing new methodologies, to testing with existing and new tools. When the assessment is complete, we know how to present the results to a broad range of target audiences. We provide our clients with the materials they need, from market-focused data to use in their own collateral to custom sales aids, such as test reports, performance assessments, and white papers. Every document reflects the results of our trusted independent analysis. We provide customized services that focus on our clients’ individual requirements. Whether the technology involves hardware, software, Web sites, or services, we offer the experience, expertise, and tools to help our clients assess how it will fare against its competition, its performance, its market readiness, and its quality and reliability. Our founders, Mark L. Van Name and Bill Catchings, have worked together in technology assessment for over 20 years. As journalists, they published over a thousand articles on a wide array of technology subjects. They created and led the Ziff-Davis Benchmark Operation, which developed such industry-standard benchmarks as Ziff Davis Media’s Winstone and WebBench. They founded and led eTesting Labs, and after the acquisition of that company by Lionbridge Technologies were the head and CTO of VeriTest. Principled Technologies is a registered trademark of Principled Technologies, Inc. All other product names are the trademarks of their respective owners. Disclaimer of Warranties; Limitation of Liability: PRINCIPLED TECHNOLOGIES, INC. HAS MADE REASONABLE EFFORTS TO ENSURE THE ACCURACY AND VALIDITY OF ITS TESTING, HOWEVER, PRINCIPLED TECHNOLOGIES, INC. SPECIFICALLY DISCLAIMS ANY WARRANTY, EXPRESSED OR IMPLIED, RELATING TO THE TEST RESULTS AND ANALYSIS, THEIR ACCURACY, COMPLETENESS OR QUALITY, INCLUDING ANY IMPLIED WARRANTY OF FITNESS FOR ANY PARTICULAR PURPOSE. ALL PERSONS OR ENTITIES RELYING ON THE RESULTS OF ANY TESTING DO SO AT THEIR OWN RISK, AND AGREE THAT PRINCIPLED TECHNOLOGIES, INC., ITS EMPLOYEES AND ITS SUBCONTRACTORS SHALL HAVE NO LIABILITY WHATSOEVER FROM ANY CLAIM OF LOSS OR DAMAGE ON ACCOUNT OF ANY ALLEGED ERROR OR DEFECT IN ANY TESTING PROCEDURE OR RESULT. IN NO EVENT SHALL PRINCIPLED TECHNOLOGIES, INC. BE LIABLE FOR INDIRECT, SPECIAL, INCIDENTAL, OR CONSEQUENTIAL DAMAGES IN CONNECTION WITH ITS TESTING, EVEN IF ADVISED OF THE POSSIBILITY OF SUCH DAMAGES. IN NO EVENT SHALL PRINCIPLED TECHNOLOGIES, INC.’S LIABILITY, INCLUDING FOR DIRECT DAMAGES, EXCEED THE AMOUNTS PAID IN CONNECTION WITH PRINCIPLED TECHNOLOGIES, INC.’S TESTING. CUSTOMER’S SOLE AND EXCLUSIVE REMEDIES ARE AS SET FORTH HEREIN.