
Empfohlen
Empfohlen
Weitere ähnliche Inhalte
Mehr von PiLNAfrica
Mehr von PiLNAfrica (20)
Kürzlich hochgeladen
Kürzlich hochgeladen (20)
Develop IT at an aerly age for the future wuth the use of literacy.
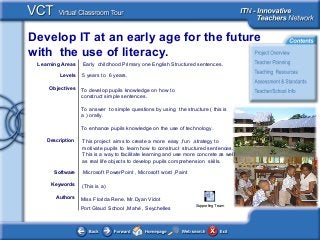
- 1. Develop IT at an early age for the future with the use of literacy. <This picture should illustrate the subject of your Classroom Learning Resource> Authors Objectives Software Description Learning Areas Early childhood Primary one English Structured sentences. Levels Keywords 5 years to 6 years. To develop pupils knowledge on how to construct simple sentences. To answer to simple questions by using the structure ( this is a ) orally. To enhance pupils knowledge on the use of technology. This project aims to create a more easy ,fun ,strategy to motivate pupils to learn how to construct structured sentences. This is a way to facilitate learning and use more concrete as well as real life objects to develop pupils comprehension skills. Microsoft PowerPoint , Microsoft word ,Paint (This is a) Miss Florida Rene, Mr.Dyan Vidot Port Glaud School ,Mahé , Seychelles Supporting Team
- 2. Develop IT at an early age for the future with the use of literacy. <This picture should illustrate the subject of your Classroom Learning Resource> Classroom Images This project was initiated by an IT facilitator after viewing a small project done by Miss Florida Rene when following a course at the National institute of Education for her Diploma in teaching. This project was to help pupils in a class to develop reading and writing skills using structured sentences. Starting with the basic knowledge of how to construct sentences using pictures and real life objects. Moreover the project was done manually. Classroom Images As it is a mixed ability class , the pupils were put in groups according to their ability needs . Documents Background & planning shcool's information
- 3. Develop IT at an early age for the future with the use of literacy. <This picture should illustrate the subject of your Classroom Learning Resource> Documents Student Project Overview: The teacher had to use the software to teach with prior to that devise and create activities to work with when delivering the lesson. An overview of the teaching recourses can be viewed on the link. Teachers Reflection: Teachers views on the project are included in the document below. Pupils overview: Pupil perception of the project involving technology at their age. Structured sentences pupils/ teachers' point of view
- 4. Develop IT at an early age for the future with the use of literacy. <This picture should illustrate the subject of your Classroom Learning Resource> Mapping the Standards Authentic Assessment Assessment: Once pupils had the basic skills and knowledge, they were able to apply these in the project. Assessment Rubrics: Examples of assessment rubrics provided to pupils showing how the project was assessed are included in the document below. Mapping the Assessment Standards: The pupils will be assessed on their ability to perform the tasks that were done in the project and the ability to perform basic skills to develop on the use of a computer. Documents
- 5. Develop IT at an early age for the future with the use of literacy. <This picture should illustrate the subject of your Classroom Learning Resource> Port Glaud Primary School is situated on the west coast of Mahé in the hub area of the district with two busy roads running parallel to it. The shopping centre, the district’s Police Station, the District Administration offices and the Health Centre are the main facilities situated close to it. It has a conducive environment ideal for learning. Miss Florida and Mr. Dyan are both teaching at the Primary level at Port Glaud School. Miss Florida is at the early childhood and Mr. Dyan is teaching at upper primary.
- 6. Develop IT at an early age for the future with the use of literacy. <This picture should illustrate the subject of your Classroom Learning Resource> Port Glaud Primary School is situated on the west coast of Mahé in the hub area of the district with two busy roads running parallel to it. The shopping centre, the district’s Police Station, the District Administration offices and the Health Centre are the main facilities situated close to it. It has a conducive environment ideal for learning. Miss Florida and Mr. Dyan are both teaching at the Primary level at Port Glaud School. Miss Florida is at the early childhood and Mr. Dyan is teaching at upper primary.
Hinweis der Redaktion
- This Virtual Classroom Tour template has been provided so you can develop your own Virtual Classroom Tours. Use the template to record a special learning project that you have found particularly successful in your classroom. Then share the project with other teachers in your school, district or beyond. Here’s how: Follow the prompts on each slide and in the embedded Word documents, in this PowerPoint document, to insert your project information. When you have finished inputting all of the project information that is requested, delete the prompts. Select each one and press the Delete key. Note: To enter the title of your Virtual Classroom Tour you must select View, Master, Slide Master, and enter it on the slide master. Then click Close Slide Master. This will cause the title to appear on each of the slides. From the File menu choose Save As… and save the document as a PowerPoint Show. (Use the File type: drop-down list to choose PowerPoint Show). You can then distribute the Virtual Classroom Tour.
- Open the Word documents at the bottom of each slide by double clicking the icons. Follow the prompts [in the yellow boxes] for inserting information about your learning project.
- On this slide, embed the student handouts and the resources created for this project. Some examples are a student project overview, Internet and other resources, directions for art projects, or instructions to students for peer editing of projects. To embed the resources, follow these steps: Have the resource document available. From the Insert menu choose Object. Select Create from File… and click Browse…. Find the file you want to include and click OK. Select Display as icon and click Change Icon… and add a suitable caption. Click OK to add the caption and click OK to embed the file. Position the document icon at the bottom of the slide. You can go to View, Grid and Guides, and click Display Grid on Screen for a grid on which to line up your icons.
- Add any assessment materials you developed for the project to this slide. Have the resource document available. From the Insert menu choose Object. Select Create from File… and click Browse…. Find the file you want to include and click OK. Select Display as icon and click Change Icon… and add a suitable caption. Click OK to add the caption and click OK to embed the file. Position the document icon at the bottom of the slide. You can go to View, Grid and Guides, and click Display Grid on Screen for a grid on which to line up your icons. To include the Standards targeted through your learning project, open the Mapping the Standards document and then add your own standards at the bottom of the document. Links are included to help you search for local curriculum and technology standards.
- Use these resources for assistance in working with and learning more about Microsoft Office applications.