Silicone Mold Primer
•
1 like•2,227 views

This document provides instructions for using 3D printing to create molds for casting multiple copies of an object in silicone. It involves the following steps: 1. Establishing a parting line in the digital model to separate it into two halves without undercuts. 2. Creating the mold geometry by sweeping the surface between the parting line and a boundary curve offset from the object. 3. Adding registers and a pour spout to the mold to aid in alignment and pouring of materials. 4. Extruding the surfaces and duplicating to create two contraptions that can be 3D printed and used to make a two-part silicone mold of the object.

Recommended
More Related Content
What's hot
What's hot (20)
Viewers also liked
Viewers also liked (16)
Similar to Silicone Mold Primer
Similar to Silicone Mold Primer (20)
More from NYCCTfab
More from NYCCTfab (20)
Recently uploaded
Recently uploaded (20)
Silicone Mold Primer
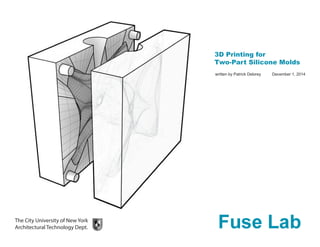
- 1. 3D Printing for Two-Part Silicone Molds The City University of New York Architectural Technology Dept. written by Patrick Delorey December 1, 2014
- 2. 3D Printing for Two-Part Silicone Molds Introduction 3D printing is a great process for producing parts of high complexity. Any part is no more costly to make than the next, generally speaking. Still, 3D printing is not always the best method for producing multiple copies of these parts, as the process can be slow and the material options are somewhat limited. To expand the possibilities available to us, we might look at processes with a much longer history - mold-making & casting. Instead of printing our desired object directly, we can use 3D printing to produce either the mold itself, or, as we will cover in this primer, augmented positives (contra molds) with which we’ll make a 2-part silicone mold. Notes: A few notes before we begin: the sample part here has no undercuts - features in the shape that will prevent its removal from either half of our mold. ◘ If we wanted to cast something with complex undercuts, that would require a different molding strategy. ◘ Secondly, this Instructable will illustrate the software workflow using Rhino, but you can achieve similar results using the software you’re most comfortable with. ◘ This Instructable assumes a basic level of modeling proficiency and the ability to produce files for 3d printing. If you’re curious about how you might go about this project in another modeling package, just leave a comment and I’ll try to suggest something. ◘ Lastly, a big thanks to Hannibal Newsom for providing the sample 3d model of the component for casting. 22
- 3. 3D Printing for Two-Part Silicone Molds STEP 1: Establish Parting Line A parting line is where two portions of a mold meet. Our goal is to draw a parting line such that neither of our molds sees any undercuts. We can generate a parting line very simply using Rhino’s Silhouette command. Move into an orthographic view that matches the orientation of your intended mold - in my case, the top view - and select your part (Fig. 1). Run Silhouette to generate the parting line in the active view. Run the Join command and clean up the resultant curves to arrive at a continuous parting line (Fig. 2). 3 Fig. 1 - Run Silhouette 3 Fig. 2 - Join & Clean Up
- 4. 3D Printing for Two-Part Silicone Molds STEP 2: Establish Mold Boundary We need to establish the perimeter of our mold. Most silicone rubbers recommend a mold wall thickness of 1/2” - 3/4”, so our mold boundary will need to have approximately that distance from our part. Using the Rectangle command, draw the edge of the mold, leaving the necessary space between it and your part. (Fig. 3). 4 Fig. 3 - Establish Mold Boundary 4
- 5. 3D Printing for Two-Part Silicone Molds STEP 3: Create Mold Surface Now draw a line perpendicular to both your parting line and to your mold boundary line. You can do this automatically by running the Line command, selecting the Perpendicular option, then the 2Curves option, and finally clicking the two curves near where you’d like the line to be drawn. (Fig. 4) Then create the mold surface with a 2-rail sweep. Using the Sweep2 command, select, in order, your parting line, the mold boundary curve, and your perpendicular line, and press enter. You can typically accept the default options for the sweep dialog box. This will build the mold’s surface between the parting line and the boundary as seen in the image. (Fig. 5) 5 Fig. 4 - Create Mold Surface 5 Fig. 5 - Create Mold Surface
- 6. 3D Printing for Two-Part Silicone Molds STEP 4: Adding Registers & a Pour Spout In traditional mold-making, we’d include additional features by molding them from clay before casting our mold. Since we’ll be 3D printing our positives, however, we can add features like registers and a pour spout now. Registers help ensure consistency and accuracy with each cast by aligning our mold halves precisely each time. A tapered pour-spout will act as a funnel for our casting material, making it easier to pour into our mold. Begin by using the Sphere command, drawing a sphere centered on the surface of the mold in one of the four corners. My registers were made using spheres with a 1/2” diameter. Then use the Mirror command to copy the sphere to the remaining corners of the mold as seen in the images. Be sure to mirror them using the midpoints of the mold boundary edges as the lines of reflection. This will ensure that the opposing sides’ registers line up correctly. (Fig. 6) Then, using the Pipe command, create a tapered pour-spout. You can re-use the perpendicular line you created for your sweep surface from the previous step. My spout began with a diameter of 1” and tapered to a diameter of 1/4”. I would include two spouts, one at the peak of each of the ridges to either side of where the pour-spout is located in the shown model. (Fig. 7) 6 Fig. 6 - Create Registers 6 Fig. 7 - Create Spout
- 7. 3D Printing for Two-Part Silicone Molds STEP 5: Extrude and Make a Copy Using the ExtrudeCrv command, you can create the sides of your contra mold. Your mold doesn’t need to be particularly deep, as it is the depth of the silicone you will pour on top that will be the thickness of the final mold. (Fig. 8) Now take the entire part you’ve been working on and drag out a copy. (Fig. 9) Congratulations - the first half of your mold is finished, and the second half should come together even more quickly. 7 Fig. 8 - Extrude 7 Fig. 9 - Make a Copy
- 8. 3D Printing for Two-Part Silicone Molds STEP 6: Flip Your Part to the Opposing Side Rotate your part to so that the side opposite the face you’ve been working on is now visible. Ensure that your axis of rotation is along the midpoints of your mold boundary edge - this ensures that your registers align properly. (Fig. 10) 88 Fig. 10 - Flip Your Part
- 9. 3D Printing for Two-Part Silicone Molds STEP 7: Trim Registers & Extrude Use the mold surface to trim the registers, then use the trimmed registers to trim the mold surface (Fig. 11). Now extrude this half of the mold’s boundary edge to make your second contra mold. (Fig. 12). 9 Fig. 11 - Trim Registers 9 Fig. 12 - Extrude
- 10. 3D Printing for Two-Part Silicone Molds STEP 8: Join, Boolean, & Export You now have all the geometry you’ll need to print your contra molds. You’ll likely need to join surfaces, boolean parts together, and export to a printable format. (Fig. 13) Depending on the software you’ve been using, the specifics of this can be slightly different. Recommended tutorials are: Rhino: ◘ 3D Printing the Rhino Model by Rhino Tutorials ◘ Preparing Rhino files for 3D Printing by McNeel Miami Maya/Mudbox: ◘ 3D print from Maya by Jesse Harrington Au Blender: ◘ Bakers Rack Bookend - Blender 3d Printing by user PS118 123D: ◘ 123D Modeling for 3D Printing by user sath02 1010 Fig. 13 - Join, Boolean & Export
- 11. 3D Printing for Two-Part Silicone Molds STEP 9: 3D Printing You can make your parts with whichever 3D printing technology you prefer or have access to. Here, I’ve used a plaster powder printer to make my contra molds. (Fig. 14 & 15). 11 Fig. 14 - 3D Printed Contra Mold 11 Fig. 15 - 3D Printed Contra Mold
- 12. 3D Printing for Two-Part Silicone Molds STEP 10: Build Mold Boxes Build a box that surrounds each of your parts. You want to ensure that the walls are tall enough to account for all the silicone that you will pour on top. In preparation for this, mark off on the side of your mold the height that you will need to pour to (about 1/2-3/4” above the highest feature of your part - Fig. 16). Try to ensure that your box is as tightly assembled as possible - silicone is expensive and will leak out otherwise! As a note, I didn’t adhere my part to the bottom of the mold in any way because the part was very tightly held by the sides of the boxes. (Fig. 17 & 18) If this isn’t the case for your part, you might consider fixing your part in place with glue, tape, or screws. Otherwise, the silicone can seep underneath and lift your part, ruining the mold. 12 Fig. 16 - Build Mold BOx 12 Fig. 17 - 3D Printed Contra Mold Fig. 18 - 3D Printed Contra Mold
- 13. 3D Printing for Two-Part Silicone Molds STEP 11: Pour Silicone Molds & Wait For my rubber molds, I’m using Smooth-On’s Mold Star 15 SLOW two-part silicone product. (Fig. 19) I chose it for the good experience I’ve had with it in the past, and its pot-life is very forgiving (50 minutes, as listed). This gives me plenty of time to make sure I’ve got a properly mixed product without worrying about the material setting up. Follow the manufacturer’s directions for whatever product that you end up using, of course. (Fig. 20) For technique, you want to pour a thin stream from several inches above your part, concentrating on its lowest point (Fig. 21). This helps ensure that the silicone seeks its own level as it rises up and over the model, while displacing air to reduce the presence of bubbles as much as possible. After you pour both halves, give the silicone a few minutes, checking back occasionally to make sure that there are no leaks in the walls and that your part is held securely to the bottom of the mold. 13 Fig. 19 - Mold & Silicone Product 13 Fig. 20 - Mixing Fig. 21 - Pouring
- 14. 3D Printing for Two-Part Silicone Molds STEP 12: De-Mold After the cure time (I always double whatever the manufacturer lists, but that’s probably being overly- cautious), remove the walls of your mold. (Fig. 22) You may need to apply some force as the silicone will likely grip any porous material (like plywood) it comes into contact with. NOTE: I did not use a release agent on my contra mold. (Fig. 23) I was concerned about the possible weakening of my raw plaster part due to the release agent. I hope to do another mold test, this time with a glue-infiltrated plaster part and seeing how a release agent affects de-molding. This would hopefully result in re-usable contra molds. Remove the printed parts from the silicone molds. Depending on the material you used for the print, this may mean sacrificing your prints (Fig. 24). But, if all has gone according to plan, this shouldn’t be a big deal. 14 Fig. 22 - De-Mold 14 Fig. 23 - Mixing Fig. 24 - Pouring
- 15. 3D Printing for Two-Part Silicone Molds STEP 13: Cast Until Your Heart’s Content You can hold your molds together one of several ways: rubber bands, velcro straps, a wooden mother mold (box that holds your molds together rigidly), or some other way. Mix whatever material you plan to cast - plaster, concrete, resin, etc. - and pour into your molds. (Fig. 25 & 26) You’ve opened up a world of rapid production and material possibility for yourself. Happy casting! 15 Fig. 25 - Final Product 15 Fig. 26 - Final Product