1. Creating My Film Trailer
Using Premiere
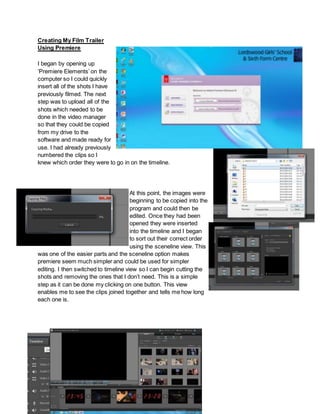
I began by opening up
‘Premiere Elements’ on the
computer so I could quickly
insert all of the shots I have
previously filmed. The next
step was to upload all of the
shots which needed to be
done in the video manager
so that they could be copied
from my drive to the
software and made ready for
use. I had already previously
numbered the clips so I
knew which order they were to go in on the timeline.
At this point, the images were
beginning to be copied into the
program and could then be
edited. Once they had been
opened they were inserted
into the timeline and I began
to sort out their correct order
using the sceneline view. This
was one of the easier parts and the sceneline option makes
premiere seem much simpler and could be used for simpler
editing. I then switched to timeline view so I can begin cutting the
shots and removing the ones that I don’t need. This is a simple
step as it can be done my clicking on one button. This view
enables me to see the clips joined together and tells me how long
each one is.
2. I found that some of the clips had duplicated
so I used the timeline setting to delete the
unwanted clips and to shorten the full movie.
I then began to select each individual clip and cut
them down to an appropriate length. This could be
done by double clicking each clip and using the
tags to drag the ends of the clip to cut them.
From this point onwards I continually saved my work
after every few edits as the program did begin to
crash from time to time. Although this proved to be a
problem at first, I got used to this and continued to
save my work.
3. I now began to one by one, add my intertitles using the text tool in the program. This was a fairly
simple process and once I had learned how to do it, it became a quick job. The only major
problem was ensuring that it was put in the right place and didn’t overlap shots. I first typed the
text onto the screen and afterwards edited the font and moved it into the correct position.
After I had inserted all of the
intertitles using the same process
mentioned above, I began to
add all of the fades that I
needed, pretty much after every
shot to add a sense of mystery
to the film. I used
this when
selecting the
‘Transitions’
feature and
clicking on the
‘Dip To
Black’
effect. This
had to be
done in the
sceneline
feature and dragged into the spaces between
each shot.
After this I uploaded two logos from the production
companies that I thought were best suited for my
film. These are to go at the beginning of my trailer to
credit the companies involved. I also used fades to
go at the beginning and end of these to ensure that
they flow well and fit in with the trailer.
4. Similar to each of the
shots, I double clicked on
the images and cut them
down to a suitable length,
two seconds. This gives the
audience chance to see
what they say and take in
the companies as the music
begins.
I also experimented with the
zoom effects to see which
ones were slow enough for
what I wanted.
I eventually found one and inserted it into
the sceneline.
Throughout
the process I
also continued
to render my
work to ensure
that it moves
smoothly and
does not jitter.
This is because
of the size of the
file.
After this, and I
was sure that I was happy with the
shots and the ordering, I saved the
project and then exported it to my
computer. This is so it was one file,
just without music. My next step was
to re-import my video and
5. begin to add the music.
The next step was to upload the music into
premiere and add it to the
timeline.
I then double clicked the music in the
timeline so I could crop it to the section that I
wanted.
Next, I inserted the other two tracks and did the same
process to cut them down. Following this I right clicked on
each clip so that I could fade them both in and out so that
they flowed well together and did not abruptly stop. I then
used the tags to drag the music in a way that fades them
slowly at tend and the beginning, merging them together.
Following this I saved my
project and exported it to my
computer, ready to be
uploaded to YouTube and to my blog.