Skin color detection using aforge
•
1 like•1,804 views

this is the article of creating skin color detection and you can download the source code from here as opensource http://www.4shared.com/rar/SXJ-uBtU/skincolordetectionforimages.html

Recommended
More Related Content
More from Medhat Dawoud
Recently uploaded
Recently uploaded (20)
Skin color detection using aforge
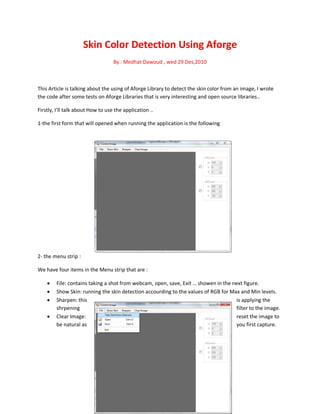
- 1. Skin Color Detection Using Aforge By : Medhat Dawoud , wed 29 Des,2010 This Article is talking about the using of Aforge Library to detect the skin color from an image, I wrote the code after some tests on Aforge Libraries that is very interesting and open source libraries.. Firstly, I’ll talk about How to use the application .. 1-the first form that will opened when running the application is the following 2- the menu strip : We have four items in the Menu strip that are : File: contains taking a shot from webcam, open, save, Exit … showen in the next figure. Show Skin: running the skin detection accourding to the values of RGB for Max and Min levels. Sharpen: this is applying the shrpening filter to the image. Clear Image: reset the image to be natural as you first capture.
- 2. 3- when you click on File>Take Shot From Webcam the following window will appear .. but actually the person who will appear will be more pretty than the following one .. :D This form is responsible for capturing a new pic from the webcam , the comboBox is filled in the run time with the connected cameras and it’s necessary to have at least one webcam or it will give an error message for you that no Capturing device is found …. You can then connect to the selected camera and then click capture button that will take a captured picture from this for to the Main form behind it as the following :
- 3. 4- then you can start applying filters on the image captured .if you click of Show Skin you will get only the skin colored pixels in the image as following : Note that : that color of the skin differs from person to another and you can take the value of the skin color by using the max and min levels boxes. 5- control the color of the detected skin by checking the box to enable it . Examble : Then you can click on the image in any place to get the RGB levels of the clicked pixel.. the values is automatically changed in the numericUpDown of R,B,and B .
- 4. The same example when checking the MaxLevel CheckBox that Min level is disabled and the maxlevel is enabled then you can also click any where to get RGB values : 6-the last thing is if you want to apply the sharpening filter to the image you can click Sharpen to get this result : The result of sharpening might not appear here but it’s give the edges sharper edges that the original image and to get the original image again you can click as we say before Clear Image. You can download the Source Code it’s opensource .. enjoy and share Thanks for reading and need your feedbacks
- 5. Contact Me: MedhatDawoud@gmail.com http://Med7at.wordpress.com http://twitter.com/MedhatDawoud