SlideShare ist ein Scribd-Unternehmen logo
1 von 10
Downloaden Sie, um offline zu lesen
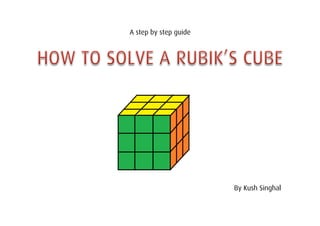
A step by step guide


                       By Kush Singhal
Basic Terminology
               F – Front face clockwise          B – Back face clockwise
               R – Right face clockwise          L – Left face clockwise
               U – Upper face clockwise          D – Down face clockwise

      If ‘I’ is added then instead of moving clockwise, move anti-clockwise.

              Algorithm: A set of instructions on how to move the faces.

       In all the subsequent slides, grey color on the cube can be any color.


    WARNING : Do not move the cube, move the faces while doing algorithms.


                                                                    Corner piece
       Aligned
                                                                      Center piece
Not aligned
                                                                      Edge piece
Step 1 – Solve the white face; align first
                       layer
There are no definite algorithms on solving this step, but here are a few tips.
Tip 1: First solve white edges.
•  If the cube is like this, here is what you do:
    Hold as shown and move F, L, D, Li, F, F.


Tip 2: Solve white corners.
•  If the cube is like this, hold like the diagram
     and do R, D, Ri, F, Di, Di, Fi.


•    If the cube is like this, hold like the diagram
     and do Di, Ri, D, R.
STEP 2 - Second layer
If you want to move edge piece down to the right, then do:
U, R ,Ui, Ri, Ui, Fi, U, F


If you want to move edge piece down to the left, then do:
Ui, Li, U, L, U, F, Ui, Fi


If your cube is like this, then hold like diagram and do:
R ,Ui, Ri, Ui, Fi, U, F ; and then do algorithms according to
how the cube is placed from the points above.
Step 3 – Solve the yellow cross

You will have 4 possibilities on the yellow face. They are:-

1.  Yellow cross completed. Go to next step.

2.  Only yellow center. Then do any 1 algorithm from points 3 or 4 then move to one
    of the points below.

3.  Yellow angle. Hold as shown in diagram and do:
     F, U, R, Ui, Ri, Fi.


4.  Yellow straight line. Hold as shown in diagram
    and do: F, R, U, Ri, Ui, Fi.
Step 4: Solve yellow face
You will have 4 possibilities. They are:-

1.  Yellow face completed. Go to next step.

2.  Only yellow cross. Hold as shown and do algorithm given below.


3. One yellow corner solved. Hold as shown and do algorithm
   given below.

4.  2 yellow corners solved. Doesn’t matter which 2 corners are solved.
    Hold as shown and do algorithm given below.

   Do this algorithm once, twice or thrice to solve yellow face. Keep changing the
     position of the cube with respect to above points before doing the algorithm
                                          again.
                          Algorithm: R, U, Ri, U, R, U, U, Ri.
Step 5 – Swap corners
Keep twisting the upper (U) face until at least 2 corners are aligned properly. There
are 3 possibilities:-

1.  All corners are aligned. Go to next step.


         Label the solved corners 3 and 4 if both are on the same face.

2.  If 3 & 4 are solved, hold them at the back and do the below algorithm
      once.
3.  If the solved corners are diagonally placed then do the algorithm once, and do
    the above points again.

                   Algorithm: Ri, F, Ri, B, B, R, Fi, Ri, B, B, R, R, Ui.
Step 6 – Swap edges
There are 2 possibilities:
1.  3 edges are out of place. Then see if the edges have to move clockwise or anti-
    clockwise to align with centers. Then hold the cube with yellow face on top and
    solved edge at the back and do the correct algorithm from below.

2.  4 edges are out of place. Then do any 1 algorithm from below. This will align 1
    edge.
    Then do the above point again.

            If edge has to move clockwise: F, F, U, L, Ri, F, F, Li, R, U, F, F.
         If edge has to move anti-clockwise: F, F, Ui, L, Ri, F, F, Li, R, Ui, F, F.
You have solved a Rubik's cube!
    If you haven’t, you must have made a mistake
                      somewhere.
Go back and go through the before steps to see where
you went wrong. Most likely you will have to start from
                     the beginning.
Thank You!

Weitere ähnliche Inhalte

Was ist angesagt?

Notes 12.1 multiplying polynomials
Notes 12.1   multiplying polynomialsNotes 12.1   multiplying polynomials
Notes 12.1 multiplying polynomialsLori Rapp
 
L’Histoire Des Nombres
L’Histoire Des NombresL’Histoire Des Nombres
L’Histoire Des NombresM2i Formation
 
Factor & Multiples
Factor & MultiplesFactor & Multiples
Factor & MultiplesNicholas Ee
 
cartesian plane by : joe olivare
cartesian plane by : joe olivarecartesian plane by : joe olivare
cartesian plane by : joe olivareJoe Olivare
 
Dll mathematics 6 q2_w10
Dll mathematics 6 q2_w10Dll mathematics 6 q2_w10
Dll mathematics 6 q2_w10Ramil Galido
 
Venn Diagram Word Problems
Venn Diagram Word ProblemsVenn Diagram Word Problems
Venn Diagram Word ProblemsPassy World
 
4.1 quadratic functions and transformations
4.1 quadratic functions and transformations4.1 quadratic functions and transformations
4.1 quadratic functions and transformationsleblance
 
Shapes riddles grade 2
Shapes riddles grade 2Shapes riddles grade 2
Shapes riddles grade 2Azzo25
 
Module 10 Topic 1 factoring gcf
Module 10 Topic 1   factoring gcfModule 10 Topic 1   factoring gcf
Module 10 Topic 1 factoring gcfLori Rapp
 
MATH - 8 WEEK 1 Q4.pptx
MATH - 8 WEEK 1 Q4.pptxMATH - 8 WEEK 1 Q4.pptx
MATH - 8 WEEK 1 Q4.pptxlarryazarias
 
Plotting of Points on the Coordinate Plane
Plotting of Points on the Coordinate PlanePlotting of Points on the Coordinate Plane
Plotting of Points on the Coordinate PlaneJoey Valdriz
 
Distributive property
Distributive propertyDistributive property
Distributive propertyMike Seitz
 
Graphing Linear Functions
Graphing Linear FunctionsGraphing Linear Functions
Graphing Linear Functionshisema01
 
MATH - Lesson 1 Module 3 (Week 4 Quarter 1).pptx
MATH - Lesson 1  Module 3 (Week 4 Quarter 1).pptxMATH - Lesson 1  Module 3 (Week 4 Quarter 1).pptx
MATH - Lesson 1 Module 3 (Week 4 Quarter 1).pptxanaliemagno
 

Was ist angesagt? (20)

Quadratic functions my maths presentation
Quadratic functions my maths presentationQuadratic functions my maths presentation
Quadratic functions my maths presentation
 
Notes 12.1 multiplying polynomials
Notes 12.1   multiplying polynomialsNotes 12.1   multiplying polynomials
Notes 12.1 multiplying polynomials
 
L’Histoire Des Nombres
L’Histoire Des NombresL’Histoire Des Nombres
L’Histoire Des Nombres
 
Factor & Multiples
Factor & MultiplesFactor & Multiples
Factor & Multiples
 
cartesian plane by : joe olivare
cartesian plane by : joe olivarecartesian plane by : joe olivare
cartesian plane by : joe olivare
 
Dll mathematics 6 q2_w10
Dll mathematics 6 q2_w10Dll mathematics 6 q2_w10
Dll mathematics 6 q2_w10
 
Venn Diagram Word Problems
Venn Diagram Word ProblemsVenn Diagram Word Problems
Venn Diagram Word Problems
 
4.1 quadratic functions and transformations
4.1 quadratic functions and transformations4.1 quadratic functions and transformations
4.1 quadratic functions and transformations
 
Shapes riddles grade 2
Shapes riddles grade 2Shapes riddles grade 2
Shapes riddles grade 2
 
Module 10 Topic 1 factoring gcf
Module 10 Topic 1   factoring gcfModule 10 Topic 1   factoring gcf
Module 10 Topic 1 factoring gcf
 
1.7 angles and perpendicular lines
1.7 angles and perpendicular lines1.7 angles and perpendicular lines
1.7 angles and perpendicular lines
 
Absolute Value
Absolute ValueAbsolute Value
Absolute Value
 
MATH - 8 WEEK 1 Q4.pptx
MATH - 8 WEEK 1 Q4.pptxMATH - 8 WEEK 1 Q4.pptx
MATH - 8 WEEK 1 Q4.pptx
 
Plotting of Points on the Coordinate Plane
Plotting of Points on the Coordinate PlanePlotting of Points on the Coordinate Plane
Plotting of Points on the Coordinate Plane
 
Transformation Geometry
Transformation GeometryTransformation Geometry
Transformation Geometry
 
Distributive property
Distributive propertyDistributive property
Distributive property
 
Graphing Linear Functions
Graphing Linear FunctionsGraphing Linear Functions
Graphing Linear Functions
 
MATH - Lesson 1 Module 3 (Week 4 Quarter 1).pptx
MATH - Lesson 1  Module 3 (Week 4 Quarter 1).pptxMATH - Lesson 1  Module 3 (Week 4 Quarter 1).pptx
MATH - Lesson 1 Module 3 (Week 4 Quarter 1).pptx
 
3 d shapes
3 d shapes3 d shapes
3 d shapes
 
properties of exponents
properties of exponentsproperties of exponents
properties of exponents
 

Ähnlich wie Step by Step guide for solving Rubik's Cube

Ähnlich wie Step by Step guide for solving Rubik's Cube (7)

8 algorithms rubik's cube
8 algorithms rubik's cube8 algorithms rubik's cube
8 algorithms rubik's cube
 
How to do the six colored cube
How to do the six colored cubeHow to do the six colored cube
How to do the six colored cube
 
How to do the six colored cube
How to do the six colored cubeHow to do the six colored cube
How to do the six colored cube
 
rubik’s cube 3 x 3 solution
rubik’s cube 3 x 3 solutionrubik’s cube 3 x 3 solution
rubik’s cube 3 x 3 solution
 
Rubiks_Solution-Guide_3x3.pdf
Rubiks_Solution-Guide_3x3.pdfRubiks_Solution-Guide_3x3.pdf
Rubiks_Solution-Guide_3x3.pdf
 
Solving the rubicks cube
Solving the rubicks cubeSolving the rubicks cube
Solving the rubicks cube
 
Rubik cube solver osama 8 3-2016
Rubik cube solver osama 8 3-2016Rubik cube solver osama 8 3-2016
Rubik cube solver osama 8 3-2016
 

Step by Step guide for solving Rubik's Cube

  • 1. A step by step guide By Kush Singhal
  • 2. Basic Terminology F – Front face clockwise B – Back face clockwise R – Right face clockwise L – Left face clockwise U – Upper face clockwise D – Down face clockwise If ‘I’ is added then instead of moving clockwise, move anti-clockwise. Algorithm: A set of instructions on how to move the faces. In all the subsequent slides, grey color on the cube can be any color. WARNING : Do not move the cube, move the faces while doing algorithms. Corner piece Aligned Center piece Not aligned Edge piece
  • 3. Step 1 – Solve the white face; align first layer There are no definite algorithms on solving this step, but here are a few tips. Tip 1: First solve white edges. •  If the cube is like this, here is what you do: Hold as shown and move F, L, D, Li, F, F. Tip 2: Solve white corners. •  If the cube is like this, hold like the diagram and do R, D, Ri, F, Di, Di, Fi. •  If the cube is like this, hold like the diagram and do Di, Ri, D, R.
  • 4. STEP 2 - Second layer If you want to move edge piece down to the right, then do: U, R ,Ui, Ri, Ui, Fi, U, F If you want to move edge piece down to the left, then do: Ui, Li, U, L, U, F, Ui, Fi If your cube is like this, then hold like diagram and do: R ,Ui, Ri, Ui, Fi, U, F ; and then do algorithms according to how the cube is placed from the points above.
  • 5. Step 3 – Solve the yellow cross You will have 4 possibilities on the yellow face. They are:- 1.  Yellow cross completed. Go to next step. 2.  Only yellow center. Then do any 1 algorithm from points 3 or 4 then move to one of the points below. 3.  Yellow angle. Hold as shown in diagram and do: F, U, R, Ui, Ri, Fi. 4.  Yellow straight line. Hold as shown in diagram and do: F, R, U, Ri, Ui, Fi.
  • 6. Step 4: Solve yellow face You will have 4 possibilities. They are:- 1.  Yellow face completed. Go to next step. 2.  Only yellow cross. Hold as shown and do algorithm given below. 3. One yellow corner solved. Hold as shown and do algorithm given below. 4.  2 yellow corners solved. Doesn’t matter which 2 corners are solved. Hold as shown and do algorithm given below. Do this algorithm once, twice or thrice to solve yellow face. Keep changing the position of the cube with respect to above points before doing the algorithm again. Algorithm: R, U, Ri, U, R, U, U, Ri.
  • 7. Step 5 – Swap corners Keep twisting the upper (U) face until at least 2 corners are aligned properly. There are 3 possibilities:- 1.  All corners are aligned. Go to next step. Label the solved corners 3 and 4 if both are on the same face. 2.  If 3 & 4 are solved, hold them at the back and do the below algorithm once. 3.  If the solved corners are diagonally placed then do the algorithm once, and do the above points again. Algorithm: Ri, F, Ri, B, B, R, Fi, Ri, B, B, R, R, Ui.
  • 8. Step 6 – Swap edges There are 2 possibilities: 1.  3 edges are out of place. Then see if the edges have to move clockwise or anti- clockwise to align with centers. Then hold the cube with yellow face on top and solved edge at the back and do the correct algorithm from below. 2.  4 edges are out of place. Then do any 1 algorithm from below. This will align 1 edge. Then do the above point again. If edge has to move clockwise: F, F, U, L, Ri, F, F, Li, R, U, F, F. If edge has to move anti-clockwise: F, F, Ui, L, Ri, F, F, Li, R, Ui, F, F.
  • 9. You have solved a Rubik's cube! If you haven’t, you must have made a mistake somewhere. Go back and go through the before steps to see where you went wrong. Most likely you will have to start from the beginning.