
Empfohlen
Empfohlen
Weitere ähnliche Inhalte
Was ist angesagt?
Was ist angesagt? (18)
Ähnlich wie sfdx continuous Integration with Jenkins on aws (Part I)
Ähnlich wie sfdx continuous Integration with Jenkins on aws (Part I) (20)
Kürzlich hochgeladen
Kürzlich hochgeladen (20)
sfdx continuous Integration with Jenkins on aws (Part I)
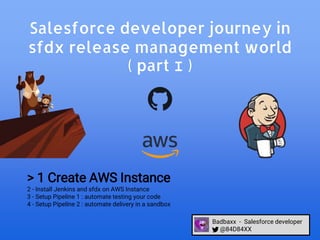
- 1. Salesforce developer journey in sfdx release management world ( part I ) > 1 Create AWS Instance 2 - Install Jenkins and sfdx on AWS Instance 3 - Setup Pipeline 1 : automate testing your code 4 - Setup Pipeline 2 : automate delivery in a sandbox Badbaxx - Salesforce developer @84D84XX
- 2. Sfdx is now an essential tool to set up in salesforce projects. It is used to ease the development of LWC and also to facilitate the continuous delivery of the code and its versioning. With the experience gained on my latest projects in SFDX release management, I made this small guide for setting up a simple continuous delivery system in a sfdx project. 2
- 3. Connect to aws at https://aws.amazon.com to create an account https://d1.awsstatic.com/Projects/P5505030/aws-project_Jenkins-build-server.pdf 3
- 4. Follow the instructions and verify your account Billing Estimates: Cost to complete project: The estimated cost to complete this project is $0.00. This cost assumes that you are within the AWS Free Tier limits, you follow the recommended configurations. Your use case may require different configurations that can impact your bill. Use the Simple Monthly Calculator to estimate costs tailored for your needs. 4
- 5. Your aws account is created click to go to sign-in page 5
- 6. your email Connect to your account 6 You are connected to your aws instance
- 7. Now our next steps are : Create a Security Group for the Amazon EC2 Instance Create Key Pair Launch the EC2 Instance Connect to the Linux Instance Download and Install Jenkins Configure Jenkins 7
- 8. 1. Go to EC2 console to start 8
- 9. 1. 1 - Create a Security Group for the Amazon EC2 Instance A security group acts as a virtual firewall that controls the traffic for one or more instances. When you launch an instance, you can specify one or more security groups; otherwise, we use the default security group. You can add rules to each security group that allow traffic to or from its associated instances. You can modify the rules for a security group at any time; the new rules are automatically applied to all instances that are associated with the security group. When we decide whether to allow traffic to reach an instance, we evaluate all the rules from all the security groups that are associated with the instance. https://docs.aws.amazon.com/AWSEC2/latest/UserGuide/using-network-security.html 9
- 10. Select Security Groups in the In the left-hand navigation bar then select Create Security Group and Add rule 1. 1 - Create a Security Group for the Amazon EC2 Instance 10
- 11. /! Decide who may access your instance, for example, a single computer or all trusted computers on a network. For this tutorial, you can use the public IP address of your computer. To find your IP address, use the checkip service from AWS. If you are connecting through an ISP or from behind your firewall without a static IP address, you will need to find the range of IP addresses used by client computers. If you don't know this address range, you can use 0.0.0.0/0 for this tutorial. However, this is unsafe for production environments because it allows everyone to access your instance using SSH. add SSH and HTTP rule 1. 1 - Create a Security Group for the Amazon EC2 Instance https://docs.aws.amazon.com/AWSEC2/latest/UserGuide/using-network-security.html 11
- 12. Amazon EC2 uses public–key cryptography to encrypt and decrypt login information. Public–key cryptography uses a public key to encrypt a piece of data, and then the recipient uses the private key to decrypt the data. The public and private keys are known as a key pair. Public-key cryptography enables you to securely access your instances using a private key instead of a password. When you launch an instance, you specify the key pair. You can specify an existing key pair or a new key pair that you create at launch. At boot time, the public key content is placed on the instance in an entry within ~/.ssh/authorized_keys. To log in to your instance, you must specify the private key when you connect to the instance https://docs.aws.amazon.com/AWSEC2/latest/UserGuide/ec2-key-pairs.html#having-ec2-create-your-key-pair 2 - Create Key Pair 12
- 13. 2 - Create Key Pair Select Key Pairs In the left-hand navigation bar and click create Key Pair Add the name of your Key and click Create A .pem file is downloaded. It’s your private key we will use later 13
- 14. 3 - Launch the EC2 Instance 14 Select Instances In the left-hand navigation bar and click Launch Instance You can choose one of the Amazon free tier machine
- 15. On the Choose an Instance Type page, the t2.microinstance is selected by default. Keep this instance type to stay within the free tier 3 - Launch the EC2 Instance 15
- 16. 3 - Launch the EC2 Instance 1. T2 instances must be launched into a subnet. From Network choose your VPC, and from Subnet choose one of your public subnets (you can let the default). 2. For Auto-assign Public IP, ensure that Enable is selected from the list. Otherwise, your instance will not get a public IP address or a public DNS name. 3. Click Review and Launch. If you are prompted to specify the type of root volume, make your selection and then click Next. 16
- 17. Go to Edit security groups (1) => Select an existing security group and select the Group we did (2) => Review and Launch You come back to the Step 7 page => click Launch (3) 3 - Launch the EC2 Instance 1 2 3 17
- 18. A window pop and ask a key. Choose the one we created before and click Launch Instance You should get a Launch status validate (3) If not (2), wait a bit and retry 1 2 3 3 - Launch the EC2 Instance 18
- 19. When you go back to the EC2 instance Menu, you should see the instance running 3 - Launch the EC2 Instance If you click connect, you will see the public DNS of your Instance. You will need it later to connect 19
- 20. 4 - Connect to the Linux Instance Now we have our fresh instance running, we connect to it. For this task, we will use Putty and PuttyGen, two littles softwares you can find here : https://www.chiark.greenend.org.uk/~sgtatham/putty/latest.html 20
- 21. 4 - Connect to the Linux Instance First we need to convert our key .pem to the putty format with puTTYGen Open puttyGen => Load your .pem file ( 1 ) => Generate the putty key (2) => Save the private key without passphrase 1 2 21
- 22. 4 - Connect to the Linux Instance To connect our instance, we now open putty 1. In Host Name, insert your public DNS we see after starting out instance 2. In Connection>Data, insert the username ec2- user 3. In Connection>SSH>Auth load your putty key => click Open The first time, a Security alert will pop, click yes 1 2 3 22
- 23. 4 - Connect to the Linux Instance use command : sudo yum update to update your instance 23
- 24. 5 - Install Jenkins 1. Update Java to 1.8 and remove the 1.7 version : [ec2-user ~]$sudo yum install java-1.8.0 sudo yum remove java-1.7.0-openjdk 1. Add Jenkins repository in the instance : [ec2-user ~]$ sudo wget -O /etc/yum.repos.d/jenkins.repo http://pkg.jenkins-ci.org/redhat/jenkins.repo 1. Import a key file from Jenkins-CI to enable installation from the package : [ec2-user ~]$ sudo rpm --import https://pkg.jenkins.io/redhat/jenkins.io.key 1. Install Jenkins : [ec2-user ~]$ sudo yum install jenkins -y 1. Start Jenkins : [ec2-user ~]$ sudo service jenkins start 24
- 25. Connect to Jenkins To know your admin password, add this command in puTTY [ec2-user ~]$ sudo cat /var/lib/jenkins/secrets/initialAdminPassword In a web brother go to : http://<your_server_public_DNS>:8080 25
- 26. 6 - Configure Jenkins 1. Select Install suggested plugins 2. Create your admin User > Save and Finish > Start Using Jenkins 1 2 26
- 27. Jenkins is ready to use ! 27
- 28. Trouble I tried to detail all the step. If you found some problems, don’t hesitate to ask and I’ll update this tutorial. Error message when trying to install plugins for the first time : You can try to uninstall and reinstall jenkins to resolve the issue (worked for me) enter this in putty : sudo yum remove jenkins sudo rm -r /var/lib/jenkins 28
- 29. 29 END OF THE FIRST PART