SlideShare ist ein Scribd-Unternehmen logo
1 von 81
Downloaden Sie, um offline zu lesen
Haas Factory Outlet
A Division of Productivity Inc


                   Mill Series
                Training Manual

                       Haas CNC
                      Mill Operator


Revised 032512 (printed 042312)
This Manual is the Property of Productivity Inc

The document may not be reproduced without the express written permission of
                             Productivity Inc.

The content must not be altered, nor may the Productivity Inc name be removed
                              from the materials.

  This material is to be used as a guide to operation of the machine tool. The
  Operator is responsible for following Safety Procedures as outlined by their
                   instructor or manufacturer s specifications.


     To obtain permission, please contact trainingmn@productivity.com.
Haas CNC Mill Operator Manual
                                       Table of Contents

INTRODUCTION TO BASIC VERTICAL MILL OPERATION ........................................................................................................5

THE CARTESIAN COORDINATE SYSTEM ................................................................................................................................7

ABSOLUTE AND INCREMENTAL POSITIONING ......................................................................................................................8
    ABSOLUTE AND INCREMENTAL EXERCISE ..................................................................................................................................... 9
VERTICAL MACHINING CENTER TRAVELS ........................................................................................................................... 12

THE MACHINE COORDINATE SYSTEM - MACHINE HOME POSITION ................................................................................... 14
    WORK COORDINATE SYSTEM ................................................................................................................................................. 15
TOOL LENGTH OFFSET ........................................................................................................................................................ 18

THE HAAS CNC CONTROL ................................................................................................................................................... 19

CONTROL DISPLAY ............................................................................................................................................................. 20

KEYBOARD INTRODUCTION ............................................................................................................................................... 21
    1 FUNCTION KEYS ............................................................................................................................................................ 22
    2 JOG KEYS .................................................................................................................................................................... 22
    3 OVERRIDE KEYS ............................................................................................................................................................ 23
    4 DISPLAY KEYS ............................................................................................................................................................... 24
    5 CURSOR KEYS ............................................................................................................................................................... 28
    6 AND 7 ALPHA KEYS AND NUMERIC KEYS .............................................................................................................................. 28
    8 MODE KEYS ................................................................................................................................................................. 30
SETTINGS ........................................................................................................................................................................... 33

ATC (AUTOMATIC TOOL CHANGE) ..................................................................................................................................... 36

SETTING TOOL LENGTH & WORK ZERO OFFSETS ................................................................................................................ 37

SET UP PROCEDURE ........................................................................................................................................................... 38
    WORK OFFSETS (X AND Y PART ZEROS)............................................................................................................................ 38
    TOOL LENGTH OFFSETS .................................................................................................................................................. 38
    PROGRAM PROOFING AND RUNNING IN MEMORY ......................................................................................................... 38
COMMUNICATIONS ........................................................................................................................................................... 39

HAAS MILL CONTROL TIPS ................................................................................................................................................. 41
    GENERAL TIPS ................................................................................................................................................................ 41
    CONTROL TIPS................................................................................................................................................................ 41
    PRGRM /CONVRS ........................................................................................................................................................... 42
    POSIT (POSITION) ............................................................................................................................................................. 42
Productivity Inc Haas CNC Mill Operator Manual   Page 2
PROGRAMMING ................................................................................................................................................................ 44
    TYPICAL HAAS G-CODES: ..................................................................................................................................................... 45
    TYPICAL HAAS M CODES: ..................................................................................................................................................... 46
    ALPHABETICAL ADDRESS CODES ............................................................................................................................................. 47
MACHINE DEFAULTS .......................................................................................................................................................... 51

PREPARATORY FUNCTIONS (G CODES)............................................................................................................................... 52
    RAPID POSITION COMMANDS (G00) ............................................................................................................................... 54
    LINEAR & CIRCULAR INTERPOLATION COMMANDS (G01, G02) ........................................................................................ 55
    MISCELLANEOUS G-CODES (G04, G03) ............................................................................................................................ 57
    HELICAL INTERPOLATION ............................................................................................................................................... 57
    CIRCULAR POCKET MILLING (G12, G13) ........................................................................................................................... 58
    REFERENCE POINT DEFINITION AND RETURN (G28)......................................................................................................... 60
    CUTTER COMPENSATION (G40, G41, G42) G43 ............................................................................................................... 60
    TOOL LENGTH COMPENSATION (G43)............................................................................................................................. 61
    ENGRAVING (G47).......................................................................................................................................................... 62
    LITERAL STRING ENGRAVING (G54-G59) ......................................................................................................................... 63
    BOLT HOLE PATTERNS (G70, G71, G72) ........................................................................................................................... 64
CANNED CYCLES (G73-G89) ................................................................................................................................................ 66

ABSOLUTE/INCREMENTAL SELECTION ............................................................................................................................... 75
    CANNED CYCLE AUXILIARY FUNCTIONS..................................................................................................................................... 75
MISCELLANEOUS FUNCTIONS (M FUNCTIONS)................................................................................................................... 76

M CODE DETAILED DESCRIPTION ....................................................................................................................................... 77

FORMULAS ........................................................................................................................................................................ 79


Productivity Inc Haas CNC Mill Operator Manual                                                                                                                             Page 3
For more information on Additional Training Opportunities
                                 or our Classroom Schedule
            Contact the Productivity Inc Applications Department in Minneapolis:
                                       ' 763.476.8600
                        Visit us on the Web: www.productivity.com
                          Click on the Training Registration Button
                              * trainingmn@productivity.com


Productivity Inc Haas CNC Mill Operator Manual                                     Page 4
Introduction to Basic Vertical Mill Operation

Welcome to Productivity, Inc., your local Haas Factory Outlet (H.F.O.) for the Haas Mill Operator Class.
This class is intended to give a basic understanding of the set-up and operation of a Haas Machining
Center.

After 1945 design of wings for the US Air Force were becoming extremely complex and hard to
manufacture using conventional machine tools. MIT developed a machine that was able to control a
cutting tool path with a series of straight lines defined by axial coordinates at prescribed feed rates.
The first NC machine tool was introduced to the defense and aerospace industry by MIT in 1952. The
contour of a constantly changing curvature could be described by a series of short lines determined by a
series of coordinate in three axes.

The first machine tools were run with instructions or programs punched out on paper tape. The files of
the early machine tools were often in the format which later became called G-code. The reason for the
name being that many of the lines of text began the letter G.

In an NC machine, the tool is controlled by a code system that enables it to be operated with minimal
supervision and with a great deal of repeatability. "CNC" (Computerized Numerical Control) is the same
type of operating system, with the exception that a computer monitors the machine tool.

The same principles used in operating a manual machine are used in programming a NC or CNC
Machine. The main difference is that instead of cranking handles to position a slide to a certain point,
the dimension is stored in the memory of the machine control once. The control will then move the
machine to these positions each time the program is run.

The operation of the VF-Series Vertical Machining Center requires that a part program be designed,
written, and entered into the memory of the control. There are several options for getting these
programs to the control. RS-232 (serial port with a computer), 3.5 Floppy Disk, Ethernet / Networking/
and USB are all viable ways to transmit and receive programs.

In order to operate and program a CNC controlled machine, a basic understanding of machining
practices and a working knowledge of math are necessary. It is also important to become familiar with
the control console and the placement of the keys, switches, displays, etc., that are pertinent to the
operation of the machine.

This manual can be used as both an operator's manual and as a programmer's manual. It is intended to
give a basic understanding of CNC programming and its applications. It is not intended as an in-depth
study of all ranges of machine use, but as an overview of common and potential situations facing CNC
programmers. Much more training and information is necessary before attempting to program on the
machine.

The programming section of this manual is meant as a supplementary teaching aid to users of the HAAS
Vertical Machining Center. The information in this section may apply in whole or in part to the operation
of other CNC machines. Its use is intended only as an aid in the operation of the HAAS Vertical
Machining Center.

                                                                                      Updated CK 3/25/12

Productivity Inc Haas CNC Mill Operator Manual                                                              Page 5
Productivity Inc Haas CNC Mill Operator Manual   Page 6
The Cartesian Coordinate System
The first diagram we are concerned with is called a NUMBER LINE. This number line has a zero reference point
location that is called an ABSOLUTE ZERO and may be placed at any point along the number line.


                                                     X axis

The number line also has numbered increments on either side of absolute zero.
Moving away from zero to the right are positive increments. Moving away from zero to the left are negative
increments. The + , or positive increments, are understood, therefore no sign is needed. We use positive and
negative signs along with increment value's to indicate its relationship to zero on the line.

Our concern is the distance and the direction from zero and is labeled as Absolute Programming

Remember that zero may be placed at any point along the line, and that once placed, one side of zero has negative
increments and the other side has positive increments.


                                  Vertical Number Line know as the Y axis


Productivity Inc Haas CNC Mill Operator Manual                                                                      Page 7
Absolute and Incremental Positioning
There are two different systems used in positioning our machine. Both will steer the machine where
we need it to go, both will net the same results. The reason we use more than one, is flexibility. Below
we will talk about both, and they are the first two G-Codes


Absolute Positioning:
With absolute positioning, we tell the machine where to move referenced to a common point, called X0
Y0 and Z0. Every time we need to move to a certain position, the ending point of that move is in direct
relationship to this common point


                                                                              G90 Absolute Positioning

                                                                 Program to move the machine to these
                                                                 4 hole locations when using G90 (Abs.)

                                                                                      X 1.0000 Y 1.0000
                                                                                      X 9.0000 Y 1.0000
                                                                                      X 9.0000 Y 9.0000
                                                                                      X 1.0000 Y 9.0000


Incremental Positioning:
With incremental positioning, we are telling the machine where to go in relationship to where it
currently is at. Basically like a set of directions given from where the machine stopped last.


G91 Incremental Positioning

Program to move the machine to the same
4 hole locations using G91 (Incr.)

X 1.0000 Y 1.0000
X 8.0000
Y 8.0000
X -8.0000


When do we decide which to use?
We switch between the two when it is more convenient. Once example is look at the above 2 prints.
Sometimes the print doesn t call out the hole-locations, but will give the distance between the holes.
Productivity Inc Haas CNC Mill Operator Manual                                                             Page 8
Absolute and Incremental Exercise


        G90 ABSOLUTE                                  G91 INCREMENTAL
  P1         X0         Y -2.5                   P1        X0      Y -2.5
  P2                                             P2
  P3                                             P3
  P4                                             P4
  P5                                             P5
  P6                                             P6
  P7                                             P7
  P8                                             P8
  P9                                             P9
 P10                                             P10


Productivity Inc Haas CNC Mill Operator Manual                              Page 9
This diagram shows a front view of the grid as it would appear on the mill. This view shows the X and Y
axes as the operator faces the mill. Note that at the intersection of the two lines, a common zero point
is established.


                                        Fig. 1-4: Operator s working grid.


Whenever we set a zero somewhere on the X axis and somewhere on the Y axis, we have automatically
caused an intersection of the two lines. This is known as zero , where our X and Y lines would both be
at a value of 0. We will move this point to a Zero position on our part so that we can steer the
machine to locations that relate to our print. Another term for this Zero position is the origin of the
part.


Productivity Inc Haas CNC Mill Operator Manual                                                             Page 10
The following illustration shows the X & Y directions of travel on a vertical machining center with respect
to a part print. It shows the positive and negative positions that our spindle would have to move with
respect to the x and y axis. Also note where these two axis meet, they create a common point of zero
where they both are at the value of 0 at the same point.


Vertical machining centers have 3 axis of travel. We have talked about two of them, the X (left to right
movement), the Y (moving the part towards and away from the operator), but the last to discuss is the
Z. The Z axis moves the milling spindle up or away from the part in the positive direction, and towards or
into the part in the negative direction. Now that we have discussed all 3 of the axis, we can take a look
at this picture of a Haas VF-8 VMC.


Productivity Inc Haas CNC Mill Operator Manual                                                                Page 11
Vertical Machining Center Travels


                                 Haas VMC (VF-8) shown with the X, Y, and Z axis


The machine illustration shows three directions of travel available on a vertical machine center. Now to
carry the number line idea a little further, imagine such a line placed along each set of travels (or axis) of
the machine.

The first number line would be the left-to-right, or X , axis of the machine. Positive X values would
move the spindle to the right on our part, and negative would move the spindle to the left.

If we place a similar number line along the front-to-back, or Y axis, and wanted to move the spindle to
the back of the table, these would be positive values. Moving the spindle towards the operator would
be negative values in the Y axis.

The third axis of travel on our machine is the up-and-down, or Z axis. A positive Z value will move the
spindle up towards the tool change position, and negative values would move the spindle towards our
part.

All axes of Haas VMCs have a resolution of .0001 inches (or .001mm).


Productivity Inc Haas CNC Mill Operator Manual                                                                   Page 12
Now theoretically all of our number lines for each axis are infinite in length, we are limited to the travels
of the particular machine we are using. Below is an example of the travels of different Haas VMCs
showing how much movement we have on each particular model.


VMC TRAVELS:
                        X-axis             Y-axis       Z-axis
VF-0/ VF-1                20"                16"          20"
VF-2                      30"                16"          20"
VF-3                      40"                20"          25"
VF-4                      50"                20"          25"
VF-6                      64"                32"          30"
VF-8                      64"                40"          30"
VF-10                   120                  32           30

Remember, when we are moving the machine, we are concerned with positioning the spindle. Although
the machine table is the moving part, our programs are written as if the spindle was moving.

Keep in mind that the zero position may be placed at any point along each of the three number lines,
and in fact, will probably be different for each setup of the machine.


Productivity Inc Haas CNC Mill Operator Manual                                                                  Page 13
The Machine Coordinate System - Machine Home Position
The principle of machine home may be seen when doing a reference return of all machine axes at
machine start-up. A zero return (POWER UP/RESTART) is required when you power on machine. All
three axes are moved to extreme positive locations until limit switches are reached. The reason the
machine does this is to double check its position with the Home switches of the machine. On power
up/restart the machine moves first up in the z axis to home and then moves to the x and y axis home
positions at the same time.

At home position the X, Y and Z axis are all at machine 0.


This is crucial to the operation and function of a CNC machine as all of our programs, fixtures, and
tooling are based off of the machine home position described as X0, Y0, Z0.


Productivity Inc Haas CNC Mill Operator Manual                                                         Page 14
Work Coordinate System

What is a Work Coordinate ?

A work coordinate (also known as a part offset) is how we tell the machine where our part(s) are located
with respect to the machine home position. Under the Work Offsets page in the control, we put the
machine in jog and hand wheel the machine to the X & Y Zero location for our part, and use the Part
Offset Measure key under the Reset key to set the corresponding work offset from our program (G54,
G55, G56, etc ..)


      Above: The relationship of machine home to work home , otherwise known as work offset

Note: Because the location of machine home zero is in the upper right hand corner of the machine table
our values for X and Y will always be negative.


G54 G59 Work Offsets

These are the first G-Codes that were assigned to work coordinates. This how we tell the machine that
we are working on part #1, part #2, etc. thru part #6. Originally no one thought we would need more
than 6 part offsets, but thru time and the invention of new types of machines more needed.

G154 P1 G154 P99 Work Offsets

These codes are the same as G54 to G59, they add more places as X & Y zero. We now can set up to 105
different zeros within the travels of our machine. On older Haas machines the extra work offsets were
G110 to G129.


Productivity Inc Haas CNC Mill Operator Manual                                                             Page 15
Other Work Coordinate Offsets
G52 Work Coordinate Shift

G52 will shift all work offsets that are set in the machine. In the Work Offsets page of the control, if we
input a value of X +1.0000, ALL of the offsets will move one to the right by a value of 1.0000. This is most
commonly used in casting and forging work where we have core movement.

         Note: The G52 command works differently depending on the value of Setting 33. This setting
         selects the FANUC, HAAS, or YASNAC style of coordinates, which are listed below.


G53 Positioning In Reference to Machine Home

G53 is used when we want to move the machine a certain distance and location from Machine Home.
This is quite often used if we want to establish a safe tool change position because we have large parts
or tools and need to clear the tool changer. G53 is non-modal and only applies to the block which it is in.

G92 Set Work Coordinate System

G92 Can be used to set our work offsets while on the fly in our program. G92 was used back when
machines only had one offset to choose from. We had to cut our first part, move the spindle over to the
second part X&Y zero, and then call G92 X0Y0 in our program. Our work offset is now set around the
second part. Using G54 G154 P99 is much faster, more tunable, and easier to use.


Productivity Inc Haas CNC Mill Operator Manual                                                                 Page 16
Multiple Work Coordinate System


                                                 Multiple fixture setup

The figure above represents a multiple-fixture setup. Each vise will have an absolute zero once it is
specified in the program. This is done by using G54 through G59. G54 through G59 and
G154 P1 through G154 P99 gives a total of 105 different work offsets which may be used.


Productivity Inc Haas CNC Mill Operator Manual                                                          Page 17
Tool Length Offset

The tool length offset is how we tell the machine where the top face of our part is located in
the Z direction with respect to machine home. The tool length offset gives the distance from
the end of the tool at home position to the top face of our part or other plane that the
programmer has determined as the Z zero reference point. This information is stored in the
Tool Offset Memory.

Each tool in the machine will have its own defined tool length stored in the tool offset register
determined by the operator during set up. Other information about each tool is stored in the
Tool Offset Register. For each tool, the coolant tube position and the diameter or radius are
also stored. In the wear section, small alterations to the tool length and diameter or radius are
stored. If you cursor to the right in the tool register, additional information about the tool may
be stored: the number of flutes, the actual diameter, the tool type, and tool category with
respect to size and weight.

In the illustration below the spindle is sitting at the Z home position and shows the distance the spindle
must go to reach +.100 above the face of the part. G43 code with an H-number tells the machine which
tool length offset to use.


Productivity Inc Haas CNC Mill Operator Manual                                                               Page 18
The Haas CNC Control

Powering On the Machine

To power up a Haas machine, regardless of where the machine table was when it was turned off, press
POWER ON. The machine must first find its fixed machine zero reference point before any operations
can occur. After it's powered on, pressing POWER UP/RESTART will send the machine to its machine
zero reference location. The machine doors must be cycled and closed to return to machine zero. Also
the machine needs to see the Emergency Stop cycled. Haas provides directions on the screen on what
needs to be done to start the machine up in the morning.


                                         When powering on the machine, if there is a message in the MESGS
                                         display, it will be the first display seen on your control screen.


                                         Will move all axis to machine zero and then changes tools to put
                                         tool #1 in the spindle. Machine will move up in Z first then the X
                                         and Y move to machine zero.


                                         If the correct program has been selected and the part program is
                                         proven to be good and it's ready to run, press cycle start.


General Machine Keys
Power On - Turns CNC machine on.

Power Off - Turns CNC machine tool off.

Emergency Stop - Stops all axis motion, stops spindle, tool changer and turns off coolant pump.

Jog Handle Jogs axis selected, also may be used to scroll through programs, menu items while editing
and also altering feeds and speeds.

Cycle Start Starts program in run mode or graphics mode.

Feed Hold Stops all axis motion. Spindle will continue to turn.

Reset Stops machine, will rewind program.

Power Up/Restart Axis will return to machine zero and tool change will occur per Setting 81
Recover If a tool change is stopped in middle of a cycle an alarm will come up. Push the Recover
button and follow the instructions to bring the tool change cycle to the beginning.


Productivity Inc Haas CNC Mill Operator Manual                                                                Page 19
Control Display


The new 16 software has a larger display and more panes than older versions. Above is the basic display
layout. What is displayed depends on which display keys have been used. The only pane active is the
one with the white background. Only when a pane is active may changes be made to data.

Control functions in Haas machine tools are organized in three modes: Setup, Edit and Operation

Access Modes using the mode keys as follows:

Setup: ZERO RET, HAND JOG keys. Provides all control features for machine setup.

Edit: EDIT, MDI/DNC, LIST PROG keys. Provides all program editing, management, and transfer
functions.

Operation:        MEM key. Provides all control features necessary to make a part.

Current mode is displayed at top of display.

Functions from another mode can still be accessed within the active mode. For example, while in the
Operation mode, pressing OFFSET will display the offset tables as the active pane in the Main Display
Pane and offsets may be altered; press OFFSET to toggle the offset display. While running a part in
operation mode another program may be edited in the Main Display Pane. Press PROGRM CONVRS in
most modes to shift to the edit pane for the current active program.


Productivity Inc Haas CNC Mill Operator Manual                                                            Page 20
Keyboard Introduction
      The keyboard is divided into eight different sectors: Function Keys, Jog Keys, Override Keys,
      Display Keys, Cursor Keys, Alpha Keys, Number Keys and Mode Keys. In addition, there are
      miscellaneous keys and features located on the pendant and keyboard which are described briefly
      on the following pages.


                                                                                        5-Cursor Keys

1-Function Keys                 4-Display Keys
                                                                                          8-Mode Keys


2-Jog Keys


3-Override


                              6-Alpha Keys                        7-Number Keys


      Productivity Inc Haas CNC Mill Operator Manual                                                    Page 21
1 Function Keys

F1 F4 Perform different functions depending on which mode the machine is in. Example in offsets
mode F1 will directly enter value that you give it into to offset register.

TOOL OFFSET MEASURE Will take machine Z position readout at bottom of offset screen and load
it in to the highlighted tool offset register.

NEXT TOOL After pressing Tool Offset Measure button in a set up this will select the next tool and
make a tool change

TOOL RELEASE - Releases tool from spindle in MDI, Zero Return or Handle mode. A button on the
front of the spindle will do the same thing.

PART ZERO SET Records work coordinate offsets into the highlighted register.


2 Jog Keys

Chip FWD (Chip Auger Forward) Turns the optional chip auger in a direction that removes chips from
the work cell.

Chip Stop (Chip Auger Stop) Stops auger movement.

Chip REV (Chip Auger Reverse) Turns the chip auger in reverse.

CLNT UP (Coolant Up) Pressing this key will position the coolant stream one position higher.

CLNT DOWN (Coolant Down) Pressing this key positions the coolant stream one position lower.
Coolant stream position will appear in tool length offset register when position is highlighted.

AUX CLNT (Auxiliary Coolant) Turns on the optional Through-the-Spindle (TSC) coolant (in MDI
mode).

+X, -X (Axis) Selects the X axis for continuous motion when depressed.

+Y, -Y (Axis) Selects the Y axis for continuous motion when depressed.

+Z, -Z (Axis) Selects the Z axis for continuous motion when depressed.

+A, -A (Axis) Selects the A axis. This key selects the B axis when used with the SHIFT key if the machine
is configured with a fifth-axis option.

Jog Lock When this is pressed prior to one of the jog keys given above, the axis moves in a
continuous motion without the need to hold down the axis key. Depressing this key again stops jogging
motion. Feed rate is determined by the selection in HAND JOG mode keys.
Productivity Inc Haas CNC Mill Operator Manual                                                              Page 22
3 Override Keys

The overrides are at the lower right of the control panel. They give the user the ability to override the
speed of rapid traverse motion, as well as programmed feeds and spindle speeds.

-10 FEED RATE   Decreases current feed rate in increments of 10 percent.
100% FEED RATE Resets the control feed rate to the programmed feed rate.
+10 FEED RATE   Increases current feed rate in increments of 10 percent.
HANDLE CONTROL FEED RATE        Hand wheel will control feed rate at 1% increments.

-10 SPINDLE     Decreases current spindle speed in increments of 10 percent.
100% SPINDLE    Sets the control spindle speed at the programmed spindle speed
+10 SPINDLE     Increases current spindle speed in increments of 10 percent.
HANDLE CONTROL FEED              Hand wheel will control feed rate at 1% increments.


CW Starts the spindle in the clockwise direction.
STOP Stops the spindle.
CCW Starts the spindle in the counterclockwise direction.

5% RAPID          Limits rapid to 5 percent of maximum.
25% RAPID         Limits rapid to 25 percent of maximum.
50% RAPID         Limits rapid to 50 percent of maximum.
100% RAPID        Allows rapid traverse to feed at its maximum.

Override Usage

Feed rates may be varied from 0% to 999%. Feed rate override is ineffective during G74 and G84
tapping cycles. Spindle speeds may be varied from 0% to 999%. Depressing Handle Control Feed rate or
Handle Control Spindle keys, the jog handle movement varies by +/-1% increments.

Setting 10 will limit rapid movement to 50%.

Settings 19, 20, 21 make it possible to disable override keys.

Coolant may be over rode by depressing COOLNT button.

Feed Hold - Stops rapid and feed moves. Cycle Start button must be depressed to resume machine
feeds. Similar situation applies when Door Hold appears. Door must be closed and Cycle Start pressed
to continue running program.

Overrides may be reset to defaults with a M06, M30 or pressing RESET by changing Settings 83, 87 and
88 respectively.


Productivity Inc Haas CNC Mill Operator Manual                                                              Page 23
4 Display Keys

PRGM/CONVRS Selects the active program pane (highlights in white). In MDI/DNC mode pressing a
second time will allow access to VQC (Visual Quick Code) and IPS (Intuitive Programming System)

POSIT (Position) Selects the positions display window (lower middle). Repeated pressing of the POSIT
key will toggle through relative positions in the Memory Mode. In Handle Jog mode all four are listed
together.

1. POS-OPER digital display. This is a reference display only. Each axis can be zeroed out
   independently; then the display shows the axis position relative to where you decided to zero it. In
   the Handle Jog mode, you can press the X, Y or Z JOG keys and ORIGIN key to zero that selected axis.
   On this display page, you can also enter in an axis letter and number (X-1.25) and press ORIGIN to
   have that value entered in that axis display.

2. POS-WORK digital display. This position display tells how far away the tools are in X, Y and Z from
   the presently selected work offset zero point.

3. POS-MACH digital display. This is in reference to machine zero, the location that the machine moves
   to automatically when you press POWER UP/RESTART. This display will show the current distance
   from machine zero.

4. POS-TO-GO digital display. When you're running the machine, or when you have the machine in a
   Feed Hold, this incrementally displays the travel distance remaining in the active program move
   being run. This is useful information when you are stepping a program through during a set up.

When the position pane is active one can change which axis is displayed simply by typing X or Y or Z or
any combination and pressing write. Then only that particular axis or combination will be displayed.

OFFSET Selects one of two offsets tables: Tool Geometry/Wear and Work Zero Offset. Depressing
the OFFSET button toggles between the two tables Tool Geometry/Wear table displays 200 tool length
offsets (100 tool length offsets on older machines) - labeled (LENGTH) GEOMETRY - along with wear
offsets. It also displays cutter compensation radius or diameter offsets with wear offsets. You can select
how you would like a tool size to be specified using cutter compensation (G41 and G42) with Setting 40
(Radius or Diameter).

The tool-offset display has a CLNT POS column for setting the coolant spigot position.

1. Programmable coolant has 34 possible positions. These may be entered into the column under CLNT
   POS for each tool in the offset display. This will move the coolant spigot to the position entered
   when that tool length offset is read.

2. When the cursor is positioned in the CLNT POS column, the actual coolant position will be shown at
   the lower left corner of the screen.

The Work Zero Offset table has G54-G59 plus G154 P1-G154 P99 offsets available.

The WRITE/ENTER key will add the number in the input buffer to the selected offset, and the F1 key
will replace the selected offset with the number entered into the input buffer. Offsets can also be
entered using TOOL OFSET MEASUR and PART ZERO SET
Productivity Inc Haas CNC Mill Operator Manual                                                               Page 24
CURNT COMDS Ten different pages; use PAGE UP and PAGE DOWN

1.       Operation Timers displays Power-On Time, Cycle Start Time, Feed Cutting Time. Hitting
         ORIGIN will clear any display that is highlighted by the cursor.

2.       Real time clock and date.

3.       System Variables, for machines with Macro Programming.

4.       All Active Codes, displays current and modal command values.

5.       Position information: Machine, Distance to Go, Operator, Work Coordinate.

6.       Tool life, displays the usage of each tool. An alarm can be set for the number of times you want
         that tool to be used, and when that condition has been met (that is, the tool has been used the
         set number of times), the machine will stop, with an alarm for you to check the condition of that
         tool. Pressing ORIGIN will clear the cursor-selected display, and pressing ORIGIN when the
         cursor is at the top of a column will clear the whole column.

7.       Tool Load displays the Tool Load Max % of each tool being used. You can use the Limit% column
         to set the maximum spindle load for a particular tool. When that condition has been met (the
         tool has reached maximum load), the machine will stop for you to check the condition of that
         tool. Pressing ORIGIN will clear the cursor-selected display, and pressing ORIGIN when the
         cursor is at the top of a column will clear the whole column. Setting 84 determines the Overload
         Action when this limit is met.
         Also vibration loads may be entered.

8.       Maintenance times for various items may be loaded.

9.       Advanced Tool Management (Optional)

10.      Tool Pot Table: Gives information on which tool is in which Pot. Refer to Automatic Tool
         Change section on information on how to use this table.

ALARM/MESGS Displays messages and current active alarms. Press right arrow key gives alarm
history. Press right arrow key again goes to the Alarm Viewer Page. Enter alarm number and press
write will give detailed information on a particular alarm code.

PARAM/DGNOS Lists machine parameters that are seldom-modified values which change the
operation of the machine. These include servo motor types, gear ratios, speeds, stored stroke limits,
lead screw compensations, motor control delays and macro call selections. All of these are rarely
changed by the user and should be protected by Setting 7, PARAMETER LOCK. A second press of
PARAM/DGNOS will show the diagnostics display. The PAGE UP and PAGE DOWN keys are then used to
select one of two different pages. This display is for service diagnostic purposes, and the user will not
normally need them.


Productivity Inc Haas CNC Mill Operator Manual                                                               Page 25
SETNG/GRAPH Displays settings - machine parameters and control functions that the user may
need to turn on and off or change to suit specific needs. A list of settings is found on page 30.

    ·    Settings are organized into functionally similar page groups with a title.
    ·    Settings are listed with a number and a short description, and a value or choice on the right.
    ·    To find a particular setting, enter the setting number and then press either the up or down
         cursor arrow key to move to the desired setting.
    ·    You can change a setting using the left or right cursor arrows to display the choices, or, if the
         setting contains a value, by typing in a new number. A message at the top of the screen will tell
         you how to change the selected setting. When you changed, it will flash on and off.
    ·    A setting change is not active until it stops flashing. To activate, press WRITE/ENTER.


SETNG/GRAPH (2nd part) - The second press of SETNG/GRAPH will bring up the graphics display in
the Main Display Pane. In this screen you can dry-run a program without moving the axes or risking tool
damage from any programming errors. This function is far more powerful than using DRY RUN, because
all of your offsets and travel limits can be checked before any attempt is made to move the axes. The
risk of a crash during setup is greatly reduced. The Graphics Screen will display the programmed tool
path and generate an alarm if there are any problems. Some of the features of the Graphics display are
controlled by selections made in the Settings display, on the page titled GRAPHICS.

        1. Press either MEM or MDI and select the program that you want to run in Graphics.
            Graphics will also run in the Edit Mode.
        2. Press SETNG/GRAPH twice.
                · The top left line of the screen will list the GRAPHICS title. Above that line will list the
                    mode you are in (MEM or MDI). The bottom lists explanations for use of function
                    keys F1 through F4.
                · The small window on the lower right side of the screen displays the whole table
                    area during the simulation run, indicating the location of the tool and any zoom
                    window. The center window of the display is a large window that represents a top-
                    down perspective of the X and Y axes. This is where the tool path is displayed during
                    graphic simulation of a CNC program.
        3. Press CYCLE START to see all the X and Y-axis moves demonstrated.
                Note machine axis and spindle will not when graphic window is up.
        4. To step through a program one block at a time in Graphics, press SINGLE BLOCK.
        5. F1 is a help key.
        6. Press F2 to zoom in on the Graphics view screen.
                · Use PAGE DOWN to zoom in further and PAGE UP to expand the view.
                · Use the Cursor Keys to position the new zoom window over the area you wish to
                    zoom in on using the small window in the bottom right hand corner. Pressing
                    HOME will display the whole table.
                · After positioning the desired zoom window, press WRITE/ENTER to accept the view
                    and CYCLE START to see the new view.
                · F3 slows the execution speed of the graphic simulation
                · F4 speeds up the execution speed of simulation.
Use SINGLE BLOCK to step through a program in graphics to find any mistakes. During single block you
can re-zoom your window to look at tool paths in tight corners etc. Also use position display to see find
any discrepant values.


Productivity Inc Haas CNC Mill Operator Manual                                                                  Page 26
HELP/CALC Will bring up a help POP UP relevant to the screen you are in. This provides information
only pertaining to that screen. Pressing the HELP/CALC button again brings up a tabbed menu. With
tabulated screens highlighting tab and pressing WRITE/ENTER key will open up respective tab. Pressing
the CANCEL key will close the tab.

Help              Opening up the Help tab brings you to the table of contents of the entire Mill Operators
                  Manual. High light the topic of interest and press WRITE/ENTER will bring up subtopics
                  on the area of interest. Select subtopic in similar fashion will bring up the relevant page
                  in the manual.

Search            The search tab will do a search of the manuals content for relevant information on a
                  keyword. Type in the search term and press F1. Topics relevant to the keyword will
                  appear. Highlight the topic and press WRITE/ENTER key to open.

Drill Table       Displays a common drill sizes, decimal information and tap drill sizes.

Calculator        Different calculator functions are available under this tab. The calculator gives ordinary
                  calculations like addition, subtraction, multiplication and division in all tabs. It also will
                  solve trig problems with information about triangles, circles, circle line tangent and
                  circle- circle tangent. A milling and tapping tab will give you suggested cutting speeds
                  and feeds per different materials and sized tools.
Simple
Calculator        It will calculate simple addition, subtraction, multiplication and division operations.
                  Operations
                  are listed as: LOAD + - * /. These are selected using the left or right cursor arrow.
                      · To enter a number cursor on to LOAD; type the number you want to load and
                            press WRITE/ENTER.
                      · To perform one of the arithmetic functions, enter the first number into the
                            calculator window. Select the operation you want ( + - * / ). Finally, enter the
                            second number into the input buffer, press WRITE/ENTER to perform the
                            calculation.
Milling and
Tapping     Help you solve values for feed rates SFM, RPM, and chip load under different conditions.
                  It uses the three equations related to milling and tapping on page 67. The first one
                  includes cutter diameter with SFM and RPM. The second one includes RPM, number of
                  flutes, feed rate and chip load. The third one includes thread pitch, RPM and feed rate.

                                        The Milling & Tapping Tab
MILLING:                      Cutter Diameter            1.2500 IN                    (entered)
                              Surface Speed              210.0000 FT/MIN              (entered)
                              RPM                        642                          (calculated)
                              Flutes                     4                            (entered)
                              Feed                       12.8343 FT/MIN               (calculated)
                              Chip Load                  0.0005 IN                    (entered)

TAPPING:                      Threads                    16.0/IN                      (entered)
                              RPM                        500                          (entered)
                              FEED                       31.2500 IN/MIN               (calculated)


Productivity Inc Haas CNC Mill Operator Manual                                                                     Page 27
5 Cursor Keys

                  Cursor Keys The cursor keys are in the center of the control panel. They give the user
                  the ability to move to and through various screens and fields in the control. They are
                  used extensively for editing and searching CNC programs. They may be arrows or
                  commands.


Up/Down Moves up/down one item, block or field.
Page Up/Down Used to change displays or move up/down one page when viewing a program.
HOME Will move the cursor to the top-most item on the screen; in editing, this is the top left block of
the program.
END Will take you to the bottom-most item of the screen. In editing, this is the last block of the
program.


6 and 7 Alpha Keys and Numeric Keys

The Alpha Keys allow the user to enter the 26 letters of the alphabet along with some special
characters. Depressing any Alphabet Key automatically puts that character in the Input Section of the
control (lower left-hand corner).


            SHIFT key provides access to the yellow characters shown in the upper left corner of some of
            the alphanumeric buttons on the keyboard. Pressing SHIFT and then the desired white
            character key will enter that character into the input buffer.


            EOB key enters the end-of-block character, which is displayed as a semicolon on the screen
            and signifies the end of a programming block. It also moves the cursor to the next line.


Parentheses are used to separate CNC program commands from user comments. They must
always be entered as a pair. Example: (T1 ½ End Mill)

Also any time an invalid line of code is received through the RS-232 port, it is added to the
program between parentheses.

( ) and (.)                These keys are used to define negative numbers and give decimal
position.

+=#*[]                     These symbols are accessed by first pressing the SHIFT key and then the key
                           with the desired symbol. They are used in macro expressions (Haas option) and
                           in parenthetical comments within the program.

,?%$!&@:                   These are additional symbols, accessed by pressing the SHIFT key, that can be
                           used in parenthetical comments.


Productivity Inc Haas CNC Mill Operator Manual                                                             Page 28
6 and 7 Alpha Keys and Numeric Keys (continued)

The Numeric Keys allow the user to enter numbers and a few special characters into the control.
Depressing any number key automatically puts it into the Input Section of the Control.

Cancel            The Cancel key will delete the last character put into the Input Section of the control
display.

Space             Is used to format comments placed into the Input Section of the control display.

Write/
Enter             General purpose Enter key. It inserts code from the input section into a program
                  when the program display is in EDIT mode. With offsets pages active, pressing the
                  WRITE/ENTER key adds a number in the Input Section to the highlighted cell. Pressing
                  the F1 key will input the number into the cell.

-                 The (Minus Sign) is used to enter negative numbers.

.                 The (Decimal Point) is used to note decimal places.


Productivity Inc Haas CNC Mill Operator Manual                                                              Page 29
8 Mode Keys

Mode keys set the operational state of the machine tool. Once a mode is set the keys to the right may
be used. The current operation mode of the machine is displayed at the top thin pane of the CRT.

EDIT              The edit mode is used to make changes in a program stored in memory. When you
                  press EDIT two panes appear at the top of the screen. In the left pane the active
                  program appears. In the right an inactive program appears or the select program screen
                  appears. On the bottom left a editor help pane appears and on the right a clipboard
                  pane. Editing may be performed in either the active or inactive panes. Pressing EDIT
                  toggles between the two panes, (changes background to white). To call up a program
                  from memory and put it in one of the edit panes press SELCT/PROG. Highlight the
                  program desired by using the up or down cursor buttons and press WRITE/ENTER.

                  In the edit mode you are able to use the edit keys in the same row as the EDIT key.

INSERT            Enters commands keyed into the input panel in lower left pane of CRT after the cursor
                  highlighted word in a program.

ALTER             Highlighted words are replaced by text input into the input panel.

DELETE            Highlighted words are deleted from a program.

UNDO              Will undo up to the last 9 edit changes.

F1 KEY            While in the edit mode pressing F1 will bring up an edit pop up window. Using the
                  sideways cursor buttons will toggle thru HELP, MODIFY, SEARCH, EDIT AND PROGRAM
                  MENUS. The up and down buttons will cursor thru the different options in each of the
                  above.

MODIFY            Gives options on changing line numbers.

SEARCH            Will perform a search and gives the option of replacing text.

EDIT              Gives option of cutting or copying and pasting to a clipboard and to another program.

PROGRAM           Gives options of creating new program, selecting a program from list to edit, duplication
                  of programs, switching from left to right side of window panes.

Background
Edit       When a program is being run pushing the edit will bring up the Background Edit pane in
                  the Main Display Pane. Simple edits may be performed on the program that is being run
                  or another program. The edits on the running program will not take place until after the
                  current cycle has completed.


Productivity Inc Haas CNC Mill Operator Manual                                                                Page 30
MEM               The memory mode is the mode used when running the machine and making a part. The
                  active program is shown in the Program Display Pane. Keys in the memory mode line
                  reflect different ways of running a part in memory. When the keys to the right are
                  depressed they will show up highlighted in black on the bottom right of the CRT.

SINGLE
BLOCK             When depressed SINGLE BLOCK is highlighted in black and will appear on the bottom of
                  the CRT. When the machine is in SINGLE BLOCK mode only one block of the program is
                  executed every time the cycle start button is depressed. Used when first test running a
                  program or temporarily stopping a program when it is running.

DRY RUN           Used to check machine movement without cutting a part. In dry run the machine runs
                  at one feed rate. With the availability of graphics which show visually what the machine
                  tool path is this mode is rarely used.

OPTION
STOP              When OPTION STOP is depressed program will stop at any M01 which is in the program.
                  Normally M01s are placed after a tool is run in a program. When a job is being set up
                  the operator may put machine in op stop mode to check dimensions after every tool has
                  completed cutting.

BLOCK
DELETE            When this button is depressed any block with a slash (/) in it is ignored of skipped.

MDI
DNC               (MANUAL DATA INPUT mode) Usually short programs are written in MDI but are not
                  put into memory. DNC mode allows large programs to be drip fed from a computer into
                  the control.

COOLNT            Turns coolant on and off manually

ORIENT
SPINDLE           Rotates and locks spindle to specific angle. Used when lining up tools where spindle
                  orientation may be a issue such as boring heads.

ATC FWD           Rotates turret to next tool and performs tool change - also used to call up specific tools
                  or pots. Enter tool number (T1) and press ATC FWD.

ATC REV           Rotates turret to previous tool and performs tool change - also used to call up specific
                  tools or pots. Enter tool number (T1) and press ATC REV.

HAND
JOG               Puts machine in jog mode for set ups. Top values (.0001, .001, .01, .1) represent
                  distance traveled per click of jog handle. Bottom values (.1, 1., 10., 100) represent feed
                  in inches/minute when jogging axis using jog buttons.


Productivity Inc Haas CNC Mill Operator Manual                                                                 Page 31
ZERO RET          On pressing position display becomes highlighted in Zero Return mode.

ALL               Returns all axes to machine home similar in similar fashion as a Power Up/Restart.

ORIGIN            Sets selected displays to zero or other functions.

SINGL             Returns a single axis to machine home. Select desired axis (X, Y, or Z) then press Singl
                  axis button.

Home/G28 Rapid motion to machine home; will make a rapid move in all axes at once - may also be
                  used for a rapid home in one-axis. Press axis to home then G28. Caution must be used
                  that fixtures or parts are out of the way before initiating this rapid move to home.

LIST PROG         Will bring up list of programs in a tab format. Pressing Cancel will return you to tab at
                  top usually MEM or USB. Cursor to left or right for which list one wants. Pressing Enter
                  will open a list of programs. Cursor UP (Ù) or DOWN (Ú) to program desired. Select the
                  desired programs to be moved by pressing WRITE/ENTER. This will put a check mark
                  beside it. F2 will copy selected program or programs to be moved. A pop up menu will
                  ask where you want the selected programs to be copied.

SELECT PROG After highlighting a program from List Program with up or down cursor pressing this
                  button will place the program in the Active Program Pane. This is the program that will
                  run the CNC machine in the Memory mode. Use in the Edit mode in the Main Display
                  will enter selected program in the Main Display pane for editing.

SEND              Will send a selected program or programs out thru RS-232 serial port

RECV              Will get machine ready to receive program from RS-232 serial port.

ERASE PROG Will erase highlighted program or programs. A prompt will appear asking if you want to
                  delete selected program asking for Y/N.


Productivity Inc Haas CNC Mill Operator Manual                                                                Page 32
Settings
Scrolling through Settings with Jog Handle - The jog handle can now be used to scroll through the
settings. In previous versions, the jog handle could only be used to scroll through (cursor-highlight) the
parameters, but not the settings. This has been corrected. (Any Mill Control Ver. 10.15 and above; any
Lathe Control Ver. 3.05 and above.)

There are many settings which give the user various options over the control of their machine tool.
Read the Settings section of the operator s manual for all the possible options. Here are some of the
more useful settings.

Setting 1         AUTO POWER OFF This turns the machine off after it is idle for the number of
                  minutes defined in this setting.

Setting 2         POWER OFF AT M30 This option will power off the machine tool when an M30
                  command is executed. In addition, for safety reasons, the control will turn itself off if an
                  overvoltage or overheat condition is detected for longer than four minutes.

Setting 8         PROG MEMORY LOCK When this is Off, control program memory can be modified.
                  When this setting is turned On, memory edits cannot be done and programs cannot be
                  erased.

Setting 9         DIMENSIONING This changes the machine control from inch to metric, which will
                  change all offset values and position displays accordingly. This setting will not change
                  your program to either inch or metric.

Setting 15        H & T CODE AGREEMENT When this is OFF, no special functions occur. When it's
                  ON, a check is made to ensure that the H offset code matches the tool presently in the
                  spindle. Usually you have one offset per tool, and it's usually the same number as the
                  tool number. If it's not the same and this setting is ON, you will get an alarm of H AND T
                  NOT MATCHED. This check can help prevent crashes. If you need to use a different
                  offset number or more than just one, this setting will need to be switched OFF. In
                  program restart this check is not done until motion begins.

Setting 23        9XXX PROGS EDIT LOCK This is an On/Off setting. When it is On, the 9000 series
                  programs (usually the Quick Code source file or macro programs) are invisible to the
                  operator and cannot be uploaded or downloaded. They also cannot be listed, edited, or
                  deleted.

Setting 30        4TH AXIS ENABLE This is selected when using a rotary axis.

Setting 31        RESET PROGRAM POINTER When this is On, the RESET key will send the cursor
                  (program pointer) back to the beginning of the program. Normally set to on.

Setting 32        COOLANT OVERRIDE This setting controls how the coolant pump operates. The
                  settings are: Normal, Ignore and Off. When it is set on Normal, coolant commands
                  respond as programmed. If set on Ignore, an M08 or M88 command in the program will
                  not turn the coolant on (i.e., the command will be ignored), but it can be turned on
                  manually using the COOLNT key. If this setting is Off, the coolant cannot be turned on at
                  all, and the control will give an alarm when it reads an M08 or M88 command in a
                  program.
Productivity Inc Haas CNC Mill Operator Manual                                                                   Page 33
Setting 33        COORDINATE SYSTEM This setting changes the way the G92/G52 offset system
                  works. It can be set to Fanuc, Haas, or Yasnac. Normally it is set to Haas.

Setting 36        PROGRAM RESTART When it is OFF, starting a program from anywhere other than
                  the beginning of a program or a tool sequence may produce inconsistent results or
                  crashes. When it is ON, you are able to start a program from the middle of a tool
                  sequence. You cursor onto the line you want to start on and press CYCLE START. It will
                  cause the entire program to be scanned to ensure that the correct tools, offsets, G
                  codes, and axes positions are set correctly before starting and continuing at the block
                  where the cursor is positioned. Some alarm conditions are not detected prior to motion
                  starting. You could leave this setting ON all the time if you want, but it might do some
                  things unnecessarily, so you would probably prefer to turn it OFF when you're done
                  using it.

Setting 40        TOOL OFFSET MEASURE This setting selects how tool size is specified for cutter
                  compensation: radius or diameter.

Setting 51        DOOR HOLD OVERRIDE This setting is no longer available to use in new machines.
                  On older machine when it is off, a program cannot be started if the doors are open, and
                  opening the doors will cause a running program to stop just like a feed hold. When this
                  setting is On, the door condition is ignored. This setting will always be Off when the
                  control is powered up.

Setting 76        TOOL RELEASE LOCK OUT When this is On, the TOOL RELEASE button on the control
                  keypad is disabled.

Setting 84        TOOL OVERLOAD ACTION This is used to determine tool overload conditions as
                  defined by the Tool Load monitor page in the CURNT COMDS display (use PAGE DOWN
                  to get there). A tool overload condition can result in one of four actions by the
                  control, depending on Setting 84. ALARM will generate an alarm when overload
                  occurs; FEED HOLD will stop with a Feed Hold when overload occurs; BEEP will sound an
                  audible alarm when overload occurs; or AUTOFEED will automatically decrease the feed
                  rate.

Setting 85        MAX CORNER ROUNDING This setting is used to set the corner rounding accuracy
                  required by the user. The accuracy defined in Setting 85 will be maintained even at
                  maximum feed rate. The control will only slow at corners when it is needed. If it is set
                  at 0 the machine will operate in the exact stop mode, slowing speed of machine.

Setting 88        RESET RESETS OVERRIDE When this is On, the RESET key sets all overrides back to
                  100%.

Setting 101       FEED OVERRIDE > RAPID When this setting is OFF, the machine will behave
                  normally. When it is ON and HANDLE CONTROL FEED RATE is active, the jog handle will
                  affect both the feed rate override and the rapid rate override simultaneously. That is,
                  changing the feed rate override will cause a proportional change to the rapid rate. The
                  maximum rapid rate will be maintained at 100% or 50% according to setting 10. (Any
                  Mill Control Ver. 10.22 and above; any Lathe Control Ver. 4.11 and above.)


Productivity Inc Haas CNC Mill Operator Manual                                                               Page 34
Setting 103       CYC START / FH SAME KEY When this setting is ON, the CYCLE START button
                  functions as the Feed Hold key as well. When CYCLE START is pressed and held in, the
                  machine will run through the program; when it s released, the machine will stop in a
                  Feed Hold. This gives you much better control when testing a new program. When you
                  are done using this feature, turn it Off. This setting can be changed while running a
                  program. It cannot be ON when Setting 104 is ON. When one of them is turned ON, the
                  other will automatically turn OFF. (Any Mill Control Ver. 9.06 and above; any Lathe
                  Control Ver. 4.11 and above.)

Setting 104       JOG HANDL TO SNGL BLK When running a program in MEM mode in the Program or
                  Graphics display, you can use the SINGLE BLOCK key to cycle through your program one
                  line at a time with each press of the CYCLE START button, when the machine is running
                  or you are in Graphics. If you turn Setting 104 ON, and SINGLE BLOCK has been selected.
                  You first press the CYCLE START button, then each counterclockwise click of the jog
                  handle will step you through a program line by line. Turning the handle clockwise will
                  cause a FEED HOLD. This setting can be changed while running a program. It cannot be
                  ON when Setting 103 is ON. When one of them is turned ON, the other will
                  automatically turn OFF. (Any Mill Control Ver. 9.06 and above; any Lathe Control Ver.
                  4.11 and above.)

Setting 114       CONVEYOR CYCLE (MIN) If this is set to zero, the conveyor will operate normally. If
                  another number is entered, it defines how long (in minutes) each cycle will be when the
                  chip conveyor is turned on. The chip conveyor cycle is started with either an M code
                  (M31 or M32) or with the control CHIP FWD/REV keys. It will stay on for the time
                  defined in Setting 115, then turn off and not restart until the cycle time in Setting 114
                  has elapsed.

Setting 115       CONVEYOR ON TIME (MIN) This setting works with Setting 114, which defines the
                  conveyor cycle time. Setting 115 defines how long the chip conveyor will stay on during
                  each cycle.

Setting 130       RIG. TAP RETRACT SPEED This feature augments one introduced in version 10.13,
                  the Quick reversal out of a G84 rigid-tapped hole. If it is set to 0 or 1, the machine
                  behaves normally. Setting it to 2 is the equivalent of a G84 command with a J value of 2.
                  That is, the spindle will retract twice as fast as it went in. If this setting is set to 3, the
                  spindle will retract three times as fast. Note that specifying a J value in a G84 command
                  for rigid tapping will override Setting 130. (Any Mill Control Ver. 10.18 and above)

Setting 201       SHOW ONLY WORK and Tool Offsets in Use With this feature turned on only the
                  Work and Tool Offsets used within a program will be shown on the respective pages. To
                  activate the program first must be run in graphics or memory regular mode.


Productivity Inc Haas CNC Mill Operator Manual                                                                      Page 35
ATC (Automatic Tool Change)

CAROUSEL TOOL CHANGER

The carousel tool changer allows you to select a tool and put it in the waiting position while machining a
part. During a tool change the tool in the spindle is put in the same pot in the carousel that the current
tool came from. This allows a speedier process and also keeps the tools out of the working envelope.
With this system the tools are in random access mode, in other words tool 1 isn t assigned to the pot 1
location. The machine however knows which pocket each tool is in. In the tool offsets display cursor to
the right several times will show which pot the tool is located in. If you depress CURNT COMDS and
PAGE UP the Pocket Tool Table will appear. In this table tool pockets are labeled sequential with the
tools that are located in them.

Large and Heavy Tool Designations A tool larger than 3 inches is considered a large tool in cat
40 taper machines, 4 inch in 50 taper. It needs a special designation in the carousel because both
pockets on each side need to be empty because of interference. A large tool is designated In the Pocket
Tool Table by entering an L after the tool number. This will create an L at that pocket location. It will
also create a - at the adjacent pockets to protect them from having a tool loaded in them. Adjacent
pots will be turned to 0 and not used. In High Speed Tool Changer machines another designation is
needed. Any tool over 4 pounds is considered a (heavy tool) and needs to be designated by capital H.
For safety considerations the tool changer will operate at 25% of normal speed with all heavy tools and
large tools. To remove large tool designations simply curser down to the pocket that holds the large
tool press (space) button then enter, this will remove the characters for that large tool location.

         Tool Designations:
                H - Heavy but not large, no empty pockets on each side.
                L - Empty pockets required on both side.
                h Heavy small diameter tool in pocket designated for large tool
                l - Small diameter tool in pocket reserved for large tool

During set up pressing the origin key at any time while on this screen you will set the tool pockets to
their default values. By pressing 0, origin, you will clear all tools to zero.

Changing Tools Tool changes may be manually operated by using the tool release button on the
spindle housing and using the ATC FWD and ATC REV buttons. Tools may also be changed in MDI with
(Tnn M6). After touching off a tool and using Tool Offset Meas, Next Tool will initiate a tool change to
the next tool. Tools will automatically go to the tool change position in Z. Tools should always be
loaded through the spindle. Never load directly into the tool changer.


Productivity Inc Haas CNC Mill Operator Manual                                                               Page 36
Setting Tool Length & Work Zero Offsets


                      To set Tool Length Offsets:


    1. Press HANDLE JOG.
    2. Press OFSET and cursor to the tool number you want to set in the LENGTH display.
    3. In Handle Jog mode, use the .1, .01, .001 and .0001 keys to jog the tip of the tool (the Z-axis) to
       the part zero surface. Touch-off the tool tip to the part surface using a feeler gauge.
    4. Press TOOL OFSET MESUR. This will take the number in the machine Z position readout (listed at
       bottom of screen) and load it into the cursor-selected offset register.
    5. Press NEXT TOOL. This will automatically change to the next tool and the next offset number,
       and the Handle Jog function switches back to the Z-axis .01 increment setting.
    6. TOOL OFSET MESUR the next tool in the same way.
    7. Repeat steps 3 through 5 for all tools needed for part setup.


                         To set Work Zero Offsets:


    1. HANDLE JOG the machine axes to the work zero point on your part.
    2. Press OFSET and PAGE UP, and cursor to the correct WORK ZERO OFFSET number in the X-axis
       column. Repeat pressing the OFSET key toggles between Work Offset page and Tool Length
       Offset page.
    3. Press PART ZERO SET to enter the X offset position. The cursor will then automatically move
       over to the Y-axis column.
    4. Position the Y-axis and then press PART ZERO SET to enter the Y offset position.
    5. The Z-axis is normally entered separately if any adjustment is needed. This setting is usually zero
       but may need to be adjusted.
    6. When the A axis is being used, find the A axis zero position and press PART ZERO SET.


Productivity Inc Haas CNC Mill Operator Manual                                                               Page 37
SET UP PROCEDURE
WORK OFFSETS (X AND Y PART ZEROS)
    1.  TURN POWER ON
    2.  RESET ALARMS
    3.  PRESS POWER UP RESTART
    4.  PRESS SETTINGS DISPLAY (SETTING 51 DOOR HOLD OVERRIDE - ON)
    5.  PRESS M.D.I. MODE (ORIENT SPINDLE/ S1000, ENTER, CYCLE START)
    6.  PRESS HANDLE JOG MODE
    7.  PRESS POSITION DISPLAY (PAGE DOWN TO OPERATOR POSITION DISPLAY)
    8.  LOCATE X PART ZERO (REMEMBER TO SHIFT HALF THE DIA. WHEN USING AND EDGE FINDER)
    9.  PRESS OFFSET DISPLAY (PAGE UP TO WORK OFFSETS, CURSOR TO DESIRED OFFSET IN X AXIS
        COLUMN)
    10. PRESS PART ZERO SET
    11. REPEAT STEPS 7 THROUGH 10 FOR Y AXIS ZERO


TOOL LENGTH OFFSETS
    1. PRESS M.D.I. MODE
    2. TYPE IN DESIRED TOOL NUMBER TO BE PLACED IN THE SPINDLE AND PRESS A.T.C. BUTTON
    3. PLACE APPROPRIATE TOOL IN SPINDLE
    4. PRESS HANDLE JOG MODE
    5. PRESS OFFSET DISPLAY (PAGE UP TO LENGTH OFFSETS)
    6. HANDLE Z AXIS DOWN TO Z PART ZERO
    7. PRESS TOOL OFFSET MEASURE (ENTER IN THE RADIUS AMOUNT OF CUTTER IF APPLICABLE)
    8. PRESS NEXT TOOL
    9. REPEAT STEPS 6 THROUGH 8 FOR REMAINING TOOLS


PROGRAM PROOFING AND RUNNING IN MEMORY

    1.    PRESS MEM MODE
    2.    PRESS SETTING/GRAPH TWICE
    3.    RUN PROGRAM IN GRAPHICS
    4.    IF RUNNING IN GRAPHICS IS SUCCESSFUL PRESS SETTING/GRAPH TO GET OUT
    5.    TURN RAPID OVERIDE TO 25%
    6.    PRESS SINGLE BLK
    7.    PAGE DOWN IN CURRENT COMMANDS UNTIL DISTANCE TO GO, MACH COORD,G54 ETC SCREEN
          APPEARS
    8.    RUN PROGRAM UP TO 1 IN FRONT OF PART AND PUSH FEED HOLD
    9.    IF DISTANCE TO GO LOOKS CLOSE TO 1 CONTINUE RAPID BLOCK TO TOP FACE OF PART
    10.   WHEN PROGRAM GOES TO FEED OR CANNED CYCLE, TAKE OFF SINGLE BLOCK
    11.   RUN PROGRAM TO NEXT TOOL, COMPLETE 6 TO 10 ABOVE.
    12.   AFTER RUNNING THRU WHOLE PROGRAM SUCCESSFULLY TURN RAPID TO 100%


Productivity Inc Haas CNC Mill Operator Manual                                              Page 38
COMMUNICATIONS
    Ø Program Format to Receive - You can receive program files from a floppy disk or the RS-232
      port into the Haas control. Each program must begin and end with a % sign on a line with
      nothing else on that line. There also must be an Onnnnn program number on the line after the
      % sign in each program. If there is a (Program Name), it should be entered between
      parentheses, either after the program number on the same line or on the next line. The program
      name will appear in the program list.

    Ø Receiving Program Files from a Floppy Disk - You can load program files from a floppy disc
      using the I/O menu and the FLOPPY DIRECTORY item of the Advanced Editor. Pressing
      WRITE/ENTER when this menu item is selected will display a list of the programs on the floppy
      disk. Use the cursor arrow keys or the handwheel to select the file you need to load, and press
      WRITE/ENTER. After loading that file, the floppy directory will remain on display to allow more
      files to be selected and loaded into the control. RESET or UNDO will exit this display.

    Ø Sending Multiple Programs from LIST PROG Using SEND RS232 - Several programs can be
      sent to the serial port by typing all the program names together on the input line without spaces
      (e.g., O12345O98765O45678) and pressing SEND RS232.

    Ø    I/O Menu SEND RS232 or SEND FLOPPY Commands - You can send programs to the RS232
         port or a floppy disk from the Advanced Editor. After selecting the menu item you want (SEND
         RS232 or SEND FLOPPY), a program list will appear. Select the program you want to save, or
          ALL (at the end of the list) if you wish to send all programs under one file name. You can also
         select any number of programs using the up and down cursor arrow keys or the handwheel and
         the INSERT key to mark the specific programs to send. If no programs are selected from the list
         using the INSERT key, the currently highlighted program will be sent.

    Ø Sending Multiple Programs Under One File Name - In the Advanced Editor, you can send
      multiple program files via the RS232 port or a floppy disk, using the SEND RS232 or SEND
      FLOPPY commands under the I/O menu (see the previous paragraph for how to do this). The
      Advanced Editor allows you to choose several programs (select them using the cursor and the
      INSERT key) and save them under one file name that you type in; then press WRITE/ENTER to
      save and send it. (Any Mill Control Ver. 9.49 and above; any Lathe Control Ver. 3.00 and above.)

    Ø Sending Multiple Programs Using Program Numbers - The SEND FLOPPY item from the I/O
      menu of the Advanced Editor allows the operator to select one or more programs to be saved to
      floppy disk. It will prompt you to "ENTER FLOPPY FILENAME". In previous versions, the control
      would insist on a file name. Now, however, if you do not enter a file name, but simply press
      WRITE/ENTER, the control will save each program (the ones you selected using the cursor and
      the INSERT key) to a separate file on the floppy and use the five-digit program number as the
      file name. For example, if programs O00123 and O45678 are selected, the new file names
      created will be O00123 and O45678. (Any Mill Control Ver. 9.49 and above; any Lathe Control
      Ver. 3.00 and above.)


Productivity Inc Haas CNC Mill Operator Manual                                                              Page 39
Ø Sending a Program File from LIST PROG Display - You can send a file or files to a floppy disk
      or through the RS-232 port from the LIST PROG display. Use the cursor arrows and the INSERT
      key to select the program(s) you want, or ALL if you want to send all of them under one file
      name. When you press F2 to send the selected program(s), the control will ask for a floppy file
      name, which can be up to eight characters long with a three-letter extension (8CHRCTRS.3XT).
      Then press F2 again to send it. You can also use the I/O menu in the Advanced Editor to send
      and receive program files.

    Ø RS-232 Communications Using X-Modem - If you are seeing occasional errors when using
      RS-232 communications, X-Modem (Setting 14) is a standard communications mode which is
      very reliable when only a few errors occur. Our control supports this, as do almost all software
      communication packages for PCs.

    Ø Haas Rotary Table Using the Serial Port and Macros - It is possible to regulate a Haas
      rotary table using the serial port and macros from the Haas control, or any Fanuc-compatible
      control. There is a set of sample macros available from the Haas applications department.

    Ø Send and Receive Offsets, Settings, Parameters and Macro Variables to/from Disk - You
      can save offsets, settings, and parameters to a floppy disk. Press LIST PROG first, then select an
      OFSET, SETNG or PARAM display page. Type in a file name and then press F2 to write that
      display information to disk (or F3 to read that file from a disk). You can also do this with the
      macro variables by pressing LIST PROG first, then selecting the macro variable display page
      (PAGE DOWN from CURNT COMDS).

    Ø Send and Receive Offsets, Settings, Parameters and Macro Variables to/from RS232
      You can also save offsets, settings, and parameters via the RS-232 port. Press LIST PROG first,
      and then select an OFSET, SETNG, or PARAM display page. Press SEND RS232 to send that
      display page to the RS-232 port under the file name that you enter. Press RECV RS232 to read
      the file via RS-232. You can also do this with the macro variables by pressing LIST PROG first,
      then selecting the macro variable display page (PAGE DOWN from CURNT COMDS).

    Ø Deleting a Program File from a Floppy Disk - A file can be erased from the floppy drive. On
      the LIST PROG display, type "DEL file name" where "file name" is the name of the file on the
      floppy disk. Do not use the program number, unless its also the file name. Press WRITE/ENTER.
      The message "FLOPPY DELETE" will appear, and the file will be deleted from the floppy disk.
      Note that this feature requires the latest floppy driver EPROM chip version 2.11. (Any Mill
      Control Ver. 10.02 and above; any Lathe Control Ver. 3.00 and above.)


Productivity Inc Haas CNC Mill Operator Manual                                                             Page 40
HAAS MILL CONTROL TIPS

GENERAL TIPS

    Ø Cursor Searching for a Program - When in EDIT or MEM mode, you can select and display
      another program quickly by entering the program number (Onnnnn) you want and pressing
      either the up or down cursor arrow or F4.

    Ø Searching for a Program Command - Searching for a specific command in a program can be
      done in either MEM or EDIT mode. Enter the address letter code (A, B, C, etc.) or address letter
      code with the value (A1.23), and press the up or down cursor arrow. If you enter just the
      address code and no value, the search will stop at the next use of that letter, regardless of the
      value.

    Ø Spindle Command - You can stop or start the spindle with CW or CCW any time you are at a
      Single Block stop or a Feed Hold. When you restart the program with CYCLE START, the spindle
      will be turned back on to the previously defined speed.

    Ø Coolant Pump - The coolant pump can be turned on or off manually while a program is
      running, by pressing the COOLNT button. This will override what the program is doing until
      another M08 or M09 coolant command is executed. This also applies to the chip conveyor.

CONTROL TIPS

    Ø Coolant Spigot Position - The coolant spigot position can be changed manually when a
      program is running, with the CLNT UP or CLNT DOWN key. This will override what the program
      commands until another spigot position is commanded with an Hnn or M08 command.

    Ø Optional Stop - Takes effect on the line after the highlighted line when pressed.

    Ø A Block Delete - Takes effect four lines after that key is pressed when cutter compensation is in
      use, or two lines later when cutter compensation is not in use.

    Ø Block Look-Ahead - This control actually does look ahead for block interpretation, up to 20
      blocks. This is not needed for high-speed operation. It is instead used to ensure that DNC
      program input is never starved, and to allow Cutter Compensation to have non-XY moves
      inserted while Cutter Compensation is On.

    Ø Memory Lock Key Switch - This is a customer machine option that prevents the operator from
      editing or deleting programs, and from altering settings when in the locked position. Since the
      Key switch locks out the Settings, it also allows you to lock out other areas within the settings:
      Setting 7 locks parameters: Parameter 57, 209, and 278 lock other features. Setting 8 locks all
      programs. Setting 23 locks 9xxx programs. Setting 119 locks offsets. Setting 120 locks macro
      variables.

    Ø Chip Conveyor - The chip conveyor can be turned on or off when a program is running, either
      manually using the control keys or in the program using M codes. The M code equivalent to
      CHIP FWD is M31, CHIP REV is M32, and CHIP STOP is M33. You can set the Conveyor Cycle time
      (in minutes) with Setting 114, and the Conveyor On-Time (in minutes) with Setting 115.

Productivity Inc Haas CNC Mill Operator Manual                                                             Page 41
Ø Transferring an MDI Program - You can transfer and save a program in MDI to your list of
      programs. When in the MDI display, make sure that the cursor is at the beginning of the MDI
      program. Enter a program number (Onnnnn) that s not being used. Then press ALTER and this
      will transfer the MDI data into your list of programs under that program number.

    Ø To Rapid an Axis Home - You can rapid all axes to machine zero by pressing the HOME G28
      key. You can also send just one axis (X, Y, Z, A or B) to machine zero in rapid motion. Enter the
      letter X, Y, Z, A or B, then press HOME G28 and that axis alone will rapid home. CAUTION! There
      is no warning to alert you of any possible collision! For example, if the Z axis is down near the
      part or fixture on the table, and then the X or Y axis is sent home using HOME G28, a crash may
      result. Care must be exercised.
      (Any Mill Control Ver. 9.49 and above; any Lathe Control Ver. 2.24 and above.)

    Ø Rotate Tool Carousel without Changing Tools (M39) - You can rotate the tool carousel
      without changing tools by using M39 and Tnn. This can be used to recover from some unusual
      conditions. However, it will also tell the control you have a different tool in the spindle, which
      may not be the case.
      (Any Mill Control Ver. 2.3 and above.)

PRGRM /CONVRS

         Pressing this key will bring up the IPS screen. From this screen various tabs help in creating
         G-code for different drilling and milling operations. This is an option provided by Haas..
         Visual Quick Code tab can also be accessed from this screen. Under this screen Visual Quick
         Code can accessed and used to created simple G-code or various probing functions accessed by
         pressing F2

POSIT (Position)

    Ø Quick Zero on DIST-TO-GO Display - To clear out and get a quick zero position display, for a
      distance reference move, use the DIST-TO-GO position display. When you are in the POSIT
      display and in HANDLE JOG mode, press any other operation mode (EDIT, MEM, MDI, etc.) and
      then go back to HANDLE JOG. This will zero out all axes on the DIST-TO-GO display and begin
      showing the distance moved.

    Ø To Origin the POS-OPER Display - This display is used for reference only. Each axis can be
      zeroed out independently, to then show its position relative to where you selected to zero that
      axis. To zero out a specific axis, PAGE UP or PAGE DOWN in the POSIT display to the POS-OPER
      large-digit display page. When you Handle Jog the X, Y or Z axis and then press ORIGIN, the axis
      that is selected will be zeroed. Or, you can press an X, Y or Z letter key and then ORIGIN to zero
      that axis display. You can also press the X, Y or Z key and enter a number (X2.125), then press
      ORIGIN to enter the number in that axis display.


Productivity Inc Haas CNC Mill Operator Manual                                                             Page 42
Ø Jog Keys. The JOG keys (+X, -X, +Y, -Y, +Z, -Z, +A, -A, +B, -B) use the jog speeds of 100., 10., 1.
      and .1 inches per minute listed next to the HANDLE JOG key (jogging with the handwheel uses
      the .1, .01, .001 and .0001 inch increments). You can also adjust feed rate using the FEED RATE
      OVERRIDE buttons, which allow you to increase or decrease feed rate in 10% increments, up to
      200% or using the HANDLE CONTROL FEED RATE or HANDLE CONTROL SPINDLE keys to adjust
      the programmed feed or speed 1% up or down with every increment of the Handle.

    Ø Jog Keys - You can also select an axis for jogging by entering the axis letter on the input line and
      then pressing the HANDLE JOG button. This works for the X, Y, Z, and A axes as well as the B, C,
      U, and V auxiliary axes.


Productivity Inc Haas CNC Mill Operator Manual                                                               Page 43
PROGRAMMING

    Ø Program Format at the Beginning and End - Programs written on a PC and sent to the
      control from a floppy disk or through the RS-232 port must start and end with a % sign, on a line
      by itself. The second line in a program received via floppy or RS-232 (which will be the first line
      the operator sees) must be Onnnnn, a six-character program number that starts with the letter
      O followed by five digits. When you create a program on the Haas control the percent (%) signs
      will be entered automatically, though you won t see them displayed.

    Ø Program Format with M06 - It is not necessary to turn off the coolant (M09), stop the spindle
      (M05), or move the Z axis home (G28) prior to a tool change. The control will do these tasks for
      you during a tool change M06 command. However, you may decide to program these
      commands anyway for convenience and timely execution of a tool change sequence. If you are
      using Single Block to step through a program you will be able to see the commands when you
      stop on that line.

    Ø Tapping with G84 or G74 - When tapping, you don t need to start the spindle with an M03 or
      M04 command. The control starts the spindle for you automatically with each G84 or G74 cycle,
      and it will in fact be faster if you don t turn on the spindle with an M03 or M04. The control
      stops the spindle and turns it back on again in the G84 or G74 tapping cycle to get the feed and
      speed in sync. The operator just needs to define the spindle speed.

    Ø Quick Reverse Out of a G84 Rigid Tapping Cycle - This feature for rigid tapping has the
      spindle back out faster than it went into a tapped hole. The way to specify this is with a J code
      on the G84 command line. J2 retracts twice as fast as the entry motion; J3 retracts three times
      as fast, and so on, up to J9. A J code of zero will be ignored. If a J code less than 0 or greater than
      9 is specified, Alarm 306 - "INVALID I, J, K or Q" - is generated. The J code is not modal and must
      be specified in each block where this effect is wanted. The J value should not contain a decimal
      point. (Any Mill Control Ver. 10.13 and above.)

    Ø M19 (Orient Spindle) with a P Value - This feature works on any vector drive mill. Previously,
      the M19 command would simply orient the spindle to only one position ó that suitable for a tool
      change. Now, a P value can be added that will cause the spindle to be oriented to a particular
      position (in degrees). If a whole number is used for the P value, no decimal point is needed. For
      example, M19 P270 will orient the spindle to 270 degrees. Note that P270.001 (or any other
      fraction) will be truncated to P270, and P365 will be treated as P5. (Any Mill Control Ver. 9.49
      and above. Any Lathe Control Ver. 2.21 and above.)

    Ø M19 (Orient Spindle) with a Fractional R Value - This feature works on any vector drive
      mill. An M19 R123.4567 command will position the spindle to the angle specified by the R
      fractional value; up to 4 decimal places will be recognized. This R command now needs a
      decimal point: if you program M19 R60, the spindle will orient to 0.060 of a degree. Previously, R
      commands were not used for this purpose and only integer P values could be used. (Any Mill
      Control Ver. 9.49 and above; any Lathe Control Ver. 2.29 and above.)

    Ø Duplicating a Program in LIST PROG - In the LIST PROG mode, you can duplicate an existing
      program by cursor-selecting the program number you wish to duplicate, typing in a new
      program number (Onnnnn), and then pressing F1. You can also go to the Advanced Editor menu
      to duplicate a program, using the PROGRAM menu and the DUPLICATE ACTIVE PROGRAM item.


Productivity Inc Haas CNC Mill Operator Manual                                                                  Page 44
Programming

Typical Haas G-Codes:

The definition of G code is typically referred to as a Preparatory Function . They establish
the mode of operation that the machine needs to be in to accomplish what the programmer
intends. Imagine a rotary switch like that on an older TV; we are just turning the switch to
different modes .

Let s discuss the G Codes that are most commonly used during the setup of a Haas VMC

         G00      Rapid traverse motion; Used for positioning and during non-cutting moves.
                  NOTE: Machine rapids can be up to 1400+ inches per minute (IPM).

         G01      Linear interpolation motion; used for actual machining and metal removal. Governed by
                  programmed feed rate

         G02      Circular interpolation Clockwise

         G03      Circular interpolation Counterclockwise

         G28      Machine home (Rapid traverse)

         G40      Cutter compensation cancel

         G41      Cutter compensation to left of path.

         G42      Cutter compensation to right of path.

         G43      Read tool length compensation.

         G54      Work coordinate #1 (Part zero)

         G80      Drilling Cycle Cancel

         G81      Drill canned cycle

         G82      Spot drill canned cycle.

         G83      Peck drill canned cycle.

         G84      Tapping canned cycle.

         G90      Absolute Positioning

         G91      Incremental Positioning

         G98      Make all drilling X&Y moves at the Initial Plane (H Line Height)

         G99      Make all drilling X&Y moves at the Rapid Plane (R Value in Canned Cycle)


Productivity Inc Haas CNC Mill Operator Manual                                                            Page 45
Typical Haas M Codes:

M Codes are used by the programmer to turn on and off certain functions of the machine.
Think of M codes as codes that turn on and off different systems of the machine.

         M00      Program Stop. The machine will wait for the operator to push Cycle Start

         M01      Optional program stop. The machine will stop if the OPT STOP mode is turned on.

         M03      Start spindle forward (Clockwise). Must have a spindle speed

         M04      Start spindle reverse (Counterclockwise). Must have a spindle speed

         M05      Spindle stop

         M06      Tool change command. Must have a T value on the same line (Tool Number)

         M08      Coolant ON command

         M09      Coolant OFF command

         M88     High Pressure Coolant On (Typically Thru Spindle Coolant)

         M89     High Pressure Coolant Off

         M30      Program end and rewind to beginning of program

         M97      Program Jump Jumps to a specific line number (M97 P100, Jump to Line N100)

         M98      Subprogram call Jump to another program

         M99      Subprogram return, or loop. Used to tell the machine to go back from a Sub Prog.

NOTE: Only one "M" code can be used per line. The "M" code will be the last item of code to
be performed, regardless of where it is located in the line.


Productivity Inc Haas CNC Mill Operator Manual                                                       Page 46
Haas CNC Mill Operator Manual

Weitere ähnliche Inhalte

Was ist angesagt?

NX training Report
NX training ReportNX training Report
NX training ReportSTAY CURIOUS
 
Crown wp2300 series pallet truck service repair manual
Crown wp2300 series pallet truck service repair manualCrown wp2300 series pallet truck service repair manual
Crown wp2300 series pallet truck service repair manualcdfzxs
 
ASME-Y14.5-2018-Dimensioning-and-Tolerancing - Copy.doc
ASME-Y14.5-2018-Dimensioning-and-Tolerancing - Copy.docASME-Y14.5-2018-Dimensioning-and-Tolerancing - Copy.doc
ASME-Y14.5-2018-Dimensioning-and-Tolerancing - Copy.docvishwanathvh
 
Design and Fabrication of Shaft Drive for two Wheelers
Design and Fabrication of Shaft Drive for two WheelersDesign and Fabrication of Shaft Drive for two Wheelers
Design and Fabrication of Shaft Drive for two WheelersIJMERJOURNAL
 
Mühendisler İçin Pratik Ekonomi Bilgileri
Mühendisler İçin Pratik Ekonomi BilgileriMühendisler İçin Pratik Ekonomi Bilgileri
Mühendisler İçin Pratik Ekonomi BilgileriYusuf Yıldız
 
ANSYS Mechanical Tutorials.pdf
ANSYS Mechanical Tutorials.pdfANSYS Mechanical Tutorials.pdf
ANSYS Mechanical Tutorials.pdfClaudia Acosta
 
internship report and design 5th year mechanical enginering
internship report and design 5th year mechanical engineringinternship report and design 5th year mechanical enginering
internship report and design 5th year mechanical engineringshushay hailu
 
JCB VIBROMAX 265 TANDEM ROLLER Service Repair Manual
JCB VIBROMAX 265 TANDEM ROLLER Service Repair ManualJCB VIBROMAX 265 TANDEM ROLLER Service Repair Manual
JCB VIBROMAX 265 TANDEM ROLLER Service Repair Manualuekmmmd
 
Bài thuyết minh hoàn chỉnh môn thiết kế ngược
Bài thuyết minh hoàn chỉnh môn thiết kế ngượcBài thuyết minh hoàn chỉnh môn thiết kế ngược
Bài thuyết minh hoàn chỉnh môn thiết kế ngượcAN VIỆT SEO
 
KOMATSU WA270PT-3 WHEEL LOADER Service Repair Manual SN:WA270H30051 and up
KOMATSU WA270PT-3 WHEEL LOADER Service Repair Manual SN:WA270H30051 and upKOMATSU WA270PT-3 WHEEL LOADER Service Repair Manual SN:WA270H30051 and up
KOMATSU WA270PT-3 WHEEL LOADER Service Repair Manual SN:WA270H30051 and upjknsmekmd
 
Yamaha outboard f60 ceht service repair manual sn1000001
Yamaha outboard f60 ceht service repair manual sn1000001Yamaha outboard f60 ceht service repair manual sn1000001
Yamaha outboard f60 ceht service repair manual sn1000001明 浩
 
Mechanical Design Portfolio
Mechanical Design PortfolioMechanical Design Portfolio
Mechanical Design PortfolioRajiv Ranjan
 
Mechanical design engineer portfolio (1.2 mb)
Mechanical design engineer portfolio (1.2 mb)Mechanical design engineer portfolio (1.2 mb)
Mechanical design engineer portfolio (1.2 mb)Nagaraja D Shenoy
 
Introduction to CAD CAM in industries
Introduction to CAD CAM in industriesIntroduction to CAD CAM in industries
Introduction to CAD CAM in industriesAshish Khudaiwala
 
MECHANICAL DESIGN PORTFOLIO
MECHANICAL DESIGN PORTFOLIOMECHANICAL DESIGN PORTFOLIO
MECHANICAL DESIGN PORTFOLIOsachin shetty
 
124817348 ejercicios-solidworks-pdf
124817348 ejercicios-solidworks-pdf124817348 ejercicios-solidworks-pdf
124817348 ejercicios-solidworks-pdfTia Setiawan
 
Sew drive calculation
Sew drive calculationSew drive calculation
Sew drive calculationMartin Doss
 
Introduction to CAD/CAE/CAM
Introduction to CAD/CAE/CAMIntroduction to CAD/CAE/CAM
Introduction to CAD/CAE/CAMpavanRaikar3
 

Was ist angesagt? (20)

NX training Report
NX training ReportNX training Report
NX training Report
 
Crown wp2300 series pallet truck service repair manual
Crown wp2300 series pallet truck service repair manualCrown wp2300 series pallet truck service repair manual
Crown wp2300 series pallet truck service repair manual
 
ASME-Y14.5-2018-Dimensioning-and-Tolerancing - Copy.doc
ASME-Y14.5-2018-Dimensioning-and-Tolerancing - Copy.docASME-Y14.5-2018-Dimensioning-and-Tolerancing - Copy.doc
ASME-Y14.5-2018-Dimensioning-and-Tolerancing - Copy.doc
 
Design and Fabrication of Shaft Drive for two Wheelers
Design and Fabrication of Shaft Drive for two WheelersDesign and Fabrication of Shaft Drive for two Wheelers
Design and Fabrication of Shaft Drive for two Wheelers
 
Mühendisler İçin Pratik Ekonomi Bilgileri
Mühendisler İçin Pratik Ekonomi BilgileriMühendisler İçin Pratik Ekonomi Bilgileri
Mühendisler İçin Pratik Ekonomi Bilgileri
 
Brendon portfolio
Brendon portfolioBrendon portfolio
Brendon portfolio
 
ANSYS Mechanical Tutorials.pdf
ANSYS Mechanical Tutorials.pdfANSYS Mechanical Tutorials.pdf
ANSYS Mechanical Tutorials.pdf
 
CAD CAE CAM Lecture
CAD CAE CAM LectureCAD CAE CAM Lecture
CAD CAE CAM Lecture
 
internship report and design 5th year mechanical enginering
internship report and design 5th year mechanical engineringinternship report and design 5th year mechanical enginering
internship report and design 5th year mechanical enginering
 
JCB VIBROMAX 265 TANDEM ROLLER Service Repair Manual
JCB VIBROMAX 265 TANDEM ROLLER Service Repair ManualJCB VIBROMAX 265 TANDEM ROLLER Service Repair Manual
JCB VIBROMAX 265 TANDEM ROLLER Service Repair Manual
 
Bài thuyết minh hoàn chỉnh môn thiết kế ngược
Bài thuyết minh hoàn chỉnh môn thiết kế ngượcBài thuyết minh hoàn chỉnh môn thiết kế ngược
Bài thuyết minh hoàn chỉnh môn thiết kế ngược
 
KOMATSU WA270PT-3 WHEEL LOADER Service Repair Manual SN:WA270H30051 and up
KOMATSU WA270PT-3 WHEEL LOADER Service Repair Manual SN:WA270H30051 and upKOMATSU WA270PT-3 WHEEL LOADER Service Repair Manual SN:WA270H30051 and up
KOMATSU WA270PT-3 WHEEL LOADER Service Repair Manual SN:WA270H30051 and up
 
Yamaha outboard f60 ceht service repair manual sn1000001
Yamaha outboard f60 ceht service repair manual sn1000001Yamaha outboard f60 ceht service repair manual sn1000001
Yamaha outboard f60 ceht service repair manual sn1000001
 
Mechanical Design Portfolio
Mechanical Design PortfolioMechanical Design Portfolio
Mechanical Design Portfolio
 
Mechanical design engineer portfolio (1.2 mb)
Mechanical design engineer portfolio (1.2 mb)Mechanical design engineer portfolio (1.2 mb)
Mechanical design engineer portfolio (1.2 mb)
 
Introduction to CAD CAM in industries
Introduction to CAD CAM in industriesIntroduction to CAD CAM in industries
Introduction to CAD CAM in industries
 
MECHANICAL DESIGN PORTFOLIO
MECHANICAL DESIGN PORTFOLIOMECHANICAL DESIGN PORTFOLIO
MECHANICAL DESIGN PORTFOLIO
 
124817348 ejercicios-solidworks-pdf
124817348 ejercicios-solidworks-pdf124817348 ejercicios-solidworks-pdf
124817348 ejercicios-solidworks-pdf
 
Sew drive calculation
Sew drive calculationSew drive calculation
Sew drive calculation
 
Introduction to CAD/CAE/CAM
Introduction to CAD/CAE/CAMIntroduction to CAD/CAE/CAM
Introduction to CAD/CAE/CAM
 

Andere mochten auch

Haas mill programming workbook
Haas mill programming workbook Haas mill programming workbook
Haas mill programming workbook Mihaela Lupoian
 
CNC PROGRAMMING FOR BEGAINER Part 1
CNC PROGRAMMING FOR BEGAINER Part 1CNC PROGRAMMING FOR BEGAINER Part 1
CNC PROGRAMMING FOR BEGAINER Part 1Parveen Kumar
 
CNC Machines
CNC MachinesCNC Machines
CNC Machinespratik207
 
New translat revolution
New translat revolutionNew translat revolution
New translat revolutionHu
 
The New Partnership Concept for Inspiring CNC Education
The New Partnership Concept for Inspiring CNC EducationThe New Partnership Concept for Inspiring CNC Education
The New Partnership Concept for Inspiring CNC EducationBert Maes
 
Haas centre prelucrare scolarizare romana
Haas centre prelucrare scolarizare romanaHaas centre prelucrare scolarizare romana
Haas centre prelucrare scolarizare romanaClimenteAlin
 
Processos de Automação Industrial - Encoders e Controladores
Processos de Automação Industrial - Encoders e ControladoresProcessos de Automação Industrial - Encoders e Controladores
Processos de Automação Industrial - Encoders e Controladoresprocessosindustriais
 
Comando Numérico Computadorizado CNC
Comando Numérico Computadorizado CNCComando Numérico Computadorizado CNC
Comando Numérico Computadorizado CNCelliando dias
 
Part program Example
Part program ExamplePart program Example
Part program ExampleAmir Dawa
 
Exemplos de programas em cnc (1)
Exemplos de programas em cnc (1)Exemplos de programas em cnc (1)
Exemplos de programas em cnc (1)Dorival Leandro
 
Fabricação de uma peça real utilizando CNC e o código G
Fabricação de uma peça real utilizando CNC e o código GFabricação de uma peça real utilizando CNC e o código G
Fabricação de uma peça real utilizando CNC e o código GRafael Lial
 
Manual de programacion de control numérico
Manual de programacion de control numérico Manual de programacion de control numérico
Manual de programacion de control numérico Javier Sanz Pérez
 

Andere mochten auch (20)

Haas mill programming workbook
Haas mill programming workbook Haas mill programming workbook
Haas mill programming workbook
 
Guia cnc hitec
Guia cnc hitecGuia cnc hitec
Guia cnc hitec
 
CNC PROGRAMMING FOR BEGAINER Part 1
CNC PROGRAMMING FOR BEGAINER Part 1CNC PROGRAMMING FOR BEGAINER Part 1
CNC PROGRAMMING FOR BEGAINER Part 1
 
CNC Machines
CNC MachinesCNC Machines
CNC Machines
 
New translat revolution
New translat revolutionNew translat revolution
New translat revolution
 
The New Partnership Concept for Inspiring CNC Education
The New Partnership Concept for Inspiring CNC EducationThe New Partnership Concept for Inspiring CNC Education
The New Partnership Concept for Inspiring CNC Education
 
Rotativa contra ponto haas - manual
Rotativa contra ponto haas - manualRotativa contra ponto haas - manual
Rotativa contra ponto haas - manual
 
Haas centre prelucrare scolarizare romana
Haas centre prelucrare scolarizare romanaHaas centre prelucrare scolarizare romana
Haas centre prelucrare scolarizare romana
 
Processos de Automação Industrial - Encoders e Controladores
Processos de Automação Industrial - Encoders e ControladoresProcessos de Automação Industrial - Encoders e Controladores
Processos de Automação Industrial - Encoders e Controladores
 
Comando Numérico Computadorizado CNC
Comando Numérico Computadorizado CNCComando Numérico Computadorizado CNC
Comando Numérico Computadorizado CNC
 
Part program Example
Part program ExamplePart program Example
Part program Example
 
Exemplos de programas em cnc (1)
Exemplos de programas em cnc (1)Exemplos de programas em cnc (1)
Exemplos de programas em cnc (1)
 
Fabricação de uma peça real utilizando CNC e o código G
Fabricação de uma peça real utilizando CNC e o código GFabricação de uma peça real utilizando CNC e o código G
Fabricação de uma peça real utilizando CNC e o código G
 
Nada que ver solo uso de cnc}
Nada que ver solo uso de cnc}Nada que ver solo uso de cnc}
Nada que ver solo uso de cnc}
 
5 g-code
5   g-code5   g-code
5 g-code
 
Introdução a CNC
Introdução a CNCIntrodução a CNC
Introdução a CNC
 
Programación CNC
Programación CNCProgramación CNC
Programación CNC
 
CNC MILLING
CNC MILLINGCNC MILLING
CNC MILLING
 
Máquinas cnc
Máquinas cncMáquinas cnc
Máquinas cnc
 
Manual de programacion de control numérico
Manual de programacion de control numérico Manual de programacion de control numérico
Manual de programacion de control numérico
 

Ähnlich wie Haas CNC Mill Operator Manual

Haas lathe programing
Haas lathe programingHaas lathe programing
Haas lathe programingyadam205
 
Haas lathe programming manual
Haas lathe programming manualHaas lathe programming manual
Haas lathe programming manualVeer Singh
 
ITSM-Process-Description doc.docx
ITSM-Process-Description doc.docxITSM-Process-Description doc.docx
ITSM-Process-Description doc.docxAsad Abbas
 
Installation Guide for ESM 6.5c
Installation Guide for ESM 6.5c	Installation Guide for ESM 6.5c
Installation Guide for ESM 6.5c Protect724manoj
 
Deutz fahr agroplus 70 tractor service repair manual
Deutz fahr agroplus 70 tractor service repair manualDeutz fahr agroplus 70 tractor service repair manual
Deutz fahr agroplus 70 tractor service repair manualfjjsekfksem
 
Deutz fahr agroplus 80 tractor service repair manual
Deutz fahr agroplus 80 tractor service repair manualDeutz fahr agroplus 80 tractor service repair manual
Deutz fahr agroplus 80 tractor service repair manualekfmsmemqa
 
Deutz fahr agroplus 80 tractor service repair manual
Deutz fahr agroplus 80 tractor service repair manualDeutz fahr agroplus 80 tractor service repair manual
Deutz fahr agroplus 80 tractor service repair manualfjjskefkksem
 
Deutz fahr agroplus 60 tractor service repair manual
Deutz fahr agroplus 60 tractor service repair manualDeutz fahr agroplus 60 tractor service repair manual
Deutz fahr agroplus 60 tractor service repair manualfusjezsfkskefmsme
 
Deutz fahr agroplus 60 tractor service repair manual
Deutz fahr agroplus 60 tractor service repair manualDeutz fahr agroplus 60 tractor service repair manual
Deutz fahr agroplus 60 tractor service repair manualfjjskefkskem
 
Deutz fahr agroplus 70 tractor service repair manual
Deutz fahr agroplus 70 tractor service repair manualDeutz fahr agroplus 70 tractor service repair manual
Deutz fahr agroplus 70 tractor service repair manualfujsejfkskemm
 
TechBook: IMS on z/OS Using EMC Symmetrix Storage Systems
TechBook: IMS on z/OS Using EMC Symmetrix Storage SystemsTechBook: IMS on z/OS Using EMC Symmetrix Storage Systems
TechBook: IMS on z/OS Using EMC Symmetrix Storage SystemsEMC
 
Sap s4 hana 1709 op sap api-master guide
Sap s4 hana 1709 op sap api-master guideSap s4 hana 1709 op sap api-master guide
Sap s4 hana 1709 op sap api-master guidemutia_arum
 
software-eng.pdf
software-eng.pdfsoftware-eng.pdf
software-eng.pdffellahi1
 
Parallels Business Automation - Standard Provider Guide
Parallels Business Automation - Standard Provider GuideParallels Business Automation - Standard Provider Guide
Parallels Business Automation - Standard Provider Guidewebhostingguy
 
Atv32 programming manual
Atv32 programming manualAtv32 programming manual
Atv32 programming manualToàn Huỳnh
 
Process Equipment Troubleshooting
Process Equipment Troubleshooting Process Equipment Troubleshooting
Process Equipment Troubleshooting Karl Kolmetz
 

Ähnlich wie Haas CNC Mill Operator Manual (20)

Haas lathe programing
Haas lathe programingHaas lathe programing
Haas lathe programing
 
Haas lathe programming manual
Haas lathe programming manualHaas lathe programming manual
Haas lathe programming manual
 
ITSM-Process-Description doc.docx
ITSM-Process-Description doc.docxITSM-Process-Description doc.docx
ITSM-Process-Description doc.docx
 
Installation Guide for ESM 6.5c
Installation Guide for ESM 6.5c	Installation Guide for ESM 6.5c
Installation Guide for ESM 6.5c
 
Manual 4 asse
Manual 4 asseManual 4 asse
Manual 4 asse
 
Deutz fahr agroplus 70 tractor service repair manual
Deutz fahr agroplus 70 tractor service repair manualDeutz fahr agroplus 70 tractor service repair manual
Deutz fahr agroplus 70 tractor service repair manual
 
Deutz fahr agroplus 80 tractor service repair manual
Deutz fahr agroplus 80 tractor service repair manualDeutz fahr agroplus 80 tractor service repair manual
Deutz fahr agroplus 80 tractor service repair manual
 
Deutz fahr agroplus 80 tractor service repair manual
Deutz fahr agroplus 80 tractor service repair manualDeutz fahr agroplus 80 tractor service repair manual
Deutz fahr agroplus 80 tractor service repair manual
 
Deutz fahr agroplus 60 tractor service repair manual
Deutz fahr agroplus 60 tractor service repair manualDeutz fahr agroplus 60 tractor service repair manual
Deutz fahr agroplus 60 tractor service repair manual
 
Deutz fahr agroplus 60 tractor service repair manual
Deutz fahr agroplus 60 tractor service repair manualDeutz fahr agroplus 60 tractor service repair manual
Deutz fahr agroplus 60 tractor service repair manual
 
Deutz fahr agroplus 70 tractor service repair manual
Deutz fahr agroplus 70 tractor service repair manualDeutz fahr agroplus 70 tractor service repair manual
Deutz fahr agroplus 70 tractor service repair manual
 
Xi31 sp3 bip_admin_en
Xi31 sp3 bip_admin_enXi31 sp3 bip_admin_en
Xi31 sp3 bip_admin_en
 
TechBook: IMS on z/OS Using EMC Symmetrix Storage Systems
TechBook: IMS on z/OS Using EMC Symmetrix Storage SystemsTechBook: IMS on z/OS Using EMC Symmetrix Storage Systems
TechBook: IMS on z/OS Using EMC Symmetrix Storage Systems
 
Sap s4 hana 1709 op sap api-master guide
Sap s4 hana 1709 op sap api-master guideSap s4 hana 1709 op sap api-master guide
Sap s4 hana 1709 op sap api-master guide
 
SR882-Manual-Ultisolar-New-Energy-Co-Ltd-Solar-Working-Station-Woolf-Zhang-Ul...
SR882-Manual-Ultisolar-New-Energy-Co-Ltd-Solar-Working-Station-Woolf-Zhang-Ul...SR882-Manual-Ultisolar-New-Energy-Co-Ltd-Solar-Working-Station-Woolf-Zhang-Ul...
SR882-Manual-Ultisolar-New-Energy-Co-Ltd-Solar-Working-Station-Woolf-Zhang-Ul...
 
software-eng.pdf
software-eng.pdfsoftware-eng.pdf
software-eng.pdf
 
Parallels Business Automation - Standard Provider Guide
Parallels Business Automation - Standard Provider GuideParallels Business Automation - Standard Provider Guide
Parallels Business Automation - Standard Provider Guide
 
Atv32 programming manual
Atv32 programming manualAtv32 programming manual
Atv32 programming manual
 
Atv32 programming manual
Atv32 programming manualAtv32 programming manual
Atv32 programming manual
 
Process Equipment Troubleshooting
Process Equipment Troubleshooting Process Equipment Troubleshooting
Process Equipment Troubleshooting
 

Kürzlich hochgeladen

MULTIDISCIPLINRY NATURE OF THE ENVIRONMENTAL STUDIES.pptx
MULTIDISCIPLINRY NATURE OF THE ENVIRONMENTAL STUDIES.pptxMULTIDISCIPLINRY NATURE OF THE ENVIRONMENTAL STUDIES.pptx
MULTIDISCIPLINRY NATURE OF THE ENVIRONMENTAL STUDIES.pptxAnupkumar Sharma
 
ENGLISH6-Q4-W3.pptxqurter our high choom
ENGLISH6-Q4-W3.pptxqurter our high choomENGLISH6-Q4-W3.pptxqurter our high choom
ENGLISH6-Q4-W3.pptxqurter our high choomnelietumpap1
 
What is Model Inheritance in Odoo 17 ERP
What is Model Inheritance in Odoo 17 ERPWhat is Model Inheritance in Odoo 17 ERP
What is Model Inheritance in Odoo 17 ERPCeline George
 
Incoming and Outgoing Shipments in 3 STEPS Using Odoo 17
Incoming and Outgoing Shipments in 3 STEPS Using Odoo 17Incoming and Outgoing Shipments in 3 STEPS Using Odoo 17
Incoming and Outgoing Shipments in 3 STEPS Using Odoo 17Celine George
 
FILIPINO PSYCHology sikolohiyang pilipino
FILIPINO PSYCHology sikolohiyang pilipinoFILIPINO PSYCHology sikolohiyang pilipino
FILIPINO PSYCHology sikolohiyang pilipinojohnmickonozaleda
 
ACC 2024 Chronicles. Cardiology. Exam.pdf
ACC 2024 Chronicles. Cardiology. Exam.pdfACC 2024 Chronicles. Cardiology. Exam.pdf
ACC 2024 Chronicles. Cardiology. Exam.pdfSpandanaRallapalli
 
AMERICAN LANGUAGE HUB_Level2_Student'sBook_Answerkey.pdf
AMERICAN LANGUAGE HUB_Level2_Student'sBook_Answerkey.pdfAMERICAN LANGUAGE HUB_Level2_Student'sBook_Answerkey.pdf
AMERICAN LANGUAGE HUB_Level2_Student'sBook_Answerkey.pdfphamnguyenenglishnb
 
USPS® Forced Meter Migration - How to Know if Your Postage Meter Will Soon be...
USPS® Forced Meter Migration - How to Know if Your Postage Meter Will Soon be...USPS® Forced Meter Migration - How to Know if Your Postage Meter Will Soon be...
USPS® Forced Meter Migration - How to Know if Your Postage Meter Will Soon be...Postal Advocate Inc.
 
Choosing the Right CBSE School A Comprehensive Guide for Parents
Choosing the Right CBSE School A Comprehensive Guide for ParentsChoosing the Right CBSE School A Comprehensive Guide for Parents
Choosing the Right CBSE School A Comprehensive Guide for Parentsnavabharathschool99
 
Proudly South Africa powerpoint Thorisha.pptx
Proudly South Africa powerpoint Thorisha.pptxProudly South Africa powerpoint Thorisha.pptx
Proudly South Africa powerpoint Thorisha.pptxthorishapillay1
 
Transaction Management in Database Management System
Transaction Management in Database Management SystemTransaction Management in Database Management System
Transaction Management in Database Management SystemChristalin Nelson
 
ECONOMIC CONTEXT - PAPER 1 Q3: NEWSPAPERS.pptx
ECONOMIC CONTEXT - PAPER 1 Q3: NEWSPAPERS.pptxECONOMIC CONTEXT - PAPER 1 Q3: NEWSPAPERS.pptx
ECONOMIC CONTEXT - PAPER 1 Q3: NEWSPAPERS.pptxiammrhaywood
 
How to Add Barcode on PDF Report in Odoo 17
How to Add Barcode on PDF Report in Odoo 17How to Add Barcode on PDF Report in Odoo 17
How to Add Barcode on PDF Report in Odoo 17Celine George
 
Global Lehigh Strategic Initiatives (without descriptions)
Global Lehigh Strategic Initiatives (without descriptions)Global Lehigh Strategic Initiatives (without descriptions)
Global Lehigh Strategic Initiatives (without descriptions)cama23
 
Visit to a blind student's school🧑‍🦯🧑‍🦯(community medicine)
Visit to a blind student's school🧑‍🦯🧑‍🦯(community medicine)Visit to a blind student's school🧑‍🦯🧑‍🦯(community medicine)
Visit to a blind student's school🧑‍🦯🧑‍🦯(community medicine)lakshayb543
 
Like-prefer-love -hate+verb+ing & silent letters & citizenship text.pdf
Like-prefer-love -hate+verb+ing & silent letters & citizenship text.pdfLike-prefer-love -hate+verb+ing & silent letters & citizenship text.pdf
Like-prefer-love -hate+verb+ing & silent letters & citizenship text.pdfMr Bounab Samir
 
INTRODUCTION TO CATHOLIC CHRISTOLOGY.pptx
INTRODUCTION TO CATHOLIC CHRISTOLOGY.pptxINTRODUCTION TO CATHOLIC CHRISTOLOGY.pptx
INTRODUCTION TO CATHOLIC CHRISTOLOGY.pptxHumphrey A Beña
 

Kürzlich hochgeladen (20)

MULTIDISCIPLINRY NATURE OF THE ENVIRONMENTAL STUDIES.pptx
MULTIDISCIPLINRY NATURE OF THE ENVIRONMENTAL STUDIES.pptxMULTIDISCIPLINRY NATURE OF THE ENVIRONMENTAL STUDIES.pptx
MULTIDISCIPLINRY NATURE OF THE ENVIRONMENTAL STUDIES.pptx
 
ENGLISH6-Q4-W3.pptxqurter our high choom
ENGLISH6-Q4-W3.pptxqurter our high choomENGLISH6-Q4-W3.pptxqurter our high choom
ENGLISH6-Q4-W3.pptxqurter our high choom
 
What is Model Inheritance in Odoo 17 ERP
What is Model Inheritance in Odoo 17 ERPWhat is Model Inheritance in Odoo 17 ERP
What is Model Inheritance in Odoo 17 ERP
 
YOUVE GOT EMAIL_FINALS_EL_DORADO_2024.pptx
YOUVE GOT EMAIL_FINALS_EL_DORADO_2024.pptxYOUVE GOT EMAIL_FINALS_EL_DORADO_2024.pptx
YOUVE GOT EMAIL_FINALS_EL_DORADO_2024.pptx
 
Incoming and Outgoing Shipments in 3 STEPS Using Odoo 17
Incoming and Outgoing Shipments in 3 STEPS Using Odoo 17Incoming and Outgoing Shipments in 3 STEPS Using Odoo 17
Incoming and Outgoing Shipments in 3 STEPS Using Odoo 17
 
FILIPINO PSYCHology sikolohiyang pilipino
FILIPINO PSYCHology sikolohiyang pilipinoFILIPINO PSYCHology sikolohiyang pilipino
FILIPINO PSYCHology sikolohiyang pilipino
 
Model Call Girl in Tilak Nagar Delhi reach out to us at 🔝9953056974🔝
Model Call Girl in Tilak Nagar Delhi reach out to us at 🔝9953056974🔝Model Call Girl in Tilak Nagar Delhi reach out to us at 🔝9953056974🔝
Model Call Girl in Tilak Nagar Delhi reach out to us at 🔝9953056974🔝
 
ACC 2024 Chronicles. Cardiology. Exam.pdf
ACC 2024 Chronicles. Cardiology. Exam.pdfACC 2024 Chronicles. Cardiology. Exam.pdf
ACC 2024 Chronicles. Cardiology. Exam.pdf
 
AMERICAN LANGUAGE HUB_Level2_Student'sBook_Answerkey.pdf
AMERICAN LANGUAGE HUB_Level2_Student'sBook_Answerkey.pdfAMERICAN LANGUAGE HUB_Level2_Student'sBook_Answerkey.pdf
AMERICAN LANGUAGE HUB_Level2_Student'sBook_Answerkey.pdf
 
Raw materials used in Herbal Cosmetics.pptx
Raw materials used in Herbal Cosmetics.pptxRaw materials used in Herbal Cosmetics.pptx
Raw materials used in Herbal Cosmetics.pptx
 
USPS® Forced Meter Migration - How to Know if Your Postage Meter Will Soon be...
USPS® Forced Meter Migration - How to Know if Your Postage Meter Will Soon be...USPS® Forced Meter Migration - How to Know if Your Postage Meter Will Soon be...
USPS® Forced Meter Migration - How to Know if Your Postage Meter Will Soon be...
 
Choosing the Right CBSE School A Comprehensive Guide for Parents
Choosing the Right CBSE School A Comprehensive Guide for ParentsChoosing the Right CBSE School A Comprehensive Guide for Parents
Choosing the Right CBSE School A Comprehensive Guide for Parents
 
Proudly South Africa powerpoint Thorisha.pptx
Proudly South Africa powerpoint Thorisha.pptxProudly South Africa powerpoint Thorisha.pptx
Proudly South Africa powerpoint Thorisha.pptx
 
Transaction Management in Database Management System
Transaction Management in Database Management SystemTransaction Management in Database Management System
Transaction Management in Database Management System
 
ECONOMIC CONTEXT - PAPER 1 Q3: NEWSPAPERS.pptx
ECONOMIC CONTEXT - PAPER 1 Q3: NEWSPAPERS.pptxECONOMIC CONTEXT - PAPER 1 Q3: NEWSPAPERS.pptx
ECONOMIC CONTEXT - PAPER 1 Q3: NEWSPAPERS.pptx
 
How to Add Barcode on PDF Report in Odoo 17
How to Add Barcode on PDF Report in Odoo 17How to Add Barcode on PDF Report in Odoo 17
How to Add Barcode on PDF Report in Odoo 17
 
Global Lehigh Strategic Initiatives (without descriptions)
Global Lehigh Strategic Initiatives (without descriptions)Global Lehigh Strategic Initiatives (without descriptions)
Global Lehigh Strategic Initiatives (without descriptions)
 
Visit to a blind student's school🧑‍🦯🧑‍🦯(community medicine)
Visit to a blind student's school🧑‍🦯🧑‍🦯(community medicine)Visit to a blind student's school🧑‍🦯🧑‍🦯(community medicine)
Visit to a blind student's school🧑‍🦯🧑‍🦯(community medicine)
 
Like-prefer-love -hate+verb+ing & silent letters & citizenship text.pdf
Like-prefer-love -hate+verb+ing & silent letters & citizenship text.pdfLike-prefer-love -hate+verb+ing & silent letters & citizenship text.pdf
Like-prefer-love -hate+verb+ing & silent letters & citizenship text.pdf
 
INTRODUCTION TO CATHOLIC CHRISTOLOGY.pptx
INTRODUCTION TO CATHOLIC CHRISTOLOGY.pptxINTRODUCTION TO CATHOLIC CHRISTOLOGY.pptx
INTRODUCTION TO CATHOLIC CHRISTOLOGY.pptx
 

Haas CNC Mill Operator Manual

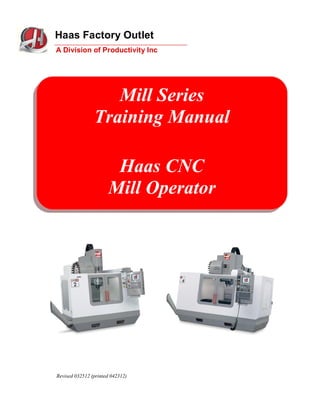
  • 1. Haas Factory Outlet A Division of Productivity Inc Mill Series Training Manual Haas CNC Mill Operator Revised 032512 (printed 042312)
  • 2. This Manual is the Property of Productivity Inc The document may not be reproduced without the express written permission of Productivity Inc. The content must not be altered, nor may the Productivity Inc name be removed from the materials. This material is to be used as a guide to operation of the machine tool. The Operator is responsible for following Safety Procedures as outlined by their instructor or manufacturer s specifications. To obtain permission, please contact trainingmn@productivity.com.
  • 3. Haas CNC Mill Operator Manual Table of Contents INTRODUCTION TO BASIC VERTICAL MILL OPERATION ........................................................................................................5 THE CARTESIAN COORDINATE SYSTEM ................................................................................................................................7 ABSOLUTE AND INCREMENTAL POSITIONING ......................................................................................................................8 ABSOLUTE AND INCREMENTAL EXERCISE ..................................................................................................................................... 9 VERTICAL MACHINING CENTER TRAVELS ........................................................................................................................... 12 THE MACHINE COORDINATE SYSTEM - MACHINE HOME POSITION ................................................................................... 14 WORK COORDINATE SYSTEM ................................................................................................................................................. 15 TOOL LENGTH OFFSET ........................................................................................................................................................ 18 THE HAAS CNC CONTROL ................................................................................................................................................... 19 CONTROL DISPLAY ............................................................................................................................................................. 20 KEYBOARD INTRODUCTION ............................................................................................................................................... 21 1 FUNCTION KEYS ............................................................................................................................................................ 22 2 JOG KEYS .................................................................................................................................................................... 22 3 OVERRIDE KEYS ............................................................................................................................................................ 23 4 DISPLAY KEYS ............................................................................................................................................................... 24 5 CURSOR KEYS ............................................................................................................................................................... 28 6 AND 7 ALPHA KEYS AND NUMERIC KEYS .............................................................................................................................. 28 8 MODE KEYS ................................................................................................................................................................. 30 SETTINGS ........................................................................................................................................................................... 33 ATC (AUTOMATIC TOOL CHANGE) ..................................................................................................................................... 36 SETTING TOOL LENGTH & WORK ZERO OFFSETS ................................................................................................................ 37 SET UP PROCEDURE ........................................................................................................................................................... 38 WORK OFFSETS (X AND Y PART ZEROS)............................................................................................................................ 38 TOOL LENGTH OFFSETS .................................................................................................................................................. 38 PROGRAM PROOFING AND RUNNING IN MEMORY ......................................................................................................... 38 COMMUNICATIONS ........................................................................................................................................................... 39 HAAS MILL CONTROL TIPS ................................................................................................................................................. 41 GENERAL TIPS ................................................................................................................................................................ 41 CONTROL TIPS................................................................................................................................................................ 41 PRGRM /CONVRS ........................................................................................................................................................... 42 POSIT (POSITION) ............................................................................................................................................................. 42
  • 4. Productivity Inc Haas CNC Mill Operator Manual Page 2
  • 5. PROGRAMMING ................................................................................................................................................................ 44 TYPICAL HAAS G-CODES: ..................................................................................................................................................... 45 TYPICAL HAAS M CODES: ..................................................................................................................................................... 46 ALPHABETICAL ADDRESS CODES ............................................................................................................................................. 47 MACHINE DEFAULTS .......................................................................................................................................................... 51 PREPARATORY FUNCTIONS (G CODES)............................................................................................................................... 52 RAPID POSITION COMMANDS (G00) ............................................................................................................................... 54 LINEAR & CIRCULAR INTERPOLATION COMMANDS (G01, G02) ........................................................................................ 55 MISCELLANEOUS G-CODES (G04, G03) ............................................................................................................................ 57 HELICAL INTERPOLATION ............................................................................................................................................... 57 CIRCULAR POCKET MILLING (G12, G13) ........................................................................................................................... 58 REFERENCE POINT DEFINITION AND RETURN (G28)......................................................................................................... 60 CUTTER COMPENSATION (G40, G41, G42) G43 ............................................................................................................... 60 TOOL LENGTH COMPENSATION (G43)............................................................................................................................. 61 ENGRAVING (G47).......................................................................................................................................................... 62 LITERAL STRING ENGRAVING (G54-G59) ......................................................................................................................... 63 BOLT HOLE PATTERNS (G70, G71, G72) ........................................................................................................................... 64 CANNED CYCLES (G73-G89) ................................................................................................................................................ 66 ABSOLUTE/INCREMENTAL SELECTION ............................................................................................................................... 75 CANNED CYCLE AUXILIARY FUNCTIONS..................................................................................................................................... 75 MISCELLANEOUS FUNCTIONS (M FUNCTIONS)................................................................................................................... 76 M CODE DETAILED DESCRIPTION ....................................................................................................................................... 77 FORMULAS ........................................................................................................................................................................ 79 Productivity Inc Haas CNC Mill Operator Manual Page 3
  • 6. For more information on Additional Training Opportunities or our Classroom Schedule Contact the Productivity Inc Applications Department in Minneapolis: ' 763.476.8600 Visit us on the Web: www.productivity.com Click on the Training Registration Button * trainingmn@productivity.com Productivity Inc Haas CNC Mill Operator Manual Page 4
  • 7. Introduction to Basic Vertical Mill Operation Welcome to Productivity, Inc., your local Haas Factory Outlet (H.F.O.) for the Haas Mill Operator Class. This class is intended to give a basic understanding of the set-up and operation of a Haas Machining Center. After 1945 design of wings for the US Air Force were becoming extremely complex and hard to manufacture using conventional machine tools. MIT developed a machine that was able to control a cutting tool path with a series of straight lines defined by axial coordinates at prescribed feed rates. The first NC machine tool was introduced to the defense and aerospace industry by MIT in 1952. The contour of a constantly changing curvature could be described by a series of short lines determined by a series of coordinate in three axes. The first machine tools were run with instructions or programs punched out on paper tape. The files of the early machine tools were often in the format which later became called G-code. The reason for the name being that many of the lines of text began the letter G. In an NC machine, the tool is controlled by a code system that enables it to be operated with minimal supervision and with a great deal of repeatability. "CNC" (Computerized Numerical Control) is the same type of operating system, with the exception that a computer monitors the machine tool. The same principles used in operating a manual machine are used in programming a NC or CNC Machine. The main difference is that instead of cranking handles to position a slide to a certain point, the dimension is stored in the memory of the machine control once. The control will then move the machine to these positions each time the program is run. The operation of the VF-Series Vertical Machining Center requires that a part program be designed, written, and entered into the memory of the control. There are several options for getting these programs to the control. RS-232 (serial port with a computer), 3.5 Floppy Disk, Ethernet / Networking/ and USB are all viable ways to transmit and receive programs. In order to operate and program a CNC controlled machine, a basic understanding of machining practices and a working knowledge of math are necessary. It is also important to become familiar with the control console and the placement of the keys, switches, displays, etc., that are pertinent to the operation of the machine. This manual can be used as both an operator's manual and as a programmer's manual. It is intended to give a basic understanding of CNC programming and its applications. It is not intended as an in-depth study of all ranges of machine use, but as an overview of common and potential situations facing CNC programmers. Much more training and information is necessary before attempting to program on the machine. The programming section of this manual is meant as a supplementary teaching aid to users of the HAAS Vertical Machining Center. The information in this section may apply in whole or in part to the operation of other CNC machines. Its use is intended only as an aid in the operation of the HAAS Vertical Machining Center. Updated CK 3/25/12 Productivity Inc Haas CNC Mill Operator Manual Page 5
  • 8. Productivity Inc Haas CNC Mill Operator Manual Page 6
  • 9. The Cartesian Coordinate System The first diagram we are concerned with is called a NUMBER LINE. This number line has a zero reference point location that is called an ABSOLUTE ZERO and may be placed at any point along the number line. X axis The number line also has numbered increments on either side of absolute zero. Moving away from zero to the right are positive increments. Moving away from zero to the left are negative increments. The + , or positive increments, are understood, therefore no sign is needed. We use positive and negative signs along with increment value's to indicate its relationship to zero on the line. Our concern is the distance and the direction from zero and is labeled as Absolute Programming Remember that zero may be placed at any point along the line, and that once placed, one side of zero has negative increments and the other side has positive increments. Vertical Number Line know as the Y axis Productivity Inc Haas CNC Mill Operator Manual Page 7
  • 10. Absolute and Incremental Positioning There are two different systems used in positioning our machine. Both will steer the machine where we need it to go, both will net the same results. The reason we use more than one, is flexibility. Below we will talk about both, and they are the first two G-Codes Absolute Positioning: With absolute positioning, we tell the machine where to move referenced to a common point, called X0 Y0 and Z0. Every time we need to move to a certain position, the ending point of that move is in direct relationship to this common point G90 Absolute Positioning Program to move the machine to these 4 hole locations when using G90 (Abs.) X 1.0000 Y 1.0000 X 9.0000 Y 1.0000 X 9.0000 Y 9.0000 X 1.0000 Y 9.0000 Incremental Positioning: With incremental positioning, we are telling the machine where to go in relationship to where it currently is at. Basically like a set of directions given from where the machine stopped last. G91 Incremental Positioning Program to move the machine to the same 4 hole locations using G91 (Incr.) X 1.0000 Y 1.0000 X 8.0000 Y 8.0000 X -8.0000 When do we decide which to use? We switch between the two when it is more convenient. Once example is look at the above 2 prints. Sometimes the print doesn t call out the hole-locations, but will give the distance between the holes. Productivity Inc Haas CNC Mill Operator Manual Page 8
  • 11. Absolute and Incremental Exercise G90 ABSOLUTE G91 INCREMENTAL P1 X0 Y -2.5 P1 X0 Y -2.5 P2 P2 P3 P3 P4 P4 P5 P5 P6 P6 P7 P7 P8 P8 P9 P9 P10 P10 Productivity Inc Haas CNC Mill Operator Manual Page 9
  • 12. This diagram shows a front view of the grid as it would appear on the mill. This view shows the X and Y axes as the operator faces the mill. Note that at the intersection of the two lines, a common zero point is established. Fig. 1-4: Operator s working grid. Whenever we set a zero somewhere on the X axis and somewhere on the Y axis, we have automatically caused an intersection of the two lines. This is known as zero , where our X and Y lines would both be at a value of 0. We will move this point to a Zero position on our part so that we can steer the machine to locations that relate to our print. Another term for this Zero position is the origin of the part. Productivity Inc Haas CNC Mill Operator Manual Page 10
  • 13. The following illustration shows the X & Y directions of travel on a vertical machining center with respect to a part print. It shows the positive and negative positions that our spindle would have to move with respect to the x and y axis. Also note where these two axis meet, they create a common point of zero where they both are at the value of 0 at the same point. Vertical machining centers have 3 axis of travel. We have talked about two of them, the X (left to right movement), the Y (moving the part towards and away from the operator), but the last to discuss is the Z. The Z axis moves the milling spindle up or away from the part in the positive direction, and towards or into the part in the negative direction. Now that we have discussed all 3 of the axis, we can take a look at this picture of a Haas VF-8 VMC. Productivity Inc Haas CNC Mill Operator Manual Page 11
  • 14. Vertical Machining Center Travels Haas VMC (VF-8) shown with the X, Y, and Z axis The machine illustration shows three directions of travel available on a vertical machine center. Now to carry the number line idea a little further, imagine such a line placed along each set of travels (or axis) of the machine. The first number line would be the left-to-right, or X , axis of the machine. Positive X values would move the spindle to the right on our part, and negative would move the spindle to the left. If we place a similar number line along the front-to-back, or Y axis, and wanted to move the spindle to the back of the table, these would be positive values. Moving the spindle towards the operator would be negative values in the Y axis. The third axis of travel on our machine is the up-and-down, or Z axis. A positive Z value will move the spindle up towards the tool change position, and negative values would move the spindle towards our part. All axes of Haas VMCs have a resolution of .0001 inches (or .001mm). Productivity Inc Haas CNC Mill Operator Manual Page 12
  • 15. Now theoretically all of our number lines for each axis are infinite in length, we are limited to the travels of the particular machine we are using. Below is an example of the travels of different Haas VMCs showing how much movement we have on each particular model. VMC TRAVELS: X-axis Y-axis Z-axis VF-0/ VF-1 20" 16" 20" VF-2 30" 16" 20" VF-3 40" 20" 25" VF-4 50" 20" 25" VF-6 64" 32" 30" VF-8 64" 40" 30" VF-10 120 32 30 Remember, when we are moving the machine, we are concerned with positioning the spindle. Although the machine table is the moving part, our programs are written as if the spindle was moving. Keep in mind that the zero position may be placed at any point along each of the three number lines, and in fact, will probably be different for each setup of the machine. Productivity Inc Haas CNC Mill Operator Manual Page 13
  • 16. The Machine Coordinate System - Machine Home Position The principle of machine home may be seen when doing a reference return of all machine axes at machine start-up. A zero return (POWER UP/RESTART) is required when you power on machine. All three axes are moved to extreme positive locations until limit switches are reached. The reason the machine does this is to double check its position with the Home switches of the machine. On power up/restart the machine moves first up in the z axis to home and then moves to the x and y axis home positions at the same time. At home position the X, Y and Z axis are all at machine 0. This is crucial to the operation and function of a CNC machine as all of our programs, fixtures, and tooling are based off of the machine home position described as X0, Y0, Z0. Productivity Inc Haas CNC Mill Operator Manual Page 14
  • 17. Work Coordinate System What is a Work Coordinate ? A work coordinate (also known as a part offset) is how we tell the machine where our part(s) are located with respect to the machine home position. Under the Work Offsets page in the control, we put the machine in jog and hand wheel the machine to the X & Y Zero location for our part, and use the Part Offset Measure key under the Reset key to set the corresponding work offset from our program (G54, G55, G56, etc ..) Above: The relationship of machine home to work home , otherwise known as work offset Note: Because the location of machine home zero is in the upper right hand corner of the machine table our values for X and Y will always be negative. G54 G59 Work Offsets These are the first G-Codes that were assigned to work coordinates. This how we tell the machine that we are working on part #1, part #2, etc. thru part #6. Originally no one thought we would need more than 6 part offsets, but thru time and the invention of new types of machines more needed. G154 P1 G154 P99 Work Offsets These codes are the same as G54 to G59, they add more places as X & Y zero. We now can set up to 105 different zeros within the travels of our machine. On older Haas machines the extra work offsets were G110 to G129. Productivity Inc Haas CNC Mill Operator Manual Page 15
  • 18. Other Work Coordinate Offsets G52 Work Coordinate Shift G52 will shift all work offsets that are set in the machine. In the Work Offsets page of the control, if we input a value of X +1.0000, ALL of the offsets will move one to the right by a value of 1.0000. This is most commonly used in casting and forging work where we have core movement. Note: The G52 command works differently depending on the value of Setting 33. This setting selects the FANUC, HAAS, or YASNAC style of coordinates, which are listed below. G53 Positioning In Reference to Machine Home G53 is used when we want to move the machine a certain distance and location from Machine Home. This is quite often used if we want to establish a safe tool change position because we have large parts or tools and need to clear the tool changer. G53 is non-modal and only applies to the block which it is in. G92 Set Work Coordinate System G92 Can be used to set our work offsets while on the fly in our program. G92 was used back when machines only had one offset to choose from. We had to cut our first part, move the spindle over to the second part X&Y zero, and then call G92 X0Y0 in our program. Our work offset is now set around the second part. Using G54 G154 P99 is much faster, more tunable, and easier to use. Productivity Inc Haas CNC Mill Operator Manual Page 16
  • 19. Multiple Work Coordinate System Multiple fixture setup The figure above represents a multiple-fixture setup. Each vise will have an absolute zero once it is specified in the program. This is done by using G54 through G59. G54 through G59 and G154 P1 through G154 P99 gives a total of 105 different work offsets which may be used. Productivity Inc Haas CNC Mill Operator Manual Page 17
  • 20. Tool Length Offset The tool length offset is how we tell the machine where the top face of our part is located in the Z direction with respect to machine home. The tool length offset gives the distance from the end of the tool at home position to the top face of our part or other plane that the programmer has determined as the Z zero reference point. This information is stored in the Tool Offset Memory. Each tool in the machine will have its own defined tool length stored in the tool offset register determined by the operator during set up. Other information about each tool is stored in the Tool Offset Register. For each tool, the coolant tube position and the diameter or radius are also stored. In the wear section, small alterations to the tool length and diameter or radius are stored. If you cursor to the right in the tool register, additional information about the tool may be stored: the number of flutes, the actual diameter, the tool type, and tool category with respect to size and weight. In the illustration below the spindle is sitting at the Z home position and shows the distance the spindle must go to reach +.100 above the face of the part. G43 code with an H-number tells the machine which tool length offset to use. Productivity Inc Haas CNC Mill Operator Manual Page 18
  • 21. The Haas CNC Control Powering On the Machine To power up a Haas machine, regardless of where the machine table was when it was turned off, press POWER ON. The machine must first find its fixed machine zero reference point before any operations can occur. After it's powered on, pressing POWER UP/RESTART will send the machine to its machine zero reference location. The machine doors must be cycled and closed to return to machine zero. Also the machine needs to see the Emergency Stop cycled. Haas provides directions on the screen on what needs to be done to start the machine up in the morning. When powering on the machine, if there is a message in the MESGS display, it will be the first display seen on your control screen. Will move all axis to machine zero and then changes tools to put tool #1 in the spindle. Machine will move up in Z first then the X and Y move to machine zero. If the correct program has been selected and the part program is proven to be good and it's ready to run, press cycle start. General Machine Keys Power On - Turns CNC machine on. Power Off - Turns CNC machine tool off. Emergency Stop - Stops all axis motion, stops spindle, tool changer and turns off coolant pump. Jog Handle Jogs axis selected, also may be used to scroll through programs, menu items while editing and also altering feeds and speeds. Cycle Start Starts program in run mode or graphics mode. Feed Hold Stops all axis motion. Spindle will continue to turn. Reset Stops machine, will rewind program. Power Up/Restart Axis will return to machine zero and tool change will occur per Setting 81 Recover If a tool change is stopped in middle of a cycle an alarm will come up. Push the Recover button and follow the instructions to bring the tool change cycle to the beginning. Productivity Inc Haas CNC Mill Operator Manual Page 19
  • 22. Control Display The new 16 software has a larger display and more panes than older versions. Above is the basic display layout. What is displayed depends on which display keys have been used. The only pane active is the one with the white background. Only when a pane is active may changes be made to data. Control functions in Haas machine tools are organized in three modes: Setup, Edit and Operation Access Modes using the mode keys as follows: Setup: ZERO RET, HAND JOG keys. Provides all control features for machine setup. Edit: EDIT, MDI/DNC, LIST PROG keys. Provides all program editing, management, and transfer functions. Operation: MEM key. Provides all control features necessary to make a part. Current mode is displayed at top of display. Functions from another mode can still be accessed within the active mode. For example, while in the Operation mode, pressing OFFSET will display the offset tables as the active pane in the Main Display Pane and offsets may be altered; press OFFSET to toggle the offset display. While running a part in operation mode another program may be edited in the Main Display Pane. Press PROGRM CONVRS in most modes to shift to the edit pane for the current active program. Productivity Inc Haas CNC Mill Operator Manual Page 20
  • 23. Keyboard Introduction The keyboard is divided into eight different sectors: Function Keys, Jog Keys, Override Keys, Display Keys, Cursor Keys, Alpha Keys, Number Keys and Mode Keys. In addition, there are miscellaneous keys and features located on the pendant and keyboard which are described briefly on the following pages. 5-Cursor Keys 1-Function Keys 4-Display Keys 8-Mode Keys 2-Jog Keys 3-Override 6-Alpha Keys 7-Number Keys Productivity Inc Haas CNC Mill Operator Manual Page 21
  • 24. 1 Function Keys F1 F4 Perform different functions depending on which mode the machine is in. Example in offsets mode F1 will directly enter value that you give it into to offset register. TOOL OFFSET MEASURE Will take machine Z position readout at bottom of offset screen and load it in to the highlighted tool offset register. NEXT TOOL After pressing Tool Offset Measure button in a set up this will select the next tool and make a tool change TOOL RELEASE - Releases tool from spindle in MDI, Zero Return or Handle mode. A button on the front of the spindle will do the same thing. PART ZERO SET Records work coordinate offsets into the highlighted register. 2 Jog Keys Chip FWD (Chip Auger Forward) Turns the optional chip auger in a direction that removes chips from the work cell. Chip Stop (Chip Auger Stop) Stops auger movement. Chip REV (Chip Auger Reverse) Turns the chip auger in reverse. CLNT UP (Coolant Up) Pressing this key will position the coolant stream one position higher. CLNT DOWN (Coolant Down) Pressing this key positions the coolant stream one position lower. Coolant stream position will appear in tool length offset register when position is highlighted. AUX CLNT (Auxiliary Coolant) Turns on the optional Through-the-Spindle (TSC) coolant (in MDI mode). +X, -X (Axis) Selects the X axis for continuous motion when depressed. +Y, -Y (Axis) Selects the Y axis for continuous motion when depressed. +Z, -Z (Axis) Selects the Z axis for continuous motion when depressed. +A, -A (Axis) Selects the A axis. This key selects the B axis when used with the SHIFT key if the machine is configured with a fifth-axis option. Jog Lock When this is pressed prior to one of the jog keys given above, the axis moves in a continuous motion without the need to hold down the axis key. Depressing this key again stops jogging motion. Feed rate is determined by the selection in HAND JOG mode keys. Productivity Inc Haas CNC Mill Operator Manual Page 22
  • 25. 3 Override Keys The overrides are at the lower right of the control panel. They give the user the ability to override the speed of rapid traverse motion, as well as programmed feeds and spindle speeds. -10 FEED RATE Decreases current feed rate in increments of 10 percent. 100% FEED RATE Resets the control feed rate to the programmed feed rate. +10 FEED RATE Increases current feed rate in increments of 10 percent. HANDLE CONTROL FEED RATE Hand wheel will control feed rate at 1% increments. -10 SPINDLE Decreases current spindle speed in increments of 10 percent. 100% SPINDLE Sets the control spindle speed at the programmed spindle speed +10 SPINDLE Increases current spindle speed in increments of 10 percent. HANDLE CONTROL FEED Hand wheel will control feed rate at 1% increments. CW Starts the spindle in the clockwise direction. STOP Stops the spindle. CCW Starts the spindle in the counterclockwise direction. 5% RAPID Limits rapid to 5 percent of maximum. 25% RAPID Limits rapid to 25 percent of maximum. 50% RAPID Limits rapid to 50 percent of maximum. 100% RAPID Allows rapid traverse to feed at its maximum. Override Usage Feed rates may be varied from 0% to 999%. Feed rate override is ineffective during G74 and G84 tapping cycles. Spindle speeds may be varied from 0% to 999%. Depressing Handle Control Feed rate or Handle Control Spindle keys, the jog handle movement varies by +/-1% increments. Setting 10 will limit rapid movement to 50%. Settings 19, 20, 21 make it possible to disable override keys. Coolant may be over rode by depressing COOLNT button. Feed Hold - Stops rapid and feed moves. Cycle Start button must be depressed to resume machine feeds. Similar situation applies when Door Hold appears. Door must be closed and Cycle Start pressed to continue running program. Overrides may be reset to defaults with a M06, M30 or pressing RESET by changing Settings 83, 87 and 88 respectively. Productivity Inc Haas CNC Mill Operator Manual Page 23
  • 26. 4 Display Keys PRGM/CONVRS Selects the active program pane (highlights in white). In MDI/DNC mode pressing a second time will allow access to VQC (Visual Quick Code) and IPS (Intuitive Programming System) POSIT (Position) Selects the positions display window (lower middle). Repeated pressing of the POSIT key will toggle through relative positions in the Memory Mode. In Handle Jog mode all four are listed together. 1. POS-OPER digital display. This is a reference display only. Each axis can be zeroed out independently; then the display shows the axis position relative to where you decided to zero it. In the Handle Jog mode, you can press the X, Y or Z JOG keys and ORIGIN key to zero that selected axis. On this display page, you can also enter in an axis letter and number (X-1.25) and press ORIGIN to have that value entered in that axis display. 2. POS-WORK digital display. This position display tells how far away the tools are in X, Y and Z from the presently selected work offset zero point. 3. POS-MACH digital display. This is in reference to machine zero, the location that the machine moves to automatically when you press POWER UP/RESTART. This display will show the current distance from machine zero. 4. POS-TO-GO digital display. When you're running the machine, or when you have the machine in a Feed Hold, this incrementally displays the travel distance remaining in the active program move being run. This is useful information when you are stepping a program through during a set up. When the position pane is active one can change which axis is displayed simply by typing X or Y or Z or any combination and pressing write. Then only that particular axis or combination will be displayed. OFFSET Selects one of two offsets tables: Tool Geometry/Wear and Work Zero Offset. Depressing the OFFSET button toggles between the two tables Tool Geometry/Wear table displays 200 tool length offsets (100 tool length offsets on older machines) - labeled (LENGTH) GEOMETRY - along with wear offsets. It also displays cutter compensation radius or diameter offsets with wear offsets. You can select how you would like a tool size to be specified using cutter compensation (G41 and G42) with Setting 40 (Radius or Diameter). The tool-offset display has a CLNT POS column for setting the coolant spigot position. 1. Programmable coolant has 34 possible positions. These may be entered into the column under CLNT POS for each tool in the offset display. This will move the coolant spigot to the position entered when that tool length offset is read. 2. When the cursor is positioned in the CLNT POS column, the actual coolant position will be shown at the lower left corner of the screen. The Work Zero Offset table has G54-G59 plus G154 P1-G154 P99 offsets available. The WRITE/ENTER key will add the number in the input buffer to the selected offset, and the F1 key will replace the selected offset with the number entered into the input buffer. Offsets can also be entered using TOOL OFSET MEASUR and PART ZERO SET Productivity Inc Haas CNC Mill Operator Manual Page 24
  • 27. CURNT COMDS Ten different pages; use PAGE UP and PAGE DOWN 1. Operation Timers displays Power-On Time, Cycle Start Time, Feed Cutting Time. Hitting ORIGIN will clear any display that is highlighted by the cursor. 2. Real time clock and date. 3. System Variables, for machines with Macro Programming. 4. All Active Codes, displays current and modal command values. 5. Position information: Machine, Distance to Go, Operator, Work Coordinate. 6. Tool life, displays the usage of each tool. An alarm can be set for the number of times you want that tool to be used, and when that condition has been met (that is, the tool has been used the set number of times), the machine will stop, with an alarm for you to check the condition of that tool. Pressing ORIGIN will clear the cursor-selected display, and pressing ORIGIN when the cursor is at the top of a column will clear the whole column. 7. Tool Load displays the Tool Load Max % of each tool being used. You can use the Limit% column to set the maximum spindle load for a particular tool. When that condition has been met (the tool has reached maximum load), the machine will stop for you to check the condition of that tool. Pressing ORIGIN will clear the cursor-selected display, and pressing ORIGIN when the cursor is at the top of a column will clear the whole column. Setting 84 determines the Overload Action when this limit is met. Also vibration loads may be entered. 8. Maintenance times for various items may be loaded. 9. Advanced Tool Management (Optional) 10. Tool Pot Table: Gives information on which tool is in which Pot. Refer to Automatic Tool Change section on information on how to use this table. ALARM/MESGS Displays messages and current active alarms. Press right arrow key gives alarm history. Press right arrow key again goes to the Alarm Viewer Page. Enter alarm number and press write will give detailed information on a particular alarm code. PARAM/DGNOS Lists machine parameters that are seldom-modified values which change the operation of the machine. These include servo motor types, gear ratios, speeds, stored stroke limits, lead screw compensations, motor control delays and macro call selections. All of these are rarely changed by the user and should be protected by Setting 7, PARAMETER LOCK. A second press of PARAM/DGNOS will show the diagnostics display. The PAGE UP and PAGE DOWN keys are then used to select one of two different pages. This display is for service diagnostic purposes, and the user will not normally need them. Productivity Inc Haas CNC Mill Operator Manual Page 25
  • 28. SETNG/GRAPH Displays settings - machine parameters and control functions that the user may need to turn on and off or change to suit specific needs. A list of settings is found on page 30. · Settings are organized into functionally similar page groups with a title. · Settings are listed with a number and a short description, and a value or choice on the right. · To find a particular setting, enter the setting number and then press either the up or down cursor arrow key to move to the desired setting. · You can change a setting using the left or right cursor arrows to display the choices, or, if the setting contains a value, by typing in a new number. A message at the top of the screen will tell you how to change the selected setting. When you changed, it will flash on and off. · A setting change is not active until it stops flashing. To activate, press WRITE/ENTER. SETNG/GRAPH (2nd part) - The second press of SETNG/GRAPH will bring up the graphics display in the Main Display Pane. In this screen you can dry-run a program without moving the axes or risking tool damage from any programming errors. This function is far more powerful than using DRY RUN, because all of your offsets and travel limits can be checked before any attempt is made to move the axes. The risk of a crash during setup is greatly reduced. The Graphics Screen will display the programmed tool path and generate an alarm if there are any problems. Some of the features of the Graphics display are controlled by selections made in the Settings display, on the page titled GRAPHICS. 1. Press either MEM or MDI and select the program that you want to run in Graphics. Graphics will also run in the Edit Mode. 2. Press SETNG/GRAPH twice. · The top left line of the screen will list the GRAPHICS title. Above that line will list the mode you are in (MEM or MDI). The bottom lists explanations for use of function keys F1 through F4. · The small window on the lower right side of the screen displays the whole table area during the simulation run, indicating the location of the tool and any zoom window. The center window of the display is a large window that represents a top- down perspective of the X and Y axes. This is where the tool path is displayed during graphic simulation of a CNC program. 3. Press CYCLE START to see all the X and Y-axis moves demonstrated. Note machine axis and spindle will not when graphic window is up. 4. To step through a program one block at a time in Graphics, press SINGLE BLOCK. 5. F1 is a help key. 6. Press F2 to zoom in on the Graphics view screen. · Use PAGE DOWN to zoom in further and PAGE UP to expand the view. · Use the Cursor Keys to position the new zoom window over the area you wish to zoom in on using the small window in the bottom right hand corner. Pressing HOME will display the whole table. · After positioning the desired zoom window, press WRITE/ENTER to accept the view and CYCLE START to see the new view. · F3 slows the execution speed of the graphic simulation · F4 speeds up the execution speed of simulation. Use SINGLE BLOCK to step through a program in graphics to find any mistakes. During single block you can re-zoom your window to look at tool paths in tight corners etc. Also use position display to see find any discrepant values. Productivity Inc Haas CNC Mill Operator Manual Page 26
  • 29. HELP/CALC Will bring up a help POP UP relevant to the screen you are in. This provides information only pertaining to that screen. Pressing the HELP/CALC button again brings up a tabbed menu. With tabulated screens highlighting tab and pressing WRITE/ENTER key will open up respective tab. Pressing the CANCEL key will close the tab. Help Opening up the Help tab brings you to the table of contents of the entire Mill Operators Manual. High light the topic of interest and press WRITE/ENTER will bring up subtopics on the area of interest. Select subtopic in similar fashion will bring up the relevant page in the manual. Search The search tab will do a search of the manuals content for relevant information on a keyword. Type in the search term and press F1. Topics relevant to the keyword will appear. Highlight the topic and press WRITE/ENTER key to open. Drill Table Displays a common drill sizes, decimal information and tap drill sizes. Calculator Different calculator functions are available under this tab. The calculator gives ordinary calculations like addition, subtraction, multiplication and division in all tabs. It also will solve trig problems with information about triangles, circles, circle line tangent and circle- circle tangent. A milling and tapping tab will give you suggested cutting speeds and feeds per different materials and sized tools. Simple Calculator It will calculate simple addition, subtraction, multiplication and division operations. Operations are listed as: LOAD + - * /. These are selected using the left or right cursor arrow. · To enter a number cursor on to LOAD; type the number you want to load and press WRITE/ENTER. · To perform one of the arithmetic functions, enter the first number into the calculator window. Select the operation you want ( + - * / ). Finally, enter the second number into the input buffer, press WRITE/ENTER to perform the calculation. Milling and Tapping Help you solve values for feed rates SFM, RPM, and chip load under different conditions. It uses the three equations related to milling and tapping on page 67. The first one includes cutter diameter with SFM and RPM. The second one includes RPM, number of flutes, feed rate and chip load. The third one includes thread pitch, RPM and feed rate. The Milling & Tapping Tab MILLING: Cutter Diameter 1.2500 IN (entered) Surface Speed 210.0000 FT/MIN (entered) RPM 642 (calculated) Flutes 4 (entered) Feed 12.8343 FT/MIN (calculated) Chip Load 0.0005 IN (entered) TAPPING: Threads 16.0/IN (entered) RPM 500 (entered) FEED 31.2500 IN/MIN (calculated) Productivity Inc Haas CNC Mill Operator Manual Page 27
  • 30. 5 Cursor Keys Cursor Keys The cursor keys are in the center of the control panel. They give the user the ability to move to and through various screens and fields in the control. They are used extensively for editing and searching CNC programs. They may be arrows or commands. Up/Down Moves up/down one item, block or field. Page Up/Down Used to change displays or move up/down one page when viewing a program. HOME Will move the cursor to the top-most item on the screen; in editing, this is the top left block of the program. END Will take you to the bottom-most item of the screen. In editing, this is the last block of the program. 6 and 7 Alpha Keys and Numeric Keys The Alpha Keys allow the user to enter the 26 letters of the alphabet along with some special characters. Depressing any Alphabet Key automatically puts that character in the Input Section of the control (lower left-hand corner). SHIFT key provides access to the yellow characters shown in the upper left corner of some of the alphanumeric buttons on the keyboard. Pressing SHIFT and then the desired white character key will enter that character into the input buffer. EOB key enters the end-of-block character, which is displayed as a semicolon on the screen and signifies the end of a programming block. It also moves the cursor to the next line. Parentheses are used to separate CNC program commands from user comments. They must always be entered as a pair. Example: (T1 ½ End Mill) Also any time an invalid line of code is received through the RS-232 port, it is added to the program between parentheses. ( ) and (.) These keys are used to define negative numbers and give decimal position. +=#*[] These symbols are accessed by first pressing the SHIFT key and then the key with the desired symbol. They are used in macro expressions (Haas option) and in parenthetical comments within the program. ,?%$!&@: These are additional symbols, accessed by pressing the SHIFT key, that can be used in parenthetical comments. Productivity Inc Haas CNC Mill Operator Manual Page 28
  • 31. 6 and 7 Alpha Keys and Numeric Keys (continued) The Numeric Keys allow the user to enter numbers and a few special characters into the control. Depressing any number key automatically puts it into the Input Section of the Control. Cancel The Cancel key will delete the last character put into the Input Section of the control display. Space Is used to format comments placed into the Input Section of the control display. Write/ Enter General purpose Enter key. It inserts code from the input section into a program when the program display is in EDIT mode. With offsets pages active, pressing the WRITE/ENTER key adds a number in the Input Section to the highlighted cell. Pressing the F1 key will input the number into the cell. - The (Minus Sign) is used to enter negative numbers. . The (Decimal Point) is used to note decimal places. Productivity Inc Haas CNC Mill Operator Manual Page 29
  • 32. 8 Mode Keys Mode keys set the operational state of the machine tool. Once a mode is set the keys to the right may be used. The current operation mode of the machine is displayed at the top thin pane of the CRT. EDIT The edit mode is used to make changes in a program stored in memory. When you press EDIT two panes appear at the top of the screen. In the left pane the active program appears. In the right an inactive program appears or the select program screen appears. On the bottom left a editor help pane appears and on the right a clipboard pane. Editing may be performed in either the active or inactive panes. Pressing EDIT toggles between the two panes, (changes background to white). To call up a program from memory and put it in one of the edit panes press SELCT/PROG. Highlight the program desired by using the up or down cursor buttons and press WRITE/ENTER. In the edit mode you are able to use the edit keys in the same row as the EDIT key. INSERT Enters commands keyed into the input panel in lower left pane of CRT after the cursor highlighted word in a program. ALTER Highlighted words are replaced by text input into the input panel. DELETE Highlighted words are deleted from a program. UNDO Will undo up to the last 9 edit changes. F1 KEY While in the edit mode pressing F1 will bring up an edit pop up window. Using the sideways cursor buttons will toggle thru HELP, MODIFY, SEARCH, EDIT AND PROGRAM MENUS. The up and down buttons will cursor thru the different options in each of the above. MODIFY Gives options on changing line numbers. SEARCH Will perform a search and gives the option of replacing text. EDIT Gives option of cutting or copying and pasting to a clipboard and to another program. PROGRAM Gives options of creating new program, selecting a program from list to edit, duplication of programs, switching from left to right side of window panes. Background Edit When a program is being run pushing the edit will bring up the Background Edit pane in the Main Display Pane. Simple edits may be performed on the program that is being run or another program. The edits on the running program will not take place until after the current cycle has completed. Productivity Inc Haas CNC Mill Operator Manual Page 30
  • 33. MEM The memory mode is the mode used when running the machine and making a part. The active program is shown in the Program Display Pane. Keys in the memory mode line reflect different ways of running a part in memory. When the keys to the right are depressed they will show up highlighted in black on the bottom right of the CRT. SINGLE BLOCK When depressed SINGLE BLOCK is highlighted in black and will appear on the bottom of the CRT. When the machine is in SINGLE BLOCK mode only one block of the program is executed every time the cycle start button is depressed. Used when first test running a program or temporarily stopping a program when it is running. DRY RUN Used to check machine movement without cutting a part. In dry run the machine runs at one feed rate. With the availability of graphics which show visually what the machine tool path is this mode is rarely used. OPTION STOP When OPTION STOP is depressed program will stop at any M01 which is in the program. Normally M01s are placed after a tool is run in a program. When a job is being set up the operator may put machine in op stop mode to check dimensions after every tool has completed cutting. BLOCK DELETE When this button is depressed any block with a slash (/) in it is ignored of skipped. MDI DNC (MANUAL DATA INPUT mode) Usually short programs are written in MDI but are not put into memory. DNC mode allows large programs to be drip fed from a computer into the control. COOLNT Turns coolant on and off manually ORIENT SPINDLE Rotates and locks spindle to specific angle. Used when lining up tools where spindle orientation may be a issue such as boring heads. ATC FWD Rotates turret to next tool and performs tool change - also used to call up specific tools or pots. Enter tool number (T1) and press ATC FWD. ATC REV Rotates turret to previous tool and performs tool change - also used to call up specific tools or pots. Enter tool number (T1) and press ATC REV. HAND JOG Puts machine in jog mode for set ups. Top values (.0001, .001, .01, .1) represent distance traveled per click of jog handle. Bottom values (.1, 1., 10., 100) represent feed in inches/minute when jogging axis using jog buttons. Productivity Inc Haas CNC Mill Operator Manual Page 31
  • 34. ZERO RET On pressing position display becomes highlighted in Zero Return mode. ALL Returns all axes to machine home similar in similar fashion as a Power Up/Restart. ORIGIN Sets selected displays to zero or other functions. SINGL Returns a single axis to machine home. Select desired axis (X, Y, or Z) then press Singl axis button. Home/G28 Rapid motion to machine home; will make a rapid move in all axes at once - may also be used for a rapid home in one-axis. Press axis to home then G28. Caution must be used that fixtures or parts are out of the way before initiating this rapid move to home. LIST PROG Will bring up list of programs in a tab format. Pressing Cancel will return you to tab at top usually MEM or USB. Cursor to left or right for which list one wants. Pressing Enter will open a list of programs. Cursor UP (Ù) or DOWN (Ú) to program desired. Select the desired programs to be moved by pressing WRITE/ENTER. This will put a check mark beside it. F2 will copy selected program or programs to be moved. A pop up menu will ask where you want the selected programs to be copied. SELECT PROG After highlighting a program from List Program with up or down cursor pressing this button will place the program in the Active Program Pane. This is the program that will run the CNC machine in the Memory mode. Use in the Edit mode in the Main Display will enter selected program in the Main Display pane for editing. SEND Will send a selected program or programs out thru RS-232 serial port RECV Will get machine ready to receive program from RS-232 serial port. ERASE PROG Will erase highlighted program or programs. A prompt will appear asking if you want to delete selected program asking for Y/N. Productivity Inc Haas CNC Mill Operator Manual Page 32
  • 35. Settings Scrolling through Settings with Jog Handle - The jog handle can now be used to scroll through the settings. In previous versions, the jog handle could only be used to scroll through (cursor-highlight) the parameters, but not the settings. This has been corrected. (Any Mill Control Ver. 10.15 and above; any Lathe Control Ver. 3.05 and above.) There are many settings which give the user various options over the control of their machine tool. Read the Settings section of the operator s manual for all the possible options. Here are some of the more useful settings. Setting 1 AUTO POWER OFF This turns the machine off after it is idle for the number of minutes defined in this setting. Setting 2 POWER OFF AT M30 This option will power off the machine tool when an M30 command is executed. In addition, for safety reasons, the control will turn itself off if an overvoltage or overheat condition is detected for longer than four minutes. Setting 8 PROG MEMORY LOCK When this is Off, control program memory can be modified. When this setting is turned On, memory edits cannot be done and programs cannot be erased. Setting 9 DIMENSIONING This changes the machine control from inch to metric, which will change all offset values and position displays accordingly. This setting will not change your program to either inch or metric. Setting 15 H & T CODE AGREEMENT When this is OFF, no special functions occur. When it's ON, a check is made to ensure that the H offset code matches the tool presently in the spindle. Usually you have one offset per tool, and it's usually the same number as the tool number. If it's not the same and this setting is ON, you will get an alarm of H AND T NOT MATCHED. This check can help prevent crashes. If you need to use a different offset number or more than just one, this setting will need to be switched OFF. In program restart this check is not done until motion begins. Setting 23 9XXX PROGS EDIT LOCK This is an On/Off setting. When it is On, the 9000 series programs (usually the Quick Code source file or macro programs) are invisible to the operator and cannot be uploaded or downloaded. They also cannot be listed, edited, or deleted. Setting 30 4TH AXIS ENABLE This is selected when using a rotary axis. Setting 31 RESET PROGRAM POINTER When this is On, the RESET key will send the cursor (program pointer) back to the beginning of the program. Normally set to on. Setting 32 COOLANT OVERRIDE This setting controls how the coolant pump operates. The settings are: Normal, Ignore and Off. When it is set on Normal, coolant commands respond as programmed. If set on Ignore, an M08 or M88 command in the program will not turn the coolant on (i.e., the command will be ignored), but it can be turned on manually using the COOLNT key. If this setting is Off, the coolant cannot be turned on at all, and the control will give an alarm when it reads an M08 or M88 command in a program. Productivity Inc Haas CNC Mill Operator Manual Page 33
  • 36. Setting 33 COORDINATE SYSTEM This setting changes the way the G92/G52 offset system works. It can be set to Fanuc, Haas, or Yasnac. Normally it is set to Haas. Setting 36 PROGRAM RESTART When it is OFF, starting a program from anywhere other than the beginning of a program or a tool sequence may produce inconsistent results or crashes. When it is ON, you are able to start a program from the middle of a tool sequence. You cursor onto the line you want to start on and press CYCLE START. It will cause the entire program to be scanned to ensure that the correct tools, offsets, G codes, and axes positions are set correctly before starting and continuing at the block where the cursor is positioned. Some alarm conditions are not detected prior to motion starting. You could leave this setting ON all the time if you want, but it might do some things unnecessarily, so you would probably prefer to turn it OFF when you're done using it. Setting 40 TOOL OFFSET MEASURE This setting selects how tool size is specified for cutter compensation: radius or diameter. Setting 51 DOOR HOLD OVERRIDE This setting is no longer available to use in new machines. On older machine when it is off, a program cannot be started if the doors are open, and opening the doors will cause a running program to stop just like a feed hold. When this setting is On, the door condition is ignored. This setting will always be Off when the control is powered up. Setting 76 TOOL RELEASE LOCK OUT When this is On, the TOOL RELEASE button on the control keypad is disabled. Setting 84 TOOL OVERLOAD ACTION This is used to determine tool overload conditions as defined by the Tool Load monitor page in the CURNT COMDS display (use PAGE DOWN to get there). A tool overload condition can result in one of four actions by the control, depending on Setting 84. ALARM will generate an alarm when overload occurs; FEED HOLD will stop with a Feed Hold when overload occurs; BEEP will sound an audible alarm when overload occurs; or AUTOFEED will automatically decrease the feed rate. Setting 85 MAX CORNER ROUNDING This setting is used to set the corner rounding accuracy required by the user. The accuracy defined in Setting 85 will be maintained even at maximum feed rate. The control will only slow at corners when it is needed. If it is set at 0 the machine will operate in the exact stop mode, slowing speed of machine. Setting 88 RESET RESETS OVERRIDE When this is On, the RESET key sets all overrides back to 100%. Setting 101 FEED OVERRIDE > RAPID When this setting is OFF, the machine will behave normally. When it is ON and HANDLE CONTROL FEED RATE is active, the jog handle will affect both the feed rate override and the rapid rate override simultaneously. That is, changing the feed rate override will cause a proportional change to the rapid rate. The maximum rapid rate will be maintained at 100% or 50% according to setting 10. (Any Mill Control Ver. 10.22 and above; any Lathe Control Ver. 4.11 and above.) Productivity Inc Haas CNC Mill Operator Manual Page 34
  • 37. Setting 103 CYC START / FH SAME KEY When this setting is ON, the CYCLE START button functions as the Feed Hold key as well. When CYCLE START is pressed and held in, the machine will run through the program; when it s released, the machine will stop in a Feed Hold. This gives you much better control when testing a new program. When you are done using this feature, turn it Off. This setting can be changed while running a program. It cannot be ON when Setting 104 is ON. When one of them is turned ON, the other will automatically turn OFF. (Any Mill Control Ver. 9.06 and above; any Lathe Control Ver. 4.11 and above.) Setting 104 JOG HANDL TO SNGL BLK When running a program in MEM mode in the Program or Graphics display, you can use the SINGLE BLOCK key to cycle through your program one line at a time with each press of the CYCLE START button, when the machine is running or you are in Graphics. If you turn Setting 104 ON, and SINGLE BLOCK has been selected. You first press the CYCLE START button, then each counterclockwise click of the jog handle will step you through a program line by line. Turning the handle clockwise will cause a FEED HOLD. This setting can be changed while running a program. It cannot be ON when Setting 103 is ON. When one of them is turned ON, the other will automatically turn OFF. (Any Mill Control Ver. 9.06 and above; any Lathe Control Ver. 4.11 and above.) Setting 114 CONVEYOR CYCLE (MIN) If this is set to zero, the conveyor will operate normally. If another number is entered, it defines how long (in minutes) each cycle will be when the chip conveyor is turned on. The chip conveyor cycle is started with either an M code (M31 or M32) or with the control CHIP FWD/REV keys. It will stay on for the time defined in Setting 115, then turn off and not restart until the cycle time in Setting 114 has elapsed. Setting 115 CONVEYOR ON TIME (MIN) This setting works with Setting 114, which defines the conveyor cycle time. Setting 115 defines how long the chip conveyor will stay on during each cycle. Setting 130 RIG. TAP RETRACT SPEED This feature augments one introduced in version 10.13, the Quick reversal out of a G84 rigid-tapped hole. If it is set to 0 or 1, the machine behaves normally. Setting it to 2 is the equivalent of a G84 command with a J value of 2. That is, the spindle will retract twice as fast as it went in. If this setting is set to 3, the spindle will retract three times as fast. Note that specifying a J value in a G84 command for rigid tapping will override Setting 130. (Any Mill Control Ver. 10.18 and above) Setting 201 SHOW ONLY WORK and Tool Offsets in Use With this feature turned on only the Work and Tool Offsets used within a program will be shown on the respective pages. To activate the program first must be run in graphics or memory regular mode. Productivity Inc Haas CNC Mill Operator Manual Page 35
  • 38. ATC (Automatic Tool Change) CAROUSEL TOOL CHANGER The carousel tool changer allows you to select a tool and put it in the waiting position while machining a part. During a tool change the tool in the spindle is put in the same pot in the carousel that the current tool came from. This allows a speedier process and also keeps the tools out of the working envelope. With this system the tools are in random access mode, in other words tool 1 isn t assigned to the pot 1 location. The machine however knows which pocket each tool is in. In the tool offsets display cursor to the right several times will show which pot the tool is located in. If you depress CURNT COMDS and PAGE UP the Pocket Tool Table will appear. In this table tool pockets are labeled sequential with the tools that are located in them. Large and Heavy Tool Designations A tool larger than 3 inches is considered a large tool in cat 40 taper machines, 4 inch in 50 taper. It needs a special designation in the carousel because both pockets on each side need to be empty because of interference. A large tool is designated In the Pocket Tool Table by entering an L after the tool number. This will create an L at that pocket location. It will also create a - at the adjacent pockets to protect them from having a tool loaded in them. Adjacent pots will be turned to 0 and not used. In High Speed Tool Changer machines another designation is needed. Any tool over 4 pounds is considered a (heavy tool) and needs to be designated by capital H. For safety considerations the tool changer will operate at 25% of normal speed with all heavy tools and large tools. To remove large tool designations simply curser down to the pocket that holds the large tool press (space) button then enter, this will remove the characters for that large tool location. Tool Designations: H - Heavy but not large, no empty pockets on each side. L - Empty pockets required on both side. h Heavy small diameter tool in pocket designated for large tool l - Small diameter tool in pocket reserved for large tool During set up pressing the origin key at any time while on this screen you will set the tool pockets to their default values. By pressing 0, origin, you will clear all tools to zero. Changing Tools Tool changes may be manually operated by using the tool release button on the spindle housing and using the ATC FWD and ATC REV buttons. Tools may also be changed in MDI with (Tnn M6). After touching off a tool and using Tool Offset Meas, Next Tool will initiate a tool change to the next tool. Tools will automatically go to the tool change position in Z. Tools should always be loaded through the spindle. Never load directly into the tool changer. Productivity Inc Haas CNC Mill Operator Manual Page 36
  • 39. Setting Tool Length & Work Zero Offsets To set Tool Length Offsets: 1. Press HANDLE JOG. 2. Press OFSET and cursor to the tool number you want to set in the LENGTH display. 3. In Handle Jog mode, use the .1, .01, .001 and .0001 keys to jog the tip of the tool (the Z-axis) to the part zero surface. Touch-off the tool tip to the part surface using a feeler gauge. 4. Press TOOL OFSET MESUR. This will take the number in the machine Z position readout (listed at bottom of screen) and load it into the cursor-selected offset register. 5. Press NEXT TOOL. This will automatically change to the next tool and the next offset number, and the Handle Jog function switches back to the Z-axis .01 increment setting. 6. TOOL OFSET MESUR the next tool in the same way. 7. Repeat steps 3 through 5 for all tools needed for part setup. To set Work Zero Offsets: 1. HANDLE JOG the machine axes to the work zero point on your part. 2. Press OFSET and PAGE UP, and cursor to the correct WORK ZERO OFFSET number in the X-axis column. Repeat pressing the OFSET key toggles between Work Offset page and Tool Length Offset page. 3. Press PART ZERO SET to enter the X offset position. The cursor will then automatically move over to the Y-axis column. 4. Position the Y-axis and then press PART ZERO SET to enter the Y offset position. 5. The Z-axis is normally entered separately if any adjustment is needed. This setting is usually zero but may need to be adjusted. 6. When the A axis is being used, find the A axis zero position and press PART ZERO SET. Productivity Inc Haas CNC Mill Operator Manual Page 37
  • 40. SET UP PROCEDURE WORK OFFSETS (X AND Y PART ZEROS) 1. TURN POWER ON 2. RESET ALARMS 3. PRESS POWER UP RESTART 4. PRESS SETTINGS DISPLAY (SETTING 51 DOOR HOLD OVERRIDE - ON) 5. PRESS M.D.I. MODE (ORIENT SPINDLE/ S1000, ENTER, CYCLE START) 6. PRESS HANDLE JOG MODE 7. PRESS POSITION DISPLAY (PAGE DOWN TO OPERATOR POSITION DISPLAY) 8. LOCATE X PART ZERO (REMEMBER TO SHIFT HALF THE DIA. WHEN USING AND EDGE FINDER) 9. PRESS OFFSET DISPLAY (PAGE UP TO WORK OFFSETS, CURSOR TO DESIRED OFFSET IN X AXIS COLUMN) 10. PRESS PART ZERO SET 11. REPEAT STEPS 7 THROUGH 10 FOR Y AXIS ZERO TOOL LENGTH OFFSETS 1. PRESS M.D.I. MODE 2. TYPE IN DESIRED TOOL NUMBER TO BE PLACED IN THE SPINDLE AND PRESS A.T.C. BUTTON 3. PLACE APPROPRIATE TOOL IN SPINDLE 4. PRESS HANDLE JOG MODE 5. PRESS OFFSET DISPLAY (PAGE UP TO LENGTH OFFSETS) 6. HANDLE Z AXIS DOWN TO Z PART ZERO 7. PRESS TOOL OFFSET MEASURE (ENTER IN THE RADIUS AMOUNT OF CUTTER IF APPLICABLE) 8. PRESS NEXT TOOL 9. REPEAT STEPS 6 THROUGH 8 FOR REMAINING TOOLS PROGRAM PROOFING AND RUNNING IN MEMORY 1. PRESS MEM MODE 2. PRESS SETTING/GRAPH TWICE 3. RUN PROGRAM IN GRAPHICS 4. IF RUNNING IN GRAPHICS IS SUCCESSFUL PRESS SETTING/GRAPH TO GET OUT 5. TURN RAPID OVERIDE TO 25% 6. PRESS SINGLE BLK 7. PAGE DOWN IN CURRENT COMMANDS UNTIL DISTANCE TO GO, MACH COORD,G54 ETC SCREEN APPEARS 8. RUN PROGRAM UP TO 1 IN FRONT OF PART AND PUSH FEED HOLD 9. IF DISTANCE TO GO LOOKS CLOSE TO 1 CONTINUE RAPID BLOCK TO TOP FACE OF PART 10. WHEN PROGRAM GOES TO FEED OR CANNED CYCLE, TAKE OFF SINGLE BLOCK 11. RUN PROGRAM TO NEXT TOOL, COMPLETE 6 TO 10 ABOVE. 12. AFTER RUNNING THRU WHOLE PROGRAM SUCCESSFULLY TURN RAPID TO 100% Productivity Inc Haas CNC Mill Operator Manual Page 38
  • 41. COMMUNICATIONS Ø Program Format to Receive - You can receive program files from a floppy disk or the RS-232 port into the Haas control. Each program must begin and end with a % sign on a line with nothing else on that line. There also must be an Onnnnn program number on the line after the % sign in each program. If there is a (Program Name), it should be entered between parentheses, either after the program number on the same line or on the next line. The program name will appear in the program list. Ø Receiving Program Files from a Floppy Disk - You can load program files from a floppy disc using the I/O menu and the FLOPPY DIRECTORY item of the Advanced Editor. Pressing WRITE/ENTER when this menu item is selected will display a list of the programs on the floppy disk. Use the cursor arrow keys or the handwheel to select the file you need to load, and press WRITE/ENTER. After loading that file, the floppy directory will remain on display to allow more files to be selected and loaded into the control. RESET or UNDO will exit this display. Ø Sending Multiple Programs from LIST PROG Using SEND RS232 - Several programs can be sent to the serial port by typing all the program names together on the input line without spaces (e.g., O12345O98765O45678) and pressing SEND RS232. Ø I/O Menu SEND RS232 or SEND FLOPPY Commands - You can send programs to the RS232 port or a floppy disk from the Advanced Editor. After selecting the menu item you want (SEND RS232 or SEND FLOPPY), a program list will appear. Select the program you want to save, or ALL (at the end of the list) if you wish to send all programs under one file name. You can also select any number of programs using the up and down cursor arrow keys or the handwheel and the INSERT key to mark the specific programs to send. If no programs are selected from the list using the INSERT key, the currently highlighted program will be sent. Ø Sending Multiple Programs Under One File Name - In the Advanced Editor, you can send multiple program files via the RS232 port or a floppy disk, using the SEND RS232 or SEND FLOPPY commands under the I/O menu (see the previous paragraph for how to do this). The Advanced Editor allows you to choose several programs (select them using the cursor and the INSERT key) and save them under one file name that you type in; then press WRITE/ENTER to save and send it. (Any Mill Control Ver. 9.49 and above; any Lathe Control Ver. 3.00 and above.) Ø Sending Multiple Programs Using Program Numbers - The SEND FLOPPY item from the I/O menu of the Advanced Editor allows the operator to select one or more programs to be saved to floppy disk. It will prompt you to "ENTER FLOPPY FILENAME". In previous versions, the control would insist on a file name. Now, however, if you do not enter a file name, but simply press WRITE/ENTER, the control will save each program (the ones you selected using the cursor and the INSERT key) to a separate file on the floppy and use the five-digit program number as the file name. For example, if programs O00123 and O45678 are selected, the new file names created will be O00123 and O45678. (Any Mill Control Ver. 9.49 and above; any Lathe Control Ver. 3.00 and above.) Productivity Inc Haas CNC Mill Operator Manual Page 39
  • 42. Ø Sending a Program File from LIST PROG Display - You can send a file or files to a floppy disk or through the RS-232 port from the LIST PROG display. Use the cursor arrows and the INSERT key to select the program(s) you want, or ALL if you want to send all of them under one file name. When you press F2 to send the selected program(s), the control will ask for a floppy file name, which can be up to eight characters long with a three-letter extension (8CHRCTRS.3XT). Then press F2 again to send it. You can also use the I/O menu in the Advanced Editor to send and receive program files. Ø RS-232 Communications Using X-Modem - If you are seeing occasional errors when using RS-232 communications, X-Modem (Setting 14) is a standard communications mode which is very reliable when only a few errors occur. Our control supports this, as do almost all software communication packages for PCs. Ø Haas Rotary Table Using the Serial Port and Macros - It is possible to regulate a Haas rotary table using the serial port and macros from the Haas control, or any Fanuc-compatible control. There is a set of sample macros available from the Haas applications department. Ø Send and Receive Offsets, Settings, Parameters and Macro Variables to/from Disk - You can save offsets, settings, and parameters to a floppy disk. Press LIST PROG first, then select an OFSET, SETNG or PARAM display page. Type in a file name and then press F2 to write that display information to disk (or F3 to read that file from a disk). You can also do this with the macro variables by pressing LIST PROG first, then selecting the macro variable display page (PAGE DOWN from CURNT COMDS). Ø Send and Receive Offsets, Settings, Parameters and Macro Variables to/from RS232 You can also save offsets, settings, and parameters via the RS-232 port. Press LIST PROG first, and then select an OFSET, SETNG, or PARAM display page. Press SEND RS232 to send that display page to the RS-232 port under the file name that you enter. Press RECV RS232 to read the file via RS-232. You can also do this with the macro variables by pressing LIST PROG first, then selecting the macro variable display page (PAGE DOWN from CURNT COMDS). Ø Deleting a Program File from a Floppy Disk - A file can be erased from the floppy drive. On the LIST PROG display, type "DEL file name" where "file name" is the name of the file on the floppy disk. Do not use the program number, unless its also the file name. Press WRITE/ENTER. The message "FLOPPY DELETE" will appear, and the file will be deleted from the floppy disk. Note that this feature requires the latest floppy driver EPROM chip version 2.11. (Any Mill Control Ver. 10.02 and above; any Lathe Control Ver. 3.00 and above.) Productivity Inc Haas CNC Mill Operator Manual Page 40
  • 43. HAAS MILL CONTROL TIPS GENERAL TIPS Ø Cursor Searching for a Program - When in EDIT or MEM mode, you can select and display another program quickly by entering the program number (Onnnnn) you want and pressing either the up or down cursor arrow or F4. Ø Searching for a Program Command - Searching for a specific command in a program can be done in either MEM or EDIT mode. Enter the address letter code (A, B, C, etc.) or address letter code with the value (A1.23), and press the up or down cursor arrow. If you enter just the address code and no value, the search will stop at the next use of that letter, regardless of the value. Ø Spindle Command - You can stop or start the spindle with CW or CCW any time you are at a Single Block stop or a Feed Hold. When you restart the program with CYCLE START, the spindle will be turned back on to the previously defined speed. Ø Coolant Pump - The coolant pump can be turned on or off manually while a program is running, by pressing the COOLNT button. This will override what the program is doing until another M08 or M09 coolant command is executed. This also applies to the chip conveyor. CONTROL TIPS Ø Coolant Spigot Position - The coolant spigot position can be changed manually when a program is running, with the CLNT UP or CLNT DOWN key. This will override what the program commands until another spigot position is commanded with an Hnn or M08 command. Ø Optional Stop - Takes effect on the line after the highlighted line when pressed. Ø A Block Delete - Takes effect four lines after that key is pressed when cutter compensation is in use, or two lines later when cutter compensation is not in use. Ø Block Look-Ahead - This control actually does look ahead for block interpretation, up to 20 blocks. This is not needed for high-speed operation. It is instead used to ensure that DNC program input is never starved, and to allow Cutter Compensation to have non-XY moves inserted while Cutter Compensation is On. Ø Memory Lock Key Switch - This is a customer machine option that prevents the operator from editing or deleting programs, and from altering settings when in the locked position. Since the Key switch locks out the Settings, it also allows you to lock out other areas within the settings: Setting 7 locks parameters: Parameter 57, 209, and 278 lock other features. Setting 8 locks all programs. Setting 23 locks 9xxx programs. Setting 119 locks offsets. Setting 120 locks macro variables. Ø Chip Conveyor - The chip conveyor can be turned on or off when a program is running, either manually using the control keys or in the program using M codes. The M code equivalent to CHIP FWD is M31, CHIP REV is M32, and CHIP STOP is M33. You can set the Conveyor Cycle time (in minutes) with Setting 114, and the Conveyor On-Time (in minutes) with Setting 115. Productivity Inc Haas CNC Mill Operator Manual Page 41
  • 44. Ø Transferring an MDI Program - You can transfer and save a program in MDI to your list of programs. When in the MDI display, make sure that the cursor is at the beginning of the MDI program. Enter a program number (Onnnnn) that s not being used. Then press ALTER and this will transfer the MDI data into your list of programs under that program number. Ø To Rapid an Axis Home - You can rapid all axes to machine zero by pressing the HOME G28 key. You can also send just one axis (X, Y, Z, A or B) to machine zero in rapid motion. Enter the letter X, Y, Z, A or B, then press HOME G28 and that axis alone will rapid home. CAUTION! There is no warning to alert you of any possible collision! For example, if the Z axis is down near the part or fixture on the table, and then the X or Y axis is sent home using HOME G28, a crash may result. Care must be exercised. (Any Mill Control Ver. 9.49 and above; any Lathe Control Ver. 2.24 and above.) Ø Rotate Tool Carousel without Changing Tools (M39) - You can rotate the tool carousel without changing tools by using M39 and Tnn. This can be used to recover from some unusual conditions. However, it will also tell the control you have a different tool in the spindle, which may not be the case. (Any Mill Control Ver. 2.3 and above.) PRGRM /CONVRS Pressing this key will bring up the IPS screen. From this screen various tabs help in creating G-code for different drilling and milling operations. This is an option provided by Haas.. Visual Quick Code tab can also be accessed from this screen. Under this screen Visual Quick Code can accessed and used to created simple G-code or various probing functions accessed by pressing F2 POSIT (Position) Ø Quick Zero on DIST-TO-GO Display - To clear out and get a quick zero position display, for a distance reference move, use the DIST-TO-GO position display. When you are in the POSIT display and in HANDLE JOG mode, press any other operation mode (EDIT, MEM, MDI, etc.) and then go back to HANDLE JOG. This will zero out all axes on the DIST-TO-GO display and begin showing the distance moved. Ø To Origin the POS-OPER Display - This display is used for reference only. Each axis can be zeroed out independently, to then show its position relative to where you selected to zero that axis. To zero out a specific axis, PAGE UP or PAGE DOWN in the POSIT display to the POS-OPER large-digit display page. When you Handle Jog the X, Y or Z axis and then press ORIGIN, the axis that is selected will be zeroed. Or, you can press an X, Y or Z letter key and then ORIGIN to zero that axis display. You can also press the X, Y or Z key and enter a number (X2.125), then press ORIGIN to enter the number in that axis display. Productivity Inc Haas CNC Mill Operator Manual Page 42
  • 45. Ø Jog Keys. The JOG keys (+X, -X, +Y, -Y, +Z, -Z, +A, -A, +B, -B) use the jog speeds of 100., 10., 1. and .1 inches per minute listed next to the HANDLE JOG key (jogging with the handwheel uses the .1, .01, .001 and .0001 inch increments). You can also adjust feed rate using the FEED RATE OVERRIDE buttons, which allow you to increase or decrease feed rate in 10% increments, up to 200% or using the HANDLE CONTROL FEED RATE or HANDLE CONTROL SPINDLE keys to adjust the programmed feed or speed 1% up or down with every increment of the Handle. Ø Jog Keys - You can also select an axis for jogging by entering the axis letter on the input line and then pressing the HANDLE JOG button. This works for the X, Y, Z, and A axes as well as the B, C, U, and V auxiliary axes. Productivity Inc Haas CNC Mill Operator Manual Page 43
  • 46. PROGRAMMING Ø Program Format at the Beginning and End - Programs written on a PC and sent to the control from a floppy disk or through the RS-232 port must start and end with a % sign, on a line by itself. The second line in a program received via floppy or RS-232 (which will be the first line the operator sees) must be Onnnnn, a six-character program number that starts with the letter O followed by five digits. When you create a program on the Haas control the percent (%) signs will be entered automatically, though you won t see them displayed. Ø Program Format with M06 - It is not necessary to turn off the coolant (M09), stop the spindle (M05), or move the Z axis home (G28) prior to a tool change. The control will do these tasks for you during a tool change M06 command. However, you may decide to program these commands anyway for convenience and timely execution of a tool change sequence. If you are using Single Block to step through a program you will be able to see the commands when you stop on that line. Ø Tapping with G84 or G74 - When tapping, you don t need to start the spindle with an M03 or M04 command. The control starts the spindle for you automatically with each G84 or G74 cycle, and it will in fact be faster if you don t turn on the spindle with an M03 or M04. The control stops the spindle and turns it back on again in the G84 or G74 tapping cycle to get the feed and speed in sync. The operator just needs to define the spindle speed. Ø Quick Reverse Out of a G84 Rigid Tapping Cycle - This feature for rigid tapping has the spindle back out faster than it went into a tapped hole. The way to specify this is with a J code on the G84 command line. J2 retracts twice as fast as the entry motion; J3 retracts three times as fast, and so on, up to J9. A J code of zero will be ignored. If a J code less than 0 or greater than 9 is specified, Alarm 306 - "INVALID I, J, K or Q" - is generated. The J code is not modal and must be specified in each block where this effect is wanted. The J value should not contain a decimal point. (Any Mill Control Ver. 10.13 and above.) Ø M19 (Orient Spindle) with a P Value - This feature works on any vector drive mill. Previously, the M19 command would simply orient the spindle to only one position ó that suitable for a tool change. Now, a P value can be added that will cause the spindle to be oriented to a particular position (in degrees). If a whole number is used for the P value, no decimal point is needed. For example, M19 P270 will orient the spindle to 270 degrees. Note that P270.001 (or any other fraction) will be truncated to P270, and P365 will be treated as P5. (Any Mill Control Ver. 9.49 and above. Any Lathe Control Ver. 2.21 and above.) Ø M19 (Orient Spindle) with a Fractional R Value - This feature works on any vector drive mill. An M19 R123.4567 command will position the spindle to the angle specified by the R fractional value; up to 4 decimal places will be recognized. This R command now needs a decimal point: if you program M19 R60, the spindle will orient to 0.060 of a degree. Previously, R commands were not used for this purpose and only integer P values could be used. (Any Mill Control Ver. 9.49 and above; any Lathe Control Ver. 2.29 and above.) Ø Duplicating a Program in LIST PROG - In the LIST PROG mode, you can duplicate an existing program by cursor-selecting the program number you wish to duplicate, typing in a new program number (Onnnnn), and then pressing F1. You can also go to the Advanced Editor menu to duplicate a program, using the PROGRAM menu and the DUPLICATE ACTIVE PROGRAM item. Productivity Inc Haas CNC Mill Operator Manual Page 44
  • 47. Programming Typical Haas G-Codes: The definition of G code is typically referred to as a Preparatory Function . They establish the mode of operation that the machine needs to be in to accomplish what the programmer intends. Imagine a rotary switch like that on an older TV; we are just turning the switch to different modes . Let s discuss the G Codes that are most commonly used during the setup of a Haas VMC G00 Rapid traverse motion; Used for positioning and during non-cutting moves. NOTE: Machine rapids can be up to 1400+ inches per minute (IPM). G01 Linear interpolation motion; used for actual machining and metal removal. Governed by programmed feed rate G02 Circular interpolation Clockwise G03 Circular interpolation Counterclockwise G28 Machine home (Rapid traverse) G40 Cutter compensation cancel G41 Cutter compensation to left of path. G42 Cutter compensation to right of path. G43 Read tool length compensation. G54 Work coordinate #1 (Part zero) G80 Drilling Cycle Cancel G81 Drill canned cycle G82 Spot drill canned cycle. G83 Peck drill canned cycle. G84 Tapping canned cycle. G90 Absolute Positioning G91 Incremental Positioning G98 Make all drilling X&Y moves at the Initial Plane (H Line Height) G99 Make all drilling X&Y moves at the Rapid Plane (R Value in Canned Cycle) Productivity Inc Haas CNC Mill Operator Manual Page 45
  • 48. Typical Haas M Codes: M Codes are used by the programmer to turn on and off certain functions of the machine. Think of M codes as codes that turn on and off different systems of the machine. M00 Program Stop. The machine will wait for the operator to push Cycle Start M01 Optional program stop. The machine will stop if the OPT STOP mode is turned on. M03 Start spindle forward (Clockwise). Must have a spindle speed M04 Start spindle reverse (Counterclockwise). Must have a spindle speed M05 Spindle stop M06 Tool change command. Must have a T value on the same line (Tool Number) M08 Coolant ON command M09 Coolant OFF command M88 High Pressure Coolant On (Typically Thru Spindle Coolant) M89 High Pressure Coolant Off M30 Program end and rewind to beginning of program M97 Program Jump Jumps to a specific line number (M97 P100, Jump to Line N100) M98 Subprogram call Jump to another program M99 Subprogram return, or loop. Used to tell the machine to go back from a Sub Prog. NOTE: Only one "M" code can be used per line. The "M" code will be the last item of code to be performed, regardless of where it is located in the line. Productivity Inc Haas CNC Mill Operator Manual Page 46