Grow Your Own, Nevada! Fall 2012: Reap What You Sow
•Als PPTX, PDF herunterladen•
1 gefällt mir•2,107 views


Empfohlen
Empfohlen
Weitere ähnliche Inhalte
Was ist angesagt?
Was ist angesagt? (19)
Andere mochten auch
Andere mochten auch (6)
Ähnlich wie Grow Your Own, Nevada! Fall 2012: Reap What You Sow
Ähnlich wie Grow Your Own, Nevada! Fall 2012: Reap What You Sow (20)
Mehr von University of Nevada Cooperative Extension
Mehr von University of Nevada Cooperative Extension (20)
Grow Your Own, Nevada! Fall 2012: Reap What You Sow
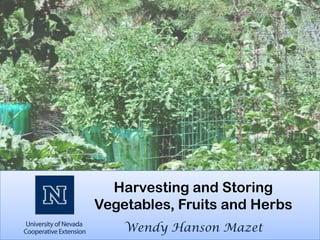
- 1. Harvesting and Storing Vegetables, Fruits and Herbs Wendy Hanson Mazet
- 2. Helpful links and resources Getting Started with a Vegetable Garden www.unce.unr.edu/publications/files /ho/2010/fs1015.pdf Searching for Fact Sheets? www.extension.org www.growyourownnevada.com
- 3. Onions Garlic •Onion bulbs varies to each variety – • Harvest when the leaves lose in general 2 to 4‖ in diameter. color and the tops begin to fall •Pull all onions when the tops fall over. over. •Allow harvested onions dry for a 1 – 2 days with the tops on •Then clip 1 inch above bulb before storing them in a cool, dry place. Green Onions •Harvest green onions when they are 6 to 8 inches tall.
- 4. Peas Spinach • If the peas will be shelled, • Harvested when the large harvest the pods when they are leaves are 4 to 6 inches long. shiny green and fully developed. • Pull the larger, whole plants or • Overly mature peas are of poor harvest the older leaves and quality. allow new growth to develop. • For the edible pod varieties, harvest when the pods are fully developed (about 3 inches.
- 5. Greens - Swiss Chard Rhubarb • beet • Only the long, thick leaf greens, collards, dandelions, kale, petioles, the ―stalks,‖ are edible. mustard greens, turnip greens, and • Wait until the second season, or others. the third season if the plants were • Break off the outer leaves when started from seed. they are 6 to 10 inches long and • To pick, hold the stalk before they start to yellow. firmly, pull, and twist. • Avoid wilted or flabby leaves.
- 6. Root Crops Jerusalem Radishes artichoke: • Harvest radishes when they • Dig the tubers after early fall are about 1 inch in diameter. frosts or in very early spring before the new growth starts.
- 7. Beets Carrots • Pull early beets when they are • Carrots are ready to be about 2 inches in diameter. If harvested when they are small they are allowed to get much and succulent. larger, they become • Do not let them get over about woody, especially in warm, dry 1 inch in diameter. weather. • Always pull the largest carrots • For late-crop beets, remove all in the row. but about 1½ inches of the tops.
- 8. Potatoes • Mature tubers can be harvested after leaves have dried or when tubers have reached full size. • For Irish potatoes, a good harvest size is 2 to 3 inches in diameter. • Harvest ―new‖ potatoes at any size, but generally do not dig before they are 1¼ to 1½ inches in diameter, 7-8 weeks after planting. • Let the potatoes dry several hours in garden after digging them.
- 9. Cucumbers Beans • Harvest them when fruits are • Harvest these beans when the bright, firm. pods are well filled but have • A rule of thumb: harvest sweet not begun to yellow. pickles at 1½ to 2 inches long; Beans—snap: • Harvest dills when they are 3 • For maximum to 4 inches long, bright tenderness, harvest snap green, and less crisp. beans when the pods are • Avoid yellowed almost full size but before the cucumbers, unless it is a seeds begin to bulge. lemon cuc.
- 10. Winter Squash Pumpkins: Winter Squash • Pick pumpkins when they are • when the fruits are full size. full size, the rind is firm and The rind is firm and glossy and glossy, and the bottom of the bottom (portion touching soil) fruit is cream to orange of fruit is cream to orange colored. colored. • Harvest before frost or when • Light frost will not damage rind resist fingernails mature fruit. scratches. Leave a 2 to 4 inch stem with the fruit.
- 11. Melons Muskmelon (cantaloupes): Honeydew: • Lift and twist – if ripe it will • These do not slip from the vine easily slip off the stem when ripe. • The outer rind should not • When the bottom is yellowish have any green color. to creamy white. • The rind should be slightly soft Watermelon: at the blossom end and have a • Harvest watermelon when faint, pleasant odor. the fruits are full size and have a dull surface and a cream-colored ground spot. • The Thump Test – If it’s a dull sound , similar to tapping your forehead, it’s not ripe. A hollow sound, similar to tapping you chest means it’s ripe.
- 12. Summer Squash Corn • Harvest squash when it is 4 • Watch corn for signs of to 6 inches long for yellow ripeness for earliest harvest. crookneck squash, 6 to 8 • Corn silks darken and dry inches long for yellow out as the ears mature. straight neck, and 3 to 4 • As the kernels fill out toward inches in diameter for white the top, the ends become scallop. more rounded instead of pointed. • A glossy color indicates • Pick sweet corn in the milk tenderness. stage, when a milk like juice exudes from the kernels if crushed with a thumbnail.
- 13. Peppers Eggplant • Harvest bell • Harvest eggplants peppers when they when the fruits are are full and have near full size—but well-formed lobes. still firm and bright in • Immature peppers color. are pale, soft, pliable, a • Older fruits become nd thin fleshed. soft, seedy, and dull • Mature peppers turn colored. orange or red; this does not mean that they are hotter.
- 14. Tomatoes • Harvest tomatoes when they are fully colored but still firm. • Harvest red tomatoes for eating fresh, cooking, or canning. • Do not can overripe tomatoes! • If necessary, pick mature green or slightly pink tomatoes and ripen them at room temperature, out of direct sunlight.
- 16. Pip Fruits Apples • Pick ripe apples from the tree by pulling fruit upward and outward while rotating Pears the fruit slightly. • Pears picked when slightly • Frost will not sweeten or immature will ripen with mature apples or other better quality than pears fruit. Sugars accumulate that are over mature when with bright, warm (not hot) picked. days and cool nights regardless of frost. • Most mature, ready to ripen pears will usually detach when "tilted" to a horizontal position from their usual vertical hanging position.
- 17. Stone Trees Stone fruits include peaches, plums, cherries, and apricots: all have a hard pit Peach/ Apricot/ Nectarine • As fruits ripen, the flesh softens and the skin changes from green to purple, red, orange. • To test ripeness by applying pressure (the flesh should yield to gentle thumb pressure.) • To harvest without hurting the fruit buds for next year’s crop, twist the fruit slightly while pulling. • harvested without the stems attached
- 18. Cherry • Fruit maturity can be determined by color • sweet cherries are hand- harvested leaving the pedicels intact. • Harvest with stems attached
- 19. Shrubs Cane Fruit Gooseberry • Ready to pick when they • Can be picked when they easily separate from the reach full size, but are not receptacle or core. fully ripe. (At this stage, the • Blackberries do not separate fruit are green, tart, and still from the core, so ripeness quite hard.) should be judged by color • Pick when ripened to a and taste. pinkish color and sweeter • All bramble fruit are flavor. extremely perishable & should be harvested frequently.
- 20. Grapes Grapes • Color, size, sweetness, and flavor are the most useful indicators of table grape maturity. • Berry color will change from green to blue, red, or white as the different grape varieties approach maturity. • Color alone should not be the sole basis for harvesting grapes. The berries of many varieties change color long before they are fully ripe.
- 21. Strawberries Currants • Strawberries are • Fully ripe currants are fully ripe when slightly soft, juicy, and uniformly red. develop the • Pick the berries with characteristic color of the cap and stem the variety. attached to retain firmness and • Most currant varieties quality. are red at maturity, a • When harvesting, few are white. pinch the stem off • Harvest currants by about 1/4 inch picking the fruit clusters above the cap. from the plant then stripping individual berries from the stem.
- 22. Herbs •The time of day and time of season can affect the quantity of oil present in the leaves of your herbs. The oil present in the leaves can determine the flavor intensity of the herb and its nutritional content or medicinal value. •Harvest your herbs before the plants flower. •Remove any flower heads from the plant to ensure it keeps producing as many leaves as possible. •For more information on herbs: www.extension.umn.edu/distribution/horti culture/components/M1223.pdf
- 23. Preserving
- 24. Food Safety • Your life depends on it! • Only use fresh, clean food • When canning, know the pH and your altitude • Maintain proper temperatures, avoid the ―danger zone‖ • Label everything with name & date to ensure it is consumed within its
- 25. Cold Storage Refrigerated, 33°to 38° Cold Storage, 39° to 50° • Vegetables: • Squashes, Onions & – All Veggies except Potatoes tomatoes – Must be washed, dried, and cured – Keep a high relative before storage humidity – Onions can be stored in • Use crisper drawer mesh bags • Perforated plastic bags • Apples (store away from – Root Vegetables should other vegetables and have the greens removed to a ¼‖ and the tap root cut fruits as they emit off ethylene gas) – Must be kept humid to prevent shriveling Storing Vegetables at Home - Fact Sheet A1135 http://nchfp.uga.edu/how/store/wisc_vegetables.pdf
- 26. Freezing temperatures 20°- 30° Vegetables • Most should be blanched prior to freezing; blanching is immersing in boiling water then quickly cooling. Time varies with the vegetable • Vacuum sealing, freezer- specific plastic bags and boxes, and glass canning jars best Preserving Food: Freezing Vegetables Complete information on freezing food at home, Pub # FDNS-E-43-5 The University of Georgia Cooperative Extension http://www.fcs.uga.edu/ext/pubs/fdns/FDNS-E-43-05.pdf
- 27. Freezing temperatures 20°- 30° Meats & Dairy • Meats should be repackaged into freezer paper or vacuum sealed if they are purchased in plastic wrapped styrofoam containers • Cheese should be packed in freezer paper or vacuum sealed Feb. 2011
- 28. Dehydrating Meats & Dairy Fruits & Vegetables • Must be temperature • To prevent browning dip controlled. A minimum of fruits in lemon juice. 160° required to ensure • Some fruits need to be safety. blanched before drying
- 29. Resources National Center for Home Food Preservation www.nchfp.uga.edu Ball / Kerr www.freshpreserving.com Canning Pantry http://www.canningpantry.com/
- 30. Happy Harvesting
Hinweis der Redaktion
- The seeds, leaves, flowering tops, bark, and occasionally the roots of the different plants are used for flavoring purposes. Their flavor is due for the most park to a volatile or essential oil contained in small glands in the leaves, seeds, and fruits. The flavor is retained longer if the herbs are harvested at the right time and properly cured and stored. The young tender leaves can be gathered and used fresh at any time during the season, but for winter use they should be harvested when the plants begin to flower, and should be dried rapidly in a well-ventilated, darkened room. If the leaves are at all dusty or gritty, they should be washed in cold water and thoroughly drained before drying. The tender leaf herbs -- basil, costmary, tarragon, lemon balm, and the mints -- which have a high moisture content, must be dried rapidly away from the light if they are to retain their green color. If dried too slowly, they will turn dark or mold. For this reason a well ventilated, darkened room, such as an attic or other dry, airy room, furnishes ideal conditions for curing these herbs in a short time. The less succulent leaf herbs -- sage, rosemary, thyme, and summer savory -- which contain less moisture, can be partially dried in the sun without affecting their color, but too long exposure should be avoided. The seed crops should be harvested when mature or when their color changes from green to brown or gray. A few plants of the annual varieties should be left undisturbed to flower and mature seed for planting each season. Seeds should be thoroughly dried before storing, to prevent loss of viability for planting and to prevent molding or loss of quality. After curing for several days in an airy room, a day or two in the sun before storing will insure safekeeping. As soon as the herb leaves or seeds are dry they should be cleaned by separating them from stems and other foreign matter and packed in suitable containers to prevent loss of the essential oils that give the herbs their delicate flavor. Glass, metal, or cardboard containers that can be closed tightly will preserve the odor and flavor. Glass jars make satisfactory containers, but they must be painted black or stored in a dark room to prevent bleaching of the green leaves by light. Drying. After harvesting, hang herbs in loosely tied bundles in a well-ventilated room. You can also spread the branches on a screen or cheesecloth, or spread herb leaves on flat trays when only the leaves are needed. To keep dust off the herbs, use a cloth or similar protective cover that allows moisture to pass through.It is generally best to dry naturally in a cool, dark room rather than use artificial heat. Experts can use artificial heat, but you may lose flavor and quality by attempting this drying method.
- Beet and Goat Cheese Salad with SpinachInspired by The City Cook6 to 8 small to medium red or golden beets, or a variety of both4 cups baby spinach, washed and dried1 small red onion, halved and thinly sliced2/3 cup crumbled goat cheese1/4 cup pine nuts1/4 cup extra virgin olive oil plus 2 tablespoons4 tablespoons red wine vinegar1 tablespoon freshly squeezed lemon juiceSaltPepperPre-heat oven to 425º F.Scrub the beets and trim off the tops. Do not peel them.Tear off 5 inch portions of aluminum foil for as many beets as you have. If you have some small beets, they can be grouped together. Wrap each beet in their foil and seal well. Place the beet packets on a sheet pan and roast for 45 minutes to 1 hour, or until tender and their skins slide off easily.Radishes differ in shape and color of their roots. In terms of form, there are round radishes, half long (most wanted) or long. They can be white, pale pink, bright red, purplish red, black and white often with a bit more or less important. They also differ according to time of cultivation and harvesting:• Radishes to force: they are early, with small leaves, and cultures for haste (under plastic tunnels) and the first plantings homeless. Radishes are formed quickly and without waiting to be harvested because they become hollow very quickly. There are radishes to force long, long, half round, red, bright red with a white tip more often.• Radishes of every month they are grown in the ground and are likely, as the name implies, to be sown for a long period from mid-March to late September. They are round radishes and a half-length, pink, red, bright red with a white tip more often.• The radish radishes: radishes as all the months, it is possible to grow them over a long period. Their culture time is longer and the crops begin 6-8 weeks after sowing. These radish long, narrow and pointed. They have a soft flesh with a sweet flavor. They do not become empty quickly.• Radishes summer and autumn varieties are sown in the summer, from June to August. These are large radish, root at long or round, pink, red, bright red, white. They have a soft flesh with a taste and do not become empty quickly. They are delicious grated and eaten in salads.• The winter radish: their root is usually long and cylindrical, sometimes round, black or purple. Their flesh is firm, more or less pungent flavor, and they consume sliced. Sown in summer, they are harvested from November. It is possible to keep them in the cellar to keep them all winter.Soil and exposure> Radishes like:• The sunny, but they accept partial shade.• Soils light and fresh.• The regular watering during dry and hot.• Soils rich in humus.> Radishes do not like:• The pebbles or soil too compact that hinder root development.• Drought makes radishes hollow quills.Sowing and plantingPeriods of seedlings vary depending on the type of radish. They start as early as mid-February and protection force for radish. They continue until September to March with radishes every month from June to August for summer radishes, autumn and winter. In October, it is possible to sow radishes forcing under plastic tunnels.> Spacing2 to 3 cm between plants15 cm for winter radish• Avoid planting too thick, otherwise the radishes will form easily. After sowing, the soil should be well compacted. Then, it is useful to cover the seed with a thin layer of soil. The round varieties should be planted close to the surface, half-long varieties deeper and long (1.5 to 3 cm).• For regular harvests and quality, we must sow small amounts several times, every 2 to 3 weeks for example and clear after emergence.• The radishes are grown in forcing under plastic tunnels or in the ground. They are planted on the fly with harvest beginning 4-6 weeks later.• Radishes of all months, the radishes turnips, radishes, summer and fall are sown on the fly in wide rows or rows spaced 10 to 20 cm.For radish every month, the culture time from 4 to 6 weeks. It is longer by about 2 weeks for radishes turnips and radishes summer and fall (6-8 weeks).• The winter radishes are sown in rows 25 to 30 cm. It is then necessary to clarify the culture by simply leaving a radish on the line every 15 cm.Crop managementRadishes are very easy to grow. After emergence, it should clear up the plants to facilitate the development of radish. Then you have to constantly keep the soil cool by frequent light watering but especially in summer. In this way, radishes become slower hollow quills.Crops should be regular when the radishes are formed. Do not delay not to give them time to become hollow. For regular consumption of crisp radish and tasty, it is necessary to stagger plantings every 2 to 3 weeks.EnemiesBecause of the short duration between sowing and harvesting, there is no treatment to predict. The regular watering can prevent attacks by beetles that devour the leaves of radish.