2. 1.0 Before You Begin Overview
Getting Ready for OmniPod® System Training > Before You Begin >
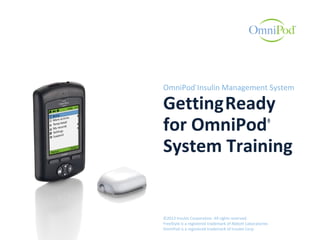
Welcome to OmniPod Interactive Learning!
3. 1.0 Before You Begin Overview
Getting Ready for OmniPod System Training > Before You Begin >
Soon you will meet with your
diabetes educator to learn how
to use the OmniPod®
Insulin
Management System.
4. 1.0 Before You Begin Overview
Getting Ready for OmniPod System Training > Before You Begin >
To get the most out of that training,
it is helpful to review the basics of
diabetes self-management and
insulin pump therapy first.
5. 1.0 Before You Begin Overview
Getting Ready for OmniPod System Training > Before You Begin >
This interactive program is designed
to give you that review. It will help
you prepare for your OmniPod
training.
6. 1.0 Before You Begin Overview
Getting Ready for OmniPod System Training > Before You Begin >
To prepare for your personal
OmniPod training, we encourage
you to:
•Listen to each topic carefully
•Take the short quizzes to check
your understanding
•Review the User Guide
7. 2.0 Living Well with Diabetes Overview
Getting Ready for OmniPod System Training > Living Well with Diabetes >
8. 2.0 Living Well with Diabetes Overview
Getting Ready for OmniPod System Training > Living Well with Diabetes >
You play the most important role in
managing your diabetes. The things
you do every day can make it easier
or harder to manage.
This section reviews some of the
basic skills that make it easier to
manage your diabetes, like keeping
your blood glucose levels in your
target range.
9. 2.0 Living Well with Diabetes Overview
Getting Ready for OmniPod System Training > Living Well with Diabetes >
In this section you will learn:
•Why it is important to check your
blood glucose regularly
•When you should check your blood
glucose in addition to your regular
checks
•Some techniques you should
always use when you check your
blood glucose
10. 2.0 Living Well with Diabetes Overview
Getting Ready for OmniPod System Training > Living Well with Diabetes >
In this section you will learn:
•What you should do when you
think you have low blood glucose
•What you should do when you
think you have high blood glucose
•What ketones are and when you should
check for ketones
•What you should do during sick days
11. 2.1 Importance of Self-Monitoring of Blood Glucose
Getting Ready for OmniPod System Training > Living Well with Diabetes >
12. 2.1 Importance of Self-Monitoring of Blood Glucose
Getting Ready for OmniPod System Training > Living Well with Diabetes >
One important part of your everyday
diabetes management is called
Self-Monitoring of Blood Glucose
(SMBG).
13. 2.1 Importance of Self-Monitoring of Blood Glucose
Getting Ready for OmniPod System Training > Living Well with Diabetes >
With SMBG, you measure and record
your blood glucose level many times
during each day.
Then you use this information to
adjust your diabetes management
and your daily routines to keep your
blood glucose in your target range.
14. 2.1 Importance of Self-Monitoring of Blood Glucose
Getting Ready for OmniPod System Training > Living Well with Diabetes >
When you ‘see’ what your current
blood glucose is, you can better
manage your diet and exercise and
their effects on your blood glucose.
15. 2.1 Importance of Self-Monitoring of Blood Glucose
Getting Ready for OmniPod System Training > Living Well with Diabetes >
Knowing your current blood glucose
also helps you adjust your insulin
doses when you need to.
16. 2.1 Importance of Self-Monitoring of Blood Glucose
Getting Ready for OmniPod System Training > Living Well with Diabetes >
Checking your blood glucose regularly
helps to avoid potential problems
from having blood glucose that is too
low (hypoglycemia) or blood glucose
that is too high (hyperglycemia).
17. 2.1 Importance of Self-Monitoring of Blood Glucose
Getting Ready for OmniPod System Training > Living Well with Diabetes >
Hypoglycemia and hyperglycemia
may not always produce symptoms.
Checking your blood glucose regularly
is the most reliable way to detect
them.
18. 2.1 Importance of Self-Monitoring of Blood Glucose
Getting Ready for OmniPod System Training > Living Well with Diabetes >
Checking your blood glucose regularly
helps your healthcare provider.
Your provider can use your blood
glucose information to plan an
individualized diabetes treatment
for you.
19. 2.1 Importance of Self-Monitoring of Blood Glucose
Getting Ready for OmniPod System Training > Living Well with Diabetes >
In short, checking your blood glucose
regularly is the most important part
of managing your diabetes
successfully.
20. 2.1 Importance of Self-Monitoring of Blood Glucose
Getting Ready for OmniPod System Training > Living Well with Diabetes >
Frequent blood glucose checks
help you to:
•Know what your current blood
glucose is
•Know if your blood glucose level is
changing
•Take corrective action when needed
to keep your blood glucose in your
target range
21. 2.2 The Basics of Checking Blood Glucose
Getting Ready for OmniPod System Training > Living Well with Diabetes >
22. 2.2 The Basics of Checking Blood Glucose
Getting Ready for OmniPod System Training > Living Well with Diabetes >
Most healthcare providers
recommend checking blood glucose
several times a day, especially before
meals and before you go to bed.
23. 2.2 The Basics of Checking Blood Glucose
Getting Ready for OmniPod System Training > Living Well with Diabetes >
In addition to these regular checks,
there are other times when checking
blood glucose is necessary.
24. 2.2 The Basics of Checking Blood Glucose
Getting Ready for OmniPod System Training > Living Well with Diabetes >
You should check your blood
glucose:
•When you feel symptoms like
weakness, sweating, nervousness,
headache, or confusion
•When you are deciding whether to
adjust your insulin dose, especially
before a meal and 2 hours after meals
•When your healthcare provider tells
you to
25. 2.2 The Basics of Checking Blood Glucose
Getting Ready for OmniPod System Training > Living Well with Diabetes >
Make it a habit to keep your blood
glucose meter, test strips and lancets
with you at all times.
Always have spare working batteries
and fresh test strips that have not
passed their expiration date.
26. 2.2 The Basics of Checking Blood Glucose
Getting Ready for OmniPod System Training > Living Well with Diabetes >
Before checking blood glucose, it is
important each time to make sure
your hands and your test site are
clean.
Use warm, soapy water; rinse and dry
your hands and your test site
completely.
27. 2.2 The Basics of Checking Blood Glucose
Getting Ready for OmniPod System Training > Living Well with Diabetes >
When you choose a test site,
remember:
•Checking blood glucose from your
fingertips may show glucose changes
sooner than checking it from other
sites.
•You may see differences between
blood glucose readings taken from
your finger or palm and readings
taken from other test sites after you
have eaten, taken insulin, or
exercised.
28. 2.2 The Basics of Checking Blood Glucose
Getting Ready for OmniPod System Training > Living Well with Diabetes >
Blood glucose readings can be
affected if you are severely
dehydrated.
29. 2.2 The Basics of Checking Blood Glucose
Getting Ready for OmniPod System Training > Living Well with Diabetes >
If your body has lost a lot of water,
your blood glucose readings may
show high results.
30. 2.2 The Basics of Checking Blood Glucose
Getting Ready for OmniPod System Training > Living Well with Diabetes >
If you believe you are severely
dehydrated, consult your healthcare
provider immediately.
32. 2.3 Managing Hypoglycemia
Getting Ready for OmniPod System Training > Living Well with Diabetes >
One potential condition you may
encounter when you take insulin is
low blood glucose levels below 70
mg/dL. This is called hypoglycemia.
33. 2.3 Managing Hypoglycemia
Getting Ready for OmniPod System Training > Living Well with Diabetes >
If your blood glucose level drops
below 70 mg/dL, do not ignore it.
Left untreated, it may lead to
unconsciousness, seizures, or death.
34. 2.3 Managing Hypoglycemia
Getting Ready for OmniPod System Training > Living Well with Diabetes >
It is always a good idea to check your
blood glucose frequently, especially,
after you have participated in
prolonged or intense exercise.
Sometimes your blood glucose can be
low, and you may not experience any
symptoms.
35. 2.3 Managing Hypoglycemia
Getting Ready for OmniPod System Training > Living Well with Diabetes >
Symptoms of hypoglycemia
(low blood glucose)
•Shakiness
•Fatigue
•Sweating
•Cold, clammy skin
•Weakness
•Blurred vision or a headache
36. 2.3 Managing Hypoglycemia
Getting Ready for OmniPod System Training > Living Well with Diabetes >
Symptoms of hypoglycemia
(low blood glucose)
•Sudden hunger
•Rapid heart rate
•Confusion
•Tingling in the lips or tongue
•Anxiety
37. 2.3 Managing Hypoglycemia
Getting Ready for OmniPod System Training > Living Well with Diabetes >
When you have any of these
symptoms, check your blood glucose.
If you get a reading below 70 mg/dL,
treat it immediately.
38. 2.3 Managing Hypoglycemia
Getting Ready for OmniPod System Training > Living Well with Diabetes >
Treatment of hypoglycemia
(low blood glucose)
•Eat 15 grams of fast-acting
carbohydrates, such as glucose
tablets or hard candy, or drink 4
ounces of fruit juice.
39. 2.3 Managing Hypoglycemia
Getting Ready for OmniPod System Training > Living Well with Diabetes >
Treatment of hypoglycemia
(low blood glucose)
•Eat 15 grams of fast-acting
carbohydrates, such as glucose
tablets or hard candy, or drink 4
ounces of fruit juice.
Check your blood glucose again
after 15 minutes.
40. 2.3 Managing Hypoglycemia
Getting Ready for OmniPod System Training > Living Well with Diabetes >
Treatment of hypoglycemia
(low blood glucose)
•If your blood glucose is still below 70
mg/dL, eat 15 grams of carbohydrate
or drink 4 ounces of fruit juice.
41. 2.3 Managing Hypoglycemia
Getting Ready for OmniPod System Training > Living Well with Diabetes >
Treatment of hypoglycemia
(low blood glucose)
•If your blood glucose is still below 70
mg/dL, eat 15 grams of carbohydrate
or drink 4 ounces of fruit juice.
Check blood glucose again in 15
minutes. Continue to check and
treat until blood glucose is above
70 mg/dL.
42. 2.3 Managing Hypoglycemia
Getting Ready for OmniPod System Training > Living Well with Diabetes >
Treatment of hypoglycemia
(low blood glucose)
•Contact your healthcare provider for
guidance.
43. 2.3 Managing Hypoglycemia
Getting Ready for OmniPod System Training > Living Well with Diabetes >
To manage hypoglycemia:
•Know your target blood glucose
level.
44. 2.3 Managing Hypoglycemia
Getting Ready for OmniPod System Training > Living Well with Diabetes >
To manage hypoglycemia:
•Keep a fast-acting carbohydrate like
glucose tablets or hard candy with
you at all times, so you can respond
quickly to low blood glucose.
45. 2.3 Managing Hypoglycemia
Getting Ready for OmniPod System Training > Living Well with Diabetes >
To manage hypoglycemia:
•Teach your friends, family members,
and colleagues to recognize the signs of
hypoglycemia, so they can help if you
develop hypoglycemia unawareness or
a severe
adverse reaction.
46. 2.3 Managing Hypoglycemia
Getting Ready for OmniPod System Training > Living Well with Diabetes >
To manage hypoglycemia:
•Keep a glucagon injection kit
(for treating low blood glucose) with
your emergency supplies. Teach
family members, roommates, and
others how to use glucagon properly
ahead
of time.
47. 2.3 Managing Hypoglycemia
Getting Ready for OmniPod System Training > Living Well with Diabetes >
To manage hypoglycemia:
•If you have an incident of
hypoglycemia, find out why.
That can help you manage
hypoglycemia in the future.
49. 2.4 Managing Hyperglycemia
Getting Ready for OmniPod System Training > Living Well with Diabetes >
When there is not enough insulin
in your body, or insulin delivery is
interrupted, your blood glucose can
rise rapidly. This may lead to another
potential condition, high blood
glucose, called hyperglycemia.
50. 2.4 Managing Hyperglycemia
Getting Ready for OmniPod System Training > Living Well with Diabetes >
To prevent hyperglycemia, check your
blood glucose four to six times a day.
It is a good idea to check your blood
glucose when you wake up, before
each meal, and before you go to bed.
51. 2.4 Managing Hyperglycemia
Getting Ready for OmniPod System Training > Living Well with Diabetes >
Symptoms of hyperglycemia
(high blood glucose)
•Fatigue
•Nausea
•Frequent urination, especially during
the night
•Unusual thirst or hunger
52. 2.4 Managing Hyperglycemia
Getting Ready for OmniPod System Training > Living Well with Diabetes >
Symptoms of hyperglycemia
(high blood glucose)
•Unexplained weight loss
•Blurred vision
•Slow healing of cuts or sores
When you feel any of these
symptoms, check your blood
glucose.
53. 2.4 Managing Hyperglycemia
Getting Ready for OmniPod System Training > Living Well with Diabetes >
You should also check your
blood glucose:
•Before you drive a car
•When your blood glucose has been
running unusually high
or low
•If you suspect that your blood
glucose is high or low
•Before, during, and after exercise
•As directed by your healthcare
provider
54. 2.4 Managing Hyperglycemia
Getting Ready for OmniPod System Training > Living Well with Diabetes >
If you get a blood glucose reading
higher than 250 mg/dL and feel
symptoms, such as fatigue, thirst,
excessive urination, or blurry vision,
treat for hyperglycemia as
recommended by your healthcare
provider.
55. 2.4 Managing Hyperglycemia
Getting Ready for OmniPod System Training > Living Well with Diabetes >
You should also check for the
presence of ketones.
Ketones are acidic substances
produced when the body breaks
down fat for energy.
They may be a sign you are
experiencing diabetic ketoacidosis
(DKA), a potentially life-threatening
condition.
56. 2.4 Managing Hyperglycemia
Getting Ready for OmniPod System Training > Living Well with Diabetes >
To check for ketones, you do a simple
urine test with a urine ketone test
strip.
If the ketone test is negative or shows
trace, continue treating for high
blood glucose.
If the ketone test shows ketones are
present, and you are feeling
nauseated or ill, call your healthcare
provider immediately for guidance.
57. 2.4 Managing Hyperglycemia
Getting Ready for OmniPod System Training > Living Well with Diabetes >
When you get a high blood glucose
reading but have no symptoms of
hyperglycemia, check your blood
glucose again with a new test strip.
If you still get a high blood glucose
reading, treat for hyperglycemia as
recommended by your healthcare
provider.
58. 2.5 Diabetic Ketoacidosis (DKA)
Getting Ready for OmniPod System Training > Living Well with Diabetes >
59. 2.5 Diabetic Ketoacidosis (DKA)
Getting Ready for OmniPod System Training > Living Well with Diabetes >
Your body needs insulin to move
glucose out of your blood and into
your cells to fuel cell activity.
When there is not enough insulin in
your body, glucose stays in your
blood. Your blood glucose level rises.
60. 2.5 Diabetic Ketoacidosis (DKA)
Getting Ready for OmniPod System Training > Living Well with Diabetes >
But your body still needs energy.
If your cells are not getting enough
glucose from your blood, your body
starts breaking down fat cells for
energy.
When the body breaks down fats for
energy, it produces acidic substances
called ‘ketones.’ Ketones in your body
can be a sign of the condition called
diabetic ketoacidosis, or DKA.
61. 2.5 Diabetic Ketoacidosis (DKA)
Getting Ready for OmniPod System Training > Living Well with Diabetes >
Symptoms of DKA similar to those
of hyperglycemia
•Fatigue
•Frequent urination, especially during
the night
•Unusual thirst or hunger
•Unexplained weight loss
•Blurred vision
•Slow healing of cuts or sores
62. 2.5 Diabetic Ketoacidosis (DKA)
Getting Ready for OmniPod System Training > Living Well with Diabetes >
Other symptoms of DKA
•Nausea and vomiting
•Abdominal pain
•Dehydration
•Fruity-smelling breath
•Dry skin or tongue
•Rapid pulse
•Labored breathing
63. 2.5 Diabetic Ketoacidosis (DKA)
Getting Ready for OmniPod System Training > Living Well with Diabetes >
The easiest and most reliable way to
prevent DKA is to check your blood
glucose four to six times a day.
These routine checks allow you to
detect and treat high blood glucose
before DKA develops.
64. 2.5 Diabetic Ketoacidosis (DKA)
Getting Ready for OmniPod System Training > Living Well with Diabetes >
If you get a blood glucose reading
higher than 250 mg/dL, also do a
check for ketones
65. 2.5 Diabetic Ketoacidosis (DKA)
Getting Ready for OmniPod System Training > Living Well with Diabetes >
To check for ketones, you do a simple
urine test with a urine ketone test
strip.
If the ketone test is negative or shows
trace, continue treating for high
blood glucose.
If the ketone test shows ketones are
present, and you are feeling
nauseated or ill, call your healthcare
provider immediately for guidance.
66. 2.5 Diabetic Ketoacidosis (DKA)
Getting Ready for OmniPod System Training > Living Well with Diabetes >
If you need emergency attention, ask
a friend or family member to take you
to the emergency room or call an
ambulance.
Do not drive yourself.
67. 2.6 Sick Day Management
Getting Ready for OmniPod System Training > Living Well with Diabetes >
68. 2.6 Sick Day Management
Getting Ready for OmniPod System Training > Living Well with Diabetes >
Any physical stress can cause your
blood glucose to rise, and illness is a
physical stress.
Even a common illness like getting
the flu can affect your blood glucose
levels.
69. 2.6 Sick Day Management
Getting Ready for OmniPod System Training > Living Well with Diabetes >
If you have flu-like symptoms,
remember many symptoms of
diabetic ketoacidosis (DKA) are
similar to flu symptoms.
If you have these symptoms, do not
assume you have the flu. Check your
blood glucose to rule out DKA.
70. 2.6 Sick Day Management
Getting Ready for OmniPod System Training > Living Well with Diabetes >
Things to do when you are ill
•Treat the underlying illness to
promote faster recovery.
•Check your blood glucose more
often, at least once every 2 hours.
Keep careful records of results.
•Test for ketones when your blood
glucose is 250 mg/dL or higher.
71. 2.6 Sick Day Management
Getting Ready for OmniPod System Training > Living Well with Diabetes >
Things to do when you are ill
•Eat as normally as you can.
•Drink plenty of non-caffeinated
fluids to prevent dehydration.
•If you are not eating normally, adjust
your bolus doses as needed to match
changes in meals and snacks.
72. 2.6 Sick Day Management
Getting Ready for OmniPod System Training > Living Well with Diabetes >
Things to do when you are ill
•Always continue your basal insulin,
even if you are unable to eat. Contact
your healthcare provider for
suggested basal rate adjustments
when you are ill.
•Follow your healthcare provider’s
guidelines for taking additional insulin
when you are ill.
73. 2.6 Sick Day Management
Getting Ready for OmniPod System Training > Living Well with Diabetes >
Please talk with your healthcare
provider about making a plan for
managing sick days.
74. 2.7 Check Your Knowledge
Getting Ready for OmniPod System Training > Living Well with Diabetes >
???
75. 2.7 Check Your Knowledge
What is SMBG?
a.Standard Measurement of Blood Glucose
b.Self-Monitoring of Blood Glucose
c.Single Measurement of Blood Glucose
d.All of the above
Getting Ready for OmniPod System Training > Living Well with Diabetes >
76. True or False?
With SMBG, you measure and record your blood
glucose level at many times during each day.
2.7 Check Your Knowledge
Getting Ready for OmniPod System Training > Living Well with Diabetes >
True:
77. True or False?
Frequent Self-Monitoring of Blood Glucose
(SMBG) helps to avoid potential problems
with hypoglycemia and hyperglycemia.
2.7 Check Your Knowledge
Getting Ready for OmniPod System Training > Living Well with Diabetes >
True:
78. 2.7 Check Your Knowledge
Frequent SMBG helps you to:
a.Know your current blood glucose
b.Know if your blood glucose is changing
c. Take corrective action to keep your blood
glucose in your target range
d.All of the above
Getting Ready for OmniPod System Training > Living Well with Diabetes >
79. True or False?
Most healthcare providers recommend checking
blood glucose several times a day, especially
before meals and before you go to bed.
2.7 Check Your Knowledge
Getting Ready for OmniPod System Training > Living Well with Diabetes >
True:
80. 2.7 Check Your Knowledge
You should check your blood glucose:
a.When you feel weakness and confusion
b.When you want to adjust your insulin dose
c. When you are instructed by your healthcare
provider
d.All of the above
Getting Ready for OmniPod System Training > Living Well with Diabetes >
81. 2.7 Check Your Knowledge
True or False?
I do not have to clean my hands and/or my test
site each time before checking blood glucose.
Before checking blood glucose, it is important
each time to make sure your hands and your
test site are clean.
Getting Ready for OmniPod System Training > Living Well with Diabetes >
False
82. 2.7 Check Your Knowledge
Blood glucose (BG) changes may be detected
sooner when:
a.Checking BG from fingertips
b.Checking BG from forearm
c.Checking BG after you have eaten
Getting Ready for OmniPod System Training > Living Well with Diabetes >
83. True or False?
If you are dehydrated, your blood glucose
readings may show high results.
2.7 Check Your Knowledge
Getting Ready for OmniPod System Training > Living Well with Diabetes >
True:
84. 2.7 Check Your Knowledge
Hypoglycemia is a condition when blood
glucose level is:
a.Between 70 mg/dL and 140 mg/dL
b.Above 250 mg/dL
c. Below 70 mg/dL
Getting Ready for OmniPod System Training > Living Well with Diabetes >
85. True or False?
Sometimes your blood glucose can be low,
and you may not experience any symptoms.
2.7 Check Your Knowledge
Getting Ready for OmniPod System Training > Living Well with Diabetes >
True:
86. True or False?
Some symptoms of hypoglycemia, or low blood
glucose, are weakness, sweating,
nervousness, headache, or confusion.
2.7 Check Your Knowledge
Getting Ready for OmniPod System Training > Living Well with Diabetes >
True:
87. 2.7 Check Your Knowledge
When treating hypoglycemia, it is
recommended to:
a.Eat 15g of fast-acting carbs or drink 4oz.
of fruit juice
b.Check blood sugar after 15 minutes
c. Continue to treat and check until BG is
above 70 mg/dL
d.All of the above
Getting Ready for OmniPod System Training > Living Well with Diabetes >
88. 2.7 Check Your Knowledge
You should check for ketones when blood
glucose level is:
a.Between 70 mg/dL and 140 mg/dL
b.Above 250 mg/dL
c.Below 70 mg/dL
Getting Ready for OmniPod System Training > Living Well with Diabetes >
89. 2.7 Check Your Knowledge
Which symptoms are not symptoms of
hyperglycemia?
a.Fatigue & nausea
b.Frequent urination, unusual thirst or hunger
c. Shakiness, sweating, and confusion
d.Unexplained weight loss
Getting Ready for OmniPod System Training > Living Well with Diabetes >
90. 2.7 Check Your Knowledge
You should check your blood glucose:
a.Before you drive a car
b.When your blood glucose has been running
unusually high or low
c. Before, during and after exercise
d.All of the above
Getting Ready for OmniPod System Training > Living Well with Diabetes >
91. True or False?
Ketones are harmful acids produced in the body
when it breaks down fat for energy. Ketones
can develop when blood glucose is 250 mg/dL
or higher.
2.7 Check Your Knowledge
Getting Ready for OmniPod System Training > Living Well with Diabetes >
True:
92. 2.7 Check Your Knowledge
The symptoms of diabetic ketoacidosis
(DKA) are:
a.Nausea and vomiting; Abdominal pain
b.Fruity-smelling breath
c. Rapid pulse and labored breathing
d.All of the above
Getting Ready for OmniPod System Training > Living Well with Diabetes >
93. True or False?
You should contact your healthcare provider
immediately when a ketone test shows
ketones are present and you are feeling
nauseated or ill.
2.7 Check Your Knowledge
Getting Ready for OmniPod System Training > Living Well with Diabetes >
True:
94. 2.7 Check Your Knowledge
When you are ill, among other things you
should:
a.Check your blood glucose at least once
every 2 hours
b.Test for ketones when BG is above 250 mg/dL
c. Continue your basal insulin even if you are
unable to eat
d.All of the above
Getting Ready for OmniPod System Training > Living Well with Diabetes >
95. 3.0 The Basics of Insulin Pump Therapy Overview
Getting Ready for OmniPod System Training > The Basics of Insulin Pump Therapy >
96. 3.0 The Basics of Insulin Pump Therapy Overview
Getting Ready for OmniPod System Training > The Basics of Insulin Pump Therapy >
Insulin pump therapy has advanced
diabetes management and
benefited many people with
diabetes.
But managing diabetes with an
insulin pump is much different from
managing it with multiple daily
injections, or MDI.
97. 3.0 The Basics of Insulin Pump Therapy Overview
Getting Ready for OmniPod System Training > The Basics of Insulin Pump Therapy >
To manage your diabetes
successfully with insulin pump
therapy, you need to understand
those differences.
This section will help you
understand basics of insulin pump
therapy and some of the ways it is
different from MDI.
98. 3.0 The Basics of Insulin Pump Therapy Overview
Getting Ready for OmniPod System Training > The Basics of Insulin Pump Therapy >
In this section you will learn about:
•Basal rates and bolus doses
•Different kinds of insulin
•Carbohydrate counting
•Factors considered in calculation
of a bolus dose
99. 3.1 Basal Rates and Bolus Doses
Getting Ready for OmniPod System Training > The Basics of Insulin Pump Therapy >
100. 3.1 Basal Rates and Bolus Doses
Getting Ready for OmniPod System Training > The Basics of Insulin Pump Therapy >
Our bodies need a small, constant
supply of insulin for normal cell
activity. For people without diabetes,
the pancreas continuously delivers
insulin and varies the amount it
delivers throughout the day based on
several factors.
101. 3.1 Basal Rates and Bolus Doses
Getting Ready for OmniPod System Training > The Basics of Insulin Pump Therapy >
Insulin delivery depends on several
factors:
•Current blood glucose level
•Physical activity level
•Type and amount of food
102. 3.1 Basal Rates and Bolus Doses
Getting Ready for OmniPod System Training > The Basics of Insulin Pump Therapy >
In a person without diabetes, the
pancreas varies the amount of insulin
it produces based on these factors, so
it automatically keeps the blood
glucose level within a normal range.
103. 3.1 Basal Rates and Bolus Doses
Getting Ready for OmniPod System Training > The Basics of Insulin Pump Therapy >
The pancreas of people with
diabetes has limited or no ability
to produce insulin.
•Management of diabetes is based on
delivering insulin directly to the body.
•Multiple daily injections of insulin or
an insulin pump can be used to
deliver insulin.
104. 3.1 Basal Rates and Bolus Doses
Getting Ready for OmniPod System Training > The Basics of Insulin Pump Therapy >
When using an insulin pump, one
part of the treatment consists of
a small amount of insulin delivered
continuously for a period of time,
similar to what the pancreas does.
This amount is called a basal rate.
It is measured in units per hour.
105. 3.1 Basal Rates and Bolus Doses
Getting Ready for OmniPod System Training > The Basics of Insulin Pump Therapy >
If your basal rate of insulin is not
enough to keep your blood glucose at
an acceptable level, your treatment
will include a bolus or extra dose of
insulin.
106. 3.1 Basal Rates and Bolus Doses
Getting Ready for OmniPod System Training > The Basics of Insulin Pump Therapy >
An extra dose of insulin:
•Meal bolus
An extra dose of insulin when you are
about to eat a meal or snack that is
likely to raise your blood glucose level
•Correction bolus
An extra dose of insulin to reduce
your blood glucose when it is above
your target level
107. 3.2 Insulin for Pump Therapy
Getting Ready for OmniPod System Training > The Basics of Insulin Pump Therapy >
108. 3.2 Insulin for Pump Therapy
Getting Ready for OmniPod System Training > The Basics of Insulin Pump Therapy >
To understand how insulin pump
therapy works, you need to know a
little more about the different kinds
of insulin and different ways to take
insulin.
Insulin Pump
Therapy
109. 3.2 Insulin for Pump Therapy
Getting Ready for OmniPod System Training > The Basics of Insulin Pump Therapy >
Two types of insulin
110. 3.2 Insulin for Pump Therapy
Getting Ready for OmniPod System Training > The Basics of Insulin Pump Therapy >
Two types of insulin
•Long-acting insulin stays in your
body longer, so you take it less often.
•Rapid-acting insulin stays a shorter
time, so you take it more often.
111. 3.2 Insulin for Pump Therapy
Getting Ready for OmniPod System Training > The Basics of Insulin Pump Therapy >
Perhaps you have used multiple
daily injections (MDI) in the past to
get your insulin. Pump therapy
works differently from MDI.
112. 3.2 Insulin for Pump Therapy
Getting Ready for OmniPod System Training > The Basics of Insulin Pump Therapy >
Perhaps you have used multiple
daily injections (MDI) in the past to
get your insulin. Pump therapy
works differently from MDI.
•The pump uses only rapid-acting
insulin and releases it continuously
into your body.
113. 3.2 Insulin for Pump Therapy
Getting Ready for OmniPod System Training > The Basics of Insulin Pump Therapy >
Perhaps you have used multiple
daily injections (MDI) in the past to
get your insulin. Pump therapy
works differently from MDI.
•The pump uses only rapid-acting
insulin and releases it continuously
into your body.
•You have more control of the
amount and the rate at which insulin
is released.
114. 3.2 Insulin for Pump Therapy
Getting Ready for OmniPod System Training > The Basics of Insulin Pump Therapy >
If you need additional insulin to
correct your blood glucose level or
match your carbohydrate intake, you
can get that insulin with the push of a
few buttons.
116. 3.3 Carbohydrate Counting
Getting Ready for OmniPod System Training > The Basics of Insulin Pump Therapy >
At times you may need an extra dose
of insulin because you are about to
eat a meal or snack that is likely to
raise your blood glucose.
This extra dose is called a meal bolus.
117. 3.3 Carbohydrate Counting
Getting Ready for OmniPod System Training > The Basics of Insulin Pump Therapy >
You probably eat many different
kinds of food: fruits, vegetables, dairy
products, and meats or proteins.
Some foods may raise your blood
glucose. This is because they contain
carbohydrates.
118. 3.3 Carbohydrate Counting
Getting Ready for OmniPod System Training > The Basics of Insulin Pump Therapy >
When the body digests food, it turns
carbohydrates into glucose very
quickly. So, foods high in
carbohydrates have the greatest
effect on blood glucose.
For example, starches and some
vegetables; fruit and fruit juice; milk
and milk products; and sweets and
desserts may affect your blood
glucose.
119. 3.3 Carbohydrate Counting
Getting Ready for OmniPod System Training > The Basics of Insulin Pump Therapy >
Eating a meal high in carbohydrates
may raise your blood glucose level
quickly. That affects how much insulin
you will need to keep your blood
glucose at the acceptable level.
120. 3.3 Carbohydrate Counting
Getting Ready for OmniPod System Training > The Basics of Insulin Pump Therapy >
So it is important to track the amount
of carbohydrates you are eating.
Because carbohydrates are typically
measured in grams, you will need to
know how many grams of carbo-
hydrates are in a meal or snack. You
can do it by counting carbs.
121. 3.3 Carbohydrate Counting
Getting Ready for OmniPod System Training > The Basics of Insulin Pump Therapy >
How would you count carbs?
One way is to read the Nutrition Facts
labels on packaged foods. These
labels tell you how many grams of
carbohydrates are in a single serving
of the food.
122. 3.3 Carbohydrate Counting
Getting Ready for OmniPod System Training > The Basics of Insulin Pump Therapy >
First, look for the serving size
information at the top of the label.
In this example, a serving is two
crackers.
But remember a package may hold
more than one serving. This package
contains 21 servings!
123. 3.3 Carbohydrate Counting
Getting Ready for OmniPod System Training > The Basics of Insulin Pump Therapy >
Next, find the section called Total
Carbohydrate. It tells you how many
grams of carbohydrates are in one
serving.
124. 3.3 Carbohydrate Counting
Getting Ready for OmniPod System Training > The Basics of Insulin Pump Therapy >
To find out how many total grams you
are eating, multiply the number of
grams in one serving by the number
of servings that you are eating.
125. 3.3 Carbohydrate Counting
Getting Ready for OmniPod System Training > The Basics of Insulin Pump Therapy >
Each serving of two of these crackers
contains 10 grams of carbohydrates.
If you eat four crackers, you have
eaten 20 grams of carbohydrates.
126. 3.3 Carbohydrate Counting
Getting Ready for OmniPod System Training > The Basics of Insulin Pump Therapy >
When you eat foods without labels,
there are other ways to count carbs.
You can ask your dietitian for a list of
foods that shows you their carb
counts, for example.
127. 3.3 Carbohydrate Counting
Getting Ready for OmniPod System Training > The Basics of Insulin Pump Therapy >
And your OmniPod System has a
reference library of carb counts for
many foods.
128. 3.3 Carbohydrate Counting
Getting Ready for OmniPod System Training > The Basics of Insulin Pump Therapy >
Before you begin using the OmniPod
System, it is recommended that you
meet with a registered dietitian to
review your meal planning and
carbohydrate counting skills.
129. 3.4 Insulin on Board (IOB)
Getting Ready for OmniPod System Training > The Basics of Insulin Pump Therapy >
130. 3.4 Insulin on Board (IOB)
Getting Ready for OmniPod System Training > The Basics of Insulin Pump Therapy >
One important factor that affects
your bolus dose is your Insulin on
Board (IOB).
IOB is the amount of insulin still
working in your body from any
previous meal or correction boluses.
131. 3.4 Insulin on Board (IOB)
Getting Ready for OmniPod System Training > The Basics of Insulin Pump Therapy >
IOB depends on three factors:
•Duration of insulin action
•Time since previous bolus
•The amount of previous bolus
132. 3.4 Insulin on Board (IOB)
Getting Ready for OmniPod System Training > The Basics of Insulin Pump Therapy >
Duration of insulin action
•How long the insulin remains active
in your body
133. 3.4 Insulin on Board (IOB)
Getting Ready for OmniPod System Training > The Basics of Insulin Pump Therapy >
Duration of insulin action
•How long the insulin remains active
in your body
Your healthcare provider determines
duration of insulin action.
134. 3.4 Insulin on Board (IOB)
Getting Ready for OmniPod System Training > The Basics of Insulin Pump Therapy >
Time since previous bolus
•How much time passed by since your
previous bolus
135. 3.4 Insulin on Board (IOB)
Getting Ready for OmniPod System Training > The Basics of Insulin Pump Therapy >
The amount of previous bolus
•How much insulin was delivered
during your previous bolus
136. 3.4 Insulin on Board (IOB)
Getting Ready for OmniPod System Training > The Basics of Insulin Pump Therapy >
Your PDM will factor IOB if you turn
on and use the suggested bolus
calculator.
It will be discussed later in the
training.
138. 3.5 Bolus Calculation
Getting Ready for OmniPod System Training > The Basics of Insulin Pump Therapy >
The OmniPod System includes
features that help you calculate the
amount of extra insulin you need for
both meal boluses and correction
boluses.
139. 3.5 Bolus Calculation
Getting Ready for OmniPod System Training > The Basics of Insulin Pump Therapy >
It can help you by suggesting an
amount of insulin that is based on
your personal settings in the
OmniPod System, your current blood
glucose, and the amount of insulin
currently active in your body.
This feature is called the suggested
bolus calculator.
140. 3.5 Bolus Calculation
Getting Ready for OmniPod System Training > The Basics of Insulin Pump Therapy >
The suggested bolus calculator
considers several factors:
•Your current blood glucose level
•The number of grams of
carbohydrates you are about
to eat
•Your Insulin on Board (IOB)—the
amount of insulin that is still active in
your body from a previous meal or
correction bolus
141. 3.5 Bolus Calculation
Getting Ready for OmniPod System Training > The Basics of Insulin Pump Therapy >
IOB depends on three factors:
•Duration of insulin action
•Time since previous bolus
•The amount of previous bolus
142. 3.5 Bolus Calculation
Getting Ready for OmniPod System Training > The Basics of Insulin Pump Therapy >
In addition, you and your healthcare
provider will determine other factors
that affect the calculation of bolus
doses.
These factors are based on the way
your body processes insulin, and your
healthcare provider will take them
into account in determining your
insulin requirements.
143. 3.5 Bolus Calculation
Getting Ready for OmniPod System Training > The Basics of Insulin Pump Therapy >
These factors include:
•Insulin to Carbohydrate Ratio
(IC Ratio)
•Correction Factor
or Sensitivity Factor
•Target blood glucose value
144. 3.5 Bolus Calculation
Getting Ready for OmniPod System Training > The Basics of Insulin Pump Therapy >
Insulin to Carbohydrate Ratio
(IC Ratio)
•How much insulin you need to take
in relation to carbohydrates eaten
For example, if your IC ratio
is 1:15, then you need to deliver
1 unit of insulin to cover every
15 grams of carbohydrate that
you eat.
145. 3.5 Bolus Calculation
Getting Ready for OmniPod System Training > The Basics of Insulin Pump Therapy >
Correction Factor
or Sensitivity Factor
•How much one unit of insulin will
lower your blood glucose level
For example, if your correction factor
is 50, it means that 1 unit
of insulin will lower your blood
glucose by approximately
50 mg/dL.
146. 3.5 Bolus Calculation
Getting Ready for OmniPod System Training > The Basics of Insulin Pump Therapy >
Target blood glucose value
•The blood glucose value that you are
trying to achieve in your day-to-day
diabetes management
147. 3.6 Check Your Knowledge
Getting Ready for OmniPod System Training > The Basics of Insulin Pump Therapy >
???
148. True or False?
A basal rate is a small amount of insulin that is
delivered continuously for a period of time.
3.6 Check Your Knowledge
Getting Ready for OmniPod System Training > The Basics of Insulin Pump Therapy >
True:
149. 3.6 Check Your Knowledge
A basal rate is measured in:
a.Ounces (oz.)
b.Milligrams per deciliter (mg/dL)
c. Units (U)
d.Units per hour (U/hr)
Getting Ready for OmniPod System Training > The Basics of Insulin Pump Therapy >
150. True or False?
A bolus is a dose of insulin to cover the
carbohydrates in a meal or snack,
or to reduce a high blood glucose level.
3.6 Check Your Knowledge
Getting Ready for OmniPod System Training > The Basics of Insulin Pump Therapy >
True:
151. 3.6 Check Your Knowledge
To reduce blood glucose when it is above your
target level, you may need:
a.Extended bolus
b.Meal bolus
c. Correction bolus
d.All of the above
Getting Ready for OmniPod System Training > The Basics of Insulin Pump Therapy >
152. 3.6 Check Your Knowledge
The insulin pump delivers insulin with:
a.Basal delivery
b.Bolus delivery
c. Basal and bolus delivery
Getting Ready for OmniPod System Training > The Basics of Insulin Pump Therapy >
153. True or False?
Rapid-acting insulin starts working right away,
and remains active for a short time.
3.6 Check Your Knowledge
Getting Ready for OmniPod System Training > The Basics of Insulin Pump Therapy >
True:
154. 3.6 Check Your Knowledge
Insulin pumps use:
a.Long-acting insulin
b.Rapid-acting insulin
c.Mixture of long-acting and rapid-acting insulin
Getting Ready for OmniPod System Training > The Basics of Insulin Pump Therapy >
155. True or False?
Eating a meal high in carbohydrates may raise
your blood glucose level quickly.
3.6 Check Your Knowledge
Getting Ready for OmniPod System Training > The Basics of Insulin Pump Therapy >
True:
156. 3.6 Check Your Knowledge
When you are about to eat a meal or snack that is
likely to raise your blood glucose, you may need:
a. Extended bolus
b.Meal bolus
c. Correction bolus
d.All of the above
Getting Ready for OmniPod System Training > The Basics of Insulin Pump Therapy >
157. 3.6 Check Your Knowledge
Carbohydrates are typically measured in:
a.Ounces
b.Fluid ounces
c. Inches
d.Grams
Getting Ready for OmniPod System Training > The Basics of Insulin Pump Therapy >
158. True or False?
When you count grams of carbohydrates you
are eating, it makes it easier to know how
much insulin you will need to keep your blood
glucose at the acceptable level.
3.6 Check Your Knowledge
Getting Ready for OmniPod System Training > The Basics of Insulin Pump Therapy >
True:
159. 3.6 Check Your Knowledge
True or False?
A Nutrition Facts label does not show grams of
carbohydrates in a single serving of the food.
A Nutrition Facts label tells you how many
grams of carbohydrates are in a single
serving of the food.
Getting Ready for OmniPod System Training > The Basics of Insulin Pump Therapy >
False
160. 3.6 Check Your Knowledge
Each serving of two crackers contains 10 grams
of carbohydrates. If you eat four crackers,
you have eaten:
a.15 grams of carbohydrates
b.20 grams of carbohydrates
c. 25 grams of carbohydrates
d.30 grams of carbohydrates
Getting Ready for OmniPod System Training > The Basics of Insulin Pump Therapy >
161. True or False?
Insulin on Board (IOB) is the amount of insulin
that is still working in your body from a
previous meal or correction bolus.
3.6 Check Your Knowledge
Getting Ready for OmniPod System Training > The Basics of Insulin Pump Therapy >
True:
162. 3.6 Check Your Knowledge
Insulin on Board (IOB) depends on:
a.Duration of insulin action
b.Time since previous bolus
c. The amount of previous bolus
d.All of the above
Getting Ready for OmniPod System Training > The Basics of Insulin Pump Therapy >
163. True or False?
Duration of insulin action is the amount of time
the insulin remains active in your body.
3.6 Check Your Knowledge
Getting Ready for OmniPod System Training > The Basics of Insulin Pump Therapy >
True:
164. 3.6 Check Your Knowledge
Which factors are used to calculate a
suggested bolus?
a.Current blood glucose
b.Carbohydrates eaten
c. Insulin on Board (IOB)
d.All of the above
Getting Ready for OmniPod System Training > The Basics of Insulin Pump Therapy >
165. 3.6 Check Your Knowledge
Which of these factors does your healthcare
provider take into account to determine your
insulin needs?
a.Insulin to Carbohydrate Ratio (IC Ratio)
b.Correction Factor
c. Target Blood Glucose Value
d.All of the above
Getting Ready for OmniPod System Training > The Basics of Insulin Pump Therapy >
166. 3.6 Check Your Knowledge
Insulin to Carbohydrate (IC Ratio) shows:
a. How much one unit of insulin will lower your BG
b. How many grams of carbohydrates will be covered
by one unit of insulin
c. How much insulin is needed to achieve the
target BG
d. All of the above
Getting Ready for OmniPod System Training > The Basics of Insulin Pump Therapy >
167. 3.6 Check Your Knowledge
Correction Factor tells:
a. How much insulin is needed to achieve your
target BG
b.How much one unit of insulin will lower your BG
c. How many grams of carbohydrates should be
eaten to achieve your target BG
Getting Ready for OmniPod System Training > The Basics of Insulin Pump Therapy >
168. 4.0 What is the OmniPod System?
Getting Ready for OmniPod System Training > OmniPod System Overview >
169. 4.0 What is the OmniPod System?
Getting Ready for OmniPod System Training > OmniPod System Overview >
…An innovative continuous insulin
delivery system
…The world’s first tubing-free system
170. 4.0 What is the OmniPod System?
Getting Ready for OmniPod System Training > OmniPod System Overview >
The OmniPod System is a two-part
tubing-free system that is easy
to use.
•The Pod holds and delivers insulin at
a continuous rate that is tailored to
your specific needs.
•The PDM helps you manage your
insulin delivery through wireless
communication with the Pod.
171. 4.0 What is the OmniPod System?
Getting Ready for OmniPod System Training > OmniPod System Overview >
In this section you will learn about:
•How the OmniPod System works
•Pod basics
•PDM basics
172. 4.1 Introducing the OmniPod System
Getting Ready for OmniPod System Training > OmniPod System Overview >
173. 4.1 Introducing the OmniPod System
Getting Ready for OmniPod System Training > OmniPod System Overview >
The OmniPod
Insulin Management System
Making diabetes a smaller part of life
174. 4.1 Introducing the OmniPod System
Getting Ready for OmniPod System Training > OmniPod System Overview >
Innovative two-part design eliminates
the tubing
•The Pod
•The Personal Diabetes Manager
(PDM)
175. 4.1 Introducing the OmniPod System
Getting Ready for OmniPod System Training > OmniPod System Overview >
The Pod
Wearable. Waterproof. Discreet.
•No tubing
•Delivers up to 200 units of insulin
•Weighs just 1.05 oz. with a full
reservoir
•Hands-free insertion
The Pod takes just 1/200th of a
second to automatically insert
the cannula.
176. 4.1 Introducing the OmniPod System
Getting Ready for OmniPod System Training > OmniPod System Overview >
The Pod
Wearable. Waterproof. Discreet.
•The Pod works comfortably and
discreetly beneath your clothing.
177. 4.1 Introducing the OmniPod System
Getting Ready for OmniPod System Training > OmniPod System Overview >
The Personal Diabetes Manager (PDM)
Wireless. Handheld. Easy.
•Personalized insulin delivery
•Built-in FreeStyle®
blood glucose meter
•Large color screen and simple
language
•Stores insulin delivery, blood glucose
values and carbohydrate intake
178. 4.1 Introducing the OmniPod System
Getting Ready for OmniPod System Training > OmniPod System Overview >
Everything you expect from
a traditional insulin pump
•Customizable basal programs
and temporary basal rates
•Bolus delivery options and bolus
delivery confirmations
•Continuous safety checks
179. 4.1 Introducing the OmniPod System
Getting Ready for OmniPod System Training > OmniPod System Overview >
Innovative features that make
diabetes a smaller part of life
•No tubing
•Waterproof Pod
•Automated insertion
•Built-in FreeStyle®
blood glucose
meter
•Suggested bolus calculator
180. 4.1 Introducing the OmniPod System
Getting Ready for OmniPod System Training > OmniPod System Overview >
OmniPod System Innovations
No tubing
• No snags or disconnections
• Move, dress, and sleep with ease
181. 4.1 Introducing the OmniPod System
Getting Ready for OmniPod System Training > OmniPod System Overview >
OmniPod System Innovations
Waterproof Pod
• 25 feet for 60 minutes
(IPX8 rating)
• Shower and swim with confidence
182. 4.1 Introducing the OmniPod System
Getting Ready for OmniPod System Training > OmniPod System Overview >
OmniPod System Innovations
Automated Insertion
• Consistent insertion every time
• Hands-free insertion
183. 4.1 Introducing the OmniPod System
Getting Ready for OmniPod System Training > OmniPod System Overview >
OmniPod System Innovations
Built-in Freestyle®
blood glucose
meter
• Checking blood glucose is
convenient
• Test strip port light illuminates port
in dim light
184. 4.1 Introducing the OmniPod System
Getting Ready for OmniPod System Training > OmniPod System Overview >
OmniPod System Innovations
Suggested bolus calculator
• Computes a bolus recommendation
that is personalized for you
185. 4.1 Introducing the OmniPod System
Getting Ready for OmniPod System Training > OmniPod System Overview >
The OmniPod
Insulin Management System
•Health
•Comfort
•Freedom
186. 4.1 Introducing the OmniPod System
Getting Ready for OmniPod System Training > OmniPod System Overview >
The OmniPod
Insulin Management System
Making diabetes a smaller part of life
187. 4.2 Basics of the New Pod
Getting Ready for OmniPod System Training > OmniPod System Overview >
188. 4.2 Basics of the New Pod
Pod features for convenience and
safety
•The new Pod is smaller, slimmer and
lighter.
•Though smaller, the Pod still holds
up to 200 units of insulin.
Your PDM will notify you when it is
time to replace your Pod.
•The Pod is waterproof.
After you have showered or gone
swimming, just gently dry it with
a towel.
Getting Ready for OmniPod System Training > OmniPod System Overview >
189. 4.2 Basics of the New Pod
Pod features for convenience and
safety
•Has a viewing window for checking
the infusion site
Check often to make sure that the
soft cannula is in place. The cannula
is tinted light blue.
•Has a pink slide insert to verify
firing of the cannula
Check the pink slide insert to verify
the cannula has deployed.
Getting Ready for OmniPod System Training > OmniPod System Overview >
190. 4.2 Basics of the New Pod
Key parts of the Pod
• Fill port
An arrow on the white paper
backing points to the fill port.
• Housing vent
• Needle cap
The larger size of the cap makes it
easier to remove.
Only remove the cap when
instructed by the PDM.
• Adhesive backing
Remove and discard when
instructed to apply the Pod.
Getting Ready for OmniPod System Training > OmniPod System Overview >
191. 4.2 Basics of the New Pod
Pod storage recommendations
• Store unopened Pods in a cool,
dry place.
• Do not expose Pods to extreme
heat or cold.
Pods can be damaged by
extreme temperatures, causing
them to malfunction.
Getting Ready for OmniPod System Training > OmniPod System Overview >
193. 4.3 PDM Basics
Introduction to using the PDM
All Pod operations are programmed
and controlled through buttons on
the palm-sized Personal Diabetes
Manager (PDM).
Getting Ready for OmniPod System Training > OmniPod System Overview >
194. 4.3 PDM Basics
PDM buttons
• Soft key functions depend on the
screen you are viewing. As you
move from screen to screen, soft
key labels and functions change.
• The Home/Power button turns
the PDM on and off – just press
and hold this button.
Getting Ready for OmniPod System Training > OmniPod System Overview >
195. 4.3 PDM Basics
PDM buttons
•The Up/Down Controller buttons let
you scroll through a series of
numbers or a list of menu options so
you can pick the one you want.
•The Question Mark button opens a
User Info/Support screen with
additional information about an
event or a record item.
Getting Ready for OmniPod System Training > OmniPod System Overview >
196. 4.3 PDM Basics
PDM batteries
• The PDM runs on two AAA
alkaline batteries.
• To insert or remove batteries,
remove the cover. Then, gently
insert or remove the batteries,
and replace the cover.
• The battery compartment door
shows the phone number for
Customer Care.
Getting Ready for OmniPod System Training > OmniPod System Overview >
197. 4.3 PDM Basics
Setting up the PDM
• When you turn the PDM on for
the first time, it will take you to a
Setup Wizard where you will enter
information to personalize your
OmniPod System.
• You will enter your name and
select a color for the screen
display to uniquely identify
your PDM.
Getting Ready for OmniPod System Training > OmniPod System Overview >
198. 4.3 PDM Basics
Primary screens overview
• ID screen shows your name
and chosen color. Only after you
identify the PDM as yours, press
the Confirm key to continue.
• Status screen shows the current
operating status of the Pod.
• Home screen lists all the major
menus.
Getting Ready for OmniPod System Training > OmniPod System Overview >
199. 4.4 Check Your Knowledge
Getting Ready for OmniPod System Training > OmniPod System Overview >
???
200. True or False?
The OmniPod System is the world’s first
tubing-free system.
4.4 Check Your Knowledge
Getting Ready for OmniPod System Training > OmniPod System Overview >
True:
201. 4.4 Check Your Knowledge
Getting Ready for OmniPod System Training > OmniPod System Overview >
202. 4.4 Check Your Knowledge
True or False?
A separate infusion set and insertion device are
required for the OmniPod System.
A separate infusion set and insertion device
are not required for the OmniPod System.
Getting Ready for OmniPod System Training > OmniPod System Overview >
False
203. 4.4 Check Your Knowledge
How many units of U100 insulin can the
Pod hold?
a.Up to 85 units
b.Up to 150 units
c.Up to 200 units
Getting Ready for OmniPod System Training > OmniPod System Overview >
204. True or False?
The Pod weighs just 1.05 ounces with a full
reservoir.
4.4 Check Your Knowledge
Getting Ready for OmniPod System Training > OmniPod System Overview >
True:
205. 4.4 Check Your Knowledge
The Pod has a feature that makes it easy to
check placement of the soft cannula. You can
check that the soft cannula is in place:
a.Through the Pod viewing window
b.On the PDM Status screen
c.By removing the Pod from your site
Getting Ready for OmniPod System Training > OmniPod System Overview >
206. 4.4 Check Your Knowledge
True or False?
The Pod cannot be submerged in water.
The Pod can be submerged in water
Getting Ready for OmniPod System Training > OmniPod System Overview >
False
207. 4.4 Check Your Knowledge
The Pod delivers insulin based on instructions
from:
a.Personal Diabetes Manager (PDM)
b.Healthcare provider
c.Pod itself
d.All of the above
Getting Ready for OmniPod System Training > OmniPod System Overview >
208. 4.4 Check Your Knowledge
Where should you insert the needle to fill the
Pod with insulin?
a.Housing vent
b.Fill port
c.Any opening in the Pod
d.All of the above
Getting Ready for OmniPod System Training > OmniPod System Overview >
209. 4.4 Check Your Knowledge
True or False?
Pods can be stored at any temperature without
being damaged.
Pods can be damaged by extreme
temperatures, causing them to malfunction.
Getting Ready for OmniPod System Training > OmniPod System Overview >
False
210. True or False?
The PDM has a built-in FreeStyle®
blood glucose
meter.
4.4 Check Your Knowledge
Getting Ready for OmniPod System Training > OmniPod System Overview >
True:
211. 4.4 Check Your Knowledge
The PDM runs on two AAA:
a.Car batteries
b.Alkaline batteries
c.Coin cell batteries
d.All of the above
Getting Ready for OmniPod System Training > OmniPod System Overview >
212. 4.4 Check Your Knowledge
True or False?
The PDM is waterproof and can be submerged
in water.
The PDM is not waterproof and cannot be
submerged in water.
Getting Ready for OmniPod System Training > OmniPod System Overview >
False
213. 4.4 Check Your Knowledge
Name the screen where you confirm that the
PDM belongs to you.
a.Home screen
b.Status screen
c.ID Screen
d.All of the above
Getting Ready for OmniPod System Training > OmniPod System Overview >
214. 4.4 Check Your Knowledge
What screen shows the current operating
status of the Pod?
a.Home screen
b.Status screen
c.ID Screen
d.All of the above
Getting Ready for OmniPod System Training > OmniPod System Overview >
215. True or False?
The Home/Power button turns the PDM on and
off – just press and hold this button.
4.4 Check Your Knowledge
Getting Ready for OmniPod System Training > OmniPod System Overview >
True:
216. 4.4 Check Your Knowledge
You can view additional information about an
event detail or a record item by pressing:
a.Question Mark button
b.Up/Down Controller buttons
c.Home/Power button
d.Soft key buttons
Getting Ready for OmniPod System Training > OmniPod System Overview >
218. 5.0 What’s Next?
Getting Ready for OmniPod System Training >
Congratulations!
You have successfully completed the
topics and quizzes to prepare for
OmniPod System training.
219. 5.0 What’s Next?
Getting Ready for OmniPod System Training >
When you meet with your OmniPod
System trainer, you will get hands-on
training in using the OmniPod
System. The trainer will help you
program your own PDM so you can
start using the OmniPod System.
220. 5.0 What’s Next?
Getting Ready for OmniPod System Training >
Should you have any questions
in the meantime, call Customer Care
at 1.800.591.3455.
221. 5.0 What’s Next?
Getting Ready for OmniPod System Training >
We look forward to helping you
make diabetes a smaller part of life.