KC Art Science Of Gonstead
•
1 gefällt mir•1,435 views

Presentation for client Kiropraktisk Center, Dr. Andreas Söderström. This document is a guide line for the complex techniques and philosophy of the Gonstead school of chiropractic adjustments. The document acts as a point of reference for students of the chiropractic profession, whom Dr. Söderström is tutoring.

Empfohlen
Weitere ähnliche Inhalte
Was ist angesagt?
Was ist angesagt? (20)
Ähnlich wie KC Art Science Of Gonstead
Ähnlich wie KC Art Science Of Gonstead (20)
Kürzlich hochgeladen
Kürzlich hochgeladen (20)
KC Art Science Of Gonstead
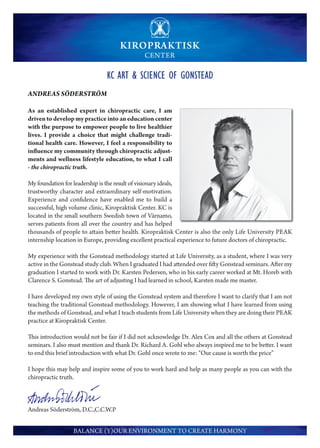
- 1. KC ART & SCIENCE OF GONSTEAD ANDREAS SÖDERSTRÖM As an established expert in chiropractic care, I am driven to develop my practice into an education center with the purpose to empower people to live healthier lives. I provide a choice that might challenge tradi- tional health care. However, I feel a responsibility to influence my community through chiropractic adjust- ments and wellness lifestyle education, to what I call - the chiropractic truth. My foundation for leadership is the result of visionary ideals, trustworthy character and extraordinary self-motivation. Experience and confidence have enabled me to build a successful, high volume clinic, Kiropraktisk Center. KC is located in the small southern Swedish town of Värnamo, serves patients from all over the country and has helped thousands of people to attain better health. Kiropraktisk Center is also the only Life University PEAK internship location in Europe, providing excellent practical experience to future doctors of chiropractic. My experience with the Gonstead methodology started at Life University, as a student, where I was very active in the Gonstead study club. When I graduated I had attended over fifty Gonstead seminars. After my graduation I started to work with Dr. Karsten Pedersen, who in his early career worked at Mt. Horeb with Clarence S. Gonstead. The art of adjusting I had learned in school, Karsten made me master. I have developed my own style of using the Gonstead system and therefore I want to clarify that I am not teaching the traditional Gonstead methodology. However, I am showing what I have learned from using the methods of Gonstead, and what I teach students from Life University when they are doing their PEAK practice at Kiropraktisk Center. This introduction would not be fair if I did not acknowledge Dr. Alex Cox and all the others at Gonstead seminars. I also must mention and thank Dr. Richard A. Gohl who always inspired me to be better. I want to end this brief introduction with what Dr. Gohl once wrote to me: “Our cause is worth the price” I hope this may help and inspire some of you to work hard and help as many people as you can with the chiropractic truth. Andreas Söderström, D.C.,C.C.W.P BALANCE (Y)OUR ENVIRONMENT TO CREATE HARMONY
- 2. KC ART & SCIENCE OF GONSTEAD CERVICAL ADJUSTMENTS ON THE CERVICAL CHAIR The Gonstead cervical chair is utilized for adjusting all segments between the third thoracic and the condyle. Most important feature with the chair is that the back can be lowered for taller patients. The chair can also be ordered with legs of various lengths to accommodate the height of the doctor. Each chair should be provided with a stabilization strap. The purpose of the chair is to secure the patient against the back of the chair, so that there is no forward motion of the patient’s body when the P to A thrust is made. My personal opinion is that the strap is not necessary as long as you don’t compensate with too much force when doing the thrust due to less stability. Also I think it is wiser to consider point of relaxations rather than only points of stabilization and some patients find it more difficult to relax with the strap on. The hand of the patient should be rested in the lap and the legs should be fully extended at the knees. The feet should not be placed under the chair, nor should they be placed so that the soles are flat on the floor. The feet should be resting on the heels. When the doctor is in position to make a cervical adjustment, the forearm of the contact hand will be in a horizontal plane and the forearm of the stabilization hand will be much more vertical. When the patient is comfortably seated in the cervical chair, the doctor should begin by standing behind the patient, and slightly toward the side being contacted. With the stabilization hand on the top of the patients head, the head should be flexed so that the spinous processes are separated. The vertebra is contacted with the palmar surface of the index finger with the middle finger adjacent to give support and both fingers should be slightly flexed. The contact hand is stabilized by placing the thumb on the ramus of the mandible, below the temporomandibular joint, so that no pressure is applied to the head of the mandible. The degree of the arch will vary depending on which vertebra is being adjusted. Greater arch for lower cervical compared to a third and axis adjustment. The tip of the index finger of the contact hand should then be placed on the end of the spinous process of the segment below the one to be adjusted. Then the contact hand is moving up so that it fits under the spinous of the vertebra being adjusted, and a little lateral to the spinous. The thumb should then be placed on the ramus of the jaw so that the arch is formed between the thumb and the index finger. The head is then brought back into a more relaxed position by the stabilization hand, and the stabilization hand is placed properly along the posterior and lateral portion of the cervical spine. Make sure you also use your body for support and a safe feel and know you start to feel for “points of relaxation”. BALANCE (Y)OUR ENVIRONMENT TO CREATE HARMONY
- 3. KC ART & SCIENCE OF GONSTEAD The chin is elevated so that the anterior surfaces of the vertebral bodies are separated. The neck is then flexed lateral about ten to twenty degrees to the side being adjusted and the head is also rotated toward the same side. This will help the subluxated vertebra towards the side it needs to go when it is corrected, that is toward the opposite side. The slack is then reduced by applying pressure on the spinous process with the contact finger. There should be no increase in pressure from the thumb when the slack is reduced. The thrust is then made with the contact hand. It should be a very quick thrust to overcome the resistance of fixation. The direction of the thrust is anterior, superior and when inferiority is involved medial. The difference when adjusting axis is that the chin should be elevated higher and the stabilization hand should also be higher placed. POINTS TO GUIDE YOU THROUGH THE ADJUSTING OF C7-C2 CERVICAL CHAIR: • Positioning of patient with hands, feet and strap vs. no strap. • Positioning of doctor where you find your own right distance for example foot towards leg of chair. • Flex patients head and make the contact with your index finger. • Positioning your stabilization hand. • Tuck chin on patient and elevate head slightly and move neck into a relaxed position. • Support with doctors body and have a safe feel. • Laterally flex and rotate neck towards contact side. • Reduce slack with contact hand and feel for points of relaxation. • Deliver a quick thrust. ATLAS ADJUSTING The patient is placed exactly the same way as when a cervical below the atlas is being adjusted. When the patient is comfortably positioned the doctor start to flex the patient’s head lateral, to the opposite side of the contact, and support the head in that position with the stabilization hand. This is done so that the mastoid process and atlas transverse is easily palpated. Then with the tips of the index and third fingers of the contact hand the atlas transverse should be located. Once the doctor has the exact location of the atlas transverse he then places the thumb over the anterior and lateral portion of the transverse process. The hand is turned so that the palmar surface is superior and the tip of the thumb is placed on the anterior and lateral surface of the transverse. At this point the head should be straightened so that the lateral flexion is removed. The doctor then squeeze the thumb towards the other finger of the hand so that there is no arch created. The stabilization hand is then placed so that the thenar eminence supports the mastoid process and atlas transverse on opposite side. The finger of the stabilization hand is wrapped around the neck so that the en- tire head is supported. With the stabilization hand the doctor flex the head toward the side of contact. This is done to create space for the atlas to move. Then the doctor reduces slack on the contact point with the tip of the thumb. By using pressure by the thumb you start to “move” in a medial and slight posterior direction and then continue that motion with a quick thrust. BALANCE (Y)OUR ENVIRONMENT TO CREATE HARMONY
- 4. KC ART & SCIENCE OF GONSTEAD POINTS TO GUIDE THROUGH THE ATLAS ADJUSTMENT: • Make the thumb contact with the palmar surface facing superior. • Squeeze the contact hand so that there is no arch. • Wrap the stabilization hand. • Consider torque and rotation. • Feel for point of relaxation and reduce the slack by adding pressure with contact thumb. • Thrust in an almost complete medial direction with a slight posterior direction (atlas anterior misalignment). OCCIPITAL CONDYLE ADJUSTMENTS All PS occipital listings should be adjusted with the patients sitting in the cervical chair. AS occipital condyle misalignments may be adjusted in the cervical chair or supine. • Contact PS listing • Contact AS listing THORACIC ADJUSTING ON THE CERVICAL CHAIR The upper thoracic vertebra may also be adjusted using the cervical chair. How far down the spine the doctor will be able to adjust will be dictated by the length of his fingers and the size of the patient. This also has to do with the skill of the adjuster. The four first thoracic vertebra may very well be adjusted. The same setup as for the lower cervical but different line of drive in the thrust and different positioning of the stabilization hand. BALANCE (Y)OUR ENVIRONMENT TO CREATE HARMONY
- 5. KC ART & SCIENCE OF GONSTEAD THORACIC ADJUSTMENTS ON THE KNEE-CHEST TABLE OR PRONE • Spinous contacts • Transverse contacts • Double thenar contacts • Pisiform-thumb contact • Double thumb contact • Upper thoracic contacts BALANCE (Y)OUR ENVIRONMENT TO CREATE HARMONY
- 6. KC ART & SCIENCE OF GONSTEAD LUMBAR ADJUSTMENT ON THE PELVIC TABLE PUSH MOVES: The lumbar vertebra may be adjusted on the pelvic table with the patient placed in the side posture position. The very same adjustment is used when adjusting the sacrum or Ilium. The push move is most effective when the patient has a lordosis and when a deep P to A move is desired to correct the subluxation. If the lordosis is minimal then the pull move will probably be the method of choice. The push move is primarily used for adjusting the fourth and fifth lumbars. Push moves are made with a pisiform contact. The contact point will be either the spinous process or the mammillary process. In spinous process contacts the patient is placed with the side of the body rotation down. You want the spinous laterality up so that the thrust will reduce the laterality. The contact hand is placed so that the fingers cross the spine at about forty-five degree angle. With the contact hand the doctor roll the patient forward to about forty-five degree angle or less so that the pelvis is stabilized against his hips. The stabilization hand the reduces the slack in the spinal tissues by pushing the shoulder superior and posterior. The thrust is then made through the plane of the intervertebral disc. The direction of the thrust should be P to A and torque may be applied to reduce the lateral wedging. In mammillary contact the side up will be the side of the body rotation and the contact hand will be parallel to the longitudinal axis of the spine. Mammillary contacts will not require the patient’s body to roll over as far, instead the doctor leans further over the patient. PULL MOVES: Pull moves are primarily used when the lumbar subluxation involves more body rotation. This is often the case when the lumbar lordosis is reduced, which is a direct result of the rotation. Pull move may also be the choice to start off with during an acute phase. Pull moves are effective for listings that require either a spinous or mammillary contact. When a spinous contact is appropriate , the patient is placed with the side of the laterality down on the table. The second and the third fingers on the contact hand are placed on the contact point. The thumb of the contact is placed on the opposite side of the spinous process about four inches away from the spinous and slightly superior to it. This allow the palmar surface of the hand to be parallel to the patients body. When the listing requires a mammillary process contact, the patient is still placed with the side of spinous laterality down on the table, Now the emphasis is shifted to the mammillary by contacting the third and fourth fingers on the spinous and the second finger on the mammillary. The thrust is with a force through the mammillary process with a P to A direction. There are other ways of using the contact hand and I will show alternate way on how to use the contact hand for adjusting. In my opinion side posture adjusting both push and pull moves may be used all the way up in the thoracics. BALANCE (Y)OUR ENVIRONMENT TO CREATE HARMONY
- 7. KC ART & SCIENCE OF GONSTEAD PUSH-PULL MOVE: Push contact with a pull stabilization and kick. Not a move typically taught but my adjustment of choice. LUMBAR ADJUSMENTS ON THE KNEE-CHEST TABLE All of the lumbars may be adjusted with the knee-chest table. Both spinous and mammillary contacts may be used. BALANCE (Y)OUR ENVIRONMENT TO CREATE HARMONY