
Empfohlen
Weitere ähnliche Inhalte
Was ist angesagt?
Was ist angesagt? (20)
Andere mochten auch
Andere mochten auch (20)
Ähnlich wie Production Log: Fashion Magazine Design
Ähnlich wie Production Log: Fashion Magazine Design (20)
Mehr von FirstClassProductions
Mehr von FirstClassProductions (20)
Kürzlich hochgeladen
Kürzlich hochgeladen (20)
Production Log: Fashion Magazine Design
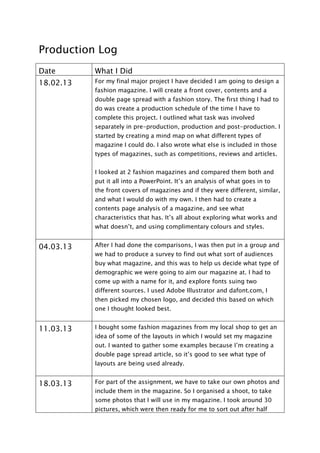
- 1. Production Log Date What I Did 18.02.13 For my final major project I have decided I am going to design a fashion magazine. I will create a front cover, contents and a double page spread with a fashion story. The first thing I had to do was create a production schedule of the time I have to complete this project. I outlined what task was involved separately in pre-production, production and post-production. I started by creating a mind map on what different types of magazine I could do. I also wrote what else is included in those types of magazines, such as competitions, reviews and articles. I looked at 2 fashion magazines and compared them both and put it all into a PowerPoint. It’s an analysis of what goes in to the front covers of magazines and if they were different, similar, and what I would do with my own. I then had to create a contents page analysis of a magazine, and see what characteristics that has. It’s all about exploring what works and what doesn’t, and using complimentary colours and styles. 04.03.13 After I had done the comparisons, I was then put in a group and we had to produce a survey to find out what sort of audiences buy what magazine, and this was to help us decide what type of demographic we were going to aim our magazine at. I had to come up with a name for it, and explore fonts suing two different sources. I used Adobe Illustrator and dafont.com, I then picked my chosen logo, and decided this based on which one I thought looked best. 11.03.13 I bought some fashion magazines from my local shop to get an idea of some of the layouts in which I would set my magazine out. I wanted to gather some examples because I’m creating a double page spread article, so it’s good to see what type of layouts are being used already. 18.03.13 For part of the assignment, we have to take our own photos and include them in the magazine. So I organised a shoot, to take some photos that I will use in my magazine. I took around 30 pictures, which were then ready for me to sort out after half
- 2. term. 03.04.13 I went through my shoot photos and picked the 4 that I liked the most. I then had to edit all 4 and show the process by print screening my actions. I created a PowerPoint and included the whole process in there. 04.04.13 I written a draft of my magazine article, I had to come up with some questions and link it all to my proposal, as it all combines as one big story. I found it a bit difficult trying to come up with questions and answers, trying to be doing 2 different people, so I just did this quick for now. 08.04.13 Today ii filled out the proposal form in which would help me write my actual proposal. I have written my proposal for my assignment which outlined what I was doing for my final major project piece. It’s a brief summary of everything and it came together really well. I also blogged all my completed work up to now. 15.04.13 I recorded my pitch through a voice recorder which is basically my proposal spoken out loud, but to my teacher. This was really nerve racking as I’m not confident speaking out loud whatsoever, so I figured this would be the best way to publish it in my own confident way. 22.04.13 I had to make a PowerPoint presentation to go with my pitch, and this is just a selection of mages such as magazine layouts and inspirations in fashion and celebrities, 10.05.13 Today I made a start on designing my layout plans on Adobe Illustrator for each page that I’m producing. I started with the front cover, then contents and article. I used boxes to indicate where I am going to put text and pictures and any other little details that need to be included, such as date and page number. I also chosen the colours that I’m going to use throughout the pages, and I’m really pleased with how the plans look. 13.05.13 I started to create my double page spread, the first thing I’ve done is scaled the size of the text boxes on the first page to the size I want. I then added my first picture to the top left hand
- 3. corner. What I wanted to do was have the picture blend out so it didn’t just look stuck there, so I used the blur and smudge tools to create this effect. I think it looks really good and fits in with the page really well. I added the name of the artist next to the picture, sort of over lapping. This was done in a large font and in a purple colour; it really stands out and looks great. I went on to the front cover after doing that because I figured it would be easier. The picture I used on the front cover had a yellow/brown back ground, and I wasn’t sure whether I wanted to keep it. I started to erase the back ground and I preferred it so much that way. I had to zoom in and erase carefully around the edges, and I’m glad I made that decision. I added the magazine logo, and enlarged it slightly to fit the top part of the page, I added a date to it, and found a barcode 14.05.13 I finished the front cover, I just needed to fill the space and add some other cover lines. I then went on to continuing with the double page spread. I started to create text boxes for the columns and began putting my article in to them. I did this with all 6 columns where I was outing the text. I added some extra text as I was going along to make it closer to the 1000 word mark. After I tweaked the article, I positioned them properly, and I was left with a few spaces. I thought it would be good to add larger pieces of text in quotation marks to highlight some important things in the article. I then added the last image on to the second page and sorted the name out at the top and it was done. I double checked through all the pages of my magazine to make sure I hadn’t missed any bits out. I uploaded it all to my blog as my finished final major project. The last thing I wanted to do was create an updated production schedule. At the beginning of the assignment, I was unsure as to what I was doing. Since I’ve progressed throughout it all, I’ve made a lot of changes so I backtracked everything I had done, and it’s all worked out to plan.