SlideShare ist ein Scribd-Unternehmen logo
1 von 39
Downloaden Sie, um offline zu lesen
1
Introduction to
Microsoft Outlook 2007 Mail
Created: 9 January 2007
Starting Outlook 2007
In this Microsoft Outlook 2007 tutorial, we’ll discuss a number of the basic procedures used in
creating, editing, sending and receiving Outlook 2007 mail messages. In addition, we’ll also
introduce other features essential to managing Outlook 2007 mail messages.
Starting Outlook Mail 2007
Double click on the Microsoft Outlook icon on the Windows desktop
(image on right), or click-on the Start button in the lower left corner of the
screen, then click-on Microsoft Office, and then click-on Microsoft
Outlook.
New Look
The first thing you’ll notice, if you have used Outlook mail previously (any version), is a whole
new visual appearance. Gone is the Outlook Bar on the left with the various icons. You’ll also
notice that there are more “items” where the Outlook Bar used to be. You’ll also notice the
screen is more colorful. If you have never used Outlook before, this won’t cause any problems
as we proceed through this tutorial.
Left Mouse Button
In this tutorial, whenever we indicate that you need to click a mouse button, it will mean to
click the left mouse button – unless we indicate that you should click the right mouse button.
So, always move the cursor over the “place” we indicate and “click left” unless we tell you
otherwise.
Inbox
When Outlook 2007 appears, you will be in the Inbox where the mail you receive is located.
Your Inbox screen should look similar to the image at the top of the next page.
2
The mail messages that you receive will be listed in chronological
order.
Different Views in Outlook 2007
Navigation Pane
When you first open Outlook 2007 your screen will normally look like
the image above. As indicated earlier, this is much different than
previous versions of Outlook. We’ll start with the left side of the
screen and work to the right. On the left side of the screen you’ll see an
image similar to the one on the right. This is called the Navigation
Pane. You’ll notice in the top area that it indicates Mail. Below Mail
there is an area called Mail Folders. We’ll show you how to change
things around in these areas, if you desire, in a little while
Below the Mail area you’ll see a series of Buttons: Mail, Calendar,
Contacts, Tasks and Notes. Notice that the Mail button is orange.
This means that this button has been selected (when you opened
Outlook Mail).
3
If you click the left mouse button on Calendar, the Calendar
will appear on the right side of the screen and the Calendar
button will turn orange. The same thing will happened when
you click-on Contacts, Tasks and Notes.
Give this a try. When you are finished, click-on Mail once
again.
A logical question is how to change this
Navigation Pane so that it looks like you
want it to. The secret is in the lower right
corner of the Navigation Pane. You’ll see
a small yellow folder, an arrow and a down
arrow. When you move your cursor over
the down arrow your screen will look like
the image on the above right. Click the down arrow
When you click the down arrow, a
drop down menu will appear to
the right of the Task Pane.
You’ll notice the choices: Show
More Buttons, Show Fewer
Buttons, Navigation Pane
Options, and Add or Remove
Buttons.
First, if you don’t want as many buttons to appear, click-
on Show Fewer Buttons. Watch what happens. You’ll
notice your buttons “leave” from the bottom of the
Navigation Pane. You’ll have to click-on the down
arrow each time you desire to open this menu again. To
add, or bring the buttons back to the Navigation Pane,
click-on Show More Buttons. Give this a try and set your
Navigation Pane as you desire.
Now we’ll see what occurs when we click-on
Navigation Pane Options… Click-on Navigation
Pane Options and the Navigation Pane Options menu
screen will appear (image at top of next page).
4
There are a number of choices with this
screen. First, notice that there are little
green “check marks” in some of the
boxes. These are the buttons that
currently appear in your Navigation
Pane. If you don’t want a box to
appear, click the check mark - and it
will disappear – and the box won’t show.
If you want to change the order of the buttons, notice the Move Down and Move Up choices
on the right side of this menu screen. If you click-on one of the buttons (like Mail above –which
is blue), and click the Move Down button, you will see Mail move down your button list.
Give both of these options a try and set your buttons as you desire. Most folks who use the
Show Fewer Buttons and Navigation Pane Options like the Navigation Pane Options better, as it
allows you to set your buttons just like you wish.
Now we’ll choose the last option in the
Configure Buttons list – Add or Remove
Buttons. Click-on the Add or Remove
Buttons choice and you will see a pop-up
menu appear to the right of the choice. Here
again, you can click on a button (like Mail)
and it will disappear, or appear when you
click. This is called “toggling.” It’s like a
light switch – On or Off. Each time you click,
the button appears or disappears.
You have a lot of choices on how to show/add, hide/remove buttons from your Navigation Pane.
You choose the method you like best from the ones we have just shown you.
Now we’ll concentrate on viewing you e-mail messages.
5
Different Views in Outlook 2007
Mail Views
You will notice that you can see a small portion of your incoming e-mail in the middle
portion of the screen and a greater portion in the right side area of the screen. This is the
default view – depending on how you set up your Outlook 2007. There are several different
“ways” to set-up a “view” that you like best. The image you see at the top of Page 2 on this
tutorial is the one that someone at Microsoft thought you’d like best. It is a combination of two
things - Preview Pane (the name for the middle portion of the screen), and Reading Pane (the
name for the right side of your screen). NOTE: depending who set up your Outlook 2007
program, your screen may not look like this. This is not a problem, as we’ll now show you
how to set up the view that you like the best. The second page of this tutorial shows this Preview
Pane and Right Side Reading Pane. Most users like this a lot – this seems to be the most popular
view – that’s why it’s the default. However, many prefer to view each e-mail message,
individually, without the Preview Pane, Reading Pane or anything else.
We’ll show you how to set several different views and you can choose the one you like best.
Outlook 2007 has various combinations of Auto Preview and Reading Pane.
First, we’ll work with the Reading Pane. To view the Reading Pane selections, click-on View
in the Menu Bar and then click Reading Pane. You will see three suggestions to the right of
Reading Pane – Right, Bottom, and Off. Normally, Right is the default. The choice for your
Outlook mail will be highlighted a bit – you can see in our image (below) that Right has a little
square around it.
We’ll start with Right. Click the View
Tab at the top of the Outlook Screen.
You will see a drop down menu like the
image on the right appear. Move your
cursor over the Reading Pane selection.
If Right is not the current choice, click
Right. You will see the text of a
message displayed on the right side of
your screen like the image at the top of the next page.
6
Now we’ll repeat what we did on
the last page, but place the reading
page on the Bottom.
Message on Left
Text on Right
Text on Bottom
Message on Top
7
Now for the last choice. Repeat what
you did on the last two pages, but
choose Off.
You choose the Reading Pane view that you like the best.
Next, we’ll work with the Auto Preview. To do this you’ll
need to click-on View in the Menu Bar. When the drop
down menu appears you’ll see a selection called Auto
Preview. This is called a “toggle” button as it can either
be “on” or “off.” Click-on the Auto Preview button.
When you do, Auto Preview will appear or disappear from
your screen.
On the next page we’ll show you examples of Auto Preview working with Reading Pane – Right,
Bottom and Off views.
All of your messages on one
screen – NO Reading Pane
8
The below image has Auto Preview on the left and Reading Pane on the right. You can see a
few lines of the message in “Auto Preview,” below the incoming message data.
The below image has Auto Preview on the top and Reading Pane below the message. You can
see a few lines of the message in “Auto Preview,” below the incoming message data.
The below image has Auto Preview ONLY – no Reading pane. You can see a few lines of the
message in “Auto Preview,” below the incoming message data.
As you can see, there are a great number of combinations for reviewing your messages using the
Reading Pane and Auto Preview together. Experiment and choose the combination you like the
best.
9
Reviewing messages in the Inbox
To view a message, simply double-click quickly on the message.
You could also click-once on a
message and then click File (in the
Menu bar), then click Open, then
click Selected Items.
You will now see a screen similar to the one below.
This screen is designed to review and respond to mail messages received.
For those of you that have used past versions of Outlook, you will quickly notice that Outlook
2007 uses the Tabs/Ribbons of 2007 Office when you are viewing messages and responding to
them. The 2007 Message Tab/Ribbon is enlarged below.
10
If this is the first time that you are looking at this
Outlook screen, it would be a good idea to move your
cursor over each item in the Message Tab/Ribbon.
As you move your cursor over an item, you will see a
Help Text box appear – like the image on the right.
Microsoft Office
Button
The Microsoft Office Button
has replaced File in the Menu
Bar. In the upper left corner of
your Outlook 2007 screen you
will see a button similar to the
image on the right. This is the
Microsoft Office Button.
Move your cursor over the
Microsoft Office Button and a
Office Button Help screen will appear.
Click the Microsoft Office Button.
You will now see the Outlook 2007
Microsoft Office Button selections.
First, notice that many of the “old”
File-Menu Bar choices are included in
this menu.
When we move our cursor over Print
an expanded menu of Preview and
Print choices appear on the right.
In the lower right corner of the
Microsoft Office Button menu screen
you will see an Editor Options button.
11
Click the Editor Options button.
The Editor Options Menu Screen (below will appear). Take a few minutes and click the choices
on the left side of the screen – Popular, Display, Proofing, Advanced and Customize.
Some of these may be too advanced for you now, but you’ll know where they are as you become
more accomplished with Outlook Mail 2007.
Replying to a message
Look at the button bar at the top
left of the screen (it will look like
the image on the right). Notice
that you can click-on Reply, and,
automatically reply to the person
who sent the message, or Reply to
All (everyone included in the To:
or Cc:). When you click-on
Reply and Reply to All, you will notice that Outlook 2007 “automatically” completes the To:
and/or Cc: in your outgoing message.
12
You then click-in the “white” message area below the To, Cc, Bcc and Subject, and add your
reply/comments to the original message to which you are replying.
After you have made any comments, you can click-on the small “Send” button and your Reply
will be “mailed.”
Forwarding a message
If you desire to forward a message to someone, click-on the Forward button (next to the Reply
and Reply to All buttons), then click-in the To: or Cc: areas. We will be covering Address
Books later in this “tutorial.” At this point, type-in the e-mail address or addresses of those to
whom you want to forward the mail message. If you have more than one address, separate
them with a semi-colon (;). You can move down to the Address Book section if you desire
(Page 15).
Envelopes
Now that you have the “feel” for looking at messages in your Inbox, replying to
and forwarding them, please take a moment to look at the “little envelops” next
to each message. When a message first arrives in your Inbox, and has not been
read, you’ll notice that the envelope is closed.
Once you have read the message, but not replied, the envelope will appear
opened.
When you reply to or forward a message in Outlook 2007, you will notice,
when you view the message again in Inbox, or Sent Items, it will now have a
small arrow attached to the message. These arrows indicate that the message
has been forwarded or replied to. A purple arrow pointing to the left
indicates you have replied to a message, a blue arrow pointing to the right
indicates that you forwarded that message. The arrows will be the same as on
the Reply, Reply to All, and Forward buttons.
13
Deleting unwanted messages
If you do not want to keep the message, you can click-on the “X” button, in the button bar, to
send the message to a “Delete folder.”
Note: This is NOT the “x” button in the upper right corner of the screen. If you do click-on
the upper right corner X, it will simply close the message and return you to the Inbox, etc.
We’ll discuss this in more detail later in Folders. When you delete a message in the Inbox, it is
sent to the Deleted Items folder to be “really deleted” or “recovered” later.
Moving from message to message in the Inbox
Notice the blue Up and Down arrows in the Quick Access Toolbar at the top left of the
Outlook 2007 screen. They are only visible when you are “in a message.” These allow you
to move forward and backward (Previous Item and Next Item) between messages in the
Inbox. Click-on these arrows to see how they work.
Printing a message
If you desire a “printed copy” of the message you can click-on the Printer in the Quick Access
Toolbar.
14
A Print Menu Screen will
appear where you can select the
printer on which you would like
to print your message and the
number of copies.
Creating and sending a new e-mail message
If you are in the Inbox and desire to send a new e-mail
message to a person or group of persons click-on the New
Mail Message button in the button bar.
If you are in some
other part of Outlook
2007 and do not see
the New Mail
Message button, you
can always (in the
Inbox as well) click-
on File in the Menu Bar, then click-on New, and then click-on Mail Message.
In both cases, the below screen should appear.
15
First, click-in the area to the right of To: (see arrow at the bottom of the last page). For now,
type-in the e-mail address of the person, or persons, to whom you desire to send this e-mail
message. Next, click-in the area to the right of Cc:. Again, type-in the name or names of
others whom you would like to receive copies of this message. If you type-in more than one e-
mail address, separate the addresses with a semi-colon (;). If you desire to use the Address
Book, move down to the Address Book section (Page 15).
Now click-in the area to the right of Subject:, and type-in a subject for your e-mail.
This is really important as many SPAM blocking programs automatically
reject messages that do not have a subject.
Finally, click-in the white area below Subject:, and type-in your e-mail message as you would
any memo to someone. You may move around, edit and change your message just like you
would do if you were in a word processor. Later in this “tutorial,” we will show you how you
may use Microsoft Word as your “e-mail editor,” with all the Microsoft Word features, if you
choose to do so.
Your screen should now look similar to the image on
the right.
When you have completed your e-mail message,
click-on the Send button in the upper left corner
of the screen.
Quick note on folders
This is simply a quick note to tell you what happens when you send an e-mail message. When a
message is sent, a copy of your e-mail is automatically placed in your Sent Items folder. So,
you can access your sent message (by clicking-on the Sent Items folder – then opening your
message), edit it, and forward it, etc., until you decide to delete it later on. If you desire to keep
the e-mail you will be able to move it to another folder if you desire. We’ll go into detail on all
of this later. For now, just be aware that you have not “lost” your message. You do not need
to “copy yourself” in Outlook unless you want to get an additional copy of your e-mail in
your Inbox.
16
Address Books
When you have clicked-on Reply, Reply to All, or Forward as indicated on Pages 10 and 11 or
created a new e-mail message, Page 13, you will see a screen similar to the one below:
If you are Replying or Replying to All on
an e-mail message in your Inbox, then the
addresses from that e-mail will
automatically appear in the To, Cc and
Bcc areas. If you don’t want to send the e-
mail to some of these addresses, you can
simply click-on them and tap the Delete
key. If you are Forwarding a message from
the Inbox or Sending a new e-mail
message, then you can either type-in the
address in the To, Cc or Bcc areas, or use
the Global Address List or Contacts
Address Book.
There are several Address Books in Outlook 2007 that you can utilize to send and respond to
e-mail messages. In addition, there are a number of options for entering e-mail addresses into
an Address Book. You will, in all probability, use two address books: Global Address List and
Contacts Address Book.
To access these address books/lists click-on the To: or Cc: “buttons” (see arrows on
the picture above). The Global Address List menu box will appear.
17
Global Address List
We’ll look at several Address Lists and explain how each is utilized. First, we’ll look at the
Global Address List. When you click-on either the To:, Cc: or Bcc: buttons the
below Select names: Global Address List screen will appear:
When you are in the Reply, Reply to All, Forward or create a New e-mail message screen, and
need to add additional e-mail addresses, you can still type-in the addresses or use a Global
Address List like the one above.
The Global Addresses List that you see above is created, and updated, when a person at the
institution/business selects to use Outlook mail. The Information Technology Staff places the
new user in the Global Address List. Thus, this address list is a current list of all Outlook mail
users (and it may also include other users who are not on Outlook – depending on your on
campus/business).
To use this list, simply click-on the person whom you want to receive the e-mail (their name
will “turn blue” – see arrows above). Or, you can type their name in the area below
“Search-Name only,” and you will notice that the list of names, below where you typed the
name, moves to all of the persons with that name. Most systems are in last name order. Some
are in first name order. By looking at the name list you can determine how your system is setup.
Then, click-on the To, Cc or Bcc (Blind copy) buttons. This will add the address to those
already in the e-mail (you will see it appear in the area to the right). You can do this for as
many addresses as you desire. When you have finished, click-on OK, and you return to your
message. Arrows in the image above point to each of these items.
18
Contacts (in older versions of Outlook – Personal Address Book)
How can you create your own “automatic” address list for someone who is not on the
campus/business Outlook 2007 mail system (especially off campus/business addresses)? There
is a feature called Contacts to take care of this. A contact is just what it indicates. You create
your own Contacts (like a personal address book). First we’ll show you how to get to Contacts
and then how to add and delete addresses.
When you click-on the To:, Cc: or Bcc: buttons (Page 16)
the Select Names Global Address List appears. In the
upper right corner of this menu screen, under Address
Book you will see an area that indicates that this is the
Global Address List. To the right of the title is a small
down arrow, click-on the down arrow and a menu screen
similar to the one at the right appears.
Now, click-on Contacts, and the screen below
appears, which contains the addresses that YOU have
already placed in your old Personal Address Book – if you
had one.
Notice, the
Select Names:
Contacts menu
screen (left
image) now
indicates
Contacts in
the upper
right corner.
Also, notice
the e-mail
addresses on
the menu
screen. These
are e-mail
addresses that
you would add
to your
Contacts list.
19
To add the addresses in Contacts, to an e-mail message, simply repeat the procedure outlined
in the Global Address List. Click-on the name, to whom you desire send the e-mail (on the left
side), then click-on the To:, Cc: or Bcc: buttons to add that name to these areas. Again, you can
add as many names as you wish. When you have finished, click OK and you will be taken back
to the e-mail that you want to send. You can then continue to creating a new e-mail or editing
the contents of one that you are working with.
Adding Names to Contacts (like Personal Address Book in older versions)
There are many ways to add names to Contacts. We’ll show you several of the more popular
procedures. You will also discover other methods, as you become more familiar with Outlook
2007.
Adding names as you type the e-mail addresses in the To or Cc areas of the
message
If a person’s e-mail address is not currently in your Global Address List or Contacts, you can
add it while you are in the process of sending them a message. In the area to the right of To or
Cc, TYPE-IN the e-mail address for the person or persons you wish to receive your e-mail. If
you type-in several addresses, separate them with a semi-colon ( ; ). Click away (somewhere
else on the screen) from the address you typed. You will notice that, in a few moments, the
addresses will become underlined.
To add an address to your Contacts, simply
RIGHT-CLICK on a name, that you
typed, and a menu box will appear (image at
left).
Click-on Add to Outlook Contacts and the
Contacts entry menu screen will appear
(image at top of next page).
20
The Contact entry menu screen appears below.
Normally, the first part of the e-mail address you entered before the “@” symbol will
appear in the full name box. To change this to a logical full name click-on the Full Name…
button (as indicated by the arrow above).
When the Check Full Name box appears
(image on left) you can then fill in the entire
name by filling in the appropriate areas (First:,
Middle:, Last:, etc.)
When you are finished, click-on OK.
You can now fill in the applicable areas for the person’s
mailing address, if you desire. To do this click-on the
Address down triangle (see arrow at right). Click-on
Business, Home or Other.
21
You will notice that your Address area changes
to your selection (we chose Home…). After
you make your selection (Business, Home,
Other), type the address in the small box to the
right of your selection.
When you have completed everything, you can click-on the
Save and Close button.
You will now return to your message. To add additional names to your Contacts Address Book
repeat the above process again.
When you are in the Contact screen (at the top of the last page) – notice that there are a lot of
other tabs and areas which you may also use to enter information about a person.
To observe that the contact you entered has been added to your Contacts, click-on either the
To, Cc or Bcc buttons in your message screen. When you have clicked one of the buttons, you
will go to the Global Address List screen again. Click-on the down arrow in the upper right
corner, and move down the menu and click-on Contacts (Page 18). You will see the address
you added. When you have a lot of addresses, you will have to use the up and down elevator
bar to view your addresses. Outlook automatically alphabetizes the names as you enter them.
Your Contacts screen should look something like this:
22
Adding Names to your Contacts as you receive e-mail in your Inbox
Big Note: Right-clicking on an e-mail address also works when you receive a
message from someone! If you know that an address is not in your Contacts, RIGHT-CLICK
on the address and add it as you did above. This really saves a lot of time. You know it’s a
good address, because you received their message!
To the left is an image of the address
area of an e-mail in the Inbox. We
simply RIGHT clicked-on the person
and then moved down the pop-up menu
to Add to Outlook Contacts – just like
we did when we typed-in and address in
our New Mail To: area.
Once you have clicked-on Add to
Contacts you will go back to the same
process that is outlined above on
pages 20 and 21.
Manually adding e-mail address to your Contacts
Many times, friends will write you (the old fashioned way) or call you on the
phone and furnish their e-mail address. So, there is still another way to add their
e-mail address to your Contacts. In the button bar, below the Menu bar, you
will notice a “small book” (like the one on the right). When you run your cursor
over the book it will indicate: Address Book. You can click-on it and add names to your
Contacts. Click-on the “book” and the following screen will appear.
Click-on File in the Menu Bar and then click
on New Entry.
A New Entry screen will appear.
It should look similar to the image on the
right. Make sure that New Contact is
highlighted in blue in the Select the entry
type: in the top portion of the screen.
And, also make sure that Contacts is selected
in the Put this entry area in the lower part of
the menu screen. If Contacts is not the choice,
click the down arrow on the right side of Put
this entry and select Contacts from the choices
that appear.
23
When everything looks like the screen above, click the OK button.
An Untitled – Contact screen like the one below will appear.
Notice that the Untitled - Contact screen is similar to the one you used to enter e-mail
addresses as you typed them into messages, or used when you copied addresses from you
Inbox again appears – with a notable exception – there is no name in Full Name… or E-mail
address in E-mail.
So, fill in the name of the person in Full Name… and enter their e-mail address in the E-
mail area. You can enter other information as you did previously, as you desire.
When you have entered the
information, your screen
should look similar to the
image on the left. When
you have entered the
information you desire, in
the appropriate areas, click
Save and Close to add this
person to your Contacts
list.
24
Note on viewing e-mail addresses
Once you begin using Outlook 2007 Mail you can check on a person’s “information” by
right-clicking the mouse on their name in the To, Cc or Bcc areas. In the pop-up menu
that appears, click-on Properties. If they are in your Global Address Book you will “see” how
the system administrator entered the information. If they are in your Contacts list, you will see
the Contacts screen similar to the one on the last page. This is very handy if you desire “quick”
information about a person in your system.
Personal Distribution Lists
Now that you have an idea of how to add individual names to Contacts, and are familiar with
the Global Address List, you may want to create a group of addresses to which you
frequently send e-mail. In Outlook 2007 this is called a Personal Distribution List. To create
a Distribution List, you will follow several steps, similar to those above.
To create a Personal Distribution List you will need to be in the Inbox, Sent
Items, or Deleted Items (you can be in other main screens when you are more
familiar with Outlook 2007). You will need to be in a main screen where you
can see the little Address Book button, click-on it.
Click-on File in the Menu Bar and then click
on New Entry.
A New Entry screen will appear.
When the New Entry screen appears,
click-on New Distribution List in the area
below Select the entry type.
Make sure that Put this entry is set on
Contacts. If it is not set on Contacts,
click-on the small down arrow to the right
of this area and select Contacts.
Then, click-on OK.
25
The following Untitled – Distribution List menu screen will now appear:
In the area to the right of
Name:, type-in a name for
your Distribution List (e.g.
Lunch Bunch).
Next, click the Select
Members button.
The Select Members: Global
Address List menu screen
will appear.
You’ll notice that this screen
looks almost like the Select
Names screen you used to
address your messages.
You’ll notice that the Select
Members screen only has a
Members - > button. So,
you can, at this moment, only
add persons, you desire to be
in your Distribution List, to
the group. Later we’ll show
you how to remove and add
members as you update your
list.
26
By using either the Global Address
List, or your Contacts you can
create your Distribution list. Click-
on the small down arrow in the
upper right corner of the Select
Members screen and select the group
you want.
In the example on the right we chose
our Contacts group, and selected
the person you see at the bottom of
the Menu screen.
We then clicked-on the Members->
button – this person was added to
our Distribution list on the right.
You may “switch between” the
various “lists” as often as you like,
and add as many names as you like.
Note: You do not need to have someone in either the Global Address List, Contacts or
another list to have them in your Distribution List. If they are in neither, simply type a semi-
colon (;) at the end of the last address on the right side, and then type-in the person’s e-mail
address. They will be included in your list.
When you have added all the names you desire, click-on OK.
Note for Outlook users who upgraded to Outlook 2007
When you upgraded, you should have saved a file called a PAB (Personal Address Book) and
incorporated it in your Outlook 2007 setup. This file contained all of the names that you placed
in your Personal Address Book in previous versions of Outlook. So, for you “old hands,” you
may use not only all of the files in your Global Address Book and Contacts, you may also use
your Personal Address book that you used previously. If you did not save the PAB file and
replace the PAB file that was loaded with Outlook 2007, the Personal Address Book names will
not be available. Your technical staff may have also indicated that they removed the Personal
Address Book option and included these addresses in your Contacts. If you have a question here,
ask you technical staff for assistance.
27
You should now return to the Distribution List screen. Your screen should look similar to the
one below. You’ll see the name of your Distribution List in the Name: area and the names of
the Members in the area below.
To remove members from the list simply click once on the member and then click-on the
Remove button. You’ll notice that they are removed from your list.
To add new members, simply repeat the steps on pages 24 to 26. Click-on the Select
Members button and add them as you did before.
When you have made all the changes you desire, click-on the Save and Close button in the
screen above.
The next time you
“visit” Contacts,
your screen will
look something
like the one on the
right.
The name will be
in bold, and there
will be a “teeny”
icon of a woman
and a man on the left.
Any time you desire to make changes to this Distribution List, just double-click quickly
on a list and you’ll be taken to that Distribution List screen that you used to create the list.
28
Sending Messages using your Distribution List
To send a message to everyone on your Distribution Lists, use the same steps that you used for
sending a message to a single person. Either type in the name of the Distribution List in the To:,
Cc:, or Bcc: areas of your message (e.g. Lunch Bunch), or use the Select Names box, like you
did on pages 16 to 18, but select your Distribution List like you would select a name.
Folders
NOTE: For Outlook 98, 2000 and XP/2002 users, you probably noticed that the Outlook
Bar, on the left of the screen, had been replaced by a whole new folder and icon area
(Navigation Pane). No longer are there Outlook Shortcuts, My Shortcuts and Other
Shortcuts areas. The prior Outlook Today icon has been replaced by a mailbox with your
name on it. We’ll review the new Navigation Pane, that we introduced at the beginning of
the tutorial, that replaces the Outlook Bar.
When you first opened Outlook 2007, the area to the left of the
screen looked something like the image to the left. The icons you
see take you to different features of Outlook (Calendar, etc.) or
contain e-mail.
The icons we are concerned with in this tutorial are the ones that
pertain to e-mail and hold messages (e.g. Inbox, Sent Items,
Deleted Items).
When your Technical Support staff set-up your Outlook 2007
account, they created limits for the amount of mail messages you can
have in your Inbox, Sent Items, and Deleted Items folders. When
you get near this limit, you will receive a cautionary message,
indicating that you need to delete messages that are no longer
needed. Frequently, you have certain messages that are related to a
topic or group, and you would like to retain them for some period of
time, and not have them “count” against your size limit.
The next area of this tutorial will address this situation
29
You can create special folders called Personal Folders for
various “groups” of e-mail (some of these on the right are –
Microsoft, Dell, Tutorials, etc). As you receive or send e-mail
related to a “group” you can move the e-mail to that folder so
that you can find the items easily, without having to search all
of your mail. You can still delete these items when they no
longer apply and delete the folder when you are finished
with it.
Creating Personal Folders
To create a Personal Folder, do the following:
Click-on File in the
Menu Bar, then
click-on New in the
drop down menu,
and then click-on
Folder…
The following Create New Folder
screen will appear:
First, select a logical name for the
folder. For this tutorial we’ll use the
title “My Junk.” Type the name you
desire in the Name: area.
Next, move down the Create New
Folder screen with the elevator arrows
(on the right of the menu screen) until
you see: “Personal Folders.” Click-on
Personal Folders.
Now, click-on OK.
This will place the created folder in
your Personal Folders area.
30
Notice that a new Personal Folder (My Junk) has been
added to your Personal folder area.
Placing e-mail messages in your Personal Folders
Moving a single message
You will notice, in the Preview Pane –
Mail Folders area, that when you click-on
Inbox, Sent Items, or Deleted Items, that
the Personal Folders you created can still
be seen in the Preview Pane on the left
side of the screen.
To “move” a single e-mail message from one folder (Inbox, etc.) to another folder (Personal
Folder), you simply click-on the e-mail message, you want to move, hold down the left
mouse button, and drag the message to the Personal Folder.
In the image above we clicked-on the highlighted message, held down the left mouse button,
and dragged the message from the Inbox to the My Junk folder. You will notice, as you are
“dragging” your e-mail message, a small box appears “attached” to the cursor arrow. The
cursor changes to a circle with a line through it (when you are over an area where you can’t
drop your message), and then changes again to the box with the arrow when you have the
cursor over a Personal Folder icon. When you have the box symbol over your Personal
Folder, release the left mouse button. This will move the message from one folder to another.
Try this with one of the messages in your Inbox.
31
Moving Several Messages
You can also move several
messages with this drag
technique.
To highlight several
messages you need to learn a
new skill. If you hold
down one of the Ctrl
keys (at the bottom of the
keyboard – one either side of
the Space Bar) and then
click-on several messages,
you’ll notice that as you
click each message it is
highlighted (like image on
left).
When you are ready to move the group of messages you highlighted, simply click-on any of
the highlighted messages, and immediately hold down the left mouse button, and then
drag all the messages to the folder where you want the messages. If you click-on one of the
messages and don’t drag the cursor immediately, this will “turn-off” the multiple message
selections and you’ll have to start again. It’s kind of tricky. So the first time that you try this, if
it doesn’t work – try again.
If you ever desire to “turn-off” the multiple highlights, you simply click-on any message and that
will remove the highlights and select the message on which you clicked.
You can still delete the messages when you no longer desire to retain them.
Moving, Deleting, and Recovering Mail Messages
You should now have a “feel” for Outlook 2007. Having just completed folders, you can see
that we can move a message from any folder to any folder simply by clicking-on it and dragging
the message to another folder. You could also click-on a message and, either using Edit (in the
Menu Bar), then Copy or Cut in the Menu bar, and then Paste, to move or copy a message in
this manner. You can also use the Cut, Copy and Paste buttons in the button bar.
To delete a message, you have already learned that you can click-on the message and then on the
“X” in the button bar (not the X in the upper right hand corner). If you click-on the upper
right hand corner X this will simply close the message and return you to the Inbox, etc.
32
When you delete an e-mail message in your Inbox, Sent Items, or a Personal Folder, this
places the message in the Deleted Items “trash can.” You can “drag” an item from Deleted
Items to any folder to retrieve it, or use the methods above to recover a message to a folder.
“Really” Deleting Messages
To “really” delete an e-mail message in the Deleted Items Folder, you can click-on the
message and click-on the “X” button, or tap the Delete key. Outlook 2007 will ask you if you
“really” want to delete the message. When you say “yes,” it’s gone. To delete several
individual messages at once, click-on the first message, then hold down the Ctrl key, and
while holding down Ctrl, click-on the other items. You will see that they turn “blue,”
indicating that you are “marking” them (just like we covered before). Now click the “X” button
or tap the Delete key. If you want to delete ALL of the items in the Delete Items trash can,
click-on Edit in the Menu bar and then Select All. Then, click-on the “X” button or tap the
Delete key.
A message box will appear asking
if you really want to delete all the
items. If you do, click-on Yes.
Adding, Sending, Receiving, Viewing, and Saving Attachments
There are many times when you want to send a Word document, Excel spreadsheet,
PowerPoint presentation, picture, or file of some type to someone, or be able to receive one.
Outlook 2007 makes this relatively simple. The items indicated above are sent as
“attachments” to your e-mail.
When you are sending an e-mail message and want to “include” an attachment it’s relatively
easy. When you are in the Untitled-Message, the Forward or Reply screens, you will notice a
“paperclip” Attach File in the Message Tab/Ribbon.
33
This paperclip (Attach File) is the button that allows you to insert an attachment in your e-
mail message. Click-on the paperclip. The following Insert File menu screen will appear.
When this Insert File screen
appears, choose the location of
your file (attachment) on your
computer (A or C drives, etc., or
on a network drive) by using the
Look in: area (see the arrow
above – we have chosen My
Documents on the C: disk
drive). Then choose the file by
clicking-on it (we chose a
PowerPoint file called How to
make a great PBJ for our
attachment). Click-on Insert.
Your e-mail message, with
attachment, will look similar to
the image on the right.
When you or, another person, receives this attachment, all you/they have to do is double-click
on the attachment and it will load into the proper program! Or, you can right click on the
attachment, and a menu will appear that you can use. Once you have the document in its
normal “environment,” you can save it, etc. Pretty neat!
34
Calendar
There is a personal calendar you can use that is included
with Outlook 2007. You can access the calendar by
clicking-on the calendar icon in Outlook Shortcuts area
on the left of your Outlook screen. You can learn how to
use this calendar by clicking-on Help.
A Calendar tutorial has been created for Outlook. You can receive a copy of this tutorial
by sending an e-mail to the address at the end of this tutorial.
Out of Office Assistant
If you are going to be away from your office computer
for a period of time, and you want to leave a courtesy
message for folks to let them know that you’ll be away,
you can use the Out of Office Assistant to do this. To
activate the Out of Office Assistant click-on Tools in the
Menu bar and then click-on Out of Office Assistant…
You will need to be in the Inbox, Sent Items, Deleted Items or one of your folder screens to
do this.
The Out of Office Assistant menu screen at the top of the next page will appear.
35
Type the message that you want others to automatically receive when they send an e-mail
message to you. Then click-in the small circle to the left of I am currently Out of the Office.
This message will be sent to each person the first time that they send you an e-mail message
telling them that you are away from the office.
When you return (to your office), and
load Outlook 2007, you will see a screen
prompt reminding you that Out of
Office Assistant is active. You can “turn
off” the Assistant when you see this
message.
Auto-Signature
There is an Outlook 2007 feature, which allows you to
place a “designed” signature at the end of your e-mail
messages. You will need to be in one of the Main areas of
Outlook 2007 to create a signature (Inbox, Sent
Items, Deleted Items, etc.).
To activate this feature, click-on Tools in the Menu Bar. When the drop down menu appears,
click-on Options.
The Options menu screen at the top of the next page will appear.
36
When the above screen appears click-on the Mail Format “Tab” (see top arrow above). In
the lower portion of the Options menu screen you will see an area called Signatures. Click-
on the Signatures… button in this area (see lower arrow above).
The following
Create Signature
menu screen will
appear.
Click-on the New
button in this
screen.
The Create New
Signature menu
screen at the top of
the next page will
appear.
37
When the New Signature menu screen appears, type
a “name” for your signature in the area under Type a
name for this signature:
Then, click-on the OK Button.
You can type anything you desire for your signature (in the Edit signature area). You can type
just your name, or name, title, phone, FAX, etc. It’s your signature.
Notice that there are several buttons below the Edit signature text – Font, Font Size, Bold,
Italics, Underline, Color, etc. If you desire to change the font of your signature, highlight the
text that you desire to change, and then click-on the Font button and select your font – then
click OK in the Font menu screen. You can have several different fonts in your signature if
you desire – as well as color.
When you have the signature you desire, click the OK button. This will take you back to the
Options menu screen. Click OK again.
38
From now on, when you create a new message, reply to one, or forward one, you will see that
you signature is automatically added at the end of the message.
If you desire to edit your signature, or create a new one, follow the process above, and choose
the logical buttons to Edit, Remove, or create a New signature.
When you are satisfied with your signature, click OK.
Using Microsoft Word as your e-mail Editor
Previous versions of Microsoft Outlook gave you a choice to use or not use Microsoft Word
would as your e-mail editing program. With Outlook 2007, Microsoft Word 2007 is
“automatically” assigned as your e-mail editor.
To get a feel for how this works, please read the Introduction to Microsoft 2007 Office
tutorial. In this tutorial you will see how the Word Tab/Ribbons work to assist you as you are
creating, editing and enhancing your Word documents.
As soon as you create a new e-mail message, respond to or forward a message, all of the Word
Tab/Ribbons to enhance your messages are available.
When you create a new message the Message Tab/Ribbon (shown below) automatically
appears. You’ll notice that you have Message Groups on your Tab/Ribbon to assist you as
you create your message – Clipboard, Basic Text, Names, Include, Options and Proofing.
Create a new message and then try out the features on the Message Tab/Ribbon.
The Insert Tab/Ribbon
Tab Ribbon
Groups
39
The Options Tab/Ribbon
The Format Text Tab/Ribbon
When you are typing your e-mail messages you will have all of the power that is inherent in
Microsoft Word 2007.
Accessing you e-mail at home through a web browser
If you desire to use your Outlook e-mail at home, using a modem and an on-line service provider
(e.g. MSN, AOL), check with your Technology Department and see if they have this service
available.
If you do, an Outlook Web Access tutorial has been created –similar to this one – to assist you.
Simply send an e-mail to address below to request a copy.
Microsoft Office Tutorials
In addition to this tutorial, Outlook tutorials for Outlook Calendar, Outlook Folder Size, and
Outlook Web Access, as well as other Office tutorials, are available at:
http://www.officetutorials.com
This site is updated frequently with tutorial revisions as well as tutorials from a number of
collegiate institutions. Please feel free to visit and down load as you desire.
This has been an introduction into the basics of Outlook 2007 mail. If you have any questions
about Outlook 2007, or comments on this tutorial, please contact:
murray.t@lynchburg.edu
Thank you for your patience and good luck.

Weitere ähnliche Inhalte

Was ist angesagt?

Training Outlook
Training OutlookTraining Outlook
Training Outlook
cmonasmith
 
FSCAA OWA for Office 365
FSCAA OWA for Office 365FSCAA OWA for Office 365
FSCAA OWA for Office 365
Robin Bostic
 
Microsoft Outlook 2013 Quickstart
Microsoft Outlook 2013 QuickstartMicrosoft Outlook 2013 Quickstart
Microsoft Outlook 2013 Quickstart
comatsg
 
Outlook 2010
Outlook 2010Outlook 2010
Outlook 2010
nolanik
 

Was ist angesagt? (20)

What is new in Outlook 2007?
What is new in Outlook 2007?What is new in Outlook 2007?
What is new in Outlook 2007?
 
Managing Emails using MS Office Outlook
Managing Emails using MS Office Outlook Managing Emails using MS Office Outlook
Managing Emails using MS Office Outlook
 
Training Outlook
Training OutlookTraining Outlook
Training Outlook
 
Outlook 2010 tips
Outlook 2010 tipsOutlook 2010 tips
Outlook 2010 tips
 
FSCAA OWA for Office 365
FSCAA OWA for Office 365FSCAA OWA for Office 365
FSCAA OWA for Office 365
 
Use outlook 2010 / 2013 best practices to achieve your personal goals
Use outlook 2010 / 2013 best practices to achieve your personal goalsUse outlook 2010 / 2013 best practices to achieve your personal goals
Use outlook 2010 / 2013 best practices to achieve your personal goals
 
Basic Outlook Skills
Basic Outlook SkillsBasic Outlook Skills
Basic Outlook Skills
 
Outlook2010 training presentation
Outlook2010 training presentationOutlook2010 training presentation
Outlook2010 training presentation
 
Microsoft Outlook 2013 Quickstart
Microsoft Outlook 2013 QuickstartMicrosoft Outlook 2013 Quickstart
Microsoft Outlook 2013 Quickstart
 
Outlook Training
Outlook TrainingOutlook Training
Outlook Training
 
13 Tips to Master Microsoft Outlook 2013
13 Tips to Master Microsoft Outlook 201313 Tips to Master Microsoft Outlook 2013
13 Tips to Master Microsoft Outlook 2013
 
Outlook 2010
Outlook 2010Outlook 2010
Outlook 2010
 
Microsoft outlook 2010
Microsoft outlook 2010Microsoft outlook 2010
Microsoft outlook 2010
 
Outlook 2013 lesson 1 Overview presentation
Outlook 2013 lesson 1 Overview presentationOutlook 2013 lesson 1 Overview presentation
Outlook 2013 lesson 1 Overview presentation
 
Outlook 2016 training
Outlook 2016 trainingOutlook 2016 training
Outlook 2016 training
 
Microsoft Outlook 2010 - Orientation
Microsoft Outlook 2010 - OrientationMicrosoft Outlook 2010 - Orientation
Microsoft Outlook 2010 - Orientation
 
Microsoft outlook
Microsoft outlookMicrosoft outlook
Microsoft outlook
 
Exploring Outlook 2010
Exploring Outlook 2010Exploring Outlook 2010
Exploring Outlook 2010
 
Customizing Outlook MS Outlook Advance
Customizing Outlook MS Outlook AdvanceCustomizing Outlook MS Outlook Advance
Customizing Outlook MS Outlook Advance
 
Office 365 overview
Office 365 overviewOffice 365 overview
Office 365 overview
 

Andere mochten auch (6)

Microsoft® Office 2007 Tutorial
Microsoft® Office 2007 TutorialMicrosoft® Office 2007 Tutorial
Microsoft® Office 2007 Tutorial
 
Introduction to microsoft word 2007
Introduction to microsoft word 2007Introduction to microsoft word 2007
Introduction to microsoft word 2007
 
Ms excel 2007
Ms excel 2007Ms excel 2007
Ms excel 2007
 
Microsoft 2007 Basics
Microsoft 2007 BasicsMicrosoft 2007 Basics
Microsoft 2007 Basics
 
MS EXCEL PPT PRESENTATION
MS EXCEL PPT PRESENTATIONMS EXCEL PPT PRESENTATION
MS EXCEL PPT PRESENTATION
 
Microsoft word basics ppt
Microsoft word basics pptMicrosoft word basics ppt
Microsoft word basics ppt
 

Ähnlich wie Outlook 2007 tutorial

Office 2007 Introduction
Office 2007 IntroductionOffice 2007 Introduction
Office 2007 Introduction
sumatipuri
 
Powerpoint 2007 tutorial
Powerpoint 2007 tutorialPowerpoint 2007 tutorial
Powerpoint 2007 tutorial
sumatipuri
 
MS Publisher Tutorial
MS Publisher TutorialMS Publisher Tutorial
MS Publisher Tutorial
virtualMaryam
 
Office 2007 introduction
Office 2007 introductionOffice 2007 introduction
Office 2007 introduction
Fadel Abbas
 
Publisher 2007 tutorial
Publisher 2007 tutorialPublisher 2007 tutorial
Publisher 2007 tutorial
Fadel Abbas
 
Creating a flyer in publisher
Creating a flyer in publisherCreating a flyer in publisher
Creating a flyer in publisher
melitoj
 
Using microsoft word
Using microsoft wordUsing microsoft word
Using microsoft word
Archana Rai
 
Lesson 1 seeting up your powerpoint presentation
Lesson 1  seeting up your powerpoint presentationLesson 1  seeting up your powerpoint presentation
Lesson 1 seeting up your powerpoint presentation
guevarra_2000
 
Lesson 1 seeting up your powerpoint presentation
Lesson 1  seeting up your powerpoint presentationLesson 1  seeting up your powerpoint presentation
Lesson 1 seeting up your powerpoint presentation
guevarra_2000
 
Windows Operating System1
Windows Operating System1Windows Operating System1
Windows Operating System1
bill balina
 
Lesson 4 moving and resizing windows
Lesson 4   moving and resizing windowsLesson 4   moving and resizing windows
Lesson 4 moving and resizing windows
guevarra_2000
 
Lesson 1 setting up excel environment
Lesson 1   setting up excel environmentLesson 1   setting up excel environment
Lesson 1 setting up excel environment
guevarra_2000
 
Outlook 2007 calendar
Outlook 2007 calendarOutlook 2007 calendar
Outlook 2007 calendar
Fadel Abbas
 

Ähnlich wie Outlook 2007 tutorial (20)

Ppt2007 tut
Ppt2007 tutPpt2007 tut
Ppt2007 tut
 
Office 2007 Introduction
Office 2007 IntroductionOffice 2007 Introduction
Office 2007 Introduction
 
Powerpoint 2007 tutorial
Powerpoint 2007 tutorialPowerpoint 2007 tutorial
Powerpoint 2007 tutorial
 
MS Publisher Tutorial
MS Publisher TutorialMS Publisher Tutorial
MS Publisher Tutorial
 
Office 2007 introduction
Office 2007 introductionOffice 2007 introduction
Office 2007 introduction
 
Publisher 2007 tutorial
Publisher 2007 tutorialPublisher 2007 tutorial
Publisher 2007 tutorial
 
Creating a flyer in publisher
Creating a flyer in publisherCreating a flyer in publisher
Creating a flyer in publisher
 
Word environment
Word environmentWord environment
Word environment
 
04 Windows Skills
04 Windows Skills04 Windows Skills
04 Windows Skills
 
Windows operating system part 1 (Introduction to Computer)
Windows operating system part 1 (Introduction to Computer)Windows operating system part 1 (Introduction to Computer)
Windows operating system part 1 (Introduction to Computer)
 
Taskbar & start menu properties
Taskbar & start menu propertiesTaskbar & start menu properties
Taskbar & start menu properties
 
Using microsoft word
Using microsoft wordUsing microsoft word
Using microsoft word
 
Lesson 1 seeting up your powerpoint presentation
Lesson 1  seeting up your powerpoint presentationLesson 1  seeting up your powerpoint presentation
Lesson 1 seeting up your powerpoint presentation
 
Lesson 1 seeting up your powerpoint presentation
Lesson 1  seeting up your powerpoint presentationLesson 1  seeting up your powerpoint presentation
Lesson 1 seeting up your powerpoint presentation
 
Windows Operating System1
Windows Operating System1Windows Operating System1
Windows Operating System1
 
Lesson 4 moving and resizing windows
Lesson 4   moving and resizing windowsLesson 4   moving and resizing windows
Lesson 4 moving and resizing windows
 
Living in the IT Era L3.pptx
Living in the IT Era L3.pptxLiving in the IT Era L3.pptx
Living in the IT Era L3.pptx
 
Lesson 1 setting up excel environment
Lesson 1   setting up excel environmentLesson 1   setting up excel environment
Lesson 1 setting up excel environment
 
Outlook 2007 calendar
Outlook 2007 calendarOutlook 2007 calendar
Outlook 2007 calendar
 
Windows Operating System
Windows Operating SystemWindows Operating System
Windows Operating System
 

Kürzlich hochgeladen

Histor y of HAM Radio presentation slide
Histor y of HAM Radio presentation slideHistor y of HAM Radio presentation slide
Histor y of HAM Radio presentation slide
vu2urc
 

Kürzlich hochgeladen (20)

How to Troubleshoot Apps for the Modern Connected Worker
How to Troubleshoot Apps for the Modern Connected WorkerHow to Troubleshoot Apps for the Modern Connected Worker
How to Troubleshoot Apps for the Modern Connected Worker
 
How to Troubleshoot Apps for the Modern Connected Worker
How to Troubleshoot Apps for the Modern Connected WorkerHow to Troubleshoot Apps for the Modern Connected Worker
How to Troubleshoot Apps for the Modern Connected Worker
 
Tech Trends Report 2024 Future Today Institute.pdf
Tech Trends Report 2024 Future Today Institute.pdfTech Trends Report 2024 Future Today Institute.pdf
Tech Trends Report 2024 Future Today Institute.pdf
 
Histor y of HAM Radio presentation slide
Histor y of HAM Radio presentation slideHistor y of HAM Radio presentation slide
Histor y of HAM Radio presentation slide
 
Powerful Google developer tools for immediate impact! (2023-24 C)
Powerful Google developer tools for immediate impact! (2023-24 C)Powerful Google developer tools for immediate impact! (2023-24 C)
Powerful Google developer tools for immediate impact! (2023-24 C)
 
Finology Group – Insurtech Innovation Award 2024
Finology Group – Insurtech Innovation Award 2024Finology Group – Insurtech Innovation Award 2024
Finology Group – Insurtech Innovation Award 2024
 
Exploring the Future Potential of AI-Enabled Smartphone Processors
Exploring the Future Potential of AI-Enabled Smartphone ProcessorsExploring the Future Potential of AI-Enabled Smartphone Processors
Exploring the Future Potential of AI-Enabled Smartphone Processors
 
From Event to Action: Accelerate Your Decision Making with Real-Time Automation
From Event to Action: Accelerate Your Decision Making with Real-Time AutomationFrom Event to Action: Accelerate Your Decision Making with Real-Time Automation
From Event to Action: Accelerate Your Decision Making with Real-Time Automation
 
Mastering MySQL Database Architecture: Deep Dive into MySQL Shell and MySQL R...
Mastering MySQL Database Architecture: Deep Dive into MySQL Shell and MySQL R...Mastering MySQL Database Architecture: Deep Dive into MySQL Shell and MySQL R...
Mastering MySQL Database Architecture: Deep Dive into MySQL Shell and MySQL R...
 
04-2024-HHUG-Sales-and-Marketing-Alignment.pptx
04-2024-HHUG-Sales-and-Marketing-Alignment.pptx04-2024-HHUG-Sales-and-Marketing-Alignment.pptx
04-2024-HHUG-Sales-and-Marketing-Alignment.pptx
 
Bajaj Allianz Life Insurance Company - Insurer Innovation Award 2024
Bajaj Allianz Life Insurance Company - Insurer Innovation Award 2024Bajaj Allianz Life Insurance Company - Insurer Innovation Award 2024
Bajaj Allianz Life Insurance Company - Insurer Innovation Award 2024
 
08448380779 Call Girls In Diplomatic Enclave Women Seeking Men
08448380779 Call Girls In Diplomatic Enclave Women Seeking Men08448380779 Call Girls In Diplomatic Enclave Women Seeking Men
08448380779 Call Girls In Diplomatic Enclave Women Seeking Men
 
TrustArc Webinar - Stay Ahead of US State Data Privacy Law Developments
TrustArc Webinar - Stay Ahead of US State Data Privacy Law DevelopmentsTrustArc Webinar - Stay Ahead of US State Data Privacy Law Developments
TrustArc Webinar - Stay Ahead of US State Data Privacy Law Developments
 
How to convert PDF to text with Nanonets
How to convert PDF to text with NanonetsHow to convert PDF to text with Nanonets
How to convert PDF to text with Nanonets
 
A Domino Admins Adventures (Engage 2024)
A Domino Admins Adventures (Engage 2024)A Domino Admins Adventures (Engage 2024)
A Domino Admins Adventures (Engage 2024)
 
08448380779 Call Girls In Civil Lines Women Seeking Men
08448380779 Call Girls In Civil Lines Women Seeking Men08448380779 Call Girls In Civil Lines Women Seeking Men
08448380779 Call Girls In Civil Lines Women Seeking Men
 
Data Cloud, More than a CDP by Matt Robison
Data Cloud, More than a CDP by Matt RobisonData Cloud, More than a CDP by Matt Robison
Data Cloud, More than a CDP by Matt Robison
 
Raspberry Pi 5: Challenges and Solutions in Bringing up an OpenGL/Vulkan Driv...
Raspberry Pi 5: Challenges and Solutions in Bringing up an OpenGL/Vulkan Driv...Raspberry Pi 5: Challenges and Solutions in Bringing up an OpenGL/Vulkan Driv...
Raspberry Pi 5: Challenges and Solutions in Bringing up an OpenGL/Vulkan Driv...
 
Boost PC performance: How more available memory can improve productivity
Boost PC performance: How more available memory can improve productivityBoost PC performance: How more available memory can improve productivity
Boost PC performance: How more available memory can improve productivity
 
Strategize a Smooth Tenant-to-tenant Migration and Copilot Takeoff
Strategize a Smooth Tenant-to-tenant Migration and Copilot TakeoffStrategize a Smooth Tenant-to-tenant Migration and Copilot Takeoff
Strategize a Smooth Tenant-to-tenant Migration and Copilot Takeoff
 

Outlook 2007 tutorial

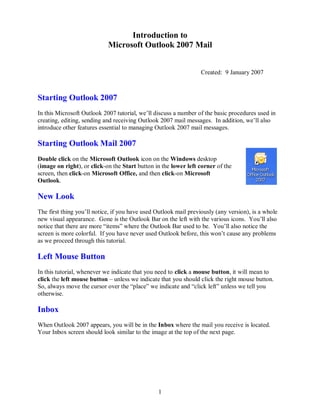
  • 1. 1 Introduction to Microsoft Outlook 2007 Mail Created: 9 January 2007 Starting Outlook 2007 In this Microsoft Outlook 2007 tutorial, we’ll discuss a number of the basic procedures used in creating, editing, sending and receiving Outlook 2007 mail messages. In addition, we’ll also introduce other features essential to managing Outlook 2007 mail messages. Starting Outlook Mail 2007 Double click on the Microsoft Outlook icon on the Windows desktop (image on right), or click-on the Start button in the lower left corner of the screen, then click-on Microsoft Office, and then click-on Microsoft Outlook. New Look The first thing you’ll notice, if you have used Outlook mail previously (any version), is a whole new visual appearance. Gone is the Outlook Bar on the left with the various icons. You’ll also notice that there are more “items” where the Outlook Bar used to be. You’ll also notice the screen is more colorful. If you have never used Outlook before, this won’t cause any problems as we proceed through this tutorial. Left Mouse Button In this tutorial, whenever we indicate that you need to click a mouse button, it will mean to click the left mouse button – unless we indicate that you should click the right mouse button. So, always move the cursor over the “place” we indicate and “click left” unless we tell you otherwise. Inbox When Outlook 2007 appears, you will be in the Inbox where the mail you receive is located. Your Inbox screen should look similar to the image at the top of the next page.
  • 2. 2 The mail messages that you receive will be listed in chronological order. Different Views in Outlook 2007 Navigation Pane When you first open Outlook 2007 your screen will normally look like the image above. As indicated earlier, this is much different than previous versions of Outlook. We’ll start with the left side of the screen and work to the right. On the left side of the screen you’ll see an image similar to the one on the right. This is called the Navigation Pane. You’ll notice in the top area that it indicates Mail. Below Mail there is an area called Mail Folders. We’ll show you how to change things around in these areas, if you desire, in a little while Below the Mail area you’ll see a series of Buttons: Mail, Calendar, Contacts, Tasks and Notes. Notice that the Mail button is orange. This means that this button has been selected (when you opened Outlook Mail).
  • 3. 3 If you click the left mouse button on Calendar, the Calendar will appear on the right side of the screen and the Calendar button will turn orange. The same thing will happened when you click-on Contacts, Tasks and Notes. Give this a try. When you are finished, click-on Mail once again. A logical question is how to change this Navigation Pane so that it looks like you want it to. The secret is in the lower right corner of the Navigation Pane. You’ll see a small yellow folder, an arrow and a down arrow. When you move your cursor over the down arrow your screen will look like the image on the above right. Click the down arrow When you click the down arrow, a drop down menu will appear to the right of the Task Pane. You’ll notice the choices: Show More Buttons, Show Fewer Buttons, Navigation Pane Options, and Add or Remove Buttons. First, if you don’t want as many buttons to appear, click- on Show Fewer Buttons. Watch what happens. You’ll notice your buttons “leave” from the bottom of the Navigation Pane. You’ll have to click-on the down arrow each time you desire to open this menu again. To add, or bring the buttons back to the Navigation Pane, click-on Show More Buttons. Give this a try and set your Navigation Pane as you desire. Now we’ll see what occurs when we click-on Navigation Pane Options… Click-on Navigation Pane Options and the Navigation Pane Options menu screen will appear (image at top of next page).
  • 4. 4 There are a number of choices with this screen. First, notice that there are little green “check marks” in some of the boxes. These are the buttons that currently appear in your Navigation Pane. If you don’t want a box to appear, click the check mark - and it will disappear – and the box won’t show. If you want to change the order of the buttons, notice the Move Down and Move Up choices on the right side of this menu screen. If you click-on one of the buttons (like Mail above –which is blue), and click the Move Down button, you will see Mail move down your button list. Give both of these options a try and set your buttons as you desire. Most folks who use the Show Fewer Buttons and Navigation Pane Options like the Navigation Pane Options better, as it allows you to set your buttons just like you wish. Now we’ll choose the last option in the Configure Buttons list – Add or Remove Buttons. Click-on the Add or Remove Buttons choice and you will see a pop-up menu appear to the right of the choice. Here again, you can click on a button (like Mail) and it will disappear, or appear when you click. This is called “toggling.” It’s like a light switch – On or Off. Each time you click, the button appears or disappears. You have a lot of choices on how to show/add, hide/remove buttons from your Navigation Pane. You choose the method you like best from the ones we have just shown you. Now we’ll concentrate on viewing you e-mail messages.
  • 5. 5 Different Views in Outlook 2007 Mail Views You will notice that you can see a small portion of your incoming e-mail in the middle portion of the screen and a greater portion in the right side area of the screen. This is the default view – depending on how you set up your Outlook 2007. There are several different “ways” to set-up a “view” that you like best. The image you see at the top of Page 2 on this tutorial is the one that someone at Microsoft thought you’d like best. It is a combination of two things - Preview Pane (the name for the middle portion of the screen), and Reading Pane (the name for the right side of your screen). NOTE: depending who set up your Outlook 2007 program, your screen may not look like this. This is not a problem, as we’ll now show you how to set up the view that you like the best. The second page of this tutorial shows this Preview Pane and Right Side Reading Pane. Most users like this a lot – this seems to be the most popular view – that’s why it’s the default. However, many prefer to view each e-mail message, individually, without the Preview Pane, Reading Pane or anything else. We’ll show you how to set several different views and you can choose the one you like best. Outlook 2007 has various combinations of Auto Preview and Reading Pane. First, we’ll work with the Reading Pane. To view the Reading Pane selections, click-on View in the Menu Bar and then click Reading Pane. You will see three suggestions to the right of Reading Pane – Right, Bottom, and Off. Normally, Right is the default. The choice for your Outlook mail will be highlighted a bit – you can see in our image (below) that Right has a little square around it. We’ll start with Right. Click the View Tab at the top of the Outlook Screen. You will see a drop down menu like the image on the right appear. Move your cursor over the Reading Pane selection. If Right is not the current choice, click Right. You will see the text of a message displayed on the right side of your screen like the image at the top of the next page.
  • 6. 6 Now we’ll repeat what we did on the last page, but place the reading page on the Bottom. Message on Left Text on Right Text on Bottom Message on Top
  • 7. 7 Now for the last choice. Repeat what you did on the last two pages, but choose Off. You choose the Reading Pane view that you like the best. Next, we’ll work with the Auto Preview. To do this you’ll need to click-on View in the Menu Bar. When the drop down menu appears you’ll see a selection called Auto Preview. This is called a “toggle” button as it can either be “on” or “off.” Click-on the Auto Preview button. When you do, Auto Preview will appear or disappear from your screen. On the next page we’ll show you examples of Auto Preview working with Reading Pane – Right, Bottom and Off views. All of your messages on one screen – NO Reading Pane
  • 8. 8 The below image has Auto Preview on the left and Reading Pane on the right. You can see a few lines of the message in “Auto Preview,” below the incoming message data. The below image has Auto Preview on the top and Reading Pane below the message. You can see a few lines of the message in “Auto Preview,” below the incoming message data. The below image has Auto Preview ONLY – no Reading pane. You can see a few lines of the message in “Auto Preview,” below the incoming message data. As you can see, there are a great number of combinations for reviewing your messages using the Reading Pane and Auto Preview together. Experiment and choose the combination you like the best.
  • 9. 9 Reviewing messages in the Inbox To view a message, simply double-click quickly on the message. You could also click-once on a message and then click File (in the Menu bar), then click Open, then click Selected Items. You will now see a screen similar to the one below. This screen is designed to review and respond to mail messages received. For those of you that have used past versions of Outlook, you will quickly notice that Outlook 2007 uses the Tabs/Ribbons of 2007 Office when you are viewing messages and responding to them. The 2007 Message Tab/Ribbon is enlarged below.
  • 10. 10 If this is the first time that you are looking at this Outlook screen, it would be a good idea to move your cursor over each item in the Message Tab/Ribbon. As you move your cursor over an item, you will see a Help Text box appear – like the image on the right. Microsoft Office Button The Microsoft Office Button has replaced File in the Menu Bar. In the upper left corner of your Outlook 2007 screen you will see a button similar to the image on the right. This is the Microsoft Office Button. Move your cursor over the Microsoft Office Button and a Office Button Help screen will appear. Click the Microsoft Office Button. You will now see the Outlook 2007 Microsoft Office Button selections. First, notice that many of the “old” File-Menu Bar choices are included in this menu. When we move our cursor over Print an expanded menu of Preview and Print choices appear on the right. In the lower right corner of the Microsoft Office Button menu screen you will see an Editor Options button.
  • 11. 11 Click the Editor Options button. The Editor Options Menu Screen (below will appear). Take a few minutes and click the choices on the left side of the screen – Popular, Display, Proofing, Advanced and Customize. Some of these may be too advanced for you now, but you’ll know where they are as you become more accomplished with Outlook Mail 2007. Replying to a message Look at the button bar at the top left of the screen (it will look like the image on the right). Notice that you can click-on Reply, and, automatically reply to the person who sent the message, or Reply to All (everyone included in the To: or Cc:). When you click-on Reply and Reply to All, you will notice that Outlook 2007 “automatically” completes the To: and/or Cc: in your outgoing message.
  • 12. 12 You then click-in the “white” message area below the To, Cc, Bcc and Subject, and add your reply/comments to the original message to which you are replying. After you have made any comments, you can click-on the small “Send” button and your Reply will be “mailed.” Forwarding a message If you desire to forward a message to someone, click-on the Forward button (next to the Reply and Reply to All buttons), then click-in the To: or Cc: areas. We will be covering Address Books later in this “tutorial.” At this point, type-in the e-mail address or addresses of those to whom you want to forward the mail message. If you have more than one address, separate them with a semi-colon (;). You can move down to the Address Book section if you desire (Page 15). Envelopes Now that you have the “feel” for looking at messages in your Inbox, replying to and forwarding them, please take a moment to look at the “little envelops” next to each message. When a message first arrives in your Inbox, and has not been read, you’ll notice that the envelope is closed. Once you have read the message, but not replied, the envelope will appear opened. When you reply to or forward a message in Outlook 2007, you will notice, when you view the message again in Inbox, or Sent Items, it will now have a small arrow attached to the message. These arrows indicate that the message has been forwarded or replied to. A purple arrow pointing to the left indicates you have replied to a message, a blue arrow pointing to the right indicates that you forwarded that message. The arrows will be the same as on the Reply, Reply to All, and Forward buttons.
  • 13. 13 Deleting unwanted messages If you do not want to keep the message, you can click-on the “X” button, in the button bar, to send the message to a “Delete folder.” Note: This is NOT the “x” button in the upper right corner of the screen. If you do click-on the upper right corner X, it will simply close the message and return you to the Inbox, etc. We’ll discuss this in more detail later in Folders. When you delete a message in the Inbox, it is sent to the Deleted Items folder to be “really deleted” or “recovered” later. Moving from message to message in the Inbox Notice the blue Up and Down arrows in the Quick Access Toolbar at the top left of the Outlook 2007 screen. They are only visible when you are “in a message.” These allow you to move forward and backward (Previous Item and Next Item) between messages in the Inbox. Click-on these arrows to see how they work. Printing a message If you desire a “printed copy” of the message you can click-on the Printer in the Quick Access Toolbar.
  • 14. 14 A Print Menu Screen will appear where you can select the printer on which you would like to print your message and the number of copies. Creating and sending a new e-mail message If you are in the Inbox and desire to send a new e-mail message to a person or group of persons click-on the New Mail Message button in the button bar. If you are in some other part of Outlook 2007 and do not see the New Mail Message button, you can always (in the Inbox as well) click- on File in the Menu Bar, then click-on New, and then click-on Mail Message. In both cases, the below screen should appear.
  • 15. 15 First, click-in the area to the right of To: (see arrow at the bottom of the last page). For now, type-in the e-mail address of the person, or persons, to whom you desire to send this e-mail message. Next, click-in the area to the right of Cc:. Again, type-in the name or names of others whom you would like to receive copies of this message. If you type-in more than one e- mail address, separate the addresses with a semi-colon (;). If you desire to use the Address Book, move down to the Address Book section (Page 15). Now click-in the area to the right of Subject:, and type-in a subject for your e-mail. This is really important as many SPAM blocking programs automatically reject messages that do not have a subject. Finally, click-in the white area below Subject:, and type-in your e-mail message as you would any memo to someone. You may move around, edit and change your message just like you would do if you were in a word processor. Later in this “tutorial,” we will show you how you may use Microsoft Word as your “e-mail editor,” with all the Microsoft Word features, if you choose to do so. Your screen should now look similar to the image on the right. When you have completed your e-mail message, click-on the Send button in the upper left corner of the screen. Quick note on folders This is simply a quick note to tell you what happens when you send an e-mail message. When a message is sent, a copy of your e-mail is automatically placed in your Sent Items folder. So, you can access your sent message (by clicking-on the Sent Items folder – then opening your message), edit it, and forward it, etc., until you decide to delete it later on. If you desire to keep the e-mail you will be able to move it to another folder if you desire. We’ll go into detail on all of this later. For now, just be aware that you have not “lost” your message. You do not need to “copy yourself” in Outlook unless you want to get an additional copy of your e-mail in your Inbox.
  • 16. 16 Address Books When you have clicked-on Reply, Reply to All, or Forward as indicated on Pages 10 and 11 or created a new e-mail message, Page 13, you will see a screen similar to the one below: If you are Replying or Replying to All on an e-mail message in your Inbox, then the addresses from that e-mail will automatically appear in the To, Cc and Bcc areas. If you don’t want to send the e- mail to some of these addresses, you can simply click-on them and tap the Delete key. If you are Forwarding a message from the Inbox or Sending a new e-mail message, then you can either type-in the address in the To, Cc or Bcc areas, or use the Global Address List or Contacts Address Book. There are several Address Books in Outlook 2007 that you can utilize to send and respond to e-mail messages. In addition, there are a number of options for entering e-mail addresses into an Address Book. You will, in all probability, use two address books: Global Address List and Contacts Address Book. To access these address books/lists click-on the To: or Cc: “buttons” (see arrows on the picture above). The Global Address List menu box will appear.
  • 17. 17 Global Address List We’ll look at several Address Lists and explain how each is utilized. First, we’ll look at the Global Address List. When you click-on either the To:, Cc: or Bcc: buttons the below Select names: Global Address List screen will appear: When you are in the Reply, Reply to All, Forward or create a New e-mail message screen, and need to add additional e-mail addresses, you can still type-in the addresses or use a Global Address List like the one above. The Global Addresses List that you see above is created, and updated, when a person at the institution/business selects to use Outlook mail. The Information Technology Staff places the new user in the Global Address List. Thus, this address list is a current list of all Outlook mail users (and it may also include other users who are not on Outlook – depending on your on campus/business). To use this list, simply click-on the person whom you want to receive the e-mail (their name will “turn blue” – see arrows above). Or, you can type their name in the area below “Search-Name only,” and you will notice that the list of names, below where you typed the name, moves to all of the persons with that name. Most systems are in last name order. Some are in first name order. By looking at the name list you can determine how your system is setup. Then, click-on the To, Cc or Bcc (Blind copy) buttons. This will add the address to those already in the e-mail (you will see it appear in the area to the right). You can do this for as many addresses as you desire. When you have finished, click-on OK, and you return to your message. Arrows in the image above point to each of these items.
  • 18. 18 Contacts (in older versions of Outlook – Personal Address Book) How can you create your own “automatic” address list for someone who is not on the campus/business Outlook 2007 mail system (especially off campus/business addresses)? There is a feature called Contacts to take care of this. A contact is just what it indicates. You create your own Contacts (like a personal address book). First we’ll show you how to get to Contacts and then how to add and delete addresses. When you click-on the To:, Cc: or Bcc: buttons (Page 16) the Select Names Global Address List appears. In the upper right corner of this menu screen, under Address Book you will see an area that indicates that this is the Global Address List. To the right of the title is a small down arrow, click-on the down arrow and a menu screen similar to the one at the right appears. Now, click-on Contacts, and the screen below appears, which contains the addresses that YOU have already placed in your old Personal Address Book – if you had one. Notice, the Select Names: Contacts menu screen (left image) now indicates Contacts in the upper right corner. Also, notice the e-mail addresses on the menu screen. These are e-mail addresses that you would add to your Contacts list.
  • 19. 19 To add the addresses in Contacts, to an e-mail message, simply repeat the procedure outlined in the Global Address List. Click-on the name, to whom you desire send the e-mail (on the left side), then click-on the To:, Cc: or Bcc: buttons to add that name to these areas. Again, you can add as many names as you wish. When you have finished, click OK and you will be taken back to the e-mail that you want to send. You can then continue to creating a new e-mail or editing the contents of one that you are working with. Adding Names to Contacts (like Personal Address Book in older versions) There are many ways to add names to Contacts. We’ll show you several of the more popular procedures. You will also discover other methods, as you become more familiar with Outlook 2007. Adding names as you type the e-mail addresses in the To or Cc areas of the message If a person’s e-mail address is not currently in your Global Address List or Contacts, you can add it while you are in the process of sending them a message. In the area to the right of To or Cc, TYPE-IN the e-mail address for the person or persons you wish to receive your e-mail. If you type-in several addresses, separate them with a semi-colon ( ; ). Click away (somewhere else on the screen) from the address you typed. You will notice that, in a few moments, the addresses will become underlined. To add an address to your Contacts, simply RIGHT-CLICK on a name, that you typed, and a menu box will appear (image at left). Click-on Add to Outlook Contacts and the Contacts entry menu screen will appear (image at top of next page).
  • 20. 20 The Contact entry menu screen appears below. Normally, the first part of the e-mail address you entered before the “@” symbol will appear in the full name box. To change this to a logical full name click-on the Full Name… button (as indicated by the arrow above). When the Check Full Name box appears (image on left) you can then fill in the entire name by filling in the appropriate areas (First:, Middle:, Last:, etc.) When you are finished, click-on OK. You can now fill in the applicable areas for the person’s mailing address, if you desire. To do this click-on the Address down triangle (see arrow at right). Click-on Business, Home or Other.
  • 21. 21 You will notice that your Address area changes to your selection (we chose Home…). After you make your selection (Business, Home, Other), type the address in the small box to the right of your selection. When you have completed everything, you can click-on the Save and Close button. You will now return to your message. To add additional names to your Contacts Address Book repeat the above process again. When you are in the Contact screen (at the top of the last page) – notice that there are a lot of other tabs and areas which you may also use to enter information about a person. To observe that the contact you entered has been added to your Contacts, click-on either the To, Cc or Bcc buttons in your message screen. When you have clicked one of the buttons, you will go to the Global Address List screen again. Click-on the down arrow in the upper right corner, and move down the menu and click-on Contacts (Page 18). You will see the address you added. When you have a lot of addresses, you will have to use the up and down elevator bar to view your addresses. Outlook automatically alphabetizes the names as you enter them. Your Contacts screen should look something like this:
  • 22. 22 Adding Names to your Contacts as you receive e-mail in your Inbox Big Note: Right-clicking on an e-mail address also works when you receive a message from someone! If you know that an address is not in your Contacts, RIGHT-CLICK on the address and add it as you did above. This really saves a lot of time. You know it’s a good address, because you received their message! To the left is an image of the address area of an e-mail in the Inbox. We simply RIGHT clicked-on the person and then moved down the pop-up menu to Add to Outlook Contacts – just like we did when we typed-in and address in our New Mail To: area. Once you have clicked-on Add to Contacts you will go back to the same process that is outlined above on pages 20 and 21. Manually adding e-mail address to your Contacts Many times, friends will write you (the old fashioned way) or call you on the phone and furnish their e-mail address. So, there is still another way to add their e-mail address to your Contacts. In the button bar, below the Menu bar, you will notice a “small book” (like the one on the right). When you run your cursor over the book it will indicate: Address Book. You can click-on it and add names to your Contacts. Click-on the “book” and the following screen will appear. Click-on File in the Menu Bar and then click on New Entry. A New Entry screen will appear. It should look similar to the image on the right. Make sure that New Contact is highlighted in blue in the Select the entry type: in the top portion of the screen. And, also make sure that Contacts is selected in the Put this entry area in the lower part of the menu screen. If Contacts is not the choice, click the down arrow on the right side of Put this entry and select Contacts from the choices that appear.
  • 23. 23 When everything looks like the screen above, click the OK button. An Untitled – Contact screen like the one below will appear. Notice that the Untitled - Contact screen is similar to the one you used to enter e-mail addresses as you typed them into messages, or used when you copied addresses from you Inbox again appears – with a notable exception – there is no name in Full Name… or E-mail address in E-mail. So, fill in the name of the person in Full Name… and enter their e-mail address in the E- mail area. You can enter other information as you did previously, as you desire. When you have entered the information, your screen should look similar to the image on the left. When you have entered the information you desire, in the appropriate areas, click Save and Close to add this person to your Contacts list.
  • 24. 24 Note on viewing e-mail addresses Once you begin using Outlook 2007 Mail you can check on a person’s “information” by right-clicking the mouse on their name in the To, Cc or Bcc areas. In the pop-up menu that appears, click-on Properties. If they are in your Global Address Book you will “see” how the system administrator entered the information. If they are in your Contacts list, you will see the Contacts screen similar to the one on the last page. This is very handy if you desire “quick” information about a person in your system. Personal Distribution Lists Now that you have an idea of how to add individual names to Contacts, and are familiar with the Global Address List, you may want to create a group of addresses to which you frequently send e-mail. In Outlook 2007 this is called a Personal Distribution List. To create a Distribution List, you will follow several steps, similar to those above. To create a Personal Distribution List you will need to be in the Inbox, Sent Items, or Deleted Items (you can be in other main screens when you are more familiar with Outlook 2007). You will need to be in a main screen where you can see the little Address Book button, click-on it. Click-on File in the Menu Bar and then click on New Entry. A New Entry screen will appear. When the New Entry screen appears, click-on New Distribution List in the area below Select the entry type. Make sure that Put this entry is set on Contacts. If it is not set on Contacts, click-on the small down arrow to the right of this area and select Contacts. Then, click-on OK.
  • 25. 25 The following Untitled – Distribution List menu screen will now appear: In the area to the right of Name:, type-in a name for your Distribution List (e.g. Lunch Bunch). Next, click the Select Members button. The Select Members: Global Address List menu screen will appear. You’ll notice that this screen looks almost like the Select Names screen you used to address your messages. You’ll notice that the Select Members screen only has a Members - > button. So, you can, at this moment, only add persons, you desire to be in your Distribution List, to the group. Later we’ll show you how to remove and add members as you update your list.
  • 26. 26 By using either the Global Address List, or your Contacts you can create your Distribution list. Click- on the small down arrow in the upper right corner of the Select Members screen and select the group you want. In the example on the right we chose our Contacts group, and selected the person you see at the bottom of the Menu screen. We then clicked-on the Members-> button – this person was added to our Distribution list on the right. You may “switch between” the various “lists” as often as you like, and add as many names as you like. Note: You do not need to have someone in either the Global Address List, Contacts or another list to have them in your Distribution List. If they are in neither, simply type a semi- colon (;) at the end of the last address on the right side, and then type-in the person’s e-mail address. They will be included in your list. When you have added all the names you desire, click-on OK. Note for Outlook users who upgraded to Outlook 2007 When you upgraded, you should have saved a file called a PAB (Personal Address Book) and incorporated it in your Outlook 2007 setup. This file contained all of the names that you placed in your Personal Address Book in previous versions of Outlook. So, for you “old hands,” you may use not only all of the files in your Global Address Book and Contacts, you may also use your Personal Address book that you used previously. If you did not save the PAB file and replace the PAB file that was loaded with Outlook 2007, the Personal Address Book names will not be available. Your technical staff may have also indicated that they removed the Personal Address Book option and included these addresses in your Contacts. If you have a question here, ask you technical staff for assistance.
  • 27. 27 You should now return to the Distribution List screen. Your screen should look similar to the one below. You’ll see the name of your Distribution List in the Name: area and the names of the Members in the area below. To remove members from the list simply click once on the member and then click-on the Remove button. You’ll notice that they are removed from your list. To add new members, simply repeat the steps on pages 24 to 26. Click-on the Select Members button and add them as you did before. When you have made all the changes you desire, click-on the Save and Close button in the screen above. The next time you “visit” Contacts, your screen will look something like the one on the right. The name will be in bold, and there will be a “teeny” icon of a woman and a man on the left. Any time you desire to make changes to this Distribution List, just double-click quickly on a list and you’ll be taken to that Distribution List screen that you used to create the list.
  • 28. 28 Sending Messages using your Distribution List To send a message to everyone on your Distribution Lists, use the same steps that you used for sending a message to a single person. Either type in the name of the Distribution List in the To:, Cc:, or Bcc: areas of your message (e.g. Lunch Bunch), or use the Select Names box, like you did on pages 16 to 18, but select your Distribution List like you would select a name. Folders NOTE: For Outlook 98, 2000 and XP/2002 users, you probably noticed that the Outlook Bar, on the left of the screen, had been replaced by a whole new folder and icon area (Navigation Pane). No longer are there Outlook Shortcuts, My Shortcuts and Other Shortcuts areas. The prior Outlook Today icon has been replaced by a mailbox with your name on it. We’ll review the new Navigation Pane, that we introduced at the beginning of the tutorial, that replaces the Outlook Bar. When you first opened Outlook 2007, the area to the left of the screen looked something like the image to the left. The icons you see take you to different features of Outlook (Calendar, etc.) or contain e-mail. The icons we are concerned with in this tutorial are the ones that pertain to e-mail and hold messages (e.g. Inbox, Sent Items, Deleted Items). When your Technical Support staff set-up your Outlook 2007 account, they created limits for the amount of mail messages you can have in your Inbox, Sent Items, and Deleted Items folders. When you get near this limit, you will receive a cautionary message, indicating that you need to delete messages that are no longer needed. Frequently, you have certain messages that are related to a topic or group, and you would like to retain them for some period of time, and not have them “count” against your size limit. The next area of this tutorial will address this situation
  • 29. 29 You can create special folders called Personal Folders for various “groups” of e-mail (some of these on the right are – Microsoft, Dell, Tutorials, etc). As you receive or send e-mail related to a “group” you can move the e-mail to that folder so that you can find the items easily, without having to search all of your mail. You can still delete these items when they no longer apply and delete the folder when you are finished with it. Creating Personal Folders To create a Personal Folder, do the following: Click-on File in the Menu Bar, then click-on New in the drop down menu, and then click-on Folder… The following Create New Folder screen will appear: First, select a logical name for the folder. For this tutorial we’ll use the title “My Junk.” Type the name you desire in the Name: area. Next, move down the Create New Folder screen with the elevator arrows (on the right of the menu screen) until you see: “Personal Folders.” Click-on Personal Folders. Now, click-on OK. This will place the created folder in your Personal Folders area.
  • 30. 30 Notice that a new Personal Folder (My Junk) has been added to your Personal folder area. Placing e-mail messages in your Personal Folders Moving a single message You will notice, in the Preview Pane – Mail Folders area, that when you click-on Inbox, Sent Items, or Deleted Items, that the Personal Folders you created can still be seen in the Preview Pane on the left side of the screen. To “move” a single e-mail message from one folder (Inbox, etc.) to another folder (Personal Folder), you simply click-on the e-mail message, you want to move, hold down the left mouse button, and drag the message to the Personal Folder. In the image above we clicked-on the highlighted message, held down the left mouse button, and dragged the message from the Inbox to the My Junk folder. You will notice, as you are “dragging” your e-mail message, a small box appears “attached” to the cursor arrow. The cursor changes to a circle with a line through it (when you are over an area where you can’t drop your message), and then changes again to the box with the arrow when you have the cursor over a Personal Folder icon. When you have the box symbol over your Personal Folder, release the left mouse button. This will move the message from one folder to another. Try this with one of the messages in your Inbox.
  • 31. 31 Moving Several Messages You can also move several messages with this drag technique. To highlight several messages you need to learn a new skill. If you hold down one of the Ctrl keys (at the bottom of the keyboard – one either side of the Space Bar) and then click-on several messages, you’ll notice that as you click each message it is highlighted (like image on left). When you are ready to move the group of messages you highlighted, simply click-on any of the highlighted messages, and immediately hold down the left mouse button, and then drag all the messages to the folder where you want the messages. If you click-on one of the messages and don’t drag the cursor immediately, this will “turn-off” the multiple message selections and you’ll have to start again. It’s kind of tricky. So the first time that you try this, if it doesn’t work – try again. If you ever desire to “turn-off” the multiple highlights, you simply click-on any message and that will remove the highlights and select the message on which you clicked. You can still delete the messages when you no longer desire to retain them. Moving, Deleting, and Recovering Mail Messages You should now have a “feel” for Outlook 2007. Having just completed folders, you can see that we can move a message from any folder to any folder simply by clicking-on it and dragging the message to another folder. You could also click-on a message and, either using Edit (in the Menu Bar), then Copy or Cut in the Menu bar, and then Paste, to move or copy a message in this manner. You can also use the Cut, Copy and Paste buttons in the button bar. To delete a message, you have already learned that you can click-on the message and then on the “X” in the button bar (not the X in the upper right hand corner). If you click-on the upper right hand corner X this will simply close the message and return you to the Inbox, etc.
  • 32. 32 When you delete an e-mail message in your Inbox, Sent Items, or a Personal Folder, this places the message in the Deleted Items “trash can.” You can “drag” an item from Deleted Items to any folder to retrieve it, or use the methods above to recover a message to a folder. “Really” Deleting Messages To “really” delete an e-mail message in the Deleted Items Folder, you can click-on the message and click-on the “X” button, or tap the Delete key. Outlook 2007 will ask you if you “really” want to delete the message. When you say “yes,” it’s gone. To delete several individual messages at once, click-on the first message, then hold down the Ctrl key, and while holding down Ctrl, click-on the other items. You will see that they turn “blue,” indicating that you are “marking” them (just like we covered before). Now click the “X” button or tap the Delete key. If you want to delete ALL of the items in the Delete Items trash can, click-on Edit in the Menu bar and then Select All. Then, click-on the “X” button or tap the Delete key. A message box will appear asking if you really want to delete all the items. If you do, click-on Yes. Adding, Sending, Receiving, Viewing, and Saving Attachments There are many times when you want to send a Word document, Excel spreadsheet, PowerPoint presentation, picture, or file of some type to someone, or be able to receive one. Outlook 2007 makes this relatively simple. The items indicated above are sent as “attachments” to your e-mail. When you are sending an e-mail message and want to “include” an attachment it’s relatively easy. When you are in the Untitled-Message, the Forward or Reply screens, you will notice a “paperclip” Attach File in the Message Tab/Ribbon.
  • 33. 33 This paperclip (Attach File) is the button that allows you to insert an attachment in your e- mail message. Click-on the paperclip. The following Insert File menu screen will appear. When this Insert File screen appears, choose the location of your file (attachment) on your computer (A or C drives, etc., or on a network drive) by using the Look in: area (see the arrow above – we have chosen My Documents on the C: disk drive). Then choose the file by clicking-on it (we chose a PowerPoint file called How to make a great PBJ for our attachment). Click-on Insert. Your e-mail message, with attachment, will look similar to the image on the right. When you or, another person, receives this attachment, all you/they have to do is double-click on the attachment and it will load into the proper program! Or, you can right click on the attachment, and a menu will appear that you can use. Once you have the document in its normal “environment,” you can save it, etc. Pretty neat!
  • 34. 34 Calendar There is a personal calendar you can use that is included with Outlook 2007. You can access the calendar by clicking-on the calendar icon in Outlook Shortcuts area on the left of your Outlook screen. You can learn how to use this calendar by clicking-on Help. A Calendar tutorial has been created for Outlook. You can receive a copy of this tutorial by sending an e-mail to the address at the end of this tutorial. Out of Office Assistant If you are going to be away from your office computer for a period of time, and you want to leave a courtesy message for folks to let them know that you’ll be away, you can use the Out of Office Assistant to do this. To activate the Out of Office Assistant click-on Tools in the Menu bar and then click-on Out of Office Assistant… You will need to be in the Inbox, Sent Items, Deleted Items or one of your folder screens to do this. The Out of Office Assistant menu screen at the top of the next page will appear.
  • 35. 35 Type the message that you want others to automatically receive when they send an e-mail message to you. Then click-in the small circle to the left of I am currently Out of the Office. This message will be sent to each person the first time that they send you an e-mail message telling them that you are away from the office. When you return (to your office), and load Outlook 2007, you will see a screen prompt reminding you that Out of Office Assistant is active. You can “turn off” the Assistant when you see this message. Auto-Signature There is an Outlook 2007 feature, which allows you to place a “designed” signature at the end of your e-mail messages. You will need to be in one of the Main areas of Outlook 2007 to create a signature (Inbox, Sent Items, Deleted Items, etc.). To activate this feature, click-on Tools in the Menu Bar. When the drop down menu appears, click-on Options. The Options menu screen at the top of the next page will appear.
  • 36. 36 When the above screen appears click-on the Mail Format “Tab” (see top arrow above). In the lower portion of the Options menu screen you will see an area called Signatures. Click- on the Signatures… button in this area (see lower arrow above). The following Create Signature menu screen will appear. Click-on the New button in this screen. The Create New Signature menu screen at the top of the next page will appear.
  • 37. 37 When the New Signature menu screen appears, type a “name” for your signature in the area under Type a name for this signature: Then, click-on the OK Button. You can type anything you desire for your signature (in the Edit signature area). You can type just your name, or name, title, phone, FAX, etc. It’s your signature. Notice that there are several buttons below the Edit signature text – Font, Font Size, Bold, Italics, Underline, Color, etc. If you desire to change the font of your signature, highlight the text that you desire to change, and then click-on the Font button and select your font – then click OK in the Font menu screen. You can have several different fonts in your signature if you desire – as well as color. When you have the signature you desire, click the OK button. This will take you back to the Options menu screen. Click OK again.
  • 38. 38 From now on, when you create a new message, reply to one, or forward one, you will see that you signature is automatically added at the end of the message. If you desire to edit your signature, or create a new one, follow the process above, and choose the logical buttons to Edit, Remove, or create a New signature. When you are satisfied with your signature, click OK. Using Microsoft Word as your e-mail Editor Previous versions of Microsoft Outlook gave you a choice to use or not use Microsoft Word would as your e-mail editing program. With Outlook 2007, Microsoft Word 2007 is “automatically” assigned as your e-mail editor. To get a feel for how this works, please read the Introduction to Microsoft 2007 Office tutorial. In this tutorial you will see how the Word Tab/Ribbons work to assist you as you are creating, editing and enhancing your Word documents. As soon as you create a new e-mail message, respond to or forward a message, all of the Word Tab/Ribbons to enhance your messages are available. When you create a new message the Message Tab/Ribbon (shown below) automatically appears. You’ll notice that you have Message Groups on your Tab/Ribbon to assist you as you create your message – Clipboard, Basic Text, Names, Include, Options and Proofing. Create a new message and then try out the features on the Message Tab/Ribbon. The Insert Tab/Ribbon Tab Ribbon Groups
  • 39. 39 The Options Tab/Ribbon The Format Text Tab/Ribbon When you are typing your e-mail messages you will have all of the power that is inherent in Microsoft Word 2007. Accessing you e-mail at home through a web browser If you desire to use your Outlook e-mail at home, using a modem and an on-line service provider (e.g. MSN, AOL), check with your Technology Department and see if they have this service available. If you do, an Outlook Web Access tutorial has been created –similar to this one – to assist you. Simply send an e-mail to address below to request a copy. Microsoft Office Tutorials In addition to this tutorial, Outlook tutorials for Outlook Calendar, Outlook Folder Size, and Outlook Web Access, as well as other Office tutorials, are available at: http://www.officetutorials.com This site is updated frequently with tutorial revisions as well as tutorials from a number of collegiate institutions. Please feel free to visit and down load as you desire. This has been an introduction into the basics of Outlook 2007 mail. If you have any questions about Outlook 2007, or comments on this tutorial, please contact: murray.t@lynchburg.edu Thank you for your patience and good luck.