SlideShare ist ein Scribd-Unternehmen logo
1 von 12
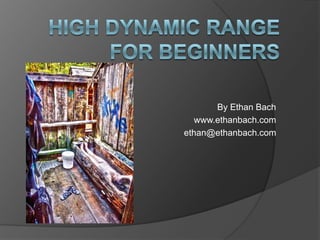
By Ethan Bach
   www.ethanbach.com
ethan@ethanbach.com
What is HDR?
 Set of techniques to create images that
  see how the human eye sees.
 From 1,000:1 contrast to 10:000:1


             Photo from Google search (www.dailyhdr.com)


                       For more examples
Why HDR in the Dome?
   Light Scattering
Light Scatter on Curved
Surface


           Photo from www.sciencedirect.com
The HDR difference
Shooting             using Canon 600D


1.   Make sure your camera is set to M (manual) on the dial
     on top of the camera
2.   Click the menu button and use the navigation buttons to
     the right of the LCD to move around.
3.   Go to the first tab over and choose Quality RAW
4.   move the bracket cursor to Quality then press “set”
5.   use navigation buttons to choose RAW and push “set”
6.   Move the main tabs in the menu to the second tab from
     the left.
7.   Go to Exposure comp. and push “set”
8.   Use the “main dial” next to the shutter button to set the
     expose bracketing to 2
9.   you may play with this later to choose .5, 1, 1.5, or 2
     stops
HDR in Photoshop
1.   Open Photoshop
2.   Go to File> Automate > Merge to HDR
     Pro
3.   Click Browse to load first set of photos
4.   Once the HDR window opens, click
     presets and choose from any of the
     options
5.   Adjust to you liking and click “OK”
HDR in Photomatix
1. Open Photomatix
2. Click “Load Bracketed
   Photos” and load first set of
   photos
3. Set Preprocessing settings
     1. If movement choose “Selective
        Deghosting” tool. If not do
        automatic.
4.    Click “Preprocess”
5. Choose a preset on the
   right window and adjust on
   the left window.
6. If you like your setting, you
   can save.
7. Click Process
What’s the 360°
Image Button for?

 Who can tell me?
 Try clicking it
 Where else can you find information?
 What if that doesn’t work?
How to Batch in Photomatix
1.   Go to Automate > Batch Bracketed
     Photos
2.   Under Process find your saved settings
3.   Check align images if any movement is
     suspected
4.   Select source Files or Folder
5.   Customize location and make a new
     folder
6.   Click Run
The Future of HDR
 HDR Video Processing using computer
  generated high and low exposure
 A Versatile HDR Video Production
  System

Weitere ähnliche Inhalte

Was ist angesagt?

Microsoft picture manager cropping images
Microsoft picture manager   cropping imagesMicrosoft picture manager   cropping images
Microsoft picture manager cropping imagesKaterinne Higuera Peña
 
How to Create a Photo Mosaic
How to Create a Photo MosaicHow to Create a Photo Mosaic
How to Create a Photo Mosaicalyxandrahopkins
 
Principles of Design - Photoshopping Basics
Principles of Design - Photoshopping BasicsPrinciples of Design - Photoshopping Basics
Principles of Design - Photoshopping BasicsMrLawler
 
quicktip_scanphotoshop
quicktip_scanphotoshopquicktip_scanphotoshop
quicktip_scanphotoshoptutorialsruby
 
How to do photo manipulation
How to do photo manipulationHow to do photo manipulation
How to do photo manipulationaztechtchr
 

Was ist angesagt? (6)

Microsoft picture manager cropping images
Microsoft picture manager   cropping imagesMicrosoft picture manager   cropping images
Microsoft picture manager cropping images
 
How to Create a Photo Mosaic
How to Create a Photo MosaicHow to Create a Photo Mosaic
How to Create a Photo Mosaic
 
Entry 6
Entry 6Entry 6
Entry 6
 
Principles of Design - Photoshopping Basics
Principles of Design - Photoshopping BasicsPrinciples of Design - Photoshopping Basics
Principles of Design - Photoshopping Basics
 
quicktip_scanphotoshop
quicktip_scanphotoshopquicktip_scanphotoshop
quicktip_scanphotoshop
 
How to do photo manipulation
How to do photo manipulationHow to do photo manipulation
How to do photo manipulation
 

Ähnlich wie HDR Photography for the digital dome (fulldome) for IMERSA 2013

Green Hectares Rural Tech Factsheet – Photoshop Elements
Green Hectares Rural Tech Factsheet – Photoshop ElementsGreen Hectares Rural Tech Factsheet – Photoshop Elements
Green Hectares Rural Tech Factsheet – Photoshop ElementsGreen Hectares
 
P1 combining images
P1 combining imagesP1 combining images
P1 combining imagesPLC
 
3. image processing and techniques finished
3. image processing and techniques finished3. image processing and techniques finished
3. image processing and techniques finishedRebecca Coughlin
 
05 pocket photography (ios)
05   pocket  photography (ios)05   pocket  photography (ios)
05 pocket photography (ios)Bruce Garber
 
HDR-2nd edition
HDR-2nd edition                                  HDR-2nd edition
HDR-2nd edition sthakshy
 
Pixlr image optimization workshop1
Pixlr  image optimization workshop1Pixlr  image optimization workshop1
Pixlr image optimization workshop1John Allan
 
Image Processing
Image ProcessingImage Processing
Image Processingtaygage
 
Image Processing
Image ProcessingImage Processing
Image Processingtaygage
 
Using microsoft office 2010 image editor
Using microsoft office 2010 image editorUsing microsoft office 2010 image editor
Using microsoft office 2010 image editorSherry Brott
 
Image editing basics using PIXLR Editor
Image editing basics using PIXLR EditorImage editing basics using PIXLR Editor
Image editing basics using PIXLR EditorJohn Allan
 
ENVI Pocket Guide: Volume 1 | Basics
ENVI Pocket Guide: Volume 1 | BasicsENVI Pocket Guide: Volume 1 | Basics
ENVI Pocket Guide: Volume 1 | BasicsAugustus Wright
 

Ähnlich wie HDR Photography for the digital dome (fulldome) for IMERSA 2013 (20)

HDR Tutorial
HDR TutorialHDR Tutorial
HDR Tutorial
 
HDR Tutorial
HDR TutorialHDR Tutorial
HDR Tutorial
 
Green Hectares Rural Tech Factsheet – Photoshop Elements
Green Hectares Rural Tech Factsheet – Photoshop ElementsGreen Hectares Rural Tech Factsheet – Photoshop Elements
Green Hectares Rural Tech Factsheet – Photoshop Elements
 
Basic tutorials
Basic tutorialsBasic tutorials
Basic tutorials
 
Basic tutorials
Basic tutorialsBasic tutorials
Basic tutorials
 
P1 combining images
P1 combining imagesP1 combining images
P1 combining images
 
3. image processing and techniques finished
3. image processing and techniques finished3. image processing and techniques finished
3. image processing and techniques finished
 
05 pocket photography (ios)
05   pocket  photography (ios)05   pocket  photography (ios)
05 pocket photography (ios)
 
Basic vray tutorial
Basic vray tutorialBasic vray tutorial
Basic vray tutorial
 
HDR-2nd edition
HDR-2nd edition                                  HDR-2nd edition
HDR-2nd edition
 
Tools
ToolsTools
Tools
 
Pixlr image optimization workshop1
Pixlr  image optimization workshop1Pixlr  image optimization workshop1
Pixlr image optimization workshop1
 
Image Processing
Image ProcessingImage Processing
Image Processing
 
Image Processing
Image ProcessingImage Processing
Image Processing
 
HDR Workshop
HDR WorkshopHDR Workshop
HDR Workshop
 
Hdr magic
Hdr magicHdr magic
Hdr magic
 
Using microsoft office 2010 image editor
Using microsoft office 2010 image editorUsing microsoft office 2010 image editor
Using microsoft office 2010 image editor
 
Image editing basics using PIXLR Editor
Image editing basics using PIXLR EditorImage editing basics using PIXLR Editor
Image editing basics using PIXLR Editor
 
Picasa&gimp v2.0
Picasa&gimp v2.0Picasa&gimp v2.0
Picasa&gimp v2.0
 
ENVI Pocket Guide: Volume 1 | Basics
ENVI Pocket Guide: Volume 1 | BasicsENVI Pocket Guide: Volume 1 | Basics
ENVI Pocket Guide: Volume 1 | Basics
 

HDR Photography for the digital dome (fulldome) for IMERSA 2013

  • 1. By Ethan Bach www.ethanbach.com ethan@ethanbach.com
  • 2. What is HDR?  Set of techniques to create images that see how the human eye sees.  From 1,000:1 contrast to 10:000:1 Photo from Google search (www.dailyhdr.com) For more examples
  • 3. Why HDR in the Dome?  Light Scattering
  • 4. Light Scatter on Curved Surface Photo from www.sciencedirect.com
  • 6. Shooting using Canon 600D 1. Make sure your camera is set to M (manual) on the dial on top of the camera 2. Click the menu button and use the navigation buttons to the right of the LCD to move around. 3. Go to the first tab over and choose Quality RAW 4. move the bracket cursor to Quality then press “set” 5. use navigation buttons to choose RAW and push “set” 6. Move the main tabs in the menu to the second tab from the left. 7. Go to Exposure comp. and push “set” 8. Use the “main dial” next to the shutter button to set the expose bracketing to 2 9. you may play with this later to choose .5, 1, 1.5, or 2 stops
  • 7. HDR in Photoshop 1. Open Photoshop 2. Go to File> Automate > Merge to HDR Pro 3. Click Browse to load first set of photos 4. Once the HDR window opens, click presets and choose from any of the options 5. Adjust to you liking and click “OK”
  • 8. HDR in Photomatix 1. Open Photomatix 2. Click “Load Bracketed Photos” and load first set of photos 3. Set Preprocessing settings 1. If movement choose “Selective Deghosting” tool. If not do automatic. 4. Click “Preprocess”
  • 9. 5. Choose a preset on the right window and adjust on the left window. 6. If you like your setting, you can save. 7. Click Process
  • 10. What’s the 360° Image Button for?  Who can tell me?  Try clicking it  Where else can you find information?  What if that doesn’t work?
  • 11. How to Batch in Photomatix 1. Go to Automate > Batch Bracketed Photos 2. Under Process find your saved settings 3. Check align images if any movement is suspected 4. Select source Files or Folder 5. Customize location and make a new folder 6. Click Run
  • 12. The Future of HDR  HDR Video Processing using computer generated high and low exposure  A Versatile HDR Video Production System

Hinweis der Redaktion

  1. When we shoot HDR we set our F stop and adjust the cameras speed to gather different light. Generally HDR is created with 3 to 7 images taken with various camera speeds to create greater luminance between the lightest and darkest areas of a photograph.The human eye can see in a range of approximately 10,000:1. In comparison, a good digital camera can capture a scene with about 1,000:1.
  2. When I first started working in the fulldome environment, one of my biggest frustrations in the dome was the inevitable washing out of images. At IAIA, our 24′ digital dome currently has 6 – PLUS U7 projectors. Each of these projectors has 3500 ANSI with a contract ratio of 2000:1. Add this low contrast ratio to the photon splash that occurs in a spherical theater and images that look gorgeous on a monitor become lifeless on the dome. High Dynamic Range (HDR) techniques solve the problem.The reflectivity and resulting light cross-bounce of the dome is also a very large factor in the apparent contrast ratio. Projectors can range from 1,000:1 to 320,000:1. But with the photons bouncing you loose a lot of the details of the image. The % of reflectivity of the screen is a big factor.
  3. Note that any time you turn off the camera, you will have to reset the brackets on this camera.
  4. Minuses – No batch process what so ever. I could not even get the Mac automator to do it.Can see what effect each preset is
  5. • 360º image: Checking this option eliminates the seam betweenthe left and right sides of a panorama viewed in a 360º panoramicviewer. The seam would otherwise show because Details Enhancertakes into accoun• 360º image: Checking this option eliminates the seam betweenthe left and right sides of a panorama viewed in a 360º panoramicviewer. The seam would otherwise show because Details Enhancertakes into account local contrast, assigning different tonal valuesto the right and left parts of the image. The default value isunchecked. Note that this option is not enabled when the imageis in portrait mode, as the option is intended for panoramast local contrast, assigning different tonal valuesto the right and left parts of the image. The default value isunchecked. Note that this option is not enabled when the imageis in portrait mode, as the option is intended for panoramas.
  6. Where else to find information:Help – type in keywords or see if there is a users manual
  7. The more you check, the more files you will get.For successful batch you cant have extra photos in your selection or file directory