Video Editing in Blender Workshop: 3D Text (DRAFT)
•
1 gefällt mir•2,123 views

This document provides instructions for creating 3D text in Blender. It explains how to load the default settings, add text using the add menu, rotate and position the text, change fonts, add color and materials, add lighting sources, and render the text for output. The steps include selecting the cube, deleting it, adding text, editing the text, adjusting fonts and size, extruding the text, choosing colors, and positioning lights to illuminate the text for rendering.

Empfohlen
Weitere ähnliche Inhalte
Was ist angesagt?
Was ist angesagt? (17)
Andere mochten auch
Andere mochten auch (13)
Ähnlich wie Video Editing in Blender Workshop: 3D Text (DRAFT)
Ähnlich wie Video Editing in Blender Workshop: 3D Text (DRAFT) (20)
Kürzlich hochgeladen
Kürzlich hochgeladen (20)
Video Editing in Blender Workshop: 3D Text (DRAFT)
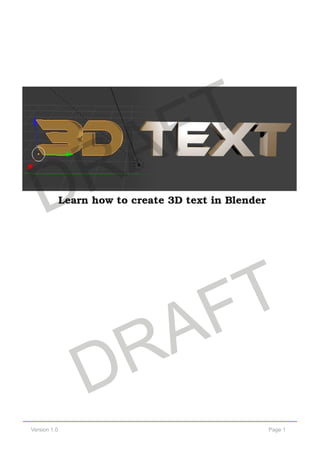
- 1. Page 1Version 1.0 Learn how to create 3D text in Blender DRAFT DRAFT
- 2. Page 2Version 1.0 Create 3D Text in Blender - Using the same parameters* that you set-up for your video project, go to your DEFAULT interface. You may need to LOAD FACTORY SETTINGS to see the original default screen. You should see a 3D Cube. After you set up your screen, you'll want to view the cube via a camera. Use your numberpad on your keyboard to access the different camera point-of- views. Press "0" to look through the main camera. Numbers 1 - 8 will give yo different perspectives while "0" is the default. *LOAD FACTORY SETTINGS can be found under the FILE menu at the top of the interface. DRAFT DRAFT
- 3. Page 3 Video Editing in Blender To begin, click the Cube to select. Press DELETE on your keyboard. Then click, DELETE. Your space is now ready for text. DRAFT DRAFT
- 4. Page 4Version 1.0 Now, at the top of your screen, click: ADD > TEXT The default text will appear. DRAFT DRAFT
- 5. Page 5 Video Editing in Blender Now to rotate the default text so it faces your camera, click the ROTATE icon located at the bottom of the screen. The controls to rotate your text will appear on screen. Each color represents a different axis so you can position the text as you see fit. Red Green Blue White DRAFT DRAFT
- 6. Page 6Version 1.0 Now to edit the default text, select the EDIT MODE from the menu. This will bring up the cursor which allows you to type. This is your opportunity to type the text you need for your project. Make sure to select the arrow. Second from the left. DRAFT DRAFT
- 7. Page 7 Video Editing in Blender To change the FONTS, note the panel to the right of your screen. The "F" stands for FONT. Whatever your text is on screen, re-type it in this window. DRAFT DRAFT
- 8. Page 8Version 1.0 Scroll down to the FONT section and browse for the FONT of your choice by clicking on the folder icon. As soon as you select the FONT, your text will change. It will then need to be adjusted. In the example below, characters that appear in the dark area will never be seen by the camera. To adjust your text, first select OBJECT MODE. Then grab one of the three arrows and move your text to the proper position. DRAFT DRAFT
- 9. Page 9 Video Editing in Blender With your text in position, it can now be seen by your camera. This means, your viewers will see the entire text as it will appear in your video. Now lets bring the text from 2D to 3D by using the EXTRUDE control - located in the right-hand panel above FONT. Play with the depth of the EXTRUDE, but keep in mind that it will still need to be legible. DRAFT DRAFT
- 10. Page 10Version 1.0 Let's give the text some color. Click on the MATERIAL icon to active the panel you see on the right. Click on DIFFUSE to access the Color Palette where you'll be able to select the color of your choice. The Color Palette is where you select the color for your text. DRAFT DRAFT
- 11. Page 11 Video Editing in Blender Now that we have added color to the text, let's ADD a light source. From the menu, there are five choices: Point, Sun, Spot, Hemi, and Area. DRAFT DRAFT
- 12. Page 12Version 1.0 Light sources help your text stand out. Here is a side view of the "workshop" text with one camera (on the right) and three light sources. To acheive this view, press "1" on your numberpad. To return to camera, press, "0". DRAFT DRAFT
- 13. Page 13 Video Editing in Blender Each item within your composition can be access and manipulated via the list of items on the right-hand side of your screen. To begin, click on an item. In this example, I have clicked on one of the "Spot" lights. Once selected, you'll instantly see where you're light is in relation to your text. The lite-grey area is what your camera's view, while the dark areas will not be seen by viewers. DRAFT DRAFT
- 14. Page 14Version 1.0 Use your numberpad to change your point-of-view (POV) to give you a better understanding on where your lights are positioned. This will also help you to better position your text. Here is the 3D text as it rendered out from Blender. You can toggle back and forth between a Rendered view and the Raw view by pressing F12 for Render and ESC to go back to the Raw view to continue working. We'll discuss RENDERING later on in this workshop. For now, let's save this file as TITLE.blend. We'll come back to this file to do some light animation. You'll find tools and properties for each item in your composition can be adjusted and tweeked from the prompts on the right of your screen. In this example, since SPOT [light] was selected, these are the prompts needed in order to get the desired appeance and effect. DRAFT DRAFT
- 15. Page 15 Video Editing in Blender NOTES: DRAFT DRAFT
- 17. Page 17 Video Editing in Blender Eddie Vega Digital Media Specialist phone: xxxxxxxxxx email: eddie.vega@plattsburgh.edu web: http://faculty.plattsburgh.edu/edwin.vega/