SlideShare ist ein Scribd-Unternehmen logo
1 von 31
Downloaden Sie, um offline zu lesen
TEXAS A&M UNIVERSITY-KINGSVILLE
ICPMS User Guide
ICPMS snX0448 Lab 236 EC
Don Marek – Lab Manager
4/30/2014
Basic User Guide for the ICPMS X-Series
Lab 236 EC
Serial number: X0448
1
Contents
Purpose of this User Guide ............................................................................................................. 2
Before Turning on the ICPMS Plasma ........................................................................................... 3
Mixing a 2% to 3% Nitric Acid Solution........................................................................................ 4
Mixing a Tune A or Tune D Standard ............................................................................................ 5
The Liquid Argon Tank .................................................................................................................. 7
Turn on the Argon....................................................................................................................... 7
Some notes about the Liquid Argon Tank .................................................................................. 8
Turning On the Chiller.................................................................................................................. 10
Install Tubing on Peristaltic Pump................................................................................................ 11
Once in Operate Mode.................................................................................................................. 14
No Counts Displayed-What to Check........................................................................................... 16
Other General Tips and Guidelines............................................................................................... 17
Cleaning the Cones with an Ultrasonic Cleaner ........................................................................... 19
Shutting Down the Vacuum Pump for ICP-MS ........................................................................... 21
Problem – Plasma does not Start .................................................................................................. 21
Plasma Lights, but does not Stay on............................................................................................. 22
PlasmaLab cannot Communicate with Instrument ....................................................................... 23
Performance Report before Starting a Sample Analysis............................................................... 25
Removing the Cover from the ICPMS.......................................................................................... 27
Torches – Cleaning and Wear....................................................................................................... 28
Consumables/Estimated Yearly Cost to Operate ICPMS............................................................. 29
References..................................................................................................................................... 30
Basic User Guide for the ICPMS X-Series
Lab 236 EC
Serial number: X0448
2
Purpose of this User Guide
It is not possible for Thermo Fisher to know all laboratory users and individual laboratory
configurations and procedures, so the purpose of this guide is to supplement the X Series ICPMS
Getting Started Guide (143 pages) provided by Thermo Fisher Scientific. Some parts of this
guide may refer to specific pages in the manual since the manual already has a good set of
pictures and explanation for some aspects of the ICPMS operation or maintenance and there is
no need to repeat that here.
This guide provides information on preparing the acid solutions and tune solutions with the
typical material available in the TAMUK lab inventory. This guide teaches information about the
liquid argon tank and its operation. Since the start up guide assumes everything is already
working and will all of the time to follow it properly, this guide addresses some of the typical
problems that may arise when turning on the plasma or operating the instrument. Where
appropriate, the page number in the manual will be referenced.
The ICPMS analyzer is an amazing instrument, but will require study and training by those who
want to operate it. Due to the number of procedures and combinations and possible situations,
not everything will learned in a month or two months, so do not feel bad if it always seems like
there is something missed or more to know. Even the writer of this guide learns something
different or new every year of using it.
When solving a problem, try to remember to check the simple stuff first. Does it have power? Is
the physical setup correct? Is anything visibly worn or damaged? Which setting needs to be
rechecked to be sure? The problems that occur can be many and various, so there is not a rigid
rule book to follow all the time. Always have the mindset to start from the simple and then move
up to the more complicated (though it is always more impressive to tell your boss the problem
was much more than someone forgot to plug something in correctly or the tubes were connected
backwards and that is why no counts were displayed).
Using and maintain this equipment exposes one to the risk involved with liquid argon and nitric
acid and other acid solutions. Make sure to read the MSDS on these chemicals and know what to
do if exposed to them accidently.
SAFETY FIRST: It is the student’s responsibility to understand lab safety protocols and
review the MSDS of any materials used in the preparation of their experimental research.
Basic User Guide for the ICPMS X-Series
Lab 236 EC
Serial number: X0448
3
Before Turning on the ICPMS Plasma
Page 2 of the startup guides provides a couple of pointers before starting. Here are some other
critical items to check before turning on the plasma (Operate mode) on the ICPMS:
1. Observe whether the fume hood is functioning. The ICPMS stack is tied into the fume
hood system to pull the heat from the plasma and gases generated. If the fume hood is not
working, do not start the ICPMS. If unsure, submit a work order with physical plant to
determine the status of the fume hood
(http://www.tamuk.edu/ppo/Overview%20Pages/Work%20Orders.html)
2. Observe whether the vacuum pump underneath the lab table is on and the Speed is at
1000-Hz. The pump is on 24/7 to protect the detector ($2,000 new) inside the vacuum
chamber and keep it ready. One indication that the pump is not on is to check the
Analyzer gauge pressure (Ana:) on Plasmalab. Otherwise, if ‘Gauge off’ is displayed,
check to make sure the vacuum pump is on.
3. Check that the liquid argon tank with enough argon and pressure (90 to 100-psi) to
operate once the valve is open.
4. Chiller is on and temperature set correctly and there is enough water. Also turn on the
auto-sampler.
5. The physical sampling system is together (the line from the auto-sampler, make sure
tubing in configured in correct directions so sample will enter the chamber and be
removed). Make sure that the waste collection bottle will not overfill.
6. Make sure there is enough Tune A and Tune D solution for doing the performance check
before running samples.
7. Some DI water for moving liquid through the sampling system while warming the
ICPMS.
8. If using the CCT, turn on the He/H cylinder mixture.
Basic User Guide for the ICPMS X-Series
Lab 236 EC
Serial number: X0448
4
Mixing a 2% to 3% Nitric Acid Solution
MSDS Nitric Acid: https://us.vwr.com/stibo/hi_res/8923775.pdf
This is the basis for all other solutions and sample preparations. This will also be used to rinse
the sampling line between samples. To mix a liter (1-L) or so at a time, mix 20-mL for a 2% or
30-mL for a 3% solution of nitric acid and ultra pure DI water. Use a graduated cylinder to
measure the amount necessary. Add about ¼ or so of water to the 1-liter container. Add the nitric
acid and then add more water. There may be a bit of a heat reaction as the strong acid is diluted.
Remember, acid to water. If making more than a liter, use HDPE or Nalgene containers to store
the additional amount required. Don’t forget to properly label.
ote: Concentrated acids have a tendency to fume, so make sure to work under a fume
hood. Once the mixture is diluted, it can be used outside of a fume hood. Also, blue
nitrile gloves, goggles, and close toed shows are a must.
Figure 1: Materials for nitric acid solution. Pour and measure acid in a graduated cylinder. Use beaker to
keep cylinder from falling over. Remember acid to water. Fill flaks with some water, then acid, then to mark
with DI water.
N
Basic User Guide for the ICPMS X-Series
Lab 236 EC
Serial number: X0448
5
For most of the applications for environmental work, Nitric Acid BDH Aristar Plus, VWR
#87003-261 (2.5-L bottle at about $75) is adequate. In some exceptional cases for lower trace
analysis, an Omni Trace Ultra Nitric Acid may be necessary, but is also much more expensive. If
there are ever any questions about the application, contact Thermo Fisher Scientific and an
applications chemist can advise.
Mixing a Tune A or Tune D Standard
The primary purpose of the Tune A and Tune D standards is to calibrate the ICPMS before
analyzing samples. The ICPMS is different from most other analytical instrumentation in that
one only uses a specific metal standard to check the functioning of the instrument as opposed to
building a calibration curve as would be the case for atomic absorption or a UV-VIS
spectrometer. The Tune A is for the daily check, auto-tuning, and mass calibration. Tune D is for
calibrating the PC voltage and analog voltage of the detector. Each tune solutions also have
various elements, so the solutions can also be used as standard checks when looking for other
metals.
Materials: Tune A 10 ppm, Tune D 10 ppm, a 1000-mL polypropylene volumetric flask, ultra
pure DI water (from blue Barnstead dispenser in Lab 239), an Eppendorf pipette set for 1-mL, 1-
mL Eppendorf tip.
Figure 2: Materials for mixing Tune A and Tune D solutions.
If not used to operating the pipette, practice with some DI water and a 3-digit scale. 1-mL of DI
water is 1-g; practice several times to get a feel for the pipette and to make sure it is operating
accurately.
Basic User Guide for the ICPMS X-Series
Lab 236 EC
Serial number: X0448
6
Take 1-mL of the 10-ppm Tune A or Tune D with the Eppendorf pipette. Put it inside the 1-Liter
volumetric flask. Fill flask to mark with 2% to 3% nitric acid solution. Remember the meniscus.
Make sure to date and label the solution. Do not EVER mix the Tune A and Tune D together in
the same flask since this is of no practical use.
Store the solution in the flask with a cap or in another HDPE or PPE container with a lid. There
is no real expiration date, but it is good practice to mix a new solution every 3 to 6 months. It is
good to keep some older solution around to test or compare if troubleshooting an issue.
Here is the basic calculation for 10-ppb of Tune A or Tune D:
How many milliliters of Tune A at 10 mg/L (10, 000-ppb) are needed to prepare 1 L (1000-mL)
of 10 ppb Tune A?
Ci Vi = Cf Vf
(10,000 ppb) Vi = (1000 mL) (10 ppb)
After rearranging and dividing out the ppb units, the final result is:
Vi = 1 mL
ote: Accuracy with the pipette and volumetric mark is of great importance! The Tune
A and Tune D need to be at 10-ppb concentration for accurate calibration of the
ICPMS. Also, make sure to store the pipette in an upright position.
What if it was necessary to prepare 250 mL of 5 ppb Tune A solution starting with the 10-ppb
Tune A?
Ci Vi = Cf Vf
(10 ppb) Vi = (250 mL) (5 ppb)
After rearranging, 125 mL of 10 ppb Tune is necessary. Pour 125 mL of Tune A into 250 mL
volumetric flask and fill the rest with 1% to 5% nitric acid solution to the fill mark on the flask.
Use this formula and procedure for making other concentrations of standard.
Note: Refer to the Eppendorf SOP for Pipettes for more information about using and
maintaining the Eppendorf pipette.
N
Basic User Guide for the ICPMS X-Series
Lab 236 EC
Serial number: X0448
7
The Liquid Argon Tank
Turn on the Argon
MSDS for Liquid Argon: https://www.mathesongas.com/pdfs/msds/00225009.pdf
Turn the Argon gas valve on by turning to the left. Remember: right tight, left loose. The
pressure on the secondary lower pressure regulator will need to maintain at ≥85 psi to light the
plasma. A setting of 90 psi to 100 psi is good; never set over 100 psi to protect the flow
controllers in ICPMS.
To check whether the pressure is correct, turn off the argon to the regulator if it is connected.
Loosen the nut holding the hose to the regulator to relieve any residual pressure in the regulator;
tighten firmly (not crushing!) after releasing gas. Turn the knob to “Decrease” several turns.
Turn the gas on again and adjust to the 85 psi or so pressure by turning the knob in the direction
of “Increase”. If the tank has adequate pressure, it should be ready for use.
Figure 3: Use the side labeled GAS on the liquid argon tank to attach the regulator. Use a CGA 580 adapter.
Basic User Guide for the ICPMS X-Series
Lab 236 EC
Serial number: X0448
8
Some notes about the Liquid Argon Tank
Liquid argon is purchased since the ICPMS uses a tremendous amount of gas. The average
regular compressed gas cylinder would only last about 8 hours at most. These tanks are basically
a large thermos. So, if the liquid is not used, eventually it must slowly heat up and vent to the
atmosphere. The tank should be vented by the gas vendor before arrival, but there will be times
when it will vent. If the tank was recently received, monitor this for a day or so. If venting too
much, this may indicate an issue with the tank. Check with the vendor for more details.
Figure 4: Top view of a typical liquid argon tank.
The figure above is a diagram of the top view of a liquid argon tank. Use the gas valve to
open/close gas supply to ICPMS. Use the pressure builder to build up tank pressure is less than
125 lbs; this also assumes that there is enough argon left in the tank so check the gauge top of
tank. Never ever open the liquid valve. The vent valve is typically used to further vent the tank.
If in doubt on something, call the tank vendor for further instructions.
Basic User Guide for the ICPMS X-Series
Lab 236 EC
Serial number: X0448
9
After turning off the plasma and returning the ICPMS to vacuum state, it is a good idea to turn
off the gas valve on the tank. In the past, the gas line disconnected and a $350 or delivered tank
of argon was lost.
Due to the laws of thermodynamics, there will always be loss of product. So it is a use it or lose
it proposition. Typically, if used two or three times a week, a liquid tank can last up to five
weeks. However, always make sure that there appears to be enough argon to run whatever
number samples expected. That judgment call will come with experience.
Figure 5: Ice build-up on a tank of argon. The hose popped off of the regulator and the valve on the tank was not
closed. The argon vented at low pressure for several hours and because of the rapid escape of gas, the ice formed.
Always close the argon tank gas valve if not using the ICPMS.
Basic User Guide for the ICPMS X-Series
Lab 236 EC
Serial number: X0448
10
Turning On the Chiller
Turn on the chiller. The chiller is set for a water temperature of 20°C. If operating properly, the
chiller should reach its target temperature in less than 3 minutes. Otherwise, when trying to
ignite the plasma, an error message will appear. Make sure to check the water level before
powering and once in a while clean the air filter.
Figure 6: The chiller for the ICPMS.
Basic User Guide for the ICPMS X-Series
Lab 236 EC
Serial number: X0448
11
Install Tubing on Peristaltic Pump
Sometimes it is necessary to replace the PVC tubing. This tubing must connect to the automated
sampler line, the nebulizer, and the line from the misting chamber.
The ends of the PVC tubing needs to be softened a bit a with a heat gun ($10 at Harbor Freight)
to connect to the teflon tubing from the auto-sampler and nebulizer tubing.
Figure 7: Ends of two different diameters of PVC tubing. Soften the ends with heat gun to insert teflon lines that attach to
the nebulizer and spray chamber.
The goal is insert the other Teflon sampling tubing into the PVC tubing.
Figure 8: Use heat gun to soften PVC tubing so teflon lines can be inserted for a complete connection.
Basic User Guide for the ICPMS X-Series
Lab 236 EC
Serial number: X0448
12
After assembling the sample and return lines, place the PVC tubing around the pump rollers. Use
the first notch on either side to install new tubing. Expand to the second notch as necessary to
tighten the PVC lines. If the PVC tubing is still stretchy after expanding the tautness to the
second notch, replace with new tubing.
Figure 9: Proper configuration for tubing to be mounted onto peristaltic. Tighten the tubing with screws on
top. Make firm, but not too tight. Always start the tubing on the first notch (see location or orange/white and
black/white tubing in picture) and move to second notch if more tightening is necessary.
Always remember to physically configure the tubing so the peristaltic pump with the clock wise
direction of the pump. If the tubing is not fitted correctly, this could be one reason why no counts
are displayed when Tune A is fed.
Tighten (firm but not too much) the tubing on the peristaltic pump on the ICP-MS. The tubing
sections around the pump should be replaced after 40 hours of use. This is a peristaltic pump, so
make sure to align the tubing so that the liquid from the samples will uptake by the pump.
From the Practical Guide to ICP-MS, page 167:
• Manually stretch new tubing before use.
• Maintain the proper tension on tubing.
• Ensure tubing is placed correctly in channel of the peristaltic pump.
Basic User Guide for the ICPMS X-Series
Lab 236 EC
Serial number: X0448
13
• Periodically check flow of sample delivery-throw away tubing if in doubt.
• Replace tubing in there is any sign of wear-do not wait until it breaks.
• With a high sample workload, change tubing every day or every other day.
• Release pressure on pump when not in use.
• Pump and capillary tubing can be a source of contamination.
• Pump tubing is a consumable-keep a large supply on hand.
Once the samples are run, turn off plasma, loosen tubing from peristaltic pump, turn off the
chiller, turn off the argon gas. Leave the desktop computer on and the vacuum pump on.
Connect sample tubing from auto-diluter or auto-sampler and check the configuration.
Make sure that the tubing connections stay together, otherwise any exposure to air from an
unconnected tubing setup will kill the plasma.
While warming up the instrument, pay attention to the nebulizer pressure on the status bar; it
should be between 1.5 bar to 2.0 bar. Too little pressure and there is leak somewhere; too much
and the nebulizer may be plugged and may result in the Teflon fitting popping out of the
nebulizer.
If running no more samples for the day, flush the lines with DI water, shutdown ICPMS, and
relieve the tension on the tubing.
Basic User Guide for the ICPMS X-Series
Lab 236 EC
Serial number: X0448
14
Once in Operate Mode
Once the plasma is operating, the next task is to start feeding some DI water into the ICPMS
while it is warming up. Go to the ‘Accessories’ panel and feed push the rinse icon.
Next, make sure the auto-sampler is on and establish communications by pressing the ‘link’ icon
on the Accessory setup and control panel.
As the water is fed into in the nebulizer and spray chamber, watch the spray chamber closely and
observe the flow of water in the sample line. If the spray chamber is filling with water, pull the
bottom nozzle to drain and then reconnect so plasma does not die. Use a towel to soak up the
water. Observe closely and try to determine why the chamber is filling with liquid. Check the
tightness of the PVC tubing and make sure top clips are firmly in place over the tubes.
Basic User Guide for the ICPMS X-Series
Lab 236 EC
Serial number: X0448
15
Here is a table with some other parameters to watch while operating:
Table 1: ICPMS Parameters to watch for troubleshooting and operation.
Definition Value If Then
Neb nebulizer back pressure ~2 bar Low/High Leak or broken neb/clog
Fwd Forward power – minor 1412W Set by software
Ref Reflected power from
plasma
< 5 W High Automatically adjust
load and tune
Load Rf Power Not zero or 255
Tune Rf power Not zero or 255
Exp Expansion Pressure 2 mbar >2.5 Hole in cone it too big
or sample cone is
installed wrong. Or
vacuum pump
Ana Vacuum chamber pressure 2.9 X 10⁻⁷ High Leak somewhere. Check
vacuum pump. Consult
with tech support.
Speed Turbo pump speed 1000-Hz
Load For vacuum pump 0.8-1.2A
The Load can range from 0 to 255, but should be greater than 90. The Tune value can range from
0 to 255, but should be AROUND 200.
Basic User Guide for the ICPMS X-Series
Lab 236 EC
Serial number: X0448
16
No Counts Displayed-What to Check
1. Make sure the marks are checked for Li, In, and U and enabled.
2. Reset the display under the Tune tab by pressing the ‘play’ button.
3. Observe the peristaltic pump. Is it spinning? Check the speed by going to the Accessory
control panel, connect to the pump and make sure the speed is set to 33 RPM.
4. Make sure sample line tubing is secure and fitted in the clock wise direction to feed the
sample fluid into the nebulizer.
5. Check the PC and Analogue voltage settings under the Global tab. Make sure the black
triangle and square is set to the last known good setting. These settings can be obtained
from the last performance report.
6. Turn off the plasma, and make sure the silver grounding screen is touching the metal
contact where the torch is mounted. See manual about how to install the torch.
7. Second, if the values are good or setting them does not work, reboot the workstation
while turning off the ICPMS computer (green switch on box at left hand rear side under
the cover). Turn on the ICPMS computer as the workstation is rebooting. Wait for the
desktop to reestablish communications. This can be done while the plasma stays on.
8. In rare cases, the torch output may have melted and is blocking the progress of the
sample to the cones. Turn off the plasma, remove the torch assembly, and do a visual
check of the output line of the torch. If the sample out is melted, a torch is necessary.
Basic User Guide for the ICPMS X-Series
Lab 236 EC
Serial number: X0448
17
Other General Tips and Guidelines
The following is in reference to the tuning, auto tunes, and performance report.
Most of this is from the class instruction provided by Thermo Fisher Scientific:
1. Before tuning, doing a performance report, or running samples, run instrument for about
15 to 20 minutes. This allows the electronic and physical aspects to stabilize their
temperatures.
2. Once warmed, feed the Tune A solution to the ICPMS. Observe the counts for Li, In,
U238. The counts should be at or well over 22,000, 250,000, 400,000 respectively.
Parameters can be manually adjusted to achieve better counts.
3. Run a performance report at the beginning; unless there are problems, no need to run
again. The PlasmaLab software records every performance report.
4. Auto-tunes are necessary after replacing the cone and torch, but most of the time, only do
an auto-tune if it fails the performance reports.
5. Instrument requires a good Tune to acquire a good mass calibration, but not required
often. Do retune if torch has been removed/replaced, new cones, or nebulizer.
6. Detector set-up: voltages set by cross calibration; should be done regularly.
7. Must have >400,000 counts for analogue counting to be engaged. Analogue counting will
engage automatically if counts are high enough.
8. Never use an atomic absorption or ion chromatography standard for ICP-MS.
9. Calibration check: (2) points are enough; a blank and an upper limit. Further validated by
preparing a standard in between those values.
10. Boron, antimony, and molybdenum “stick” to tubing and glass. May require an alkaline
solution to wash out effectively.
11. If the elements are unknown, run sample without the internal standards and see what is in
the sample. Then adjust or choose the procedure depending upon elements that you are
looking for.
Basic User Guide for the ICPMS X-Series
Lab 236 EC
Serial number: X0448
18
12. Pay attention to interferences when setting up experiment. To reduce interferences,
choose an isotope that is less abundant.
13. As the argon gas decreases in the tank, Kr (Krypton) does not bail off as fast and that
may generate interferences that require a correction for certain analysis (like with arsenic
and selenium).
14. If the plasma is flickering, this may indicate the venting air flow is too high. Call physical
plant to have Siemens adjust the flow rate within an acceptable range. Flow should bet set
at around 9 m/s.
15. Sample preparation: Filter, filter, filter. All samples whether from surface water,
groundwater, microwave digestion, lab experiment, should be filtered through a 0.45µ
filter. There are different ways to do this, but filtration is critical so as not to clog the
nebulizer ($550 to replace).
Basic User Guide for the ICPMS X-Series
Lab 236 EC
Serial number: X0448
19
Cleaning the Cones with an Ultrasonic Cleaner
After some hours of sample analysis, the cones at the entry point of mass spectrometer will
become dirty.
arning: Remember that these are nickel metal cones. DO NOT clean with an
acid or base. DI water only or a light mixture of Micro-90 soap will suffice!
Follow the instructions in the manual for removing the cones from the ICPMS. See page 118 of
the X Series ICPMS Getting Started Guide.
Fill the ultrasonic unit pictured below with DI water to about an 1 inch to 1.5 inches of the top.
Find a small beaker to put the cones in with some DI water filling the beaker. Do each cone
separately for up to 15 minutes. Five and ten minute can also be enough depending upon the
dirtiness of the cones.
Rinse the cones a couple of times with DI water while in the beaker. Try to minimize contact
with the cones unless wearing gloves. The cones need to be dried and this can be either air
drying or with a heat gun. Another quick way is to rinse the cones with alcohol and air dry. Set
the cones out to dry. After drying, reinstall the cones.
Figure 10: An ultrasonic cleaner.
W
Basic User Guide for the ICPMS X-Series
Lab 236 EC
Serial number: X0448
20
Figure 11: A small beaker filled with DI water to cover the cones. Fill some DI water around the beakers before
sonicating. Sonicate for about 5 to 10 minutes. This can vary depending upon dirtiness of the cones.
Basic User Guide for the ICPMS X-Series
Lab 236 EC
Serial number: X0448
21
Shutting Down the Vacuum Pump for ICP-MS
There are times when it is necessary to totally shutdown the ICP-MS.
The only acceptable reason is when maintenance is required on the vacuum pump like changing
the vacuum pump oil or to replace the detector that is located inside the vacuum chamber.
Another acceptable time is if a known power outage to the building is scheduled.
After the maintenance is completed or the power is back on, return the pump to a vacuum state.
When restarting the vacuum pump, this message will appear:
Unless a new detector has been replaced, click ‘NO’ and continue on as usual.
Problem – Plasma does not Start
On occasion, there will be problems igniting the plasma. The errors displayed by Plasma-lab are
at times not necessarily directly related to the problem.
First, check that the gas is at the required 90-lbs or so. Remove the air pipe from the ICP-MS and
check whether there is any flow or suction through the air pipe. Make sure the chiller is at
operating temperature. Check the tubing connected to the nebulizer and make sure there are no
leaks.
• It is possible under certain circumstances, for the plasma to not light because the cone
hole is too big. The increased hole size will not allow the plasma to light because the
Basic User Guide for the ICPMS X-Series
Lab 236 EC
Serial number: X0448
22
proper vacuum is not obtainable. Examine the cone for wear and replace with another and
see what happens.
• Pages 130 to 131 from the X Series ICP-MS Getting Started Guide startup guide has a
flowchart for troubleshooting plasma start issues.
Plasma Lights, but does not Stay on
Sometimes the plasma will run for a few minutes and then turn off. First, make sure that all the
tubing to the nebulizer and from pump is connected correctly. Any substantial amount of air will
interfere with the plasma staying on for a period of time.
• Check to make sure that the silver screen is touching the grounding pin on the Teflon
torch holder (inside the cage).
• Check the Event Log under the instrument guy icon (the person wearing a lab coat) to see
what errors may have occurred. Recheck tank pressure and status.
• Did the spray chamber fill with too much liquid? If so, the extra liquid will get sucked
into the torch assembly which makes it damp. If that is the case, the torch needs to be
taken out, dried with a blow dryer or heat gun, and reinstalled.
• The black tubes carrying argon lines to the nebulizer and the torch assembly have plug
together connectors. Over time, the metal pieces cut into the black tubes thus causing a
small leak and air is always the enemy of the plasma. Disconnect the tubes, cut a 1/8”
piece of the constricted portion and re-attach.
Sometimes, after several attempts, the problem will work itself out and the plasma will stay on
for the duration of the available argon or sampling run.
Basic User Guide for the ICPMS X-Series
Lab 236 EC
Serial number: X0448
23
PlasmaLab cannot Communicate with Instrument
Sometimes the communication fails between the PC and the ICPMS. The ICPMS has its own
low end PC inside of it. The purpose of the desk PC is to record errors and store data from the
sample analysis. If rebooting the computer, the following error will occur when starting
Plasmalab software:
The message appears because Plasmalab services (services is a program that is always running in
the background to maintain constant communications with ICPMS) has not connected to the
ICPMS computer.
To see if this message appears, right the “MS” icon at the lower right hand side and click “Open
Service Window”.
This message means that there is no contact between the PC and the ICPMS's computer.
Check the following:
1. Make sure that the serial cable is connected to COM1 on the PC and to the ICPMS.
2. Make sure the serial port is enables in Windows by going to 'System->Device Manager-
Ports'. Since TAMUK uses McAfee virus scanner, some versions have been known to
prevent Plasmalab from working.
Basic User Guide for the ICPMS X-Series
Lab 236 EC
Serial number: X0448
24
If communication is established between the ICPMS computer and desktop, this message will
appear under the “MS” icon and “Open Service Window”. The time stamp followed by
“Checking for modules” followed by another time stamp and the words “Idle” should appear.
Figure 12: Communication between ICPMS and workstation is successful.
Note: If the desktop and ICPMS computer have not been rebooted for some time, it is a good
idea to reboot both computers. Remove the instrument cover to turn off the ICPMS computer
(green power switch on box at upper left). While doing that, reboot the workstation. The “End
Program” message will pop-up for the Plasmalab services. End the program, restart, and log-in
again to the workstation. Turn on the ICPMS computer while the “MS” icon (lower left of
desktop) will reappear after a couple minutes. This reboot procedure can be done while the
plasma is on (ICPMS in operate mode).
Basic User Guide for the ICPMS X-Series
Lab 236 EC
Serial number: X0448
25
Performance Report before Starting a Sample Analysis
A daily performance check is a necessary before running an experiment. Before running a
performance check, have the plasma operating for at least 15 to 20 minutes. Next, go to the
“Configurations” tab and select the following:
Figure 13: Screen under Configurations Tab.
Under “Configurations”, select 'X Series Default'. Under 'Available Accessories and Devices',
make sure the Cetac 500 is selected and 'Peri pump' is checked as well; once set these are
defaults though and it is usually not necessary to change.
Under “Instrument settings”, select the last known good '2. Xi + screen' parameters. In this
example, one would select the ‘4/24/2009 2:01:33PM Autotune’.
Next, the Tune A solution must be fed into the ICPMS. One way is to go ahead and begin
feeding the solution since it may be necessary to do an auto-tune or other functions more than
once to obtain a good performance report. Select the accessory control panel icon and select the
Autosampler tab.
Connect to the auto-sampler and feed the Tune A solution. Use the following screen to connect
and set which rack number the solution is fed.
Basic User Guide for the ICPMS X-Series
Lab 236 EC
Serial number: X0448
26
Remember that the physical column for the larger sample tubes on the auto-sampler is Rack 0.
The rest use a 5 X 12 configuration. Use the 17 X 100-mm disposable test tubes for samples.
Also remember that the laboratory ventilation system does have dust in the air, so make sure to
cover the sample tubes with Parafilm to prevent contamination.
If using the CCT, always turn on the gas cylinder mix and purge the chamber before running a
performance report for the CCT. Remember that the default report must pass before doing the
CCT.
Basic User Guide for the ICPMS X-Series
Lab 236 EC
Serial number: X0448
27
Removing the Cover from the ICPMS
Sometimes it is necessary to remove the cover from the ICP-MS to access the circuit breakers,
vacuum cage, or vacuum chamber.
If turning off the breakers to reset the instrument, leave them off for at least 30 seconds before
turning back on. This should allow for most of the electronics to discharge.
The breaker to the far right says “Electronics Embedded PC Rotary Pump Turbo Pump”. This
breaker also controls the roughing pump on sitting on the floor beneath the table. If it does not
come back on after resetting the breaker, press the GRAY button on the board just to the right.
The RED button stops the roughing pump. Sometimes, this may require up to three or more
attempts. Open Plasmalab and watch the ‘Hertz:’ display; it should reach 1000-Hz in about five
minutes.
Figure 14: Breaker controls for ICPMS.
Basic User Guide for the ICPMS X-Series
Lab 236 EC
Serial number: X0448
28
Torches – Cleaning and Wear
The torch assembly consists of the torch, the silver grounding screen, and the bonnet to protect
the screen from the intense heat of the plasma. This item is a consumable and should last about 6
months. It is good practice when not using the ICPMS to soak the glass portions in higher
percentage of nitric acid. Rinse and dry thoroughly before replacing.
Figure 15: Torch on left from plasma arcing. Torch on right from wear and tear.
The torch on the left is from a ‘plasma arc’. For whatever reason, the electrical energy of the
plasma arcs like a lightning bolt and fuses the assembly together. This is why it is necessary to
keep a spare. The one on right is from use over a long period of time, but at some point, it must
be replaced. If the screen is an issue, sometimes it can rehabilitated by lightly sanding the rough
edges/
Basic User Guide for the ICPMS X-Series
Lab 236 EC
Serial number: X0448
29
Consumables/Estimated Yearly Cost to Operate ICPMS
Here is a table showing some of the typical consumable for the ICPMS during the course of a
year in this lab. The detector should last at least two years but was included to show it is an
important consumable. A couple packages of PVC tubing should last for more than a year. The
liquid argon cost assumes that a minimum of six tanks may be consumed during the year. The
prices may change for any of the listed items of course, but this is a close estimate.
The items that have a quantity of two are consumables that one should have more than on hand at
all times. This is so these consumables can be swapped to isolate some of the problems that may
arise while operating. Note also these all have to do with the sampling system.
ITEM QTY EACH COST
Maintenance contract 1 $19,000 $19,000
Liquid Argon Tank 6 $350 $2,100
Liquid Argon Tank Rental (about $2/day 35 days) 6 $70 $420
Tune A Standard SCP Science (500-mL) 1 $141 $141
Tune D Standard SCP Science (500-mL) 1 $330 $330
Ni Skimmer Cone 2 $323 $646
Ni Sample Cone 2 $287 $574
Torch Screen 2 $163 $326
Torch Bonnet 2 $50 $100
Standard Glass Nebulizer Kit 2 $570 $1,140
Detector 1 $1,825 $1,825
Pure Nitric Acid 2 $75 $150
PVC Tubing 1 $80 $80
TOTAL $26,832
The maintenance contract covers a number of items. If the chiller, vacuum pump, auto-sampler
fail, they are replaced. Thermo may request that the broken item be shipped back to them and
they pay for return shipping. The contract covers the many internals to the ICPMS like slide
valves, penning gauge, RF generator, various boards, peristaltic pump, and too much else to list.
In some cases, a service engineer may come to replace some of these items. The contract also
includes a yearly preventive maintenance visit where the lenses are cleaned, the instrument
inspected to make sure specs are met, and some parts replaced.
Basic User Guide for the ICPMS X-Series
Lab 236 EC
Serial number: X0448
30
References
Thermo Electron Corporation, X-Series ICP-MS Getting Started Guide, Issue 1.3 : January 2004,
Ref. No. : S419MA
Thermo Electron Corporation, X-Series ICP-MS Training Course Lectures, Issue 1.1: Nov 2002,
Part No. 3601078
Eppendorf, Eppendorf SOP, Standard Operating Procedure for Pipettes
Long, S.E. METHOD 200.8 : DETERMINATION OF TRACE ELEMENTS IN WATERS AND
WASTES BY INDUCTIVELY COUPLED PLASMA - MASS SPECTROMETRY, Revision
5.4, EMMCC Version.
http://water.epa.gov/scitech/methods/cwa/bioindicators/upload/2007_07_10_methods_method_2
00_8.pdf
Thermo Scientific, NESLAB ThermoFlex Recirculating Chillers, Installation, Operation, Basic
Maintenance.
Csuros, Maria. 1997. Environmental Sampling and Analysis: Lab Manual, ISBN-13:978-
1566701785.

Weitere ähnliche Inhalte

Was ist angesagt?

Metrologia aplicada
Metrologia aplicadaMetrologia aplicada
Metrologia aplicadaLuiz Gomes
 
Auctioneering control system
Auctioneering control systemAuctioneering control system
Auctioneering control systemAshvani Shukla
 
9789740337737
97897403377379789740337737
9789740337737CUPress
 
PARKER - MANUAL DE IDENFITICAÇÃO DE ROSCAS E SEDES DE VEDAÇÕES
PARKER - MANUAL DE IDENFITICAÇÃO DE ROSCAS E SEDES DE VEDAÇÕESPARKER - MANUAL DE IDENFITICAÇÃO DE ROSCAS E SEDES DE VEDAÇÕES
PARKER - MANUAL DE IDENFITICAÇÃO DE ROSCAS E SEDES DE VEDAÇÕESSandro Marques Solidario
 
Paquimetro
PaquimetroPaquimetro
Paquimetrofera_al
 
Pad Cratering: Prevention, Mitigation and Detection Strategies
Pad Cratering: Prevention, Mitigation and Detection StrategiesPad Cratering: Prevention, Mitigation and Detection Strategies
Pad Cratering: Prevention, Mitigation and Detection StrategiesCheryl Tulkoff
 

Was ist angesagt? (8)

Flow measurement pdf
Flow measurement pdfFlow measurement pdf
Flow measurement pdf
 
Metrologia aplicada
Metrologia aplicadaMetrologia aplicada
Metrologia aplicada
 
System 800xA Hardware trouble shooting
System 800xA Hardware trouble shootingSystem 800xA Hardware trouble shooting
System 800xA Hardware trouble shooting
 
Auctioneering control system
Auctioneering control systemAuctioneering control system
Auctioneering control system
 
9789740337737
97897403377379789740337737
9789740337737
 
PARKER - MANUAL DE IDENFITICAÇÃO DE ROSCAS E SEDES DE VEDAÇÕES
PARKER - MANUAL DE IDENFITICAÇÃO DE ROSCAS E SEDES DE VEDAÇÕESPARKER - MANUAL DE IDENFITICAÇÃO DE ROSCAS E SEDES DE VEDAÇÕES
PARKER - MANUAL DE IDENFITICAÇÃO DE ROSCAS E SEDES DE VEDAÇÕES
 
Paquimetro
PaquimetroPaquimetro
Paquimetro
 
Pad Cratering: Prevention, Mitigation and Detection Strategies
Pad Cratering: Prevention, Mitigation and Detection StrategiesPad Cratering: Prevention, Mitigation and Detection Strategies
Pad Cratering: Prevention, Mitigation and Detection Strategies
 

Andere mochten auch

Inductively coupled mass spectrometry
Inductively coupled mass spectrometryInductively coupled mass spectrometry
Inductively coupled mass spectrometryAnup Patil
 
INDUCTIVELY COUPLED PLASMA -ATOMIC EMISSION SPECTROSCOPY
INDUCTIVELY COUPLED PLASMA -ATOMIC EMISSION SPECTROSCOPYINDUCTIVELY COUPLED PLASMA -ATOMIC EMISSION SPECTROSCOPY
INDUCTIVELY COUPLED PLASMA -ATOMIC EMISSION SPECTROSCOPYParimi Anuradha
 
inductively coupled plasma ICP techniques & applications
inductively coupled plasma ICP techniques &  applicationsinductively coupled plasma ICP techniques &  applications
inductively coupled plasma ICP techniques & applicationsGamal Abdel Hamid
 
Application Note: The Analysis of Drinking Waters by U.S. EPA Method 200.8 Us...
Application Note: The Analysis of Drinking Waters by U.S. EPA Method 200.8 Us...Application Note: The Analysis of Drinking Waters by U.S. EPA Method 200.8 Us...
Application Note: The Analysis of Drinking Waters by U.S. EPA Method 200.8 Us...PerkinElmer, Inc.
 
The Origin of Precious Metals on Earth
The Origin of Precious Metals on EarthThe Origin of Precious Metals on Earth
The Origin of Precious Metals on Earthmahulshoff
 
Icp (inductively couple plasma)
Icp (inductively couple plasma)Icp (inductively couple plasma)
Icp (inductively couple plasma)Henny Erlia
 
(mass spectrometry chapter 29)
(mass spectrometry chapter 29)(mass spectrometry chapter 29)
(mass spectrometry chapter 29)Bianca Mangin
 
Atomic Spectroscopy: Basic Principles and Instruments
Atomic Spectroscopy: Basic Principles and InstrumentsAtomic Spectroscopy: Basic Principles and Instruments
Atomic Spectroscopy: Basic Principles and InstrumentsVasiliy V. Rosen (Ph.D.)
 

Andere mochten auch (13)

Inductively coupled mass spectrometry
Inductively coupled mass spectrometryInductively coupled mass spectrometry
Inductively coupled mass spectrometry
 
ICP - Lecture 7 and 8
ICP - Lecture 7 and 8ICP - Lecture 7 and 8
ICP - Lecture 7 and 8
 
Icp ms
Icp msIcp ms
Icp ms
 
INDUCTIVELY COUPLED PLASMA -ATOMIC EMISSION SPECTROSCOPY
INDUCTIVELY COUPLED PLASMA -ATOMIC EMISSION SPECTROSCOPYINDUCTIVELY COUPLED PLASMA -ATOMIC EMISSION SPECTROSCOPY
INDUCTIVELY COUPLED PLASMA -ATOMIC EMISSION SPECTROSCOPY
 
ICP-MS
ICP-MSICP-MS
ICP-MS
 
inductively coupled plasma ICP techniques & applications
inductively coupled plasma ICP techniques &  applicationsinductively coupled plasma ICP techniques &  applications
inductively coupled plasma ICP techniques & applications
 
Application Note: The Analysis of Drinking Waters by U.S. EPA Method 200.8 Us...
Application Note: The Analysis of Drinking Waters by U.S. EPA Method 200.8 Us...Application Note: The Analysis of Drinking Waters by U.S. EPA Method 200.8 Us...
Application Note: The Analysis of Drinking Waters by U.S. EPA Method 200.8 Us...
 
The Origin of Precious Metals on Earth
The Origin of Precious Metals on EarthThe Origin of Precious Metals on Earth
The Origin of Precious Metals on Earth
 
Icpms
IcpmsIcpms
Icpms
 
Icp (inductively couple plasma)
Icp (inductively couple plasma)Icp (inductively couple plasma)
Icp (inductively couple plasma)
 
(mass spectrometry chapter 29)
(mass spectrometry chapter 29)(mass spectrometry chapter 29)
(mass spectrometry chapter 29)
 
Atomic Spectroscopy: Basic Principles and Instruments
Atomic Spectroscopy: Basic Principles and InstrumentsAtomic Spectroscopy: Basic Principles and Instruments
Atomic Spectroscopy: Basic Principles and Instruments
 
Mass spectrometry
Mass spectrometryMass spectrometry
Mass spectrometry
 

Ähnlich wie X-Series ICPMS User Guide

Industrial training report of ACG associated capsule Pvt. Ltd.
Industrial training report of ACG associated capsule Pvt. Ltd.Industrial training report of ACG associated capsule Pvt. Ltd.
Industrial training report of ACG associated capsule Pvt. Ltd.Sarvesh Bari
 
Jay 5 bw
Jay 5 bwJay 5 bw
Jay 5 bwJeroxxx
 
Determination of Oxygen in Anhydrous Ammonia
Determination of Oxygen in Anhydrous AmmoniaDetermination of Oxygen in Anhydrous Ammonia
Determination of Oxygen in Anhydrous AmmoniaGerard B. Hawkins
 
Automated SPE-LC/MS/MS method development using ITSP
Automated SPE-LC/MS/MS method development using ITSPAutomated SPE-LC/MS/MS method development using ITSP
Automated SPE-LC/MS/MS method development using ITSPMark Hayward
 
Method Development Poster-MicroLiter
Method Development Poster-MicroLiterMethod Development Poster-MicroLiter
Method Development Poster-MicroLiterRick Youngblood
 
19039 automated analyser lect_1__instrumentation lect 2nd yr mt_2nd semester
19039 automated analyser  lect_1__instrumentation lect 2nd yr mt_2nd semester19039 automated analyser  lect_1__instrumentation lect 2nd yr mt_2nd semester
19039 automated analyser lect_1__instrumentation lect 2nd yr mt_2nd semesterguayacan87
 
HPLC tips & tricks
HPLC tips & tricks HPLC tips & tricks
HPLC tips & tricks Oskari Aro
 
Column care for your Aeris Widepore HPLC
Column care for your Aeris Widepore HPLCColumn care for your Aeris Widepore HPLC
Column care for your Aeris Widepore HPLCSandy Simmons
 
LAURA’S SIWES PP PRESENTATION copy.pptx
LAURA’S SIWES PP PRESENTATION copy.pptxLAURA’S SIWES PP PRESENTATION copy.pptx
LAURA’S SIWES PP PRESENTATION copy.pptxLauraAkanBassey
 
Hướng dẫn sử dụng testo 550
Hướng dẫn sử dụng testo 550Hướng dẫn sử dụng testo 550
Hướng dẫn sử dụng testo 550Tenmars Việt Nam
 
M SERVICIO CHEM RAY 240 pdfcoffee.com_chemray-240-service-manual-v10e-5-pdf-f...
M SERVICIO CHEM RAY 240 pdfcoffee.com_chemray-240-service-manual-v10e-5-pdf-f...M SERVICIO CHEM RAY 240 pdfcoffee.com_chemray-240-service-manual-v10e-5-pdf-f...
M SERVICIO CHEM RAY 240 pdfcoffee.com_chemray-240-service-manual-v10e-5-pdf-f...DIEGOPARRAGAMOSCOSO1
 
Overview of Summer Internship Projects
Overview of Summer Internship ProjectsOverview of Summer Internship Projects
Overview of Summer Internship ProjectsJami Turnquist
 
Manual de operación y mantenimiento concentrador de oxigeno jay-5
Manual de operación y mantenimiento concentrador de oxigeno jay-5Manual de operación y mantenimiento concentrador de oxigeno jay-5
Manual de operación y mantenimiento concentrador de oxigeno jay-5AntonioBarrios54
 
Flash Chromatography by GBNigade
Flash Chromatography by GBNigadeFlash Chromatography by GBNigade
Flash Chromatography by GBNigadeGANESH NIGADE
 

Ähnlich wie X-Series ICPMS User Guide (20)

Industrial training report of ACG associated capsule Pvt. Ltd.
Industrial training report of ACG associated capsule Pvt. Ltd.Industrial training report of ACG associated capsule Pvt. Ltd.
Industrial training report of ACG associated capsule Pvt. Ltd.
 
Jay 5 bw
Jay 5 bwJay 5 bw
Jay 5 bw
 
BenchMark Special Stains Product Guide
BenchMark Special Stains Product GuideBenchMark Special Stains Product Guide
BenchMark Special Stains Product Guide
 
Determination of Oxygen in Anhydrous Ammonia
Determination of Oxygen in Anhydrous AmmoniaDetermination of Oxygen in Anhydrous Ammonia
Determination of Oxygen in Anhydrous Ammonia
 
Msa altair 4 meter manual
Msa altair 4 meter manualMsa altair 4 meter manual
Msa altair 4 meter manual
 
Automated SPE-LC/MS/MS method development using ITSP
Automated SPE-LC/MS/MS method development using ITSPAutomated SPE-LC/MS/MS method development using ITSP
Automated SPE-LC/MS/MS method development using ITSP
 
Method Development Poster-MicroLiter
Method Development Poster-MicroLiterMethod Development Poster-MicroLiter
Method Development Poster-MicroLiter
 
19039 automated analyser lect_1__instrumentation lect 2nd yr mt_2nd semester
19039 automated analyser  lect_1__instrumentation lect 2nd yr mt_2nd semester19039 automated analyser  lect_1__instrumentation lect 2nd yr mt_2nd semester
19039 automated analyser lect_1__instrumentation lect 2nd yr mt_2nd semester
 
Auto analyzer
Auto analyzerAuto analyzer
Auto analyzer
 
HPLC tips & tricks
HPLC tips & tricks HPLC tips & tricks
HPLC tips & tricks
 
HPTLC Naveen Balaji
HPTLC Naveen BalajiHPTLC Naveen Balaji
HPTLC Naveen Balaji
 
istatprocedure.PDF
istatprocedure.PDFistatprocedure.PDF
istatprocedure.PDF
 
Column care for your Aeris Widepore HPLC
Column care for your Aeris Widepore HPLCColumn care for your Aeris Widepore HPLC
Column care for your Aeris Widepore HPLC
 
Nova Analytica
Nova AnalyticaNova Analytica
Nova Analytica
 
LAURA’S SIWES PP PRESENTATION copy.pptx
LAURA’S SIWES PP PRESENTATION copy.pptxLAURA’S SIWES PP PRESENTATION copy.pptx
LAURA’S SIWES PP PRESENTATION copy.pptx
 
Hướng dẫn sử dụng testo 550
Hướng dẫn sử dụng testo 550Hướng dẫn sử dụng testo 550
Hướng dẫn sử dụng testo 550
 
M SERVICIO CHEM RAY 240 pdfcoffee.com_chemray-240-service-manual-v10e-5-pdf-f...
M SERVICIO CHEM RAY 240 pdfcoffee.com_chemray-240-service-manual-v10e-5-pdf-f...M SERVICIO CHEM RAY 240 pdfcoffee.com_chemray-240-service-manual-v10e-5-pdf-f...
M SERVICIO CHEM RAY 240 pdfcoffee.com_chemray-240-service-manual-v10e-5-pdf-f...
 
Overview of Summer Internship Projects
Overview of Summer Internship ProjectsOverview of Summer Internship Projects
Overview of Summer Internship Projects
 
Manual de operación y mantenimiento concentrador de oxigeno jay-5
Manual de operación y mantenimiento concentrador de oxigeno jay-5Manual de operación y mantenimiento concentrador de oxigeno jay-5
Manual de operación y mantenimiento concentrador de oxigeno jay-5
 
Flash Chromatography by GBNigade
Flash Chromatography by GBNigadeFlash Chromatography by GBNigade
Flash Chromatography by GBNigade
 

Mehr von TAMUK

Quartus_19.1_stand_ed_installingonPC.pdf
Quartus_19.1_stand_ed_installingonPC.pdfQuartus_19.1_stand_ed_installingonPC.pdf
Quartus_19.1_stand_ed_installingonPC.pdfTAMUK
 
Dasibi 1008 Ozone Monitor Manual
Dasibi 1008 Ozone Monitor Manual Dasibi 1008 Ozone Monitor Manual
Dasibi 1008 Ozone Monitor Manual TAMUK
 
Voltage Drop Calculator for Street Lighting
Voltage Drop Calculator for Street LightingVoltage Drop Calculator for Street Lighting
Voltage Drop Calculator for Street LightingTAMUK
 
Basic SOP for Agilent 6890/5973 system
Basic SOP for Agilent 6890/5973 systemBasic SOP for Agilent 6890/5973 system
Basic SOP for Agilent 6890/5973 systemTAMUK
 
Using an Agilent 6890 GCMS with Entech Canister Sampler
Using an Agilent 6890 GCMS with Entech Canister SamplerUsing an Agilent 6890 GCMS with Entech Canister Sampler
Using an Agilent 6890 GCMS with Entech Canister SamplerTAMUK
 
Use electsftylab-dwm
Use electsftylab-dwmUse electsftylab-dwm
Use electsftylab-dwmTAMUK
 
Use lab safety-dwm
Use lab safety-dwm Use lab safety-dwm
Use lab safety-dwm TAMUK
 
Lab colloid chemistry & turbidity
Lab colloid chemistry & turbidityLab colloid chemistry & turbidity
Lab colloid chemistry & turbidityTAMUK
 
Lab Batch Reactors
Lab Batch ReactorsLab Batch Reactors
Lab Batch ReactorsTAMUK
 
Site Operation Manual for a Typical Air Monitoring Site
Site Operation Manual for a Typical Air Monitoring SiteSite Operation Manual for a Typical Air Monitoring Site
Site Operation Manual for a Typical Air Monitoring SiteTAMUK
 
Wiring a pH and Conductivity Probe to a Zeno3200
Wiring a pH and Conductivity Probe to a Zeno3200Wiring a pH and Conductivity Probe to a Zeno3200
Wiring a pH and Conductivity Probe to a Zeno3200TAMUK
 
Using a Zeno 3200
Using a Zeno 3200Using a Zeno 3200
Using a Zeno 3200TAMUK
 
Settingupgsm1208modem
Settingupgsm1208modemSettingupgsm1208modem
Settingupgsm1208modemTAMUK
 
Kpsi User Guide Model 500
Kpsi User Guide Model 500Kpsi User Guide Model 500
Kpsi User Guide Model 500TAMUK
 
2014 environmental engineeringlabmanual
2014 environmental engineeringlabmanual2014 environmental engineeringlabmanual
2014 environmental engineeringlabmanualTAMUK
 
Performance checks dasibi ozone-v2
Performance checks dasibi ozone-v2Performance checks dasibi ozone-v2
Performance checks dasibi ozone-v2TAMUK
 
Calibration dasibi-ozone
Calibration dasibi-ozoneCalibration dasibi-ozone
Calibration dasibi-ozoneTAMUK
 
Method to expose rats to ozone-updated2014
Method to expose rats to ozone-updated2014Method to expose rats to ozone-updated2014
Method to expose rats to ozone-updated2014TAMUK
 
Criteria Air Pollutants and Ambient Air Monitoring
Criteria Air Pollutants and Ambient Air MonitoringCriteria Air Pollutants and Ambient Air Monitoring
Criteria Air Pollutants and Ambient Air MonitoringTAMUK
 
4 lab-tss-tds-vss
4 lab-tss-tds-vss4 lab-tss-tds-vss
4 lab-tss-tds-vssTAMUK
 

Mehr von TAMUK (20)

Quartus_19.1_stand_ed_installingonPC.pdf
Quartus_19.1_stand_ed_installingonPC.pdfQuartus_19.1_stand_ed_installingonPC.pdf
Quartus_19.1_stand_ed_installingonPC.pdf
 
Dasibi 1008 Ozone Monitor Manual
Dasibi 1008 Ozone Monitor Manual Dasibi 1008 Ozone Monitor Manual
Dasibi 1008 Ozone Monitor Manual
 
Voltage Drop Calculator for Street Lighting
Voltage Drop Calculator for Street LightingVoltage Drop Calculator for Street Lighting
Voltage Drop Calculator for Street Lighting
 
Basic SOP for Agilent 6890/5973 system
Basic SOP for Agilent 6890/5973 systemBasic SOP for Agilent 6890/5973 system
Basic SOP for Agilent 6890/5973 system
 
Using an Agilent 6890 GCMS with Entech Canister Sampler
Using an Agilent 6890 GCMS with Entech Canister SamplerUsing an Agilent 6890 GCMS with Entech Canister Sampler
Using an Agilent 6890 GCMS with Entech Canister Sampler
 
Use electsftylab-dwm
Use electsftylab-dwmUse electsftylab-dwm
Use electsftylab-dwm
 
Use lab safety-dwm
Use lab safety-dwm Use lab safety-dwm
Use lab safety-dwm
 
Lab colloid chemistry & turbidity
Lab colloid chemistry & turbidityLab colloid chemistry & turbidity
Lab colloid chemistry & turbidity
 
Lab Batch Reactors
Lab Batch ReactorsLab Batch Reactors
Lab Batch Reactors
 
Site Operation Manual for a Typical Air Monitoring Site
Site Operation Manual for a Typical Air Monitoring SiteSite Operation Manual for a Typical Air Monitoring Site
Site Operation Manual for a Typical Air Monitoring Site
 
Wiring a pH and Conductivity Probe to a Zeno3200
Wiring a pH and Conductivity Probe to a Zeno3200Wiring a pH and Conductivity Probe to a Zeno3200
Wiring a pH and Conductivity Probe to a Zeno3200
 
Using a Zeno 3200
Using a Zeno 3200Using a Zeno 3200
Using a Zeno 3200
 
Settingupgsm1208modem
Settingupgsm1208modemSettingupgsm1208modem
Settingupgsm1208modem
 
Kpsi User Guide Model 500
Kpsi User Guide Model 500Kpsi User Guide Model 500
Kpsi User Guide Model 500
 
2014 environmental engineeringlabmanual
2014 environmental engineeringlabmanual2014 environmental engineeringlabmanual
2014 environmental engineeringlabmanual
 
Performance checks dasibi ozone-v2
Performance checks dasibi ozone-v2Performance checks dasibi ozone-v2
Performance checks dasibi ozone-v2
 
Calibration dasibi-ozone
Calibration dasibi-ozoneCalibration dasibi-ozone
Calibration dasibi-ozone
 
Method to expose rats to ozone-updated2014
Method to expose rats to ozone-updated2014Method to expose rats to ozone-updated2014
Method to expose rats to ozone-updated2014
 
Criteria Air Pollutants and Ambient Air Monitoring
Criteria Air Pollutants and Ambient Air MonitoringCriteria Air Pollutants and Ambient Air Monitoring
Criteria Air Pollutants and Ambient Air Monitoring
 
4 lab-tss-tds-vss
4 lab-tss-tds-vss4 lab-tss-tds-vss
4 lab-tss-tds-vss
 

Kürzlich hochgeladen

办理学位证(KU证书)堪萨斯大学毕业证成绩单原版一比一
办理学位证(KU证书)堪萨斯大学毕业证成绩单原版一比一办理学位证(KU证书)堪萨斯大学毕业证成绩单原版一比一
办理学位证(KU证书)堪萨斯大学毕业证成绩单原版一比一F dds
 
global trend Chapter 1.presentation power point
global trend Chapter 1.presentation power pointglobal trend Chapter 1.presentation power point
global trend Chapter 1.presentation power pointyohannisyohannis54
 
Biogas Production from Agricultural Feedstock and Energy Crops
Biogas Production from Agricultural Feedstock and Energy CropsBiogas Production from Agricultural Feedstock and Energy Crops
Biogas Production from Agricultural Feedstock and Energy CropsRabiyaSalman2
 
9873940964 Full Enjoy 24/7 Call Girls Near Shangri La’s Eros Hotel, New Delhi
9873940964 Full Enjoy 24/7 Call Girls Near Shangri La’s Eros Hotel, New Delhi9873940964 Full Enjoy 24/7 Call Girls Near Shangri La’s Eros Hotel, New Delhi
9873940964 Full Enjoy 24/7 Call Girls Near Shangri La’s Eros Hotel, New Delhidelih Escorts
 
BIODIVERSITY QUIZ ELIMINATION ROUND.pptx
BIODIVERSITY QUIZ ELIMINATION ROUND.pptxBIODIVERSITY QUIZ ELIMINATION ROUND.pptx
BIODIVERSITY QUIZ ELIMINATION ROUND.pptxROLANARIBATO3
 
原版定制copy澳洲詹姆斯库克大学毕业证JCU毕业证成绩单留信学历认证保障质量
原版定制copy澳洲詹姆斯库克大学毕业证JCU毕业证成绩单留信学历认证保障质量原版定制copy澳洲詹姆斯库克大学毕业证JCU毕业证成绩单留信学历认证保障质量
原版定制copy澳洲詹姆斯库克大学毕业证JCU毕业证成绩单留信学历认证保障质量sehgh15heh
 
INSIDER THREAT PREVENTION IN THE US BANKING SYSTEM
INSIDER THREAT PREVENTION IN THE US BANKING SYSTEMINSIDER THREAT PREVENTION IN THE US BANKING SYSTEM
INSIDER THREAT PREVENTION IN THE US BANKING SYSTEMijsc
 
5 Wondrous Places You Should Visit at Least Once in Your Lifetime (1).pdf
5 Wondrous Places You Should Visit at Least Once in Your Lifetime (1).pdf5 Wondrous Places You Should Visit at Least Once in Your Lifetime (1).pdf
5 Wondrous Places You Should Visit at Least Once in Your Lifetime (1).pdfsrivastavaakshat51
 
NO1 Certified Rohani Amil In Islamabad Amil Baba in Rawalpindi Kala Jadu Amil...
NO1 Certified Rohani Amil In Islamabad Amil Baba in Rawalpindi Kala Jadu Amil...NO1 Certified Rohani Amil In Islamabad Amil Baba in Rawalpindi Kala Jadu Amil...
NO1 Certified Rohani Amil In Islamabad Amil Baba in Rawalpindi Kala Jadu Amil...Amil baba
 
التغيرات المناخية وتاثيرها على القطاع الزراعي المصري
التغيرات المناخية وتاثيرها على القطاع الزراعي المصريالتغيرات المناخية وتاثيرها على القطاع الزراعي المصري
التغيرات المناخية وتاثيرها على القطاع الزراعي المصريRawhyaShaheen
 
Gwalior Call Girls 7001305949 WhatsApp Number 24x7 Best Services
Gwalior Call Girls 7001305949 WhatsApp Number 24x7 Best ServicesGwalior Call Girls 7001305949 WhatsApp Number 24x7 Best Services
Gwalior Call Girls 7001305949 WhatsApp Number 24x7 Best Servicesnajka9823
 
Available to Promise Oracle R12 ATP.pptx
Available to Promise Oracle R12 ATP.pptxAvailable to Promise Oracle R12 ATP.pptx
Available to Promise Oracle R12 ATP.pptxbskumar_slideshare
 
885MTAMount DMU University Bachelor's Diploma in Education
885MTAMount DMU University Bachelor's Diploma in Education885MTAMount DMU University Bachelor's Diploma in Education
885MTAMount DMU University Bachelor's Diploma in Educationz xss
 
Group 4The Species of the Atlantic Forest.pdf
Group 4The Species of the Atlantic Forest.pdfGroup 4The Species of the Atlantic Forest.pdf
Group 4The Species of the Atlantic Forest.pdfs2015004
 
办理德州理工大学毕业证书TTU文凭学位证书
办理德州理工大学毕业证书TTU文凭学位证书办理德州理工大学毕业证书TTU文凭学位证书
办理德州理工大学毕业证书TTU文凭学位证书zdzoqco
 
EARTH DAY Slide show EARTHDAY.ORG is unwavering in our commitment to end plas...
EARTH DAY Slide show EARTHDAY.ORG is unwavering in our commitment to end plas...EARTH DAY Slide show EARTHDAY.ORG is unwavering in our commitment to end plas...
EARTH DAY Slide show EARTHDAY.ORG is unwavering in our commitment to end plas...Aqsa Yasmin
 
办理(Victoria毕业证书)维多利亚大学毕业证成绩单原版一比一
办理(Victoria毕业证书)维多利亚大学毕业证成绩单原版一比一办理(Victoria毕业证书)维多利亚大学毕业证成绩单原版一比一
办理(Victoria毕业证书)维多利亚大学毕业证成绩单原版一比一z xss
 
Along the Lakefront, "Menacing Unknown"s
Along the Lakefront, "Menacing Unknown"sAlong the Lakefront, "Menacing Unknown"s
Along the Lakefront, "Menacing Unknown"syalehistoricalreview
 
Hi FI Call Girl Ahmedabad 7397865700 Independent Call Girls
Hi FI Call Girl Ahmedabad 7397865700 Independent Call GirlsHi FI Call Girl Ahmedabad 7397865700 Independent Call Girls
Hi FI Call Girl Ahmedabad 7397865700 Independent Call Girlsssuser7cb4ff
 

Kürzlich hochgeladen (20)

办理学位证(KU证书)堪萨斯大学毕业证成绩单原版一比一
办理学位证(KU证书)堪萨斯大学毕业证成绩单原版一比一办理学位证(KU证书)堪萨斯大学毕业证成绩单原版一比一
办理学位证(KU证书)堪萨斯大学毕业证成绩单原版一比一
 
global trend Chapter 1.presentation power point
global trend Chapter 1.presentation power pointglobal trend Chapter 1.presentation power point
global trend Chapter 1.presentation power point
 
Biogas Production from Agricultural Feedstock and Energy Crops
Biogas Production from Agricultural Feedstock and Energy CropsBiogas Production from Agricultural Feedstock and Energy Crops
Biogas Production from Agricultural Feedstock and Energy Crops
 
9873940964 Full Enjoy 24/7 Call Girls Near Shangri La’s Eros Hotel, New Delhi
9873940964 Full Enjoy 24/7 Call Girls Near Shangri La’s Eros Hotel, New Delhi9873940964 Full Enjoy 24/7 Call Girls Near Shangri La’s Eros Hotel, New Delhi
9873940964 Full Enjoy 24/7 Call Girls Near Shangri La’s Eros Hotel, New Delhi
 
BIODIVERSITY QUIZ ELIMINATION ROUND.pptx
BIODIVERSITY QUIZ ELIMINATION ROUND.pptxBIODIVERSITY QUIZ ELIMINATION ROUND.pptx
BIODIVERSITY QUIZ ELIMINATION ROUND.pptx
 
原版定制copy澳洲詹姆斯库克大学毕业证JCU毕业证成绩单留信学历认证保障质量
原版定制copy澳洲詹姆斯库克大学毕业证JCU毕业证成绩单留信学历认证保障质量原版定制copy澳洲詹姆斯库克大学毕业证JCU毕业证成绩单留信学历认证保障质量
原版定制copy澳洲詹姆斯库克大学毕业证JCU毕业证成绩单留信学历认证保障质量
 
INSIDER THREAT PREVENTION IN THE US BANKING SYSTEM
INSIDER THREAT PREVENTION IN THE US BANKING SYSTEMINSIDER THREAT PREVENTION IN THE US BANKING SYSTEM
INSIDER THREAT PREVENTION IN THE US BANKING SYSTEM
 
5 Wondrous Places You Should Visit at Least Once in Your Lifetime (1).pdf
5 Wondrous Places You Should Visit at Least Once in Your Lifetime (1).pdf5 Wondrous Places You Should Visit at Least Once in Your Lifetime (1).pdf
5 Wondrous Places You Should Visit at Least Once in Your Lifetime (1).pdf
 
NO1 Certified Rohani Amil In Islamabad Amil Baba in Rawalpindi Kala Jadu Amil...
NO1 Certified Rohani Amil In Islamabad Amil Baba in Rawalpindi Kala Jadu Amil...NO1 Certified Rohani Amil In Islamabad Amil Baba in Rawalpindi Kala Jadu Amil...
NO1 Certified Rohani Amil In Islamabad Amil Baba in Rawalpindi Kala Jadu Amil...
 
التغيرات المناخية وتاثيرها على القطاع الزراعي المصري
التغيرات المناخية وتاثيرها على القطاع الزراعي المصريالتغيرات المناخية وتاثيرها على القطاع الزراعي المصري
التغيرات المناخية وتاثيرها على القطاع الزراعي المصري
 
Gwalior Call Girls 7001305949 WhatsApp Number 24x7 Best Services
Gwalior Call Girls 7001305949 WhatsApp Number 24x7 Best ServicesGwalior Call Girls 7001305949 WhatsApp Number 24x7 Best Services
Gwalior Call Girls 7001305949 WhatsApp Number 24x7 Best Services
 
Available to Promise Oracle R12 ATP.pptx
Available to Promise Oracle R12 ATP.pptxAvailable to Promise Oracle R12 ATP.pptx
Available to Promise Oracle R12 ATP.pptx
 
885MTAMount DMU University Bachelor's Diploma in Education
885MTAMount DMU University Bachelor's Diploma in Education885MTAMount DMU University Bachelor's Diploma in Education
885MTAMount DMU University Bachelor's Diploma in Education
 
PLANTILLAS DE MEMORAMA CIENCIAS NATURALES
PLANTILLAS DE MEMORAMA CIENCIAS NATURALESPLANTILLAS DE MEMORAMA CIENCIAS NATURALES
PLANTILLAS DE MEMORAMA CIENCIAS NATURALES
 
Group 4The Species of the Atlantic Forest.pdf
Group 4The Species of the Atlantic Forest.pdfGroup 4The Species of the Atlantic Forest.pdf
Group 4The Species of the Atlantic Forest.pdf
 
办理德州理工大学毕业证书TTU文凭学位证书
办理德州理工大学毕业证书TTU文凭学位证书办理德州理工大学毕业证书TTU文凭学位证书
办理德州理工大学毕业证书TTU文凭学位证书
 
EARTH DAY Slide show EARTHDAY.ORG is unwavering in our commitment to end plas...
EARTH DAY Slide show EARTHDAY.ORG is unwavering in our commitment to end plas...EARTH DAY Slide show EARTHDAY.ORG is unwavering in our commitment to end plas...
EARTH DAY Slide show EARTHDAY.ORG is unwavering in our commitment to end plas...
 
办理(Victoria毕业证书)维多利亚大学毕业证成绩单原版一比一
办理(Victoria毕业证书)维多利亚大学毕业证成绩单原版一比一办理(Victoria毕业证书)维多利亚大学毕业证成绩单原版一比一
办理(Victoria毕业证书)维多利亚大学毕业证成绩单原版一比一
 
Along the Lakefront, "Menacing Unknown"s
Along the Lakefront, "Menacing Unknown"sAlong the Lakefront, "Menacing Unknown"s
Along the Lakefront, "Menacing Unknown"s
 
Hi FI Call Girl Ahmedabad 7397865700 Independent Call Girls
Hi FI Call Girl Ahmedabad 7397865700 Independent Call GirlsHi FI Call Girl Ahmedabad 7397865700 Independent Call Girls
Hi FI Call Girl Ahmedabad 7397865700 Independent Call Girls
 

X-Series ICPMS User Guide

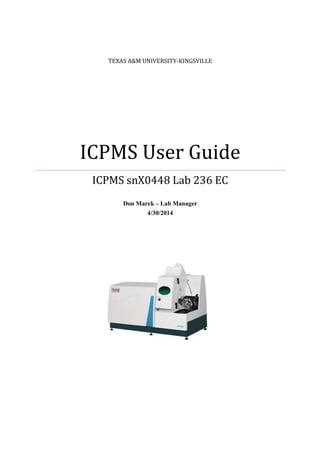
  • 1. TEXAS A&M UNIVERSITY-KINGSVILLE ICPMS User Guide ICPMS snX0448 Lab 236 EC Don Marek – Lab Manager 4/30/2014
  • 2. Basic User Guide for the ICPMS X-Series Lab 236 EC Serial number: X0448 1 Contents Purpose of this User Guide ............................................................................................................. 2 Before Turning on the ICPMS Plasma ........................................................................................... 3 Mixing a 2% to 3% Nitric Acid Solution........................................................................................ 4 Mixing a Tune A or Tune D Standard ............................................................................................ 5 The Liquid Argon Tank .................................................................................................................. 7 Turn on the Argon....................................................................................................................... 7 Some notes about the Liquid Argon Tank .................................................................................. 8 Turning On the Chiller.................................................................................................................. 10 Install Tubing on Peristaltic Pump................................................................................................ 11 Once in Operate Mode.................................................................................................................. 14 No Counts Displayed-What to Check........................................................................................... 16 Other General Tips and Guidelines............................................................................................... 17 Cleaning the Cones with an Ultrasonic Cleaner ........................................................................... 19 Shutting Down the Vacuum Pump for ICP-MS ........................................................................... 21 Problem – Plasma does not Start .................................................................................................. 21 Plasma Lights, but does not Stay on............................................................................................. 22 PlasmaLab cannot Communicate with Instrument ....................................................................... 23 Performance Report before Starting a Sample Analysis............................................................... 25 Removing the Cover from the ICPMS.......................................................................................... 27 Torches – Cleaning and Wear....................................................................................................... 28 Consumables/Estimated Yearly Cost to Operate ICPMS............................................................. 29 References..................................................................................................................................... 30
  • 3. Basic User Guide for the ICPMS X-Series Lab 236 EC Serial number: X0448 2 Purpose of this User Guide It is not possible for Thermo Fisher to know all laboratory users and individual laboratory configurations and procedures, so the purpose of this guide is to supplement the X Series ICPMS Getting Started Guide (143 pages) provided by Thermo Fisher Scientific. Some parts of this guide may refer to specific pages in the manual since the manual already has a good set of pictures and explanation for some aspects of the ICPMS operation or maintenance and there is no need to repeat that here. This guide provides information on preparing the acid solutions and tune solutions with the typical material available in the TAMUK lab inventory. This guide teaches information about the liquid argon tank and its operation. Since the start up guide assumes everything is already working and will all of the time to follow it properly, this guide addresses some of the typical problems that may arise when turning on the plasma or operating the instrument. Where appropriate, the page number in the manual will be referenced. The ICPMS analyzer is an amazing instrument, but will require study and training by those who want to operate it. Due to the number of procedures and combinations and possible situations, not everything will learned in a month or two months, so do not feel bad if it always seems like there is something missed or more to know. Even the writer of this guide learns something different or new every year of using it. When solving a problem, try to remember to check the simple stuff first. Does it have power? Is the physical setup correct? Is anything visibly worn or damaged? Which setting needs to be rechecked to be sure? The problems that occur can be many and various, so there is not a rigid rule book to follow all the time. Always have the mindset to start from the simple and then move up to the more complicated (though it is always more impressive to tell your boss the problem was much more than someone forgot to plug something in correctly or the tubes were connected backwards and that is why no counts were displayed). Using and maintain this equipment exposes one to the risk involved with liquid argon and nitric acid and other acid solutions. Make sure to read the MSDS on these chemicals and know what to do if exposed to them accidently. SAFETY FIRST: It is the student’s responsibility to understand lab safety protocols and review the MSDS of any materials used in the preparation of their experimental research.
  • 4. Basic User Guide for the ICPMS X-Series Lab 236 EC Serial number: X0448 3 Before Turning on the ICPMS Plasma Page 2 of the startup guides provides a couple of pointers before starting. Here are some other critical items to check before turning on the plasma (Operate mode) on the ICPMS: 1. Observe whether the fume hood is functioning. The ICPMS stack is tied into the fume hood system to pull the heat from the plasma and gases generated. If the fume hood is not working, do not start the ICPMS. If unsure, submit a work order with physical plant to determine the status of the fume hood (http://www.tamuk.edu/ppo/Overview%20Pages/Work%20Orders.html) 2. Observe whether the vacuum pump underneath the lab table is on and the Speed is at 1000-Hz. The pump is on 24/7 to protect the detector ($2,000 new) inside the vacuum chamber and keep it ready. One indication that the pump is not on is to check the Analyzer gauge pressure (Ana:) on Plasmalab. Otherwise, if ‘Gauge off’ is displayed, check to make sure the vacuum pump is on. 3. Check that the liquid argon tank with enough argon and pressure (90 to 100-psi) to operate once the valve is open. 4. Chiller is on and temperature set correctly and there is enough water. Also turn on the auto-sampler. 5. The physical sampling system is together (the line from the auto-sampler, make sure tubing in configured in correct directions so sample will enter the chamber and be removed). Make sure that the waste collection bottle will not overfill. 6. Make sure there is enough Tune A and Tune D solution for doing the performance check before running samples. 7. Some DI water for moving liquid through the sampling system while warming the ICPMS. 8. If using the CCT, turn on the He/H cylinder mixture.
  • 5. Basic User Guide for the ICPMS X-Series Lab 236 EC Serial number: X0448 4 Mixing a 2% to 3% Nitric Acid Solution MSDS Nitric Acid: https://us.vwr.com/stibo/hi_res/8923775.pdf This is the basis for all other solutions and sample preparations. This will also be used to rinse the sampling line between samples. To mix a liter (1-L) or so at a time, mix 20-mL for a 2% or 30-mL for a 3% solution of nitric acid and ultra pure DI water. Use a graduated cylinder to measure the amount necessary. Add about ¼ or so of water to the 1-liter container. Add the nitric acid and then add more water. There may be a bit of a heat reaction as the strong acid is diluted. Remember, acid to water. If making more than a liter, use HDPE or Nalgene containers to store the additional amount required. Don’t forget to properly label. ote: Concentrated acids have a tendency to fume, so make sure to work under a fume hood. Once the mixture is diluted, it can be used outside of a fume hood. Also, blue nitrile gloves, goggles, and close toed shows are a must. Figure 1: Materials for nitric acid solution. Pour and measure acid in a graduated cylinder. Use beaker to keep cylinder from falling over. Remember acid to water. Fill flaks with some water, then acid, then to mark with DI water. N
  • 6. Basic User Guide for the ICPMS X-Series Lab 236 EC Serial number: X0448 5 For most of the applications for environmental work, Nitric Acid BDH Aristar Plus, VWR #87003-261 (2.5-L bottle at about $75) is adequate. In some exceptional cases for lower trace analysis, an Omni Trace Ultra Nitric Acid may be necessary, but is also much more expensive. If there are ever any questions about the application, contact Thermo Fisher Scientific and an applications chemist can advise. Mixing a Tune A or Tune D Standard The primary purpose of the Tune A and Tune D standards is to calibrate the ICPMS before analyzing samples. The ICPMS is different from most other analytical instrumentation in that one only uses a specific metal standard to check the functioning of the instrument as opposed to building a calibration curve as would be the case for atomic absorption or a UV-VIS spectrometer. The Tune A is for the daily check, auto-tuning, and mass calibration. Tune D is for calibrating the PC voltage and analog voltage of the detector. Each tune solutions also have various elements, so the solutions can also be used as standard checks when looking for other metals. Materials: Tune A 10 ppm, Tune D 10 ppm, a 1000-mL polypropylene volumetric flask, ultra pure DI water (from blue Barnstead dispenser in Lab 239), an Eppendorf pipette set for 1-mL, 1- mL Eppendorf tip. Figure 2: Materials for mixing Tune A and Tune D solutions. If not used to operating the pipette, practice with some DI water and a 3-digit scale. 1-mL of DI water is 1-g; practice several times to get a feel for the pipette and to make sure it is operating accurately.
  • 7. Basic User Guide for the ICPMS X-Series Lab 236 EC Serial number: X0448 6 Take 1-mL of the 10-ppm Tune A or Tune D with the Eppendorf pipette. Put it inside the 1-Liter volumetric flask. Fill flask to mark with 2% to 3% nitric acid solution. Remember the meniscus. Make sure to date and label the solution. Do not EVER mix the Tune A and Tune D together in the same flask since this is of no practical use. Store the solution in the flask with a cap or in another HDPE or PPE container with a lid. There is no real expiration date, but it is good practice to mix a new solution every 3 to 6 months. It is good to keep some older solution around to test or compare if troubleshooting an issue. Here is the basic calculation for 10-ppb of Tune A or Tune D: How many milliliters of Tune A at 10 mg/L (10, 000-ppb) are needed to prepare 1 L (1000-mL) of 10 ppb Tune A? Ci Vi = Cf Vf (10,000 ppb) Vi = (1000 mL) (10 ppb) After rearranging and dividing out the ppb units, the final result is: Vi = 1 mL ote: Accuracy with the pipette and volumetric mark is of great importance! The Tune A and Tune D need to be at 10-ppb concentration for accurate calibration of the ICPMS. Also, make sure to store the pipette in an upright position. What if it was necessary to prepare 250 mL of 5 ppb Tune A solution starting with the 10-ppb Tune A? Ci Vi = Cf Vf (10 ppb) Vi = (250 mL) (5 ppb) After rearranging, 125 mL of 10 ppb Tune is necessary. Pour 125 mL of Tune A into 250 mL volumetric flask and fill the rest with 1% to 5% nitric acid solution to the fill mark on the flask. Use this formula and procedure for making other concentrations of standard. Note: Refer to the Eppendorf SOP for Pipettes for more information about using and maintaining the Eppendorf pipette. N
  • 8. Basic User Guide for the ICPMS X-Series Lab 236 EC Serial number: X0448 7 The Liquid Argon Tank Turn on the Argon MSDS for Liquid Argon: https://www.mathesongas.com/pdfs/msds/00225009.pdf Turn the Argon gas valve on by turning to the left. Remember: right tight, left loose. The pressure on the secondary lower pressure regulator will need to maintain at ≥85 psi to light the plasma. A setting of 90 psi to 100 psi is good; never set over 100 psi to protect the flow controllers in ICPMS. To check whether the pressure is correct, turn off the argon to the regulator if it is connected. Loosen the nut holding the hose to the regulator to relieve any residual pressure in the regulator; tighten firmly (not crushing!) after releasing gas. Turn the knob to “Decrease” several turns. Turn the gas on again and adjust to the 85 psi or so pressure by turning the knob in the direction of “Increase”. If the tank has adequate pressure, it should be ready for use. Figure 3: Use the side labeled GAS on the liquid argon tank to attach the regulator. Use a CGA 580 adapter.
  • 9. Basic User Guide for the ICPMS X-Series Lab 236 EC Serial number: X0448 8 Some notes about the Liquid Argon Tank Liquid argon is purchased since the ICPMS uses a tremendous amount of gas. The average regular compressed gas cylinder would only last about 8 hours at most. These tanks are basically a large thermos. So, if the liquid is not used, eventually it must slowly heat up and vent to the atmosphere. The tank should be vented by the gas vendor before arrival, but there will be times when it will vent. If the tank was recently received, monitor this for a day or so. If venting too much, this may indicate an issue with the tank. Check with the vendor for more details. Figure 4: Top view of a typical liquid argon tank. The figure above is a diagram of the top view of a liquid argon tank. Use the gas valve to open/close gas supply to ICPMS. Use the pressure builder to build up tank pressure is less than 125 lbs; this also assumes that there is enough argon left in the tank so check the gauge top of tank. Never ever open the liquid valve. The vent valve is typically used to further vent the tank. If in doubt on something, call the tank vendor for further instructions.
  • 10. Basic User Guide for the ICPMS X-Series Lab 236 EC Serial number: X0448 9 After turning off the plasma and returning the ICPMS to vacuum state, it is a good idea to turn off the gas valve on the tank. In the past, the gas line disconnected and a $350 or delivered tank of argon was lost. Due to the laws of thermodynamics, there will always be loss of product. So it is a use it or lose it proposition. Typically, if used two or three times a week, a liquid tank can last up to five weeks. However, always make sure that there appears to be enough argon to run whatever number samples expected. That judgment call will come with experience. Figure 5: Ice build-up on a tank of argon. The hose popped off of the regulator and the valve on the tank was not closed. The argon vented at low pressure for several hours and because of the rapid escape of gas, the ice formed. Always close the argon tank gas valve if not using the ICPMS.
  • 11. Basic User Guide for the ICPMS X-Series Lab 236 EC Serial number: X0448 10 Turning On the Chiller Turn on the chiller. The chiller is set for a water temperature of 20°C. If operating properly, the chiller should reach its target temperature in less than 3 minutes. Otherwise, when trying to ignite the plasma, an error message will appear. Make sure to check the water level before powering and once in a while clean the air filter. Figure 6: The chiller for the ICPMS.
  • 12. Basic User Guide for the ICPMS X-Series Lab 236 EC Serial number: X0448 11 Install Tubing on Peristaltic Pump Sometimes it is necessary to replace the PVC tubing. This tubing must connect to the automated sampler line, the nebulizer, and the line from the misting chamber. The ends of the PVC tubing needs to be softened a bit a with a heat gun ($10 at Harbor Freight) to connect to the teflon tubing from the auto-sampler and nebulizer tubing. Figure 7: Ends of two different diameters of PVC tubing. Soften the ends with heat gun to insert teflon lines that attach to the nebulizer and spray chamber. The goal is insert the other Teflon sampling tubing into the PVC tubing. Figure 8: Use heat gun to soften PVC tubing so teflon lines can be inserted for a complete connection.
  • 13. Basic User Guide for the ICPMS X-Series Lab 236 EC Serial number: X0448 12 After assembling the sample and return lines, place the PVC tubing around the pump rollers. Use the first notch on either side to install new tubing. Expand to the second notch as necessary to tighten the PVC lines. If the PVC tubing is still stretchy after expanding the tautness to the second notch, replace with new tubing. Figure 9: Proper configuration for tubing to be mounted onto peristaltic. Tighten the tubing with screws on top. Make firm, but not too tight. Always start the tubing on the first notch (see location or orange/white and black/white tubing in picture) and move to second notch if more tightening is necessary. Always remember to physically configure the tubing so the peristaltic pump with the clock wise direction of the pump. If the tubing is not fitted correctly, this could be one reason why no counts are displayed when Tune A is fed. Tighten (firm but not too much) the tubing on the peristaltic pump on the ICP-MS. The tubing sections around the pump should be replaced after 40 hours of use. This is a peristaltic pump, so make sure to align the tubing so that the liquid from the samples will uptake by the pump. From the Practical Guide to ICP-MS, page 167: • Manually stretch new tubing before use. • Maintain the proper tension on tubing. • Ensure tubing is placed correctly in channel of the peristaltic pump.
  • 14. Basic User Guide for the ICPMS X-Series Lab 236 EC Serial number: X0448 13 • Periodically check flow of sample delivery-throw away tubing if in doubt. • Replace tubing in there is any sign of wear-do not wait until it breaks. • With a high sample workload, change tubing every day or every other day. • Release pressure on pump when not in use. • Pump and capillary tubing can be a source of contamination. • Pump tubing is a consumable-keep a large supply on hand. Once the samples are run, turn off plasma, loosen tubing from peristaltic pump, turn off the chiller, turn off the argon gas. Leave the desktop computer on and the vacuum pump on. Connect sample tubing from auto-diluter or auto-sampler and check the configuration. Make sure that the tubing connections stay together, otherwise any exposure to air from an unconnected tubing setup will kill the plasma. While warming up the instrument, pay attention to the nebulizer pressure on the status bar; it should be between 1.5 bar to 2.0 bar. Too little pressure and there is leak somewhere; too much and the nebulizer may be plugged and may result in the Teflon fitting popping out of the nebulizer. If running no more samples for the day, flush the lines with DI water, shutdown ICPMS, and relieve the tension on the tubing.
  • 15. Basic User Guide for the ICPMS X-Series Lab 236 EC Serial number: X0448 14 Once in Operate Mode Once the plasma is operating, the next task is to start feeding some DI water into the ICPMS while it is warming up. Go to the ‘Accessories’ panel and feed push the rinse icon. Next, make sure the auto-sampler is on and establish communications by pressing the ‘link’ icon on the Accessory setup and control panel. As the water is fed into in the nebulizer and spray chamber, watch the spray chamber closely and observe the flow of water in the sample line. If the spray chamber is filling with water, pull the bottom nozzle to drain and then reconnect so plasma does not die. Use a towel to soak up the water. Observe closely and try to determine why the chamber is filling with liquid. Check the tightness of the PVC tubing and make sure top clips are firmly in place over the tubes.
  • 16. Basic User Guide for the ICPMS X-Series Lab 236 EC Serial number: X0448 15 Here is a table with some other parameters to watch while operating: Table 1: ICPMS Parameters to watch for troubleshooting and operation. Definition Value If Then Neb nebulizer back pressure ~2 bar Low/High Leak or broken neb/clog Fwd Forward power – minor 1412W Set by software Ref Reflected power from plasma < 5 W High Automatically adjust load and tune Load Rf Power Not zero or 255 Tune Rf power Not zero or 255 Exp Expansion Pressure 2 mbar >2.5 Hole in cone it too big or sample cone is installed wrong. Or vacuum pump Ana Vacuum chamber pressure 2.9 X 10⁻⁷ High Leak somewhere. Check vacuum pump. Consult with tech support. Speed Turbo pump speed 1000-Hz Load For vacuum pump 0.8-1.2A The Load can range from 0 to 255, but should be greater than 90. The Tune value can range from 0 to 255, but should be AROUND 200.
  • 17. Basic User Guide for the ICPMS X-Series Lab 236 EC Serial number: X0448 16 No Counts Displayed-What to Check 1. Make sure the marks are checked for Li, In, and U and enabled. 2. Reset the display under the Tune tab by pressing the ‘play’ button. 3. Observe the peristaltic pump. Is it spinning? Check the speed by going to the Accessory control panel, connect to the pump and make sure the speed is set to 33 RPM. 4. Make sure sample line tubing is secure and fitted in the clock wise direction to feed the sample fluid into the nebulizer. 5. Check the PC and Analogue voltage settings under the Global tab. Make sure the black triangle and square is set to the last known good setting. These settings can be obtained from the last performance report. 6. Turn off the plasma, and make sure the silver grounding screen is touching the metal contact where the torch is mounted. See manual about how to install the torch. 7. Second, if the values are good or setting them does not work, reboot the workstation while turning off the ICPMS computer (green switch on box at left hand rear side under the cover). Turn on the ICPMS computer as the workstation is rebooting. Wait for the desktop to reestablish communications. This can be done while the plasma stays on. 8. In rare cases, the torch output may have melted and is blocking the progress of the sample to the cones. Turn off the plasma, remove the torch assembly, and do a visual check of the output line of the torch. If the sample out is melted, a torch is necessary.
  • 18. Basic User Guide for the ICPMS X-Series Lab 236 EC Serial number: X0448 17 Other General Tips and Guidelines The following is in reference to the tuning, auto tunes, and performance report. Most of this is from the class instruction provided by Thermo Fisher Scientific: 1. Before tuning, doing a performance report, or running samples, run instrument for about 15 to 20 minutes. This allows the electronic and physical aspects to stabilize their temperatures. 2. Once warmed, feed the Tune A solution to the ICPMS. Observe the counts for Li, In, U238. The counts should be at or well over 22,000, 250,000, 400,000 respectively. Parameters can be manually adjusted to achieve better counts. 3. Run a performance report at the beginning; unless there are problems, no need to run again. The PlasmaLab software records every performance report. 4. Auto-tunes are necessary after replacing the cone and torch, but most of the time, only do an auto-tune if it fails the performance reports. 5. Instrument requires a good Tune to acquire a good mass calibration, but not required often. Do retune if torch has been removed/replaced, new cones, or nebulizer. 6. Detector set-up: voltages set by cross calibration; should be done regularly. 7. Must have >400,000 counts for analogue counting to be engaged. Analogue counting will engage automatically if counts are high enough. 8. Never use an atomic absorption or ion chromatography standard for ICP-MS. 9. Calibration check: (2) points are enough; a blank and an upper limit. Further validated by preparing a standard in between those values. 10. Boron, antimony, and molybdenum “stick” to tubing and glass. May require an alkaline solution to wash out effectively. 11. If the elements are unknown, run sample without the internal standards and see what is in the sample. Then adjust or choose the procedure depending upon elements that you are looking for.
  • 19. Basic User Guide for the ICPMS X-Series Lab 236 EC Serial number: X0448 18 12. Pay attention to interferences when setting up experiment. To reduce interferences, choose an isotope that is less abundant. 13. As the argon gas decreases in the tank, Kr (Krypton) does not bail off as fast and that may generate interferences that require a correction for certain analysis (like with arsenic and selenium). 14. If the plasma is flickering, this may indicate the venting air flow is too high. Call physical plant to have Siemens adjust the flow rate within an acceptable range. Flow should bet set at around 9 m/s. 15. Sample preparation: Filter, filter, filter. All samples whether from surface water, groundwater, microwave digestion, lab experiment, should be filtered through a 0.45µ filter. There are different ways to do this, but filtration is critical so as not to clog the nebulizer ($550 to replace).
  • 20. Basic User Guide for the ICPMS X-Series Lab 236 EC Serial number: X0448 19 Cleaning the Cones with an Ultrasonic Cleaner After some hours of sample analysis, the cones at the entry point of mass spectrometer will become dirty. arning: Remember that these are nickel metal cones. DO NOT clean with an acid or base. DI water only or a light mixture of Micro-90 soap will suffice! Follow the instructions in the manual for removing the cones from the ICPMS. See page 118 of the X Series ICPMS Getting Started Guide. Fill the ultrasonic unit pictured below with DI water to about an 1 inch to 1.5 inches of the top. Find a small beaker to put the cones in with some DI water filling the beaker. Do each cone separately for up to 15 minutes. Five and ten minute can also be enough depending upon the dirtiness of the cones. Rinse the cones a couple of times with DI water while in the beaker. Try to minimize contact with the cones unless wearing gloves. The cones need to be dried and this can be either air drying or with a heat gun. Another quick way is to rinse the cones with alcohol and air dry. Set the cones out to dry. After drying, reinstall the cones. Figure 10: An ultrasonic cleaner. W
  • 21. Basic User Guide for the ICPMS X-Series Lab 236 EC Serial number: X0448 20 Figure 11: A small beaker filled with DI water to cover the cones. Fill some DI water around the beakers before sonicating. Sonicate for about 5 to 10 minutes. This can vary depending upon dirtiness of the cones.
  • 22. Basic User Guide for the ICPMS X-Series Lab 236 EC Serial number: X0448 21 Shutting Down the Vacuum Pump for ICP-MS There are times when it is necessary to totally shutdown the ICP-MS. The only acceptable reason is when maintenance is required on the vacuum pump like changing the vacuum pump oil or to replace the detector that is located inside the vacuum chamber. Another acceptable time is if a known power outage to the building is scheduled. After the maintenance is completed or the power is back on, return the pump to a vacuum state. When restarting the vacuum pump, this message will appear: Unless a new detector has been replaced, click ‘NO’ and continue on as usual. Problem – Plasma does not Start On occasion, there will be problems igniting the plasma. The errors displayed by Plasma-lab are at times not necessarily directly related to the problem. First, check that the gas is at the required 90-lbs or so. Remove the air pipe from the ICP-MS and check whether there is any flow or suction through the air pipe. Make sure the chiller is at operating temperature. Check the tubing connected to the nebulizer and make sure there are no leaks. • It is possible under certain circumstances, for the plasma to not light because the cone hole is too big. The increased hole size will not allow the plasma to light because the
  • 23. Basic User Guide for the ICPMS X-Series Lab 236 EC Serial number: X0448 22 proper vacuum is not obtainable. Examine the cone for wear and replace with another and see what happens. • Pages 130 to 131 from the X Series ICP-MS Getting Started Guide startup guide has a flowchart for troubleshooting plasma start issues. Plasma Lights, but does not Stay on Sometimes the plasma will run for a few minutes and then turn off. First, make sure that all the tubing to the nebulizer and from pump is connected correctly. Any substantial amount of air will interfere with the plasma staying on for a period of time. • Check to make sure that the silver screen is touching the grounding pin on the Teflon torch holder (inside the cage). • Check the Event Log under the instrument guy icon (the person wearing a lab coat) to see what errors may have occurred. Recheck tank pressure and status. • Did the spray chamber fill with too much liquid? If so, the extra liquid will get sucked into the torch assembly which makes it damp. If that is the case, the torch needs to be taken out, dried with a blow dryer or heat gun, and reinstalled. • The black tubes carrying argon lines to the nebulizer and the torch assembly have plug together connectors. Over time, the metal pieces cut into the black tubes thus causing a small leak and air is always the enemy of the plasma. Disconnect the tubes, cut a 1/8” piece of the constricted portion and re-attach. Sometimes, after several attempts, the problem will work itself out and the plasma will stay on for the duration of the available argon or sampling run.
  • 24. Basic User Guide for the ICPMS X-Series Lab 236 EC Serial number: X0448 23 PlasmaLab cannot Communicate with Instrument Sometimes the communication fails between the PC and the ICPMS. The ICPMS has its own low end PC inside of it. The purpose of the desk PC is to record errors and store data from the sample analysis. If rebooting the computer, the following error will occur when starting Plasmalab software: The message appears because Plasmalab services (services is a program that is always running in the background to maintain constant communications with ICPMS) has not connected to the ICPMS computer. To see if this message appears, right the “MS” icon at the lower right hand side and click “Open Service Window”. This message means that there is no contact between the PC and the ICPMS's computer. Check the following: 1. Make sure that the serial cable is connected to COM1 on the PC and to the ICPMS. 2. Make sure the serial port is enables in Windows by going to 'System->Device Manager- Ports'. Since TAMUK uses McAfee virus scanner, some versions have been known to prevent Plasmalab from working.
  • 25. Basic User Guide for the ICPMS X-Series Lab 236 EC Serial number: X0448 24 If communication is established between the ICPMS computer and desktop, this message will appear under the “MS” icon and “Open Service Window”. The time stamp followed by “Checking for modules” followed by another time stamp and the words “Idle” should appear. Figure 12: Communication between ICPMS and workstation is successful. Note: If the desktop and ICPMS computer have not been rebooted for some time, it is a good idea to reboot both computers. Remove the instrument cover to turn off the ICPMS computer (green power switch on box at upper left). While doing that, reboot the workstation. The “End Program” message will pop-up for the Plasmalab services. End the program, restart, and log-in again to the workstation. Turn on the ICPMS computer while the “MS” icon (lower left of desktop) will reappear after a couple minutes. This reboot procedure can be done while the plasma is on (ICPMS in operate mode).
  • 26. Basic User Guide for the ICPMS X-Series Lab 236 EC Serial number: X0448 25 Performance Report before Starting a Sample Analysis A daily performance check is a necessary before running an experiment. Before running a performance check, have the plasma operating for at least 15 to 20 minutes. Next, go to the “Configurations” tab and select the following: Figure 13: Screen under Configurations Tab. Under “Configurations”, select 'X Series Default'. Under 'Available Accessories and Devices', make sure the Cetac 500 is selected and 'Peri pump' is checked as well; once set these are defaults though and it is usually not necessary to change. Under “Instrument settings”, select the last known good '2. Xi + screen' parameters. In this example, one would select the ‘4/24/2009 2:01:33PM Autotune’. Next, the Tune A solution must be fed into the ICPMS. One way is to go ahead and begin feeding the solution since it may be necessary to do an auto-tune or other functions more than once to obtain a good performance report. Select the accessory control panel icon and select the Autosampler tab. Connect to the auto-sampler and feed the Tune A solution. Use the following screen to connect and set which rack number the solution is fed.
  • 27. Basic User Guide for the ICPMS X-Series Lab 236 EC Serial number: X0448 26 Remember that the physical column for the larger sample tubes on the auto-sampler is Rack 0. The rest use a 5 X 12 configuration. Use the 17 X 100-mm disposable test tubes for samples. Also remember that the laboratory ventilation system does have dust in the air, so make sure to cover the sample tubes with Parafilm to prevent contamination. If using the CCT, always turn on the gas cylinder mix and purge the chamber before running a performance report for the CCT. Remember that the default report must pass before doing the CCT.
  • 28. Basic User Guide for the ICPMS X-Series Lab 236 EC Serial number: X0448 27 Removing the Cover from the ICPMS Sometimes it is necessary to remove the cover from the ICP-MS to access the circuit breakers, vacuum cage, or vacuum chamber. If turning off the breakers to reset the instrument, leave them off for at least 30 seconds before turning back on. This should allow for most of the electronics to discharge. The breaker to the far right says “Electronics Embedded PC Rotary Pump Turbo Pump”. This breaker also controls the roughing pump on sitting on the floor beneath the table. If it does not come back on after resetting the breaker, press the GRAY button on the board just to the right. The RED button stops the roughing pump. Sometimes, this may require up to three or more attempts. Open Plasmalab and watch the ‘Hertz:’ display; it should reach 1000-Hz in about five minutes. Figure 14: Breaker controls for ICPMS.
  • 29. Basic User Guide for the ICPMS X-Series Lab 236 EC Serial number: X0448 28 Torches – Cleaning and Wear The torch assembly consists of the torch, the silver grounding screen, and the bonnet to protect the screen from the intense heat of the plasma. This item is a consumable and should last about 6 months. It is good practice when not using the ICPMS to soak the glass portions in higher percentage of nitric acid. Rinse and dry thoroughly before replacing. Figure 15: Torch on left from plasma arcing. Torch on right from wear and tear. The torch on the left is from a ‘plasma arc’. For whatever reason, the electrical energy of the plasma arcs like a lightning bolt and fuses the assembly together. This is why it is necessary to keep a spare. The one on right is from use over a long period of time, but at some point, it must be replaced. If the screen is an issue, sometimes it can rehabilitated by lightly sanding the rough edges/
  • 30. Basic User Guide for the ICPMS X-Series Lab 236 EC Serial number: X0448 29 Consumables/Estimated Yearly Cost to Operate ICPMS Here is a table showing some of the typical consumable for the ICPMS during the course of a year in this lab. The detector should last at least two years but was included to show it is an important consumable. A couple packages of PVC tubing should last for more than a year. The liquid argon cost assumes that a minimum of six tanks may be consumed during the year. The prices may change for any of the listed items of course, but this is a close estimate. The items that have a quantity of two are consumables that one should have more than on hand at all times. This is so these consumables can be swapped to isolate some of the problems that may arise while operating. Note also these all have to do with the sampling system. ITEM QTY EACH COST Maintenance contract 1 $19,000 $19,000 Liquid Argon Tank 6 $350 $2,100 Liquid Argon Tank Rental (about $2/day 35 days) 6 $70 $420 Tune A Standard SCP Science (500-mL) 1 $141 $141 Tune D Standard SCP Science (500-mL) 1 $330 $330 Ni Skimmer Cone 2 $323 $646 Ni Sample Cone 2 $287 $574 Torch Screen 2 $163 $326 Torch Bonnet 2 $50 $100 Standard Glass Nebulizer Kit 2 $570 $1,140 Detector 1 $1,825 $1,825 Pure Nitric Acid 2 $75 $150 PVC Tubing 1 $80 $80 TOTAL $26,832 The maintenance contract covers a number of items. If the chiller, vacuum pump, auto-sampler fail, they are replaced. Thermo may request that the broken item be shipped back to them and they pay for return shipping. The contract covers the many internals to the ICPMS like slide valves, penning gauge, RF generator, various boards, peristaltic pump, and too much else to list. In some cases, a service engineer may come to replace some of these items. The contract also includes a yearly preventive maintenance visit where the lenses are cleaned, the instrument inspected to make sure specs are met, and some parts replaced.
  • 31. Basic User Guide for the ICPMS X-Series Lab 236 EC Serial number: X0448 30 References Thermo Electron Corporation, X-Series ICP-MS Getting Started Guide, Issue 1.3 : January 2004, Ref. No. : S419MA Thermo Electron Corporation, X-Series ICP-MS Training Course Lectures, Issue 1.1: Nov 2002, Part No. 3601078 Eppendorf, Eppendorf SOP, Standard Operating Procedure for Pipettes Long, S.E. METHOD 200.8 : DETERMINATION OF TRACE ELEMENTS IN WATERS AND WASTES BY INDUCTIVELY COUPLED PLASMA - MASS SPECTROMETRY, Revision 5.4, EMMCC Version. http://water.epa.gov/scitech/methods/cwa/bioindicators/upload/2007_07_10_methods_method_2 00_8.pdf Thermo Scientific, NESLAB ThermoFlex Recirculating Chillers, Installation, Operation, Basic Maintenance. Csuros, Maria. 1997. Environmental Sampling and Analysis: Lab Manual, ISBN-13:978- 1566701785.