
Empfohlen
Weitere ähnliche Inhalte
Was ist angesagt?
Was ist angesagt? (20)
Andere mochten auch
Andere mochten auch (20)
Ähnlich wie Computer graphics
Ähnlich wie Computer graphics (20)
Computer graphics
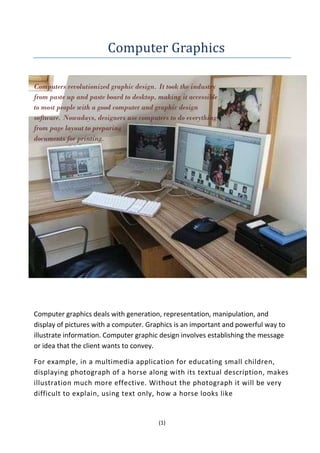
- 1. Computer Graphics Computers revolutionized graphic design. It took the industry from paste up and paste board to desktop, making it accessible to most people with a good computer and graphic design software. Nowadays, designers use computers to do everything from page layout to preparing documents for printing. Computer graphics deals with generation, representation, manipulation, and display of pictures with a computer. Graphics is an important and powerful way to illustrate information. Computer graphic design involves establishing the message or idea that the client wants to convey. For example, in a multimedia application for educating small children, displaying photograph of a horse along with its textual description, makes illustration much more effective. Without the photograph it will be very difficult to explain, using text only, how a horse looks like (1)
- 2. Classification of computer graphics- Computer graphics Type of Pictorial Kinds of Picture Type of object interaction representation Realistic 2D Controllable Image drawing Non- Symbolic 3D Line drawing controllable Here we classify computer graphics in various fields but basically it divided into two main parts vector graphics and raster graphics. Vector graphics- Vector graphics depends on line drawing. Raster graphics – Raster graphics depends on pixels (the smallest addressable screen elements). Services of computer graphics – Scan conversion and transformation both are the basic services of Computer graphics. Scan conversion – Converting the geometric definition of a primitive form into a set of pixels that make up the primitive in the image space. This conversion task is generally referred to as scan conversion or rasterization. Figure 1: Scan conversion system (2)
- 3. Scan converting a line: Mathematical Representation of a line A line segment is defined by its two endpoints and the line equation Y = mx + b, where m is the slope and b is the intercept Figure 2 : Defining a line Transformation- Simulated spatial manipulation is referred as Transformation. Basic transformations are- 1. Translation 4. Reflection 2. Rotation 5. Shearing 3. Scaling (3)
- 4. 1. Translation- o Displacement of an object in a given distance and direction from its original position. o Rigid body transformation that moves object without deformation o Initial Position point P (x, y) o The new point P’ (x’, y’) where x’ = x + tx y’ = y + ty tx and ty is the displacement in x and y respectively. The translation pair (tx, ty) is called a translation vector or shift vector. Matrix representation 2. Rotation- Rotation is applied to an object by repositioning it along a circular path in the xy plane. To generate a rotation, we specify Rotation angle θ Pivot point ( xr , yr) Positive values of θ for counterclockwise rotation. Negative values of θ for clockwise rotation. Figure 3: 2 D rotation (4)
- 5. 3. Scaling- Scaling alters the size of an object. Operation can be carried out by multiplying each of its components by a scalar. Uniform scaling means this scalar is the same for all components and non-uniform scaling means different scalars per component. Figure4: Uniform scaling Figure 5: Non-uniform scale 4. Reflection- A reflection is a transformation that produces a mirror image of an object. 5. Shearing- A transformation that distorts the shape of an object such that the transformed object appears as if the object were composed of internal layers that had been caused to slide over each other. Shear relative to the x-axis Shear related to the y-axis (5)
- 6. Graphics Algorithms Line drawing algorithms: Slope-Intercept method Digital Differential (DDA) Algorithm Bresenham’s Line Algorithm Slope-Intercept method- An algorithm to draw a line using the slope- intercept methods (slope is between 0o to 45o) 1. Compute dx = x2-x1 dy = y2-y1 m = dy/dx b = y1-m*x1 2. If dx < 0 x = x2, y = y2 and xend =x1 3. If dx > 0 x=x1, y=y1 and xend = x2 4. If x< xend, stop 5. Plot a point at (x, y) x = x+1 Y=mx+b 6. Go to step 4 Digital Differential (DDA) Algorithm- It is an Incremental scan-conversion method which is faster than the direct use of the line equation; however, a floating point operation is still required. The line drifts away from the original line when the line is relatively long. An algorithm to draw a line using the DDA method: 1. Compute dx = x2-x1 dy = y2-y1 2. If abs(dx) > abs(dy) then steps = abs(dx) 3. Else steps = abs(dy) (6)
- 7. 4. Plot a point at (x, y) 5. xinc = dx / steps; 6. yinc = dy/steps; 7. x = x1 and y = y1 8. Plot a point at (x, y) 9. k=1 10. if k = steps , stop 11. x = x +xinc 12. y = y + yinc 13. Plot a point at (x, y) 14. k = k+1 15. Go to step 7 Bresenham’s line algorithm- It is highly efficient incremental method and produces mathematically correct results using simple calculations. An algorithm to draw a line using the Bresenham’s method (slope is between 0o to 45o) 1. Compute dx = x2-x1 dy = y2-y1 inc1 = 2(dy-dx) Inc2 = 2 * dy d = inc1 -dx 2. If dx < 0 x = x2, y = y2 and xend =x1 3. If dx > 0 x=x1, y=y1 and xend = x2 4. Plot a point at (x, y) 5. If x= xend, stop 6. if d < 0 then d= d+inc1 7. If d>=0 then d= d+ inc2 y = y+1 8. x = x+1 9. Plot a point at (x, y) 10. Go to step 5 (7)
- 8. Bresenham’s circle algorithm: This algorithm is used to plot the circle efficiently. It avoids the use of trigonometric functions and power functions. An algorithm to draw a circle using the Bresenham’s method: 1. Set (h,k)= coordinates of circle center, x=0, y= r and the decision parameter d= 3 –2*r 2. If x>y, stop 3. Plot the eight points, with respect to the current coordinates (x,y) Plot ( x + h, y + k) Plot (-x + h, -y + k) Plot (y + h, x + k) Plot ( -y + h, -x + k) Plot ( -y + h, x + k) Plot (y + h, -x + k) Plot (-x + h, y + k) Plot (x + h, -y + k) 4. If d < 0 then d =d d+4*x + 6 and x = x + 1 5. If d >=0 then d= d + 4*(x-y) + 10, x = x + 1 and y = y-1 6. Go to step 2 (8)
- 9. Now a day’s computer graphics is going up with a very high speed in each and every field such as gaming, designing of projects and in education also. In all these jobs we also use computer graphic cards. Computer Graphics Cards- With the help of this card, we can experience better gaming quality. Moreover, with the help of this card, we can easily play multi-players game online. In fact, many people convert their processor into home theatre with the help video card. This card can improve the quality of our video. In fact, some processor comes with inbuilt graphics cards and video card. Figure 6: Computer graphic card Utilities of computer graphics – Computer graphic design uses computers to create visual communication images. So we use computer graphics in many ways. Some are following- Page Layout- According to Trade-Schools.net, graphic designers use programs like Adobe InDesign to lay out the pages of newsletters, booklets, books, annual reports, newspapers and other documents that require page layout. Web Design- Web page design is an important design skill in modern design cirlces, and computers and computer programs like Dreamweaver are used by graphic design professionals. (9)
- 10. Graphic utilities in MS Word – There are two basic types of graphics that we can use to enhance our Microsoft Word documents: drawing objects and pictures. Drawing objects include auto shapes, diagrams, curves, lines, and WordArt drawing objects. These objects are part of our Word document. Use the Drawing toolbar to change and enhance these objects with colors, patterns, borders, and other effects. Figure7: Examples of Auto shapes Pictures are graphics that were created from another file. They include bitmaps, scanned pictures and photographs, and clip art. We can change and enhance pictures by using the options on the Picture toolbar and a limited number of options on the Drawing toolbar. In some cases, we must ungroup and convert a picture to a drawing object before we can use the Drawing toolbar options. Figure8: Examples of clip art and imported images (10)
- 11. Software used for computer graphics- There are so many software such as Adobe Page maker, Adobe Photoshop, Coral draw, AutoCAD, and Swissmax etc ,we use in graphic designing. Introduction to Adobe Page Maker- Adobe PageMaker is computer software used for making professional quality publications including newsletters, brochures and other paper projects. PageMaker, produced by Adobe Systems Incorporated, is a publication development tool used for creating print or electronic reading material. PageMaker's features enable us to create publications using either formatted templates or original designs. PageMaker integrates with other software and printers. Parts of Adobe PageMaker- The Working Window The Working Window contains many parts that work together to make creating a document easier. o Rulers - Two rulers running vertically and horizontally along the screen can be set to several measurements: points, inches, decimal, millimeters, and so on. o Pasteboard - The pasteboard is the background behind the In design document. It is useful for temporarily placing text and graphic elements when deciding where to place items. Items on the pasteboard will not print. (11)
- 12. o Navigation Buttons - The navigation buttons allow us to move between pages one-by-one or to the first or last page in our document. o Page Pull-Down List - This list allows us to jump to a specific page in our document, including the document master pages. o Margins - The colored lines represent the page margins. All the text and graphics are generally placed within the page margins. o Page Boundaries - The page boundaries represent the edges of the paper. Any items outside or overlapping the page boundaries will not print. The Menu Bar What we will find: o File: New, Open, Close, Save, Save as, Save a Copy, Export, Document setup, Page setup, Print. o Edit: Undo, redo, Cut, Copy, Paste, Clear, Color settings. o Layout: Margins, Ruler Guides, Table of Contents, Styles. o Type: Font, Size, Blocks, Wrap, Find, Check Spelling. o Object: Transform, Arrange, Group, Lock, Flatten, Slice, Blend, Clipping Mask, Crop Marks. o Table: Insert, Options, Delete, Merge Cells. o View: Zoom, Fit in window, Actual size, Rulers, Grids. o Window: Different windows. o Help: In Design help. The Tools Window If the toolbox does not appear on the screen when we open Adobe in Design for the first time we will have to open it from the menu bar. To do this: (12)
- 13. o Select Window from the menu bar. o From the dropdown menu select Tools. o The toolbox will then appear on the left hand side of the screen. The Tools Selection Tool: Selects entire paths, objects, and groups by selecting any spot on them. Direct-Selection Tool: Selects individual anchor points or segments on a path. Pen Tool: Creates straight lines and smooth, flowing curves with great precision. Eyedropper Tool: Copy appearance and color attributes from any object. Pencil Tool: Draw open and closed paths as if you were drawing with a pencil on paper. Type Tool: Creates horizontal or vertical type anywhere in a file. Scissors Tool: Split an open path into two paths and split a closed path so that it becomes one or more open paths. Free-Transforming Tool: Distorts objects into different sizes and shapes. Rotate Tool: Rotates objects around a fixed point that you designate. Zoom Tools: Magnifies or reduces the display of an area in the file to 64 time’s actual size. Shear Tool: Slants or skews object along its horizontal axis, and can also rotate both axes. Scale Tool: Enlarges or reduces object horizontally, vertically The Palettes Palettes contain different sets of options that allow us to format our documents. (13)
- 14. Formatting Color We can apply color to objects and text by using the Colors palette or the Swatches palette. Color palette Swatches palette How to Use PageMaker 7.0 With Adobe PageMaker, you can create professional-looking publications for print and the web, or convert them to PDF (Portable Document Format) from within the PageMaker application. PageMaker has been around since 1985 when it was known as Aldus PageMaker. Instructions 1. Document Setup o Open the PageMaker application and set up your document properties. o Set your page orientation, margins and whether you want the pages to be facing and/or double-sided. o Type in the number of pages for your publication if you want to add multiple pages to the document in this step, or leave it at 1 to start with just one page. Additional pages can be added later. o Click OK to start working with your document. (14)
- 15. 2. Add Text and Graphics o Click the "File" menu, then the "Place" command to add text or graphic files to your document. Text will appear in boxes you can move around with your mouse by grabbing the tab at the top. o Click and drag the corners of the text box or the graphic to expand or reduce how much space it takes on the page. Hold down the "Shift" key to shrink or enlarge the graphic while keeping the proportions even. o Click on the top ruler and drag down to create a guide line you can use to line up objects. Click and drag from the side ruler to create a vertical guide line. o Click the text ("T") tool in the toolbox on the left, then click on the page to enter text directly into PageMaker. o Click and drag to select the text and use the "Control Palette" at the bottom of the screen to adjust the font, size or other text properties. o Click the "Layout" menu, then "Column Guides" to divide the page into multiple columns. 3. Add Pages, Master Page Elements and Page Numbers o Click the Layout menu, then "Insert Pages" to add more pages to the document. The pages can be inserted before or after the current pages you are on. o Click the thumbnail icons down the bottom left of the screen to switch to other pages. o Click the "L" and "R" thumbnail icons to access the "Master Pages" and add elements you want to appear on all left-facing pages or all right- facing pages. o Click the text tool and click on the "L" or "R" pages, then press the "Command+Option+p" keys (Macintosh) or "Ctrl+Alt+p" keys (Windows) to insert a page number in the text box. An LM or RM place marker will indicate the page number position on the master page. The page numbers display in the main document only. 4. Save, Print and Export o Click the "File" menu, then the "Save" command to save your work. o Use the "Print" command under the "File" menu to print your document. o Use the "Export" command under the "File" menu to create an Adobe PDF file from the document. (15)
- 16. Features of Adobe PageMaker- The latest version, Adobe PageMaker 7.0, was noted by PC Magazine in 2001 for adding the data-merge feature. Users can import data from other sources, such as spreadsheets and databases, into a form. This feature is helpful for mail merges. The ability to work with portable digital format (PDF) files also creates possibilities for users who need to perform electronic publishing. Professional quality, quick layout, compatibility, wrapping also are the very good features of Adobe Page Maker. For example, a business can publish a form on its website that can be printed in high quality by any Internet user. (16)