

Empfohlen
Weitere ähnliche Inhalte
Was ist angesagt?
Was ist angesagt? (20)
Andere mochten auch
Andere mochten auch (16)
Ähnlich wie Enrutamiento en solaris 10
Ähnlich wie Enrutamiento en solaris 10 (20)
Kürzlich hochgeladen
Kürzlich hochgeladen (20)
Enrutamiento en solaris 10
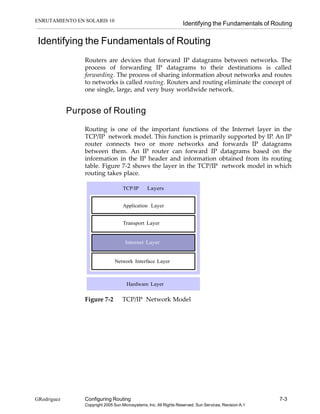
- 1. ENRUTAMIENTO EN SOLARIS 10 Identifying the Fundamentals of Routing Identifying the Fundamentals of Routing Routers are devices that forward IP datagrams between networks. The process of forwarding IP datagrams to their destinations is called forwarding. The process of sharing information about networks and routes to networks is called routing. Routers and routing eliminate the concept of one single, large, and very busy worldwide network. Purpose of Routing Routing is one of the important functions of the Internet layer in the TCP/IP network model. This function is primarily supported by IP. An IP router connects two or more networks and forwards IP datagrams between them. An IP router can forward IP datagrams based on the information in the IP header and information obtained from its routing table. Figure 7-2 shows the layer in the TCP/IP network model in which routing takes place. TCP/IP Layers Application Layer Transport Layer Internet Layer Network Interface Layer Hardware Layer Figure 7-2 TCP/IP Network Model GRodriguez Configuring Routing 7-3 Copyright 2005 Sun Microsystems, Inc. All Rights Reserved. Sun Services, Revision A.1
- 2. Identifying the Fundamentals of Routing Types of Routes Routes can be dividing in to two types: direct routes and indirect routes. A direct route is a route in which the destination system is on the same local network as the source system. The source system can send the IP datagram to the destination system without any involvement from another system. This activity could be thought of as direct delivery of a datagram because no routers are required to complete the transaction. An indirect route is a route in which the destination system is not on the same local network as the source system. The IP datagram is sent through one or more routers or gateways on its way to the destination. Because the delivery of the datagram is not direct and other systems are involved in the delivery, this is called an indirect route. Note – A router connects two networks running the same protocol stack. A gateway connects two networks running different protocol stacks. 7-4 Network Administration for the Solaris™ 10 Operating System Copyright 2005 Sun Microsystems, Inc. All Rights Reserved. Sun Services, Revision A.1
- 3. Identifying the Fundamentals of Routing Figure 7-3 shows an example of direct and indirect routes. The sys11 system has a direct route to the sys13 system and an indirect route to the sys24 system through the sys21 router. 192.168.1.0 192.168.30.0 192.168.4.0 sys11 instructor sys12 sys21 sys13 sys24 Direct Route Indirect Route Figure 7-3 Direct and Indirect Routes Configuring Routing 7-5 Copyright 2005 Sun Microsystems, Inc. All Rights Reserved. Sun Services, Revision A.1
- 4. Introducing the Routing Table Introducing the Routing Table The Solaris OS kernel uses a random access memory-based (RAM-based) table, called the routing table, to store information needed to deliver IP datagrams to their destinations. This table is populated with either static or dynamic entries. Static Routes Static routes are permanent entries in the routing table. Static routes can be removed through manual intervention only. The most common static entries are the direct routes that a system creates to its local networks. The ifconfig command updates the routing table with static entries for networks that are directly connected to the local network interfaces when an interface is configured as up. Therefore, even in single-user mode, a system can route directly to its local network or networks because the interfaces are initialized by the ifconfig command. Static routes can also be added to your system’s routing table manually by using the /etc/defaultrouter file or by using entries placed in the /etc/gateways file. The /etc/defaultrouter file defines one or more static default routes for a system. A default route defines the router to use for all destinations that do not have an explicit routing table entry. The /etc/gateways file is used to define static indirect routes to networks and hosts. 7-6 Network Administration for the Solaris™ 10 Operating System Copyright 2005 Sun Microsystems, Inc. All Rights Reserved. Sun Services, Revision A.1
- 5. Introducing the Routing Table Dynamic Routes Dynamic routes are added to or removed from the routing table by processes, such as the in.routed daemons. When the routing table is updated with information about other reachable networks, the router can forward or deliver datagrams to these networks. The svc:/network/initial SMF service enables routing. Routing in the Solaris 10 OS is implemented by the in.routed daemon. The in.routed daemon implements three routing protocols: ● Routing Information Protocol version 1 (RIPv1) ● Routing Information Protocol version 2 (RIPv2) ● ICMP Router Discovery Protocol Routers advertise the networks that they know about. Other hosts and routers listen to these periodic announcements and update their routing table with the most current and correct information. Only those entries calculated to be the best paths to a network destination remain in the routing table. Configuring Routing 7-7 Copyright 2005 Sun Microsystems, Inc. All Rights Reserved. Sun Services, Revision A.1
- 6. Introducing Routing Protocol Types Introducing Routing Protocol Types A single routing protocol cannot efficiently handle all situations because networks can be connected in many different ways. As a result, different protocols were developed to manage routing in different areas of the Internet. Autonomous Systems An autonomous system (AS), as shown in Figure 7-4, is a collection of networks and routers under a single administrative control. This broad definition was incorporated into the Internet in an attempt to reduce excessively large routing tables. AS AS AS Figure 7-4 Autonomous Systems An autonomous system number is a unique 16-bit address that is assigned by the Internet Corporation for Assigned Names and Numbers (ICANN). The Internet can be considered to be a set of autonomous systems that are connected together. 7-8 Network Administration for the Solaris™ 10 Operating System Copyright 2005 Sun Microsystems, Inc. All Rights Reserved. Sun Services, Revision A.1
- 7. Introducing Routing Protocol Types Interior Gateway Protocols Routing within an AS is managed by an Interior Gateway Protocol (IGP). IGPs manage the sharing of routing information between networks in the AS, and are also responsible for sharing information about any external routes that the gateways (the routers which connect the AS to the rest of the Internet) might be advertising to the networks in the AS. Figure 7-5 shows how IGPs are used in networks. IGP AS IGP AS AS IGP Figure 7-5 Use of IGPs in Networks Many routing protocols are designed to pass routing information within an autonomous system. Two popular protocols are RIP and the Open Shortest Path First (OSPF) Protocol. RIP is a distance-vector protocol that exchanges route information between IP routers. Distance-vector algorithms obtain their name from the fact that they compute the least-cost path by using information that is exchanged with other routers that describes reachable networks with their distances, in the form of hop counts. There are two versions of RIP: RIPv1 and RIPv2. Configuring Routing 7-9 Copyright 2005 Sun Microsystems, Inc. All Rights Reserved. Sun Services, Revision A.1
- 8. Introducing Routing Protocol Types OSPF is a link-state protocol. OSPF maintains a map of the network topology instead of computing route paths that are based on distance vectors in the way that RIP computes the route paths. OSPF provides a view of the entire network and provides the shortest path choices on routes. The map on each OSPF router is updated regularly. Exterior Gateway Protocols An Exterior Gateway Protocol (EGP) is a routing protocol used to forward packets between autonomous systems. EGPs are used between organizations or sites, for example in a large WAN, such as the Internet or a large corporation’s intranet. Figure 7-6 shows the role of EGPs in Internet routing. AS EGP EGP EGP AS AS Figure 7-6 Role of EGPs in Internet Routing EGP and the Border Gateway Protocol (BGP) are the two principal protocols that exchange routing information among autonomous systems. 7- Network Administration for the Solaris™ 10 Operating System 10 Copyright 2005 Sun Microsystems, Inc. All Rights Reserved. Sun Services, Revision A.1
- 9. Introducing Routing Protocol Types EGP was developed in the early 1980s. The concept of an autonomous system developed out of the research and development of EGP. BGP was developed in the mid 1990s to replace EGP. BGP replaces the distance-vector algorithm of EGP with a path-vector algorithm. The path vector that is implemented by BGP causes the routing information to include a complete path (all autonomous system numbers) from the source to the destination. This eliminates the possibility of looping problems that might arise from complex network topologies, such as the Internet. A loop is detected by BGP when the path it receives has an autonomous system listed twice. If this occurs, BGP generates an error condition. Configuring Routing 7- Copyright 2005 Sun Microsystems, Inc. All Rights Reserved. Sun Services, Revision A.1 11
- 10. Working With the Routing Table Working With the Routing Table A system’s routing table is used to store routing information for the system. The routing table is referenced when a path to another computer is required. The routing table is often interrogated when you troubleshoot connectivity issues. Displaying the Routing Table To display the contents of a system’s routing table without interpreting the names of the systems, use the netstat command with the -r and -n options. The -r option causes the routing table to be displayed. The -n option causes the IP addresses to be displayed instead of resolving them to names. For example: # netstat -rn Routing Table: IPv4 Destination Gateway Flags Ref Use Interface -------------------- -------------------- ----- ----- ------ --------- 192.168.1.0 192.168.1.1 U 1 51 hme0 192.168.30.0 192.168.30.31 U 1 54 qfe0 224.0.0.0 192.168.1.1 U 1 0 hme0 127.0.0.1 127.0.0.1 UH 37 132 lo0 # 7- Network Administration for the Solaris™ 10 Operating System 12 Copyright 2005 Sun Microsystems, Inc. All Rights Reserved. Sun Services, Revision A.1
- 11. Working With the Routing Table Introducing Routing Table Information Table 7-1 describes the output from the netstat -rn command. Table 7-1 Routing Table Entries Field Description Destination The destination network or host address. This entry can also contain the keyword default to represent a default route. Gateway The system that delivers or forwards the datagram. Flags The status of this route. This field uses the following flags: ● U – The interface is up. ● H – Host route. The destination is a system, not a network. ● G – The delivery system is another system (an indirect route). ● D – The entry was added dynamically by an ICMP redirect. Ref The current number of routes that share the same network interface (Ethernet) address. Use The number of datagrams that have used this route. For the localhost entry, it is a snapshot of the number of datagrams that are received. Interface The local interface used to reach the destination. Configuring Routing 7- Copyright 2005 Sun Microsystems, Inc. All Rights Reserved. Sun Services, Revision A.1 13
- 12. Working With the Routing Table Searching the Routing Table Figure 7-7 shows the kernel routing algorithm. Extract the destination IP address, and compute the network number. Encapsulate the datagram Does the destination IP by setting the destination Yes Ethernet address to that address match a host- of the router associated specific route in the route with the host route table table? entry. Deliver the frame through the interface connected to the system. No Encapsulate the datagram by setting the destination Does the network Ethernet address to that number match one Yes of the router associated found in the with the route table route table? entry. Deliver the frame through the interface connected to the system. No Encapsulate the datagram by setting the destination Is there Ethernet address to that Yes of the default router found a default entry in the route table? in the route table. Deliver the packet through the interface frame connected to the system. No Generate a routing error message through ICMP Figure 7-7 The kernel Routing Algorithm 7- Network Administration for the Solaris™ 10 Operating System 14 Copyright 2005 Sun Microsystems, Inc. All Rights Reserved. Sun Services, Revision A.1
- 13. Working With the Routing Table The kernel routing algorithm searches for routing table entries in the following order when determining where to send a datagram: 1. The kernel routing algorithm checks to see if the IP address is on a local network. The kernel extracts the destination IP address from the IP datagram and computes the destination network number. The destination network number is then compared with the network numbers of all of the local interfaces (interfaces that are physically attached to the system) for a match. If the destination network number matches that of a local interface network number, the kernel encapsulates the IP datagram inside an Ethernet frame and sends it through the matching local interface for delivery. 2. The kernel routing algorithm checks the routing table for a route to a matching host IP address on a non-local network. The kernel searches the routing table entries for a matching host IP address. If an entry that matches the host IP address is found, the kernel encapsulates the IP datagram inside an Ethernet frame and sends the frame to the router that is associated with that destination. 3. The kernel routing algorithm checks the routing table for a route to a matching network number. The kernel searches the routing table for a matching network number. If a matching number is found, the kernel sets the destination Ethernet address to that of the corresponding router and delivers the frame to that router. The router that receives the frame repeats the execution of the route algorithm, but leaves the destination IP address unchanged. 4. The kernel routing algorithm checks for a default route in the routing table. The kernel searches the routing table for a default entry, which signifies that a default route is configured. If a default route is found, the kernel encapsulates the datagram, sets the destination Ethernet address to that of the default router, leaves the destination IP address unchanged, and delivers the datagram through the interface that is local to the default router. 5. If there is no route to the destination, the kernel routing algorithm check generates an ICMP error message. The kernel cannot forward the datagram. The error message states either No route to host or Network is unreachable. Configuring Routing 7- Copyright 2005 Sun Microsystems, Inc. All Rights Reserved. Sun Services, Revision A.1 15
- 14. Working With the Routing Table Associating Names and Network Numbers The netstat -rn command displays the routing table without resolving any of the IP addresses in the routing table to names. If the netstat -r command is used instead, the netstat command attempts to resolve IP addresses to names, and displays the names instead of the numbers. IP addresses and host names are associated by using the /etc/inet/hosts file. An equivalent file for associating network names and numbers also exists: the /etc/inet/networks file. The /etc/networks file is a symbolic link to the /etc/inet/networks file. The fields in the /etc/inet/networks file are organized by network name, network number, and nicknames. For example: # cat /etc/inet/networks #ident "@(#)networks 1.4 92/07/14 SMI" /* SVr4.0 1.1 */ # # The networks file associates Internet Protocol (IP) network numbers # with network names. The format of this file is: # # network-name network-number nicnames . . . # # # The loopback network is used only for intra-machine communication # loopback 127 # # Internet networks # arpanet 10 arpa # Historical one 192.168.1 one two 192.168.2 two three 192.168.3 three thirty 192.168.30 thirty # When the /etc/inet/networks file is modified, you can use the defined network name in a command instead of a network address. 7- Network Administration for the Solaris™ 10 Operating System 16 Copyright 2005 Sun Microsystems, Inc. All Rights Reserved. Sun Services, Revision A.1
- 15. Working With the Routing Table To view how defined networks are displayed in the output from the netstat command, use the netstat command with the -r option: # netstat -r Routing Table: IPv4 Destination Gateway Flags Ref Use Interface -------------------- -------------------- ----- ----- ------ --------- one sys11 U 1 53 hme0 two sys11ext UG 1 0 three sys11ext UG 1 0 thirty sys11ext U 1 56 qfe0 224.0.0.0 sys11 U 1 0 hme0 localhost localhost UH 3 132 lo0 # Observe that the destination networks are now displayed by name instead of by network number, and the loopback address is replaced by its entry from the /etc/inet/hosts file. Configuring Routing 7- Copyright 2005 Sun Microsystems, Inc. All Rights Reserved. Sun Services, Revision A.1 17
- 16. Configuring Static Routes Configuring Static Routes You can configure a route that does not change or time-out. This type of route is called a static route. Static routes are not removed from the routing table by the system. Configuring Static Direct Routes Static direct routes are routes to local networks which do not expire from the routing table. A static direct route is added to a network when a network interface is configured as up by the ifconfig command. The ifconfig command builds the direct route entries initially when the network interface is configured during system startup. To view the static direct routes configured by the ifconfig command, use the netstat -rn command: # netstat -rn Routing Table: IPv4 Destination Gateway Flags Ref Use Interface -------------------- -------------------- ----- ----- ------ --------- 192.168.1.0 192.168.1.1 U 1 53 hme0 ... ... 192.168.30.0 192.168.30.31 U 1 77 qfe0 224.0.0.0 192.168.1.1 U 1 0 hme0 127.0.0.1 127.0.0.1 UH 3 132 lo0 # The 127.0.0.1 entry in the routing table is a loopback route to the local host that is created when the lo0 pseudo interface is configured. 7- Network Administration for the Solaris™ 10 Operating System 18 Copyright 2005 Sun Microsystems, Inc. All Rights Reserved. Sun Services, Revision A.1
- 17. Configuring Static Routes Configuring the /etc/defaultrouter File Default routes are routing table entries that define the default routers to use if no specific host or network routes are available. Default route entries can be either static entries or dynamic entries. The /etc/defaultrouter file is used to define static default routes. Default routes mean that you do not need to define every reachable network because datagrams that are addressed to non-local destinations use a default router in the absence of an explicit route. You can define default routers by creating entries in the /etc/defaultrouter file, which lists the host names or IP addresses of the default routers. You must use host names that exist in the system’s /etc/inet/hosts file because no name-resolution services are available at the time that this file is read at system boot. A system that is configured with an /etc/defaultrouter file does not execute the in.routed daemon. Some advantages of default routing are: ● The /etc/defaultrouter file prevents unneeded routing processes from starting. ● The default entries result in a smaller routing table, which reduces the processing time spent on each IP datagram. ● Multiple default routers can be identified, which eliminate single points-of-failure within a network. ● Systems that use default route entries do not depend on actual routing protocols. Some disadvantages of default routing are: ● The default entries created by the /etc/defaultrouter file are always present, even when the default router is not available. The system does not learn about other possible routes. ● All systems must have a local /etc/defaultrouter file configured properly because this file cannot be administered by a name service. This can be an administrative problem on large, evolving networks. Configuring Routing 7- Copyright 2005 Sun Microsystems, Inc. All Rights Reserved. Sun Services, Revision A.1 19
- 18. Configuring Static Routes Configuring the /etc/gateways File The /etc/gateways file, if it exists, is read by the in.routed daemon when the daemon starts. The in.routed daemon uses the contents of the /etc/gateways file to add additional static routes to the routing table. Static route entries in the /etc/gateways file use the format: net|host destination gateway gateway metric hops [passive|active|extern] For example: # cat /etc/gateways net 192.168.3.0 gateway sys31ext metric 1 # Note – It is a better practice to use IP addresses rather than the host names because it might not be possible to resolve host names. The /etc/gateways file also supports the use of directives to control the behavior of the system. For example, you can disable the RIP protocols (RIPv1 and RIPv2) by placing the following directive in the /etc/gateways file: no_rip Use the no_rip_v1in directive when you want your system to ignore RIPv1 information received on a specific interface. For example, to ignore RIPv1 information received on the qfe3 interface, use the following directive in the /etc/gateways file: no_ripv1_in if=qfe3 You can disable the RDISC protocol by placing the following directive in the /etc/gateways file: no_rdisc Refer to the gateways man page for more information on the /etc/gateways file. 7- Network Administration for the Solaris™ 10 Operating System 20 Copyright 2005 Sun Microsystems, Inc. All Rights Reserved. Sun Services, Revision A.1
- 19. Configuring Static Routes Configuring Static Routes on the Command Line The route command enables manual manipulation of the routing table. The route command can be used to add, remove, and change routing table entries. The route command uses sub-commands to perform its tasks. To add routes to the routing table, you use the route add command. Its basic format is: route add destination gateway The destination can be a host, a network, or a default route. For example, to add a static route to the 192.168.3.0 network with the sys31ext system as the gateway, type the command: # route add net 192.168.3.0 sys31ext add net 192.168.3.0: gateway sys31ext # To add a static route to the sys24 host with the sys21ext system as the gateway, type the command: # route add host sys24 sys21ext add host sys24: gateway sys21ext # To add a default route with the instructor system as its gateway, type the command: # route add default instructor add default: gateway instructor # To delete a route, you use the route delete command. Its basic format is: route delete destination gateway For example, to delete the route to the host sys24 using the gateway sys21ext, type the command: # route delete sys24 sys21ext delete host sys24: gateway sys21ext # Configuring Routing 7- Copyright 2005 Sun Microsystems, Inc. All Rights Reserved. Sun Services, Revision A.1 21
- 20. Configuring Static Routes To retrieve information about a specific route, use the route get command. For example, to retrieve information about the default route, type the following command: # route get default route to: default destination: default mask: default gateway: instructor interface: hme0 flags: <UP,GATEWAY,DONE,STATIC> recvpipe sendpipe ssthresh rtt,ms rttvar,ms hopcount mtu expire 0 0 0 0 0 0 1500 0 # To change the routing table, use the route change command. For example, to change the default route from instructor to sys41, type a command similar to the following: # route change default sys41 change net default: gateway sys41 # To continuously report any changes to the routing table, route look-up misses, or suspected network partitionings, use the route monitor command. For example, when a route is deleted, to receive the following output, type the route monitor command: # route monitor got message of size 124 RTM_DELETE: Delete Route: len 124, pid: 633, seq 1, errno 0, flags:<UP,GATEWAY,DONE,STATIC> locks: inits: sockaddrs: <DST,GATEWAY,NETMASK> 192.168.3.0 sys11ext 255.255.255.0 To flush (remove) the routing table of all gateway entries, use the route flush command. For example: # route flush 192.168.9 sys13 done two sys13 done two sys11ext done default 172.20.4.248 done # 7- Network Administration for the Solaris™ 10 Operating System 22 Copyright 2005 Sun Microsystems, Inc. All Rights Reserved. Sun Services, Revision A.1
- 21. Configuring Static Routes To cause the routing table to flush before the remaining options are evaluated, use the flush option in combination with other options. For example, to flush the routing table of gateways and to add a route to the 192.168.2.0 network, type a command similar to the following: # route -f add net 192.168.2.0 sys21ext add net 192.168.2.0: gateway sys21ext # To add a route manually to the multicast address range of 224–239, type the command: # route add 224.0/4 ‘uname -n‘ Note – You can find the command syntax in the /lib/svc/method/net-svc SMF method file. To define a route that uses a specific netmask to support a network, use the -netmask option with the route command. For example, to add a route to the 192.168.3.0 network that uses a netmask of 255.255.255.224, type the command: # route add net 192.168.3.0 sys31ext -netmask 255.255.255.224 add net 192.168.3.0: gateway sys31ext # To achieve the same results in a more concise way, specify the length of the subnet mask after the destination. For example, enter: 192.168.3.0/27 The 255.255.255.224 netmask for the 192.168.3.0 network is 11111111.11111111.11111111.11100000 in binary format. There are 27 ones (1s) in the binary netmask, hence the /27 after the network address. A command similar to the following is identical to the command in the preceding example: # route add net 192.168.3.0/27 sys31ext add net 192.168.3.0/27: gateway sys31ext # Configuring Routing 7- Copyright 2005 Sun Microsystems, Inc. All Rights Reserved. Sun Services, Revision A.1 23
- 22. Configuring Static Routes Note – The in.routed process does not detect any routing table changes that are performed by other programs on the machine, for example, routes that are added, deleted, or flushed as a result of the route command. Therefore, do not perform these types of changes while the in.routed process is running. Instead, shut down the in.routed process, make the required changes, and then restart the in.routed process. This ensures that the in.routed process learns of any changes. Network names can also be used to define routes. To add a route to the two network, defined in the /etc/inet/networks file, type a command similar to the following: # route add net two 192.168.30.31 add net two: gateway 192.168.30.31 # Note – Use of the metric argument in the route command is no longer supported. 7- Network Administration for the Solaris™ 10 Operating System 24 Copyright 2005 Sun Microsystems, Inc. All Rights Reserved. Sun Services, Revision A.1
- 23. Configuring Dynamic Routing Configuring Dynamic Routing RIP is a routing protocol that is used commonly on computer systems to provide dynamic routing. RIPv1 and RIPv2 are bundled with the Solaris 10 OS. RIP is an Application layer protocol. RIP Version 1 RIP version 1 is a distance-vector protocol that exchanges route information between IP routers. RIP version 1 does not support VLSM or CIDR. Distance-Vector Protocols Distance-vector algorithms compute the least-cost path of a route by using information that is exchanged with other routers. This information describes how far away (in distance) reachable networks are from the sending or receiving system. This distance is measured by a metric known as a hop. The total number of hops is called the hop count. The efficiency of a route is determined by its distance from the source to the destination. RIP maintains only the best route to a destination. When multiple paths to a destination exist, only the first path with the lowest hop count is maintained. Figure 7-8 shows the least hop count between a source host and a destination host. Metric = 1 (propagated to route tables) Router Router Router Source Destination Host Host Metric = 2 (discarded) Figure 7-8 Least Hop Count RIP specifies a number of features that make its operation more stable in the face of rapid network topology changes. These stability features include a hop-count limit, hold-down states, split horizons, triggered updates, and route poisoning. Configuring Routing 7- Copyright 2005 Sun Microsystems, Inc. All Rights Reserved. Sun Services, Revision A.1 25
- 24. Configuring Dynamic Routing Hop-Count Limits RIP permits a maximum hop count of 15. A destination greater than 15 hops away is tagged as unreachable. The maximum hop count of RIP greatly restricts its use in large networks but prevents a problem called count to infinity from causing endless network routing loops. This upper limit of 15 does not cause problems since RIP is an IGP and is used within autonomous systems only. Hold-Down States Hold-down states prevent regular update messages from inappropriately reinstating a route that has gone bad. When a route goes down, neighboring routers detect this condition. These routers then calculate new routes and send route update messages to inform their neighbors of the route change. This activity begins a wave of route updates that filter through the network. These updates do not instantly arrive at every network device. It is possible that a device that has yet to be informed of a network failure can send a regular update message (indicating that a route that has just gone down is still available) to a device that has just been notified of the network failure. In this case, the latter device now contains (and potentially advertises) incorrect route information. Hold-down states tell routers to hold down any changes that can affect recently removed routes for a specified period of time. The hold-down period is usually calculated to be just greater than the period of time that is necessary to update the entire network with a route change. Split Horizons Split horizons derive from the fact that it is never useful to send information about a route back in the direction from which it came. The split-horizon rule prohibits this from happening. This helps prevent two-node routing loops. Triggered Updates Triggered updates propagate changing route information quickly throughout the network. As the router becomes aware that new routes are available or that existing routes are not available, it advertises this information immediately rather than waiting until the next 30-second (default) advertisement interval occurs. 7- Network Administration for the Solaris™ 10 Operating System 26 Copyright 2005 Sun Microsystems, Inc. All Rights Reserved. Sun Services, Revision A.1
- 25. Configuring Dynamic Routing Route Poisoning When a router learns that a destination is no longer available, it issues a triggered update for that destination. This update includes a hop-count advertisement of 16. All other hosts and routers consider the destination as unreachable, and the hosts and routers remove the route entry. This is to ensure that other systems do not attempt to use the bad route. RIP Version 2 RIP version 2 was developed to address some of the limitations of RIPv1, while maintaining backward compatibility combined with the simplicity of RIPv1. RIPv2 has the following characteristics: ● RIPv2 supports VLSM and non-byte-bounded subnet masks. ● RIPv2 uses muticast to advertise routes. The 224.0.0.9 multicast address is reserved for RIPv2. ● RIPv2 includes support for simple authentication of messages. Note – RIP version 2 is defined in RFC 2453. Configuring Routing 7- Copyright 2005 Sun Microsystems, Inc. All Rights Reserved. Sun Services, Revision A.1 27
- 26. Configuring Dynamic Routing The in.routed Daemon RIPv1 and RIPv2 are implemented by the /usr/sbin/in.routed daemon. The /usr/sbin/in.routed daemon causes a system to broadcast its own routing information if IP forwarding and IP routing are enabled by the routeadm command. A router sends routing information to the networks to which it is directly connected every 30 seconds. You cannot change this time interval. If RIPv2 multicasts are being processed, only those hosts listening for the RIPv2 multicast address process the information. If RIPv1 broadcasts are being processed, all hosts receive the information, but only those hosts that run the in.routed daemon use the information. Routers and non-routers run the in.routed daemon. The in.routed daemon is started at boot time if the ipv4-routing option is specifically enabled by using the routeadm command, or if the /etc/defaultrouter file is empty or does not exist. Stopping and Starting the in.routed Daemon The in.routed daemon can be stopped and started on the command line by using the routeadm command. The routeadm command is used to control whether a system runs the in.routed routing daemon and whether a system forwards IP packets between networks. To view the current configuration, type the routeadm command with no arguments: # routeadm Configuration Current Current Option Configuration System State IPv4 forwarding default (disabled) disabled IPv4 routing default (enabled) enabled IPv6 forwarding default (disabled) disabled IPv6 routing default (disabled) disabled IPv4 routing daemon "/usr/sbin/in.routed" IPv4 routing daemon args "" IPv4 routing daemon stop "kill -TERM ‘cat /var/tmp/in.routed.pid‘" IPv6 routing daemon "/usr/lib/inet/in.ripngd" IPv6 routing daemon args "-s" IPv6 routing daemon stop "kill -TERM ‘cat /var/tmp/in.ripngd.pid‘" # 7- Network Administration for the Solaris™ 10 Operating System 28 Copyright 2005 Sun Microsystems, Inc. All Rights Reserved. Sun Services, Revision A.1
- 27. Configuring Dynamic Routing To stop the in.routed daemon, type the command: # routeadm -u -d ipv4-routing # To start the in.routed daemon, type the command: # routeadm -u -e ipv4-routing # The -d option changes the contents of the /etc/inet/routing.conf file to list the argument as disabled explicitly. The -e option changes the contents of the /etc/inet/routing.conf file to list the argument as enabled explicitly. The -u option updates the system’s current configuration by using the contents of the /etc/inet/routing.conf file. Note – Using the routeadm command without the -u option causes the configuration to be changed in the /etc/inet/routing.conf file, but does not change the current configuration of the system. To cause the system to revert to default behavior at system boot (start the in.routed daemon unless the /etc/defaultrouter file is not empty), type the command: # routeadm -r ipv4-routing # Configuring Routing 7- Copyright 2005 Sun Microsystems, Inc. All Rights Reserved. Sun Services, Revision A.1 29
- 28. Configuring Dynamic Routing The RDISC Protocol The RDISC Protocol sends and receives router advertisement messages pertaining to default routes. RFC 1256 specifies the format of related ICMP messages. The in.routed daemon implements the RDISC Protocol. Routers that run the in.routed daemon advertise their presence by using the 224.0.0.1 multicast address every 600 seconds (10 minutes). Non-routers running the in.routed daemon listen to the 224.0.0.1 multicast address for these router advertisement messages. The in.routed process builds a default route entry for each router from which an advertisement is received. Some advantages of the RDISC Protocol are that it: ● Is independent of routing protocol ● Uses a multicast address ● Results in small routing tables ● Provides redundancy through multiple default-route entries Note – The RDISC Protocol was previously implemented by using the in.rdisc daemon. While the in.rdisc daemon is still present in the Solaris 10 OS, it is no longer started at system boot. In the Solaris 10 OS, the in.routed daemon has been enhanced to include equivalent route discovery funtionality. Some disadvantages of the RDISC protocol are: ● An advertisement period of 10 minutes can result in a black hole. A black hole is the time period in which a router path is present in the table, but the router is not actually available. The default lifetime for a non-advertised route is 30 minutes (three times the advertising time interval). ● Routers must still run a routing protocol, such as RIP, to learn about other networks. The RDISC protocol provides a default route from hosts to routers, not between routers. The behavior of the RDISC protocol can be controlled by entries in the /etc/gateways file. For example, to change the advertisement interval to 100 seconds, create the entry: rdisc_interval=100 7- Network Administration for the Solaris™ 10 Operating System 30 Copyright 2005 Sun Microsystems, Inc. All Rights Reserved. Sun Services, Revision A.1
- 29. Configuring Dynamic Routing ICMP Redirects ICMP provides control and error messages. ICMP on a router or gateway attempts to send reports of problems to the original source if an IP datagram cannot be delivered for some reason. ICMP datagrams are always encapsulated in IP. ICMP redirects occur when a system uses more than one default route. If the router determines a more efficient route, or if there is only one way to forward the datagram, it redirects the datagram using the better or only route and reports that route to the sender. Figure 7-9 on page 7-32 shows an ICMP redirect process where the sys21 system needs to communicate with the server1 system and has a default route of sys11. The information does reach the server1 system and the sys11 system sends an ICMP redirect to the sys21 system, telling it that the best route to the server1 system is through the instructor system. The sending system’s routing table is updated with the new information. The drawback to this method of routing is that for every ICMP redirect, there is a separate entry in the sending system’s routing table. This action can lead to a large routing table. However, this method of routing also ensures that the datagrams that are going to all reachable hosts are taking the shortest route. Caution – An attacker might forge redirect errors to install false routes, which might initiate a denial of service attack if the newly specified router is not a router at all. There are rules governing valid redirect errors, all of which can be spoofed easily. Use this ndd command to ignore IPv4 ICMP redirect errors: ndd -set /dev/ip ip_ignore_redirect 1. Refer to the Sun BluePrints™ document Solaris Operating Environment Network Settings for Security, available at: http://www.sun.com/solutions/blueprints/1200/ network-updt1.pdf. Configuring Routing 7- Copyright 2005 Sun Microsystems, Inc. All Rights Reserved. Sun Services, Revision A.1 31
- 30. Configuring Dynamic Routing server1 4 Datagram 5 Datagram #telnet server1 sys21 instructor 3 ICMP Redirect 1 Datagram 2 Datagram sys11 Figure 7-9 ICMP Redirect 7- Network Administration for the Solaris™ 10 Operating System 32 Copyright 2005 Sun Microsystems, Inc. All Rights Reserved. Sun Services, Revision A.1
- 31. Introducing CIDR Introducing CIDR The rapid growth of the Internet in the early 1990s created concerns about the ability to scale and support future growth. The most severe problems are: ● Impending depletion of Class B networks ● Increasing the size of routing tables Depletion of Class B networks creates a problem for large organizations because Class C addresses with 254 as their maximum number of host addresses are not large enough. Assigning multiple Class C networks to companies will, over time, dramatically increase the number of routes in the routing table. Large routing tables cause poor router performance because the router spends excessive time performing address lookups. Purpose of CIDR A task force was created by the Internet Engineering Task Force (IETF) to develop a solution to the scale and growth problems. The solution became known as CIDR, or supernetting, and is a way to make more-efficient use of the IP address space. CIDR is documented in RFC 1517, RFC 1518, RFC 1519, and RFC 1520. Three important features of CIDR that address scalability and growth issues for the Internet are: ● Elimination of network classes (Class A, Class B, and Class C) ● Block address allocation ● Hierarchical routing Operation of CIDR CIDR uses classless addresses. Netmasks are referred to as network prefixes and are used to create networks of varying sizes. The network prefix is expressed in the following notation: X.X.X.X/Y. The value Y is an integer value that specifies the number of 1s in the netmask. For example, using /18 is equivalent to a netmask of 255.255.192.0. The first 18 bits identify the network, and the remaining 14 bits identify the host. Configuring Routing 7- Copyright 2005 Sun Microsystems, Inc. All Rights Reserved. Sun Services, Revision A.1 33
- 32. Introducing CIDR Figure 7-10 shows an example of a CIDR prefix. Evolution of Routing Protocols Classful Routing Protocols Network Route 10nnnnnn.nnnnnnnn.00000000.00000000 Subnet Route 10nnnnnn.nnnnnnnn.ssssssss.ss0000000 Host Route 10nnnnnn.nnnnnnnn.ssssssss.sshhhhhhh Classless Routing Protocols pppppppp.pppppppp.pp000000.00000000 Prefix Route Prefix Length n = Network s = Subnet h = Host Figure 7-10 CIDR Prefix This use of variable length subnet masks means making efficient use of network address space by supernetting or subnetting. Supernetting is the combining of two or more contiguous network addresses. For example, 192.168.2/24 (11000000.10101000.00000010, 0xffffff00, or 255.255.255.0) and 192.168.3/24 (11000000.10101000.00000011, 0xffffff00, or 255.255.255.0) can be supernetted by using a prefix of /23 (11000000.10101000.0000001X, 0xfffffe00, or 255.255.254.0). The systems on the supernetted networks must all use the following in order to properly communicate without a router: ● Network address – 192.168.2.0/23 ● Broadcast address – 192.168.3.255 Valid host addresses for this supernetted network range from 192.168.2.1–192.168.3.254 (510 addresses). The 192.168.2.255 and 192.168.3.0 addresses are valid host addresses, but they are not used in the Solaris 10 OS. 7- Network Administration for the Solaris™ 10 Operating System 34 Copyright 2005 Sun Microsystems, Inc. All Rights Reserved. Sun Services, Revision A.1
- 33. Introducing CIDR Following is an example that configures an interface on this supernetted network: # ifconfig eri0 plumb 192.168.3.239/23 broadcast + up # ifconfig -a lo0: flags=1000849<UP,LOOPBACK,RUNNING,MULTICAST,IPv4> mtu 8232 index 1 inet 127.0.0.1 netmask ff000000 eri0: flags=1000843<UP,BROADCAST,RUNNING,MULTICAST,IPv4> mtu 1500 index 4 inet 192.168.3.239 netmask fffffe00 broadcast 192.168.3.255 ether 0:3:ba:2a:9d:7a # netstat -rnv IRE Table: IPv4 Destination Mask Gateway Device Mxfrg Rtt Ref Flg Out In/Fwd --------------- --------------- --------------- ------ ----- ---- --- --- ---- ------ 172.20.221.6 255.255.255.255 192.168.2.254 1500* 0 1 UGH 0 0 192.168.2.0 255.255.254.0 192.168.3.239 eri0 1500* 0 1 U 0 0 127.0.0.1 255.255.255.255 127.0.0.1 lo0 8232* 0 1 UH 10 0 # A CIDR and VLSM aware routing protocol, such as RIPv2, must be used on the router that connects this supernetted network to other networks. Subnetting is the application of a netmask on an IP address to divide the network up into smaller pieces. CIDR and VLSM permit a portion of the IP address space to be divided into successively smaller pieces. For example, an Internet service provider (ISP) could be allocated blocks of address space, which they then assign in subset address blocks to smaller ISPs. These smaller ISPs can then supply an even smaller subset of addresses to a customer or private organization. CIDR and VLSM make this aggregation and subdivision of address space possible. The routing table entry for each ISP or organization reflects the first address in the block assigned to it, for example, 204.106.8.0/22, even though there can be additional network addresses that are associated with the block. A range of CIDR addresses is known as a CIDR block. This support of network addresses eliminates the number of entries required in the backbone routing tables. Configuring Routing 7- Copyright 2005 Sun Microsystems, Inc. All Rights Reserved. Sun Services, Revision A.1 35
- 34. Introducing CIDR Consider an ISP that requires IP addresses for 1000 clients. Based on 254 clients per Class C network, the ISP requires four Class C networks. You can supernet four Class C networks, for example: ● 204.106.8.0 ● 204.106.9.0 ● 204.106.10.0 ● 204.106.11.0 Figure 7-11 shows the network addresses that can result from applying different network prefixes. Figure 7-11 CIDR Network Addresses It can be seen from Figure 7-11 that the four networks being considered have identical values in their first 22 bits. Therefore, if you consider the first 22 bits only of an address on any of these networks to represent the network portion of the address, every address on the four networks has the same network address. The networks can therefore be supernetted and a single route can be used to reach all four networks. 7- Network Administration for the Solaris™ 10 Operating System 36 Copyright 2005 Sun Microsystems, Inc. All Rights Reserved. Sun Services, Revision A.1
- 35. Introducing CIDR Figure 7-12 shows an example of supernetting. 204.106.0.0/21 (2048 Internet Service Provider Host Addresses) 204.106.0.0/16 (65,536 Address Range Host Addresses) 204.106.0.0–204.106.7.0 Internet 204.106.8.0/22 (1024 Host Addresses) 204.106.0.0/20 (4096 Host Addresses) Address Range 204.106.8.0–204.106.11.0 Figure 7-12 Supernetting Example An ISP who is given a block of supernetted addresses can then divide the range into different sized blocks to suit the needs of their customers, while minimizing the number of routing table entries required. Configuring Routing 7- Copyright 2005 Sun Microsystems, Inc. All Rights Reserved. Sun Services, Revision A.1 37
- 36. Configuring Routing at Boot Time Configuring Routing at Boot Time The behavior of a Solaris 10 system in regard to route configuration is different to previous versions of the Solaris OS. The /etc/inet/routing.conf file contains two options regarding route configuration on a Solaris 10 system: ipv4-routing and ipv4-forwarding. The ipv4-routing option refers to whether a system will start the in.routed daemon. The ipv4-forwarding option refers to whether a system will be configured to forward packets between networks. Initializing a Router When a system boots, the system first checks the contents of the /etc/inet/routing.conf file. If the ipv4-routing or ipv4-forwarding options are set explicitly to either enabled or disabled, the setting is applied. If either option has not been set explicitly, then the system determines whether or not to enable or disable each option. IPv4 routing is disabled if the /etc/defaultrouter file is not empty. If the /etc/defaultrouter file is not present, or is empty, IPv4 routing is enabled (the in.routed daemon is started). IPv4 forwarding is disabled by default and must be enabled explicitly by using the routeadm command. 7- Network Administration for the Solaris™ 10 Operating System 38 Copyright 2005 Sun Microsystems, Inc. All Rights Reserved. Sun Services, Revision A.1
- 37. Configuring Routing at Boot Time Figure 7-13 shows how the /lib/svc/method/net-init method configures a system for IPv4 forwarding and routing. Start Disable IPv4 forwarding Does Yes Disable /etc/defaultrouter IPv4 routing exist? No IPv4 routing Yes Enable enabled by routeadm? IPv4 routing No Disable IPv4 routing IPv4 forwarding Yes Enable enabled by IPv4 forwarding routeadm? No Disable IPv4 forwarding End Figure 7-13 IPv4 Router Initialization Configuring Routing 7- Copyright 2005 Sun Microsystems, Inc. All Rights Reserved. Sun Services, Revision A.1 39
- 38. Configuring Routing at Boot Time Configuring a Router Without Rebooting To configure a Solaris OS system as a router without rebooting, complete the following steps: 1. Verify that the /etc/hostname.interface and the /etc/inet/hosts files are configured properly. 2. Do one of the following: ● Turn on IP forwarding on all of the interfaces: # routeadm -u -e ipv4-forwarding ● Turn on IP forwarding for specific interfaces: # ifconfig specific_interface router 3. Stop and restart the in.routed daemon: # routeadm -u -d ipv4-routing # routeadm -u -e ipv4-routing # The system now functions as a router. Initializing a Multihomed Host A multihomed host is a system with two or more physical network interfaces that does not forward IP datagrams between the networks to which it is attached. In the Solaris 10 OS, all systems with two or more physical network interfaces are multihomed hosts by default. To create a multihomed host, complete the following steps: 1. Become a superuser on the prospective multihomed system. 2. Create an /etc/hostname.interface file for each additional network interface that is installed in the system. For example, if the qfe2 interface is to be enabled and known on the network, you create the /etc/hostname.qfe2 file, containing contents similar to the following: # cat /etc/hostname.qfe2 sample-hostname-for-qfe2 # This causes the interfaces to be configured by the SMF methods at boot time. 7- Network Administration for the Solaris™ 10 Operating System 40 Copyright 2005 Sun Microsystems, Inc. All Rights Reserved. Sun Services, Revision A.1
- 39. Configuring Routing at Boot Time 3. Add an entry to the /etc/inet/hosts file so that the interface can be assigned an IP address at boot time. The entry looks similar to the following: # grep sample /etc/inet/hosts 192.168.19.1 sample-hostname-for-qfe2 # 4. Do either of the two following procedures: ● Reboot the system with the init 6 command. ● Complete the following steps to enable the configuration without rebooting: 1. Use the ifconfig command to configure the new interface as appropriate, but do not enable the interface at this stage: # ifconfig qfe2 plumb 192.168.19.1 netmask + broadcast + # 2. Use the routeadm command to disable IP forwarding explicitly: # routeadm -u -d ipv4_forwarding # 3. Use the ifconfig command to enable the interface: # ifconfig qfe2 up # The system is now a multihomed host that has connectivity to more than one network and can be used without concern of advertising routes and potentially causing routing issues on any of the networks to which it belongs. Initializing a Non-Router Disabling IP forwarding stops a router from forwarding packets between the networks to which it is connected. To initialize a non-router, use the routeadm command to disable IP forwarding on all interfaces by typing the following command: # routeadm -u -d ipv4_forwarding Configuring Routing 7- Copyright 2005 Sun Microsystems, Inc. All Rights Reserved. Sun Services, Revision A.1 41
- 40. Troubleshooting Routing Troubleshooting Routing One of the most challenging tasks that a network administrator has to perform is troubleshooting routing. Router configuration and troubleshooting relies on mastering other basic network skills. Troubleshooting the Router Configuration When troubleshooting a problem, verify the following: ● The device information tree recognizes the additional interfaces. Use the prtconf command, and search for the interface with the grep command. For example, to determine if the qfe interface is in the device tree, use the following command: # prtconf | grep qfe SUNW,qfe, instance #0 SUNW,qfe, instance #1 SUNW,qfe, instance #2 SUNW,qfe, instance #3 # ● The ifconfig command reports the interface to be configured as expected. For example, to determine if the qfe0 interface is configured as expected, use the following command: # ifconfig qfe0 qfe0: flags=1000843<UP,BROADCAST,RUNNING,MULTICAST,IPv4> mtu 1500 index 3 inet 192.168.30.31 netmask ffffff00 broadcast 192.168.30.255 ether 8:0:20:ac:9b:20 # If the interface is up, examine the inet (IP address), netmask, and broadcast entries, and make sure that they are set correctly. If the IP address is set incorrectly, check the contents of the /etc/inet/hosts file. If the netmask and broadcast addresses are wrong, check the contents of the /etc/inet/netmasks file. ● The correct device and file name are defined for the interface. For example, if you are configuring the qfe0 interface, to verify that the hostname.qfe0 file is correct, type the command: # ls -al /etc/hostname.qfe0 -rw-r--r-- 1 root other 113 Nov 16 14:58 /etc/hostname.qfe0 # 7- Network Administration for the Solaris™ 10 Operating System 42 Copyright 2005 Sun Microsystems, Inc. All Rights Reserved. Sun Services, Revision A.1
- 41. Troubleshooting Routing ● The name that is assigned to the interface is correct. For example, to determine if qfe0 has an assigned host name of sys11ext, type the command: # cat /etc/hostname.qfe0 sys11ext # ● The name that is defined in the hostname.interface file exists in the /etc/inet/hosts file and is associated with the correct address. For example, to determine if sys11 has an assigned IP address of 192.168.1.1, type the command: # grep sys11 /etc/inet/hosts 192.168.30.31 sys11ext 192.168.1.1 sys11 # Data address for hme0 192.168.1.21 sys11-data-qfe1 # Data address for qfe1 192.168.1.51 sys11-test-hme0 # qfe0:1 Test address for hme0 192.168.1.71 sys11-test-qfe1 # qfe1:1 Test address for qfe1 # Configuring Routing 7- Copyright 2005 Sun Microsystems, Inc. All Rights Reserved. Sun Services, Revision A.1 43
- 42. Troubleshooting Routing Troubleshooting Network Names The netstat command, when used with the -r option, displays routing table information. For example: # netstat -r Routing Table: IPv4 Destination Gateway Flags Ref Use Interface -------------------- -------------------- ----- ----- ------ --------- three sys33ext UG 1 0 one sys11 U 1 189 hme0 two sys32ext UG 1 0 192.168.30.0 sys11ext U 1 175 qfe0 224.0.0.0 sys11 U 1 0 hme0 localhost localhost UH 3 132 lo0 # Observe how some of the destinations have names instead of numbers. This can lead to errors when you configure a new interface. To report addresses as numbers instead of names, use the -n option with the netstat command. For example: # netstat -rn Routing Table: IPv4 Destination Gateway Flags Ref Use Interface -------------------- -------------------- ----- ----- ------ --------- 192.168.3.0 192.168.30.33 UG 1 0 192.168.1.0 192.168.1.1 U 1 191 hme0 192.168.2.0 192.168.30.32 UG 1 0 192.168.30.0 192.168.30.31 U 1 176 qfe0 224.0.0.0 192.168.1.1 U 1 0 hme0 127.0.0.1 127.0.0.1 UH 3 132 lo0 # 7- Network Administration for the Solaris™ 10 Operating System 44 Copyright 2005 Sun Microsystems, Inc. All Rights Reserved. Sun Services, Revision A.1
- 43. Exercise: Reviewing Routing Configuration Exercise: Reviewing Routing Configuration In this exercise, you configure a Sun Microsystems workstation as a router and use the route command to configure the system’s routing tables manually. At times, you are instructed to work as a group on the system that is your subnet’s router. Be sure to watch for prompts in the task steps to ensure that you are working on the correct system. Preparation Refer to the lecture notes as necessary to perform the tasks listed. Populate your system’s /etc/inet/hosts file with all of the hosts in the class network if this is not already done. Your /etc/inet/hosts file should have contents similar to the following: # cat /etc/inet/hosts # # Internet host table # 127.0.0.1 localhost loghost # SA-300-S10 host information 192.168.30.31 sys11ext # router to get to instructor->Internet 192.168.1.1 sys11 192.168.1.2 sys12 192.168.1.3 sys13 192.168.1.4 sys14 # 192.168.30.32 sys21ext # router to get to instructor->Internet 192.168.2.1 sys21 192.168.2.2 sys22 192.168.2.3 sys23 192.168.2.4 sys24 # 192.168.30.33 sys31ext # router to get to instructor->Internet 192.168.3.1 sys31 192.168.3.2 sys32 192.168.3.3 sys33 192.168.3.4 sys34 # 192.168.30.30 instructor # Configuring Routing 7- Copyright 2005 Sun Microsystems, Inc. All Rights Reserved. Sun Services, Revision A.1 45
- 44. Exercise: Reviewing Routing Configuration Caution – If your system is designated by the instructor as being a router, verify that its second interface is not configured. If the interface is configured, the command output will not match the solutions properly for the exercises. Figure 7-14 shows the classroom’s network diagram. Take a few moments to familiarize yourself with the diagram. instructor xxx.xxx.xxx.xxx Internet .30 192.168.30.0 .31 .32 .33 192.168.1.0 192.168.2.0 192.168.3.0 .1 .1 .1 sys11 sys21 sys31 .2 .2 .2 sys12 sys22 sys32 .2 .3 .3 sys13 sys23 sys33 .4 .4 .4 sys14 sys24 sys34 Figure 7-14 Classroom Network Diagram 7- Network Administration for the Solaris™ 10 Operating System 46 Copyright 2005 Sun Microsystems, Inc. All Rights Reserved. Sun Services, Revision A.1
- 45. Exercise: Reviewing Routing Configuration Tasks Complete the following steps: 1. In your own words, define each of the following routing schemes: a. Static route b. Dynamic route c. Default route 2. What is a multihomed host? 3. Define the term autonomous system. 4. In your own words, describe the differences between an interior gateway protocol and an exterior gateway protocol. 5. Give two examples of an interior gateway protocol. Configuring Routing 7- Copyright 2005 Sun Microsystems, Inc. All Rights Reserved. Sun Services, Revision A.1 47
- 46. Exercise: Reviewing Routing Configuration 6. Give two examples of an exterior gateway protocol. 7. Explain the purpose of ICMP redirects. Subnet Group: Working on the Routers 8. Before making any changes to the interfaces, write the netmask and broadcast values of the Ethernet interface. Command used: Netmask: Broadcast: Caution – Do not proceed if your system has more than one physical interface configured. If additional interfaces are configured, remove the relevant /etc/hostname.interface files, and use the ifconfig command or reboot the system to remove the interface configuration. The success of this exercise depends on your system having only one configured physical interface. If the /etc/defaultrouter file or the /etc/gateways file exists on your system: 1. Remove the file/s. 2. Reboot the system in order to restore it to a default state for this exercise. a. Which class of IPv4 address (A, B, or C) is assigned to your system? b. How many bits of your IPv4 address are currently being used for your network address? 7- Network Administration for the Solaris™ 10 Operating System 48 Copyright 2005 Sun Microsystems, Inc. All Rights Reserved. Sun Services, Revision A.1
- 47. Exercise: Reviewing Routing Configuration 9. Use the netstat -r command to observe your current routing table. Write down which route destinations are available. 10. Use the netstat command with the -rn options. What is the difference between this output and the previous netstat -r output? 11. Use the ps command to determine if the routing daemon is currently running on the system. Individually: Working on Non-Router Systems 12. Use the ps command to determine if the routing daemon is currently running on the system. Subnet Group: Working on the Routers 13. Configure the router for your subnet. a. Create the /etc/hostname.interface file for your system’s second interface, and place the host name in it so that the second interface is configured automatically at boot time. b. Verify that the name to be associated with the second interface that is used in the /etc/hostname.interface file exists in the /etc/inet/hosts file. If it does not, edit the /etc/inet/hosts file, and place an appropriate name in the file. Configuring Routing 7- Copyright 2005 Sun Microsystems, Inc. All Rights Reserved. Sun Services, Revision A.1 49
- 48. Exercise: Reviewing Routing Configuration 14. Configure IP forwarding and IP routing for IPv4 to become enabled on the next boot of the router. Write the command that you use: Note – Do not proceed beyond this point until everyone in the class has completed this step. 15. Reboot the router. Write the command that you use: 16. Verify that each router is correctly configured. a. Display the configuration of each network interface. How many external interfaces are configured and running now? b. Display the contents of the routing table. Which network destinations are now available? c. Determine that the routing daemon is running on the router. What does this daemon do? 7- Network Administration for the Solaris™ 10 Operating System 50 Copyright 2005 Sun Microsystems, Inc. All Rights Reserved. Sun Services, Revision A.1
- 49. Exercise: Reviewing Routing Configuration Individually: Working on Non-Router Systems Caution – Do not proceed if your system has more than one physical interface configured. If additional interfaces are configured, remove the relevant /etc/hostname.interface files, and use the ifconfig command or reboot the system to remove the interface configuration. The success of this exercise depends on your system having only one configured physical interface. If the /etc/defaultrouter file or the /etc/gateways file exists on your system: 1. Remove the file/s. 2. Reboot the system in order to restore it to a default state for this exercise. 17. Complete the following steps: a. Determine if the routing daemon is running on each non-router system. Why is this daemon running? b. Run the netstat -r command, and record the current network destinations. c. Run the ifconfig -a command, and record the current netmask and broadcast values. Configuring Routing 7- Copyright 2005 Sun Microsystems, Inc. All Rights Reserved. Sun Services, Revision A.1 51
- 50. Exercise: Reviewing Routing Configuration Subnet Group: Working on Your Router System 18. Start the snoop utility on the router to watch for network traffic associated with multicast address 224.0.0.2 as the non-routers reboot. (Hint: Use the icmp option on the snoop command line.) Be sure to use the snoop utility on the appropriate interface for the network that you want to monitor. Be prepared to see ICMP router advertisements after the next step. Write the command that you use: Individually: Working on Non-Router Systems 19. Reboot your non-router workstation. Write the command that you use: Subnet Group: Working on Your Router System 20. Observe the snoop output on the router system. Individually: Working on Non-Router Systems 21. Use the netstat -r command, and observe the change to the routing tables. Which new type of entry is now present? How was it entered into the routing table? 22. Use the ps command on the non-router systems to determine if the routing daemon is now running. Write the command that you use: Why is this daemon running? 7- Network Administration for the Solaris™ 10 Operating System 52 Copyright 2005 Sun Microsystems, Inc. All Rights Reserved. Sun Services, Revision A.1
- 51. Exercise: Reviewing Routing Configuration Subnet Group: Working on Your Router System 23. Terminate the snoop trace that you had running, and then start a verbose snoop trace in a separate window on your router system. Write the command that you use: 24. Working in a new window, use the routeadm command to terminate the in.routed process on the router. Write the command that you use: 25. View the output from the snoop utility. Look for the router notification when the in.routed daemon terminates gracefully. Hint: Look for multicasts and ICMP messages. a. Examine the snoop trace. Did you see the router notification when the in.routed daemon terminated gracefully? b. What was the ETHER destination, as reported by the snoop trace? c. What protocol did the router notification use? d. What was the destination IP address of the router notification? 26. Verify that the process has been terminated. Write the command that you use: Individually: Working on Non-Router Systems 27. Use the netstat command to view the routing tables on one of the non-router systems. What is missing? Note – Do not proceed beyond this point until everyone in the class has completed this step. Configuring Routing 7- Copyright 2005 Sun Microsystems, Inc. All Rights Reserved. Sun Services, Revision A.1 53
- 52. Exercise: Reviewing Routing Configuration Subnet Group: Working on Your Router System 28. Verify that the snoop session started earlier on your router is still running, and then start the in.routed process on your router system, changing the advertisement interval to 90 seconds by placing the appropriate entry in the /etc/gateways file. What entry do you place in the /etc/gateways file? Which command do you use to restart the in.routed daemon? Observe ICMP and other traffic as the in.routed daemon is started. Individually: Working on Non-Router Systems 29. Use the netstat command to view the routing tables on one of the non-router systems to verify that the default route has been inserted into the routing table. Write the command that you use: In this section, you test to see how long it takes for the default route to be removed when no communications are received from a router. You use the 9 (KILL) signal to kill the in.routed daemon, so that the daemon does not have a chance to advertise that it is going down. 30. On a non-router, use the date and netstat commands to determine how long before the default route entry is removed. Note – The while statement syntax assumes that you are using the Bourne shell: while true > do date; netstat -rn | grep default; sleep 20 > done 7- Network Administration for the Solaris™ 10 Operating System 54 Copyright 2005 Sun Microsystems, Inc. All Rights Reserved. Sun Services, Revision A.1
- 53. Exercise: Reviewing Routing Configuration Subnet Group: Working on Your Router System 31. Simulate a router crash, and kill the in.routed daemon on the router again, but use the 9 (KILL) signal this time. Write the command that you use: Individually: Working on Non-Router Systems 32. Watch the output from the script, and keep track of the time. When the default entry stops being reported, subtract the start time from the finish time to determine how long the system took to remove the default route entry. Approximately how long did it take for the default entry to be removed from the table? When done, stop the script by pressing the Control+C key sequence. 33. Stop the in.routed daemon on the non-router systems. Write the command that you use: Caution – Do not proceed beyond this point until everyone in the class has completed this step. Individually: Working on All Systems 34. Flush the routing tables on routers first and then the non-router systems. Write the command that you use: Individually: Working on Non-Router Systems 35. Working on a non-router system, use the ping command to attempt to contact a non-router system on one of the other subnets. What is the response from the ping command? Configuring Routing 7- Copyright 2005 Sun Microsystems, Inc. All Rights Reserved. Sun Services, Revision A.1 55
- 54. Exercise: Reviewing Routing Configuration Subnet Group: Working on Your Router System 36. Add routes manually to the other subnets by using the route command. Write the commands that you use: Individually: Working on Non-Router Systems 37. Add routes manually by using the route command to the remote subnets. Write the commands that you use. Caution – Do not proceed beyond this point until everyone in the class has completed this step. 7- Network Administration for the Solaris™ 10 Operating System 56 Copyright 2005 Sun Microsystems, Inc. All Rights Reserved. Sun Services, Revision A.1
- 55. Exercise: Reviewing Routing Configuration Individually: Working on All Systems 38. Working on all systems, observe the routing tables. Write the command that you use: Individually: Working on Non-Router Systems 39. Working on a non-router system, use the ping command to attempt to contact a non-router system on one of the other subnets. What is the response from the ping command? 40. Edit the contents of the /etc/inet/networks file, and add the one, two and three network names. 41. Observe the changes to the routing table on all non-router systems. Write the command that you use: Are the networks described in the /etc/inet/networks file present in the routing table? Note – Do not proceed beyond this point until everyone in the class has completed this step. 42. Reboot the routers. Schedule a job so that the non-routers reboot two minutes later. Check to see if the in.routed daemon was started on each of the non-router systems. Explain why you see the results that you do. Configuring Routing 7- Copyright 2005 Sun Microsystems, Inc. All Rights Reserved. Sun Services, Revision A.1 57
- 56. Exercise: Reviewing Routing Configuration Subnet Group: Working on Your Router System Perform the following steps to leave your router system in a known routing configuration for subsequent exercises: 43. Configure to enable IPv4 routing when the system next boots. 44. Configure to enable IPv4 forwarding when the system next boots. 45. If they exist, remove the /etc/gateways and /etc/defaultrouter files. Caution – Do not proceed beyond this point until everyone in the class has completed this step. 46. Reboot the system. Individually: Working on Non-Router Systems Perform the following steps to leave your non-router system in a known routing configuration for subsequent exercises: 47. Remove the /etc/inet/routing.conf file. 48. If they exist, remove the /etc/gateways and /etc/defaultrouter files. 49. Reboot the system 7- Network Administration for the Solaris™ 10 Operating System 58 Copyright 2005 Sun Microsystems, Inc. All Rights Reserved. Sun Services, Revision A.1
- 57. Exercise Summary Exercise Summary Discussion – Take a few minutes to discuss what experiences, issues, or discoveries you had during the lab exercise. ! ? ● Experiences ● Interpretations ● Conclusions ● Applications Configuring Routing 7-59 Copyright 2005 Sun Microsystems, Inc. All Rights Reserved. Sun Services, Revision A.1