SlideShare ist ein Scribd-Unternehmen logo
1 von 97
Downloaden Sie, um offline zu lesen
BACK TO THE FUTURE:
INSTALLING THE 2-LEVEL DEFENSE


          By Ted Seay


           v. 3, 01/27/04
TABLE OF CONTENTS


Introduction                                               Page   3
The Concept: Buying -- and Selling -- the Idea             Page   4
The Basics: Defining Terms                                 Page   6
       Position/Personnel Requirements                     Page   10
       1L Alignments/2L Stacks and Positioning             Page   12
       Fundamentals by Position                            Page   18
       Variations - 1L Stunts/2L Blitzes                   Page   29
       Coverages/Two-Deep                                  Page   32
The Basics II: Consolidation                               Page   41
The Schedule: Installing the 2LD in Two Weeks              Page   43
The Game Plan: How to "Fine Tune" for an Opponent          Page   77
Conclusion: JT and the Mouse                               Page   97


                               DEDICATION:

                          To John M. Thomson,
                     creator of the 2-Level Defense;
                      and to Darrel "Mouse" Davis,
            the man who modernized the Run and Shoot offense:

"When a true genius appears in the world, you may know him by this sign --
           that the dunces are all in a confederacy against him"

                               --Jonathan Swift


         NOTE: This document is in the public domain --
  no copyright is claimed on any of the author's material herein.
                  It is free, and freely distributed.


                                    2
INTRODUCTION

This installation guide represents a labor of love -- an attempt to pass on my
knowledge of the 2-Level Defense (2LD) to other coaches. Since I first
purchased the 2LD textbook, Football Defense of the Future: The 2-Level Model
by John M. Thomson and Bill Arnsparger (Englewood Cliffs, NJ: Prentice-Hall,
Inc., 1988), I have tried to share this fascinating defense with others. The text
and Teaching Supplement have been so hard to come by, however, that until
fairly recently, my efforts have been limited to a small handful of coaches.

In recent years, the Internet has given a new lease on life to a number of
obscure football concepts from the Yale Formation direct-snap offense to the
Gap-Air-Mirror (GAM) defense. This new medium for exchanging ideas has also
revealed a 2LD "underground" -- a small but dedicated group of coaches who
have kept Coach Thomson's concepts alive since the beginning.

(I should note here that I mean no disrespect at all to Coach Arnsparger, one of
the great defensive minds in football, but -- the 2LD is John Thomson's baby.
You won’t find reference to the 2LD in any of Arnsparger's other publications,
and for good reason: as John Thomson relates it, Coach Arnsparger called him
shortly after publication of the 2LD text to say that coaches from all over were
bugging him to death about the 2LD. Since he was still coaching at LSU, and
attempting to recruit, he basically washed his hands of the whole thing and left
the 2LD where it belonged, with its creator, John Thomson.)

(On a related note, there are ridiculous rumors making their way around the
Internet regarding why the 2LD is so little known. The most popular version is
that a hit by a 2LD Deep Safety left a receiver paralyzed or dead, and a
subsequent lawsuit forced the recall of the textbook and its destruction by the
publisher. This is pure hogwash -- but it says a great deal about the reputation
the 2LD developed in a very short time for ferocious hits by the deep safety.
Prentice-Hall only ever published about 2,000 copies, according to Doctor
Thomson, and most of those were snapped up by institutional buyers -- libraries
and universities. I happened to receive a mailing from Prentice-Hall in 1988
offering a number of football texts, and the 2LD book immediately caught my
eye. For those coaches interested in obtaining a copy, I suggest you try an
inter-library loan and a trip to your local photocopy shop.)

My intent with this installation guide is to pass on my version -- a simplified
"subset" -- of the John Thomson 2-Level Defense. I outline the requirements for
each position, then lay out key drills and an installation sequence. One word of
warning, however: if you aren’t willing to line up your deep safety at a depth of
+28 yards from the LOS, you should find another defense.


                                        3
THE CONCEPT: BUYING (AND SELLING) THE IDEA

There is no way around it -- the 2LD is a startling defensive concept. The first
time you see a safety lined up 28 yards deep, you react. Some coaches shake
their heads, some blink very hard, and some laugh out loud. Reactions from the
armchair intelligentsia (parents, "fans", etc.) can be even more vehement.
"What the hell are you playing that kid so deep for? That quarterback can't even
throw the ball that far!" Since this was actually one of the more intelligent
comments I have heard regarding the 2LD, I just smiled politely.

There is no substitute for belief in a system of offense or defense -- in order to
"sell" it to assistants and players (much less parents and fans), you have to
"buy" the concept yourself. With the 2LD, that means first and foremost buying
into the use of a deep safety (or two!) at +28. (Note for youth coaches: this
depth can be cut down in proportion to the speed and skills of your age group,
just as you cut other dimensions down to suit, say, the 10-year-old player. What
matters is the ability to enforce an "end line" beyond which the offense is not
welcome to operate, not an exact adherence to the +28 depth.)

Before I discuss the rationale behind the depth of the safety, I want to talk about
the theoretical underpinnings of the 2LD. Coach Thomson has said that his
impetus in designing a new defensive look was the success of the Mouse Davis
Run and Shoot offense in the late 1970's and early '80s. Thomson saw the need
for a defensive look that could cover the short receivers tightly without sacrificing
the deep ball.

He also saw that a model for such a defense existed in Bear Bryant's 6-5 goal-
line defense. The six defensive linemen (the first level of the defense) attacked
their gaps, while the defensive backs and linebackers (the second level) each
"mirrored" a potential offensive receiver. The second level played tight man
defense, for the most part, while the close proximity of the back of the end zone
provided an "end line" beyond which the offense could not operate.

The great leap Coach Thomson made was to imagine a safety placed so deep in
"centerfield" that he could effectively intercept at a set depth anything the
offense tried -- thus providing the same "end line" coverage that the 6-5 enjoyed
from the back of the end zone. Through "extensive experimentation", Coach
Thomson determined that a deep safety (DS) placed at +28 yards could enforce
an end line at +18 that would eliminate the deep pass and force the offense to
concentrate on medium-range routes. The factor that made this coverage
possible was that the DS could cover much more ground than a traditional
defensive back because he was running forward -- not back-pedalling meant he
could effectively cover twice as much ground.


                                          4
The next step in the master 2LD design was the play of the second level of five
pass defenders. Their basic concept was to play tight man-to-man defense on
their respective "mirrors", denying the short pass by playing underneath the
receiver after bumping him. This left the offense with a window of opportunity
for passing the ball of between +15 and +18 -- the medium range passing
game. However, because of the tight coverage by the second level defenders,
the quarterback was forced to arc the ball in the air to drop it in between the
second level and the deep safety. This is basic 2LD man or "Max" coverage.

The chess game began in earnest with the other basic coverage, a zone scheme
called "Cover". Here, the second level (2L) played the short zones at a depth of
about +12 to +15, taking away the medium depth pass while conceding the
quick stuff. Max coverage would normally dictate a "hard" alignment by the 2L
defender on an outside receiver (up to +1, basically right in the receiver's face),
while Cover would call for a medium depth deployment by the 2L defender (+3 -
+5). If offenses start keying the depth of the 2L alignment, however, we can
align them hard and run Cover, or medium and play Max -- giving no clue of our
intentions before the snap. Combined with our bumping response to motion no
matter what coverage we're in (page 9), we provide no pre-snap clues to the
offense. They must decide -- are we taking the short pass or the medium pass
away on this snap? Will we stunt and/or blitz? If so, what variation of Max
coverage will we play behind it? Combined with 13 different defensive fronts
which we can shift into just before the snap, and the automatic stacking of 2L
defenders behind their 1L counterparts when they are mirroring an offensive
backfielder in the box (or "Core", as we call it), we make pre-snap reads a
nightmare for offensive coordinators and quarterbacks.

I will detail alignments, stunts, blitzes and coverages in this guide, but I will
make the point again -- the deep alignment of the DS is crucial to the operation
of the 2LD. It is what allows the first and second levels to attack the offensive
gaps and receivers with abandon, and to disguise what they are doing until the
snap. In short, it is absolutely essential to the 2LD. Coach Thomson does allow
for the re-alignment of the DS at free safety depth (+ 8 to +18 yards), but only
in certain special circumstances. As a rule, the 2LD absolutely requires a truly
DEEP Safety. Minor adjustments for slower or faster personnel, (i.e. from +25 to
+30) are perfectly acceptable; however, if you are not willing to accept the basic
concept of the deep safety, the 2LD is not for you.


                                         5
THE BASICS

WORKING WITHIN THE SYSTEM: DEFINING TERMS


Areas: By definition, the sections of the field on the offensive side of the ball
where potential receivers are located. The area between the offensive tackles
and 5-7 yards deep is the Backfield; Area C extends 5 yards outside the Backfield
in each direction; Area B extends out from Area C a further 7 yards toward each
sideline; and Area A extends from Area B to each sideline. Each Area A and C
may contain only one receiver; receivers nearby are considered to be in Area B.


Core: An area surrounding the static offensive personnel (i.e., the offensive


                                        6
line), the quarterback, and the First Level (1L) of the defense. It may also
include mobile personnel (i.e., running backs, tight ends, slotbacks and/or
wingbacks) and their Second Level (2L) "mirror" defenders. The core normally
extends in an oval with a radius of 5-7 yards from the football.

Numbering: Mobile offensive personnel (that is, potential receivers -- backs and
ends) are given a number relative to their position. The receiver closest to each
sideline is counted as #1; the next receivers in are #2; while the remaining
receiver, regardless of position, is #3. Reading across the field in either
direction, the numbering is always 1, 2 ,3, 2, 1. Stacked receivers are numbered
from front to back: if the front receiver is #1, the one behind him would be #2,
a third in the stack would be #3, and in a quad stack, the fourth receiver at the
back would be #2.


Offensive receivers are identified with reference to their number and area. By
definition, there can be only one receiver in each Area A and C, so receivers
stacked behind #1A are automatically #2B, followed by #3B, etc. Similarly, a
TE/wingback combination will be numbered (assuming Area A to that side is
empty) as #2C and #1B, respectively (see diagram next page). Two important
points to note: backfield receivers are identified by number only; and
quarterbacks (that is, the most likely passers) are not numbered at all, even in
direct-snap (shotgun) formations.


                                        7
Formations with Area A receivers can be classed as spread formations, and we
further identify the set by the number of receivers to one side: Iso, Twin, Trips
or Quad. Since Len and Ron always mirror #1 to their side, and Mike mirrors
#3, Sam and Will by definition mirror #2 to the strong and weakside
respectively. If Sam, for example, is mirroring a slotback to his side, and he sees
two backs in an I formation, he can deduce one remaining receiver on the other
side of the formation. If his slotback goes in motion across the formation, Sam
does two things: he bumps to the Core to stack behind a 1L defender and
mirror one of the I-backs; and he calls out "Twin! Twin!" so that Will can be
waiting on the other side of the Core to pick up the motion man. Our bump
rules (see page 9) protect us if the ball is snapped when the motion man is in
the backfield -- if the ball is handed to the motion man on a fly/jet/speed sweep,
the 2L defender who has bumped to cover him will pursue him inside-out, while
the defender who has switched to the fullback will mirror him for trap and belly
plays.


                                         8
Bump: 2L defenders always react to motion the same way, regardless of the
coverage we have called. If Len is mirroring a flanker who goes in motion, Len
will follow him across the formation until he encounters another 2L defender --
let's say Sam. Len then physically tags Sam with his hand ands says "bump" --
Sam picks up the motion man, while Len now mirrors the receiver Sam had been
covering. The key to effective coverage is that a 2L defender is ONLY
responsible for his man unless and until someone comes along and bumps him
to another receiver.


In the diagram, Ron bumps left with motion until he contacts Sam; Sam in turn
drops back at an angle as he approaches the Core (to avoid 1L defenders) and
mirrors the motion man. If the ball is snapped for a fly/jet/speed sweep series
play at the moment diagramed, Sam still has the motion back and will pass in
front of Mike if necessary. If the motion man passes in front of the FB, on the
other hand, Sam would bump him to Mike and mirror the FB himself.

Wideside: If the ball is scrimmaged from a hashmark, the wide side of the field
is obvious; however, by 2LD definition, if the ball is scrimmaged from BETWEEN
the hashes, BOTH sides of the field are the wideside. This has distinct effects on
several 2LD coverages (see pp. 32-40).


                                        9
THE 2LD BY POSITION


Here are some thumbnail sketches of the requirements for the various 2LD
positions.

First Level (1L): Body mass is important, but quickness and agility are vital at
Nose and Tackle. This is a fluid, swarming defense, so smaller/quicker personnel
should be preferred at these positions to larger/slower (all other things being
equal). The Ends should have speed, quickness, lean body mass, AND height.
These are by far the best athletes in the First Level, and should be among the
best on your team. Julius Peppers is the current prototype. (You've got a couple
of those lying around, right?)

The Ends are your principal pass rush threat, yet must be able to plug the off-
tackle hole. They almost always crash, and are responsible for the C gaps; the


                                       10
other DL personnel usually have a one-gap responsibility as well, although we
often give one Tackle or the Nose two-gap responsibility. Otherwise, we just
move the unassigned gap around in a kind of shell game.

The key to all 1L maneuvers is that they begin as pass rush -- everything else is
a reaction. When you give the 1L that aggressive mindset, you can still channel
that aggression into fighting through blocks to stop a running play coming at
them, or tearing down the LOS to pursue. I've found it much easier to teach D-
line techniques this way than to teach gap responsibilities first and then pass
rush as a reaction.

Second Level (2L): Speed kills, inside and out. A glue-footed Mike (what
Coach Thomson calls Gael, the middle LB equivalent in the 2LD) can be caught in
mismatches against speedy receivers any time the offense chooses, so you need
foot speed at all five 2L positions. The two outside positions (I call them Len
and Ron -- CB equivalents) must be burners with big egos -- think Deion. While
we rarely hang them out to dry without top cover, these kids just have to be
quick and cocky. The middle three positions (Sam, Mike and Will) are similar in
requirement to the Ends, but don't have to be quite so genetically superior.
Body mass for plugging the inside and height for staying with crossing TEs are
important, but again, speed shouldn't be sacrificed for size. If you have to, you
can play both a big LB type and a quicker SS type at one of the 2L positions,
substituting them according to game plan.

Deep Safety (DS): This can be one of the most average athletes on the team.
Reasonable speed is an asset, but intelligence, timing and football sense are all
very important. The only critical trait is that he must LOVE TO HIT. He will get
opportunities to lay the leather on receivers who are stretched out reaching for
passes while looking backward, and he will be expected to make the most of
these opportunities. We see very few deep Post patterns by teams after a few
good hits by the DS -- most teams stick to out routes and the shorter stuff after
one or two "rifle shot" collisions.

We don't coach brutality, and I certainly do NOT teach head shots, but the laws
of physics dictate that a DS running forward can cover twice the ground of a FS
backpedaling, and will arrive at the point of impact with twice the momentum --
which means twice the impact energy.


                                        11
ALIGNMENTS (Note: The Deep Safety aligns 28 yards deep at the midpoint
between the two widest receivers, but always inside the {high school}
hashmarks.)

First Level: I'll give the two alignment rules for each 1L position, then
demonstrate with diagrams.

Nose:         Rule #1: All odd-numbered calls -- 11, 3's (3 Left and 3 Right), 33,
              5's, 55 -- the Nose aligns ODD, over the center.

              Rule #2: Even-numbered calls -- 2's, 22, 4's, 44 -- the Nose aligns
              EVEN, on the guard to his Left or Right, depending on the Ends'
              call. (Corollary: In 22 and 44, Nose aligns EVEN, but stacks
              behind a Tackle, again depending on the Ends' call.)


Tackles:      Rule #1: All double-digit calls, alignment is pre-determined: In 11,
              OPEN, over offensive tackle; in 22, 33, 44 or 55, CLOSED, over
              offensive guard.


              Rule #2: All single-digit calls, (2's, 3's, 4's or 5's), Tackles align
              according to the Ends' call at the LOS: "Left", left Tackle is OPEN
              and right Tackle is CLOSED (both aligned to the left); "Right", left
              Tackle is CLOSED and right Tackle is OPEN (both aligned to the
              right).


                                         12
Ends:        Rule #1: All calls starting with a 1, 2 or 3 (11, 2's, 22, 3's, 33),
             Ends align LOOSE, outflanking the offensive core.

             Rule #2: All calls starting with a 4 or 5 (4's, 44, 5's, 55), Ends
             align TIGHT (outside eye on offensive tackle). Exception: When
             lining up next to an Open Tackle, the End aligns Loose.


Note: When aligned opposite a tight end or tight slotback, a Loose End will play
a standard 9 technique on the TE's outside shoulder, rather than the slanting
stance shown in the diagram above, which is normal for a Loose End on the Split
End side. We can also make a Wide call for the Ends, which would put them a
yard outside a standard TE, or outside shoulder on a TE/WB combination.

The Ends' Calls: As the offense breaks its huddle, both Ends will call out a
directional indicator decided by game plan: "Left" or "Right" in response to
formation strength, field width, and/or other factors. In order to give the
defense as much flexibility as possible in aligning before the snap, we provide an
additional bit of information in the huddle. When we call a single-digit front in
the huddle, we may add the word "Away" -- for the benefit of the Ends only.
Thus, if we call "5" in the huddle as the 1L alignment, and the offense lines up
with its strength to the left (as previously defined by that weeks' game plan), the
Ends would normally call out "Left! Left!" and the 1L would align in 5 Left (see
diagram next page). If the huddle call was "5 Away", however, the Ends would
call out "Right! Right!" -- AWAY from offensive strength -- at the LOS, and the
1L would align in 5 Right (see diagram next page). Thus all 13 alignments are
available to the defense at all times, no matter how the offense lines up.


                                         13
In Odd fronts, the Nose has two-gap responsibility; in Even fronts, the Tackle
opposite the Nose has both gaps. All other linemen have a single gap to defend.

(Please excuse the quality of the diagram. Ends are further outside offensive
tackles when aligned Loose than the pictures indicate, and the angle of slant is
wrong, too.)


                                        14
Second Level: There are two basic areas where 2L defenders deploy: out wide
mirroring immediate receivers (in Areas A and B); or mirroring backs, TE's or
tight slot/wingbacks (in Area C or the Backfield). In the latter case, the 2L
defenders are considered to be within the Core, and are almost always stacked
behind 1L teammates at a depth of up to +5 yards.


Unstacked: 2L alignment outside the Core consists of two components: shade
           (Inside or Outside the receiver) and depth (Hard, Medium or Soft).

Shade: From an Outside shade, the 2L defender will aggressively FUNNEL his
receiver to the inside, denying outside (i.e., Fade) routes; from Inside, he will
STEER the receiver outside, denying the inside release and crossing routes.

Depth:        Hard:         Up to +1 -- in the receiver's face;
              Medium:       +3 - +5;
              Soft:         +7

2L defenders in Area C may line up at a Hard (Outside shade) or Medium (either
shade) depth; in Area B, all combinations of the three depths and two shades
are possible; while in Area A, both shades are possible from a Hard depth
alignment, but only an Inside shade is played from a Medium or Soft depth.

The Hard Area C Outside shade results when a TE or slotback is present and the
1L End is aligned Tight (over the offensive tackle). If Mike, for example, is
stacked behind that End in a 2 Stack, Sam (who has responsibility for the TE or
slot) will AUTOMATICALLY move up to a Hard Area C Outside shade, which we
call "JAM". The Jam position allows Mike to mirror his man outside without
colliding with Sam.

Stacked:      2L defenders will Stack in the Core at three possible locations: a 1
              Stack over the center; one or two 2 Stacks over the offensive
              tackles; and one or two (Area) C Stacks over a TE or slotback.

1 Stack: The 2L defender stacks behind Nose in Odd alignment (over center).


                                         15
2 Stacks: The defender stacks behind a Tackle or End opposite the offensive
tackle, or behind a Tackle or Nose opposite an offensive guard.


C Stacks: The 2L defender stacks behind an End opposite a tight end or
slotback. (See explanation of Jam technique on page 15.)


Obviously, combinations are possible. The following example shows how both 2L
defenders are protected from offensive line blocks by the 1 and 2 Stacks.


                                      16
Some combinations of stacks and 1L alignments are shown below against
different offensive formations.


      5 LEFT vs. Wing-T                           11 vs. Double Wing


      4 LEFT vs. Single Wing                      5 RIGHT vs. Tandem


                          33 vs. Run and Shoot


                                     17
FUNDAMENTALS: First Level

Stance:

   Nose and Tackles use a 3-point stance with a shoulder-width base and fairly
    minimal stagger -- must be ready to move laterally;
   Down hand should be about 18 inches from LOS; off hand is partially
    extended, ready to deliver arm shiver;
   Tackles and Ends should play with their inside hand down; left-handed
    personnel should play on right of defense;
   Nose aligned Even and Tackles aligned Open or Closed must shift to an
    inside-eye (Eagle) position when the offensive lineman opposite them is split
    out more than two feet; otherwise alignment is always head-up on O-
    lineman;
   Ends' stance is either two-point or three-point; two-point is mandatory when
    End has pass coverage responsibilities, three-point is mandatory when End is
    lined up Tight (inside TE) and is relieved of pass coverage responsibilities;
   Ends' stagger is always inside foot slightly back, and initial step is always
    with inside foot, whether lined up Tight or Loose.

Shifting:

   We will shift from one 1L alignment to another to disguise our intentions,
    after the Ends' Left/Right offensive strength call and before the snap;
   From 3-point stance, Nose and Tackles shuffle laterally to new position with
    hands skimming grass;
   Ends start Loose, may/may shift inside to Tight 3-point stance;
   Timing against opponent's cadence (including Ends' Left/Right call) must be
    practiced every week.

Responsibilities:

Against the run, Nose/Tackles' responsibility sequence is:

Primary:      Defend the assigned gap(s).
Secondary:    Assist with the gaps to either side.
Pursuit:      Locate the ball and execute tear technique (page 20).


                                        18
Against the pass, the Nose/Tackles sequence becomes:

Primary:      Line gap becomes pass rush alley, narrowing and converging at the
              passer; if blocked out of his alley, the pass rusher must work his
              way back.
Secondary:    React to screens, draws, delayed runs.
Pursuit:      Begins when QB escapes from core with the ball.

Ends' responsibility sequence against the run is:

Primary:      Contain.
Pursuit:      Backside end must trail play at the same depth as the ball, always
              keeping the QB in sight.
Secondary:    Very limited responsibilities. Once containment is lost, End is
              almost always out of the play.

Against the pass, the responsibility sequence becomes:

Primary:     Contain the QB -- rush him outside-in, cut off sprint- or roll-out.
Secondary:   React to screens outside the core, and contain draws, screens and
             shovels inside the core.
Note: Ends have certain specified pass coverage responsibilities. They are
detailed on pp. 21-24.

Techniques:

Nose/Tackles have two techniques, power move and slant; and two reflex
reactions, breakdown and tear.

Power Move: The N/T launches himself straight ahead at the blocker, striking
blows on the upper arms just below the shoulder pads with the heels of the
hands. The defender's helmet may also impact the blocker just above the
numbers; in any case, the defender must maintain the flex in his knees and keep
his back bent forward at the waist. He locks out with both arms without giving
ground; even if he cannot completely lock out against larger opponents, he
maintains separation from the blocker this way. Keeping his eyes on the ball-
carrier, the defender pushes on one shoulder pad and pulls on the other to
control the blocker and clear a path to the ball. If the blocker grabs a forearm or
elbow, the defender pulls down through the blocker's thumb to clear his arm.

Slant: Defender lead-steps (never use a cross-over step) into his assigned gap
at a 45 degree angle. He simultaneously punches his opposite arm and shoulder
across his body to deny the offensive lineman he lines up across from a clear
shot at his chest. With his head and shoulders in the gap, he can now play the


                                        19
blocker: if the lineman he is slanting toward blocks down on him, he employs his
power move techniques; if the lineman he originally aligned over attempts to
reach-block him, the defender attacks the shoulder pad with his inside elbow,
and hand-fights his way clear to secure the gap.

Breakdown: The N/T always attacks, but this attack only continues at full
throttle when confirmed by pass-blocking by the offensive line. If the O-line fires
out, the defender immediately breaks down with shoulders square to the LOS --
the rule for breakdown is to penetrate no further than the heels of the offensive
line.

Tear: A pursuit reaction along the LOS by N/T's who have broken down from
their initial pass rush attitude. The defender keeps the ball carrier in front of him
without circling around blockers or getting blown off the line. He never overruns
the ball, but adjusts his tear course to intersect the ball carrier.

It is important to emphasize that a N/T's original intention is to ATTACK full
speed ahead; he will continue to do so if his offensive line keys (see page 46)
confirm pass blocking, and will only initiate breakdown and/or tear AS A
REFLEXIVE ADJUSTMENT to aggressive blocking by his key triangle (see page
46).

Ends have two run techniques, crash and trail.

Crash: Aligned Loose, the End is free to crash into the offensive backfield. He
penetrates aggressively through the C gap aiming at the near halfback (or at the
spot where one would be). He maintains outside leverage on the ball while
forcing it directly -- the End should NEVER allow a ball-carrier to cut back inside
him untouched. From a Tight alignment, the crash technique is more difficult to
initiate, but the End should fight through blocks by the offensive line to gain his
crash leverage whenever possible. The End must stay on his feet, so the arm
shiver technique is preferred, fighting through the head and neck of inside-out
blockers, disengaging as soon as possible and keeping his feet clear. If an End
aligned Loose reads an off-tackle play coming directly at him, however, he
should engage the trap or kickout-blocker with his inside shoulder to maintain
outside leverage. Aligned Tight, an End should fight outside-in pressure from a
TE with his outside shoulder, stringing him along the LOS while being aware of
cutback attempts by the ball-carrier.

Trail: A natural extension of crash technique. If potential ball-carriers move
away from him, and no blockers attack, the End immediately locates the QB and
the football, trails AT FULL SPEED and expects a cutback, counter or reverse
move by a ball-carrier. Reverses or bootlegs will almost always be preceded by


                                         20
blockers, telling the End he must maintain his primary contain responsibility
rather than initiating trail.

Ends also have three pass techniques to master: Max (man), Cover (zone), and
Shortside Square.


                      ENDS: MAX AND ZONE TECHNIQUES


                                        21
ENDS: COVER, SHORTSIDE SQUARE, AND STUNTS

As indicated in the diagrams, the Ends have a few, very limited pass coverage
responsibilities. They must be drilled relentlessly, however, if the 2LD is to
succeed as a pass defense platform. Ends are called on to Max backfield
receivers (p. 21, top, 22 bottom left, and see p. 29) when the 2L "Dog" blitz is
verified; Max TE's or tight slotbacks (p. 21, middle, 22 bottom right, and see p.
31) when the 2L blitz "Cushion" or the coverage variant "Tight Cushion" (p. 34)
is verified; drop to Shortside Hook or Flat zones in Cover (p. 21, bottom and p.
22, top and middle left); or drop to Shortside Square if Wideside Trips is


                                        22
authenticated from Cover (p. 22 middle right, and see pp. 23, 24, and 35). In
addition, they must rush a sprintout pass in their direction even though "Cover"
is called (p. 22 top right).

SHORTSIDE SQUARE

This is a unique feature of the 2LD. Neither man nor traditional zone coverage,
SS is invoked from Cover when the ball is scrimmaged from a hashmark and the
offense lines up in or motions to Trips or Quads to the Wideside of the field (p.
24). If (and only if) the remaining receiver to the shortside attacks the short
side of the field as a pass receiver does the End drop to his SS responsibilities. If
the receiver (usually a backfielder) sets to block shortside, the End can rush
under control, but must be prepared to cover a delayed pass release to the
shortside; if he sets up to block or releases for a pass to the wideside, the End is
free to crash as normal. The Shortside Square extends from the LOS to the
Deep Safety's end line at +18 yards, and from the shortside hashmark to the
sideline.


                                         23
ENDS: SHORTSIDE SQUARE ASSIGNMENTS


                24
FUNDAMENTALS: Second Level

Stance: Stacked in the core, 2L defenders require lateral mobility. Therefore,
their two-point stance should have feet shoulder-width apart in a minimal heel-
toe stagger, with weight forward over the toes, and knees and waist slightly
bent. They should have a clear view into the backfield.

In an Area C Jam technique over a TE or tight slotback, the 2L defender keeps
his outside foot back, widening his stance slightly and keeping his center of
gravity lower.

Outside the core, covering an Area B or A receiver, the 2L defender keeps his
inside foot forward and his body weight forward. (Exception: When playing a
hard outside shade, the defender keeps his outside foot forward.) As a general
rule, the closer the 2L defender mirrors his receiver, the more he lowers his
center of gravity by lowering his hips and widening his stance (but never wider
than shoulder width).

Responsibilities: The basic responsibility of the 2L defender is the man he is
mirroring. This is true whether the play develops as an inside run, outside run,
dropback, action or screen pass.

Mirroring a running back within the core, run defense is normally the primary
responsibility for 2L defenders -- however, this may change in "sure" passing
situations (i.e., 3rd and 15+). Outside the core in Area A or B, 2L defenders
must play the pass first. In Area C, the 2L defender's primary versus secondary
responsibilities may depend (according to game plan) on the type of receiver he
is mirroring. Against a larger, slower TE, the 2L defender should play the run
first; while against a smaller, faster slotback, the 2L defender should play pass
responsibility first. Again, this will be controlled by the specific game plan for
each opponent.

Techniques: When mirroring in the core, the 2L defender stacks behind the 1L
defender closest to his mirror. If no 1L defender is aligned within one offensive
lineman of the mirror back, the 2L defender may align directly opposite his
mirror unstacked. When receivers go in motion across the formation, 2L
defenders shuffle between stacks, keeping their shoulders parallel to the LOS at
all times.

If the mirror back dives at the 2L defender, he fills aggressively. If the mirror
moves outside the 2L defender, he scrapes down the LOS and plays the ball
inside-out as long as it remains inside containment. He should meet blockers
with a two-hand shiver to maintain separation while he keep his feet moving. If


                                        25
the ball moves across the core away from the 2L defender, he must play cutback
responsibility, shuffling cautiously across the formation and keeping the ball in
front of him laterally so he can play the cutback if it comes. When the ball clears
the core, the 2L defender immediately institutes pursuit, accelerating to catch up
with the ball (but not overrun it). From the backside of the play, pursuit takes a
deep course called rotation. When the ball crosses the LOS, the rotating
defender should be exactly in between the two hashmarks, and takes the best
available angle to intercept the ball carrier.

In an Area C Jam technique, the 2L defender may have to concentrate almost
entirely on his primary responsibilities -- pass coverage or containment -- and
ignore pursuit and rotation on plays away.

Outside the core, the 2L defender aligned at hard depth will Steer his mirror
outside or Funnel him inside; at soft depth he will employ positional technique to
deny specific pass routes (i.e., aligning to the inside to take away the quick Slant
and Post); and at medium depth he will employ both methods.

Specific techniques are covered in the Installation/Drills section (page 43).


FUNDAMENTALS: Deep Safety

The Deep Safety (DS) position is unlike any other position in defensive football.
He is not a defensive back. Defensive backs are trained to react instantly to
offensive cues. The DS, however, must be trained NOT to react immediately to
what he sees before or at the snap. Defensive backs must move rapidly and
with great agility to prosecute their responsibilities. The DS is more like a
military force being held in reserve until the crucial moment of battle. He tracks
the offensive threats from long distance while pre-positioning himself during the
first 1.5 to 2 seconds of any play -- then he strikes like a guillotine falling.
Defensive backs read keys and react to them immediately. The DS eliminates
possibilities based on keys -- he looks for what doesn't happen and eliminates it,
leaving him always with only one course of action. His train of thought is like a
flow chart:


                                         26
PRE-SNAP


           RUN                                              PASS

 INSIDE                                      SHORT/MEDIUM

      OUTSIDE                                          DEEP
The DS will position himself before the snap at the approximate mid-point of the
offensive formation (but never wider than one of the hashmarks). He will note
the location of all five potential receivers, how many are available for immediate
release downfield (i.e., 2, 3, 4 or 5 receiver sets) and whether the formation is
balanced (1x1 or 2x2) or unbalanced (1x2, 1x3, 1x4 or 2x3).

At the snap, the DS will analyze the offensive play, eliminating possibilities by
following the above flow chart. He does not give equal credence and weight to
all possibilities, however. One key to the play of the DS is that he must assume
that every play will be a deep pass -- to the end-line at +18 or beyond (note the
stars in the flow chart). Any other offensive play becomes a reaction for the DS
-- and his reaction is to secure the tackle without fail.

Stance: The DS stands tall and relaxed, bouncing lightly on his toes (like a
boxer, or a tennis player waiting to return a serve) as the ball is snapped,
reading the quarterback.

Responsibilities: In Max coverage, the DS will intercept the ball at the end-line
(or deeper, in case of a deep pass). In Max/Double, he is responsible for
double-covering a chosen receiver. In Cover, his responsibilities may include the
deep middle 1/3 or a deep 2/3 of the field.

Technique: The most important point to teach the DS is the correct path to
intercept the ball at the end-line (see diagram next page).


                                        27
This is the DS "glide path". He should never head directly for the LOS, but
should focus his attention on the offense after the snap and begin to move under
control toward the likely point of intersection with the ball. If the DS first moves
forward, and then is forced to sprint laterally, he will have lost all the advantage
that his built-up momentum and kinetic energy would otherwise give him (i.e.,
intercept speed and force of impact). The DS "bounce and glide" is explained in
greater detail in the Installation/Drills section (see page 57).

By the time a ball is thrown, the DS should be well on his way toward the
intended receiver. If the ball will land near or past the end-line at +18 yards,
the DS has a decision to make -- should he collision the receiver, or attempt the
interception? In almost every case, the preferred option is to HIT THE
RECEIVER. Therefore, before the ball starts downward from the high point of its
trajectory, the DS will have made his hit vs. intercept decision. If he decides to
impact the receiver, he must factor in two things -- the timing of the hit vs. the
ball's arrival; and the position of any 2L defenders who may be covering the
receiver. Taking the latter point first, the DS should TRY to hit through the
shoulder of the receiver opposite the 2L defender. Of course, if this proves too
difficult, the DS must still deliver a maximum blow to the receiver. We give the
DS the full benefit of the doubt on his timing. If he impacts the receiver a
fraction of a second before the ball arrives, well and good. We will take the
penalty under those circumstances, and work with the DS after the fact to
prevent recurrences. Meanwhile, the receiver will clearly understand why we
"play that kid so deep."

Or, to quote Dr. Thomson:

"...(T)he safety's transition from read to enforcement, from mental integration to
physical action, involves a gradual commitment, a building of momentum:
-- at the snap, mentally eliminating the offensive possibilities, starting with the
various (short) patterns, while gliding slowly;
-- as the moment of his action-decision approaches, accelerating his glide;
-- as the pass rush closes in on the QB, never fully committing until cued."

(By cued, Thomson means the ball crossing the LOS on the ground or in the air.)


                                         28
VARIATIONS: 1L Stunts

We distinguish between Stunts by the 1L and Blitzes by the 2L, even though
there is some overlap.

Slant:        Involves the Nose and one Tackle slanting in the same direction to
              disguise the final alignment of the 1L, even after the ball is
              snapped.

From odd-numbered fronts (11, 3's or 5's), the Nose and the Tackle away from
strength will Slant toward strength, aiming for the spot where the back foot of
their target offensive lineman (the one toward whom they are slanting) is lined
up before the snap. Even-numbered fronts (2's, 22, 4's or 44) mean that the
Nose and the Tackle who is aligned Closed (in 22 and 44, the one the Nose is
NOT stacked behind) Slant away from strength -- the Nose always toward the
center, and the slanting Tackle away from him.


         11 SLANT                                     2 or 4 RIGHT SLANT

Twist:        Two maneuvers involve changing gap responsibilities between 1L
              defenders: the Tackle-Nose Twist (TNT) and Tackle-End Twist
              (TET). These are not primarily pass-rush maneuvers, but we will
              use them to disrupt man-blocking schemes.

TNT is executed by the Nose and an adjacent Tackle (either in Odd/Closed or
Even/Open alignments). The Nose slants outside, away from the Center, then
the Tackle crosses behind him.


         3 LEFT TNT                                   2 or 4 RIGHT TNT


                                       29
TET similarly involves a Tackle and adjacent End, but requires an Open Tackle
and Loose End. As with TNT, the inside 1L defender (the Tackle in this case)
slants out, and the End loops behind him.


                                  3 RIGHT TET

Once again, combinations are possible.


5 LEFT SLANT TET                                       5 LEFT TNT TET


VARIATIONS: 2L Blitzes

Three 2L blitzes provide the DC with more means of disrupting offensive plans.
Blitzes also complement 1L stunts for a very practical reason -- a stunting 1L
defender may be assigned two gaps in a particular front, but can only fill one of
them -- making 2L blitzes a practical way to fill the undefended gap at
unexpected moments. All blitzes must be VISUALLY VERIFIED at the LOS.

Dog:         2L defender mirroring a Backfield receiver MAY fire through a gap
             AT HIS DISCRETION.

The Dogging 2L defender is never wasted on a futile blitz. If his mirror back sets
up to pass-block or moves laterally toward the perimeter of the Core, the
defender is free to fire IF HE THINKS IT WILL BE EFFECTIVE (his mirror will be
picked up by an End -- see page 21). If his back dives ahead, however (either
immediately or after starting across the formation laterally), he must continue to
mirror until he is sure the back is neither carrying the ball nor sneaking out on a
pass route.


                                         30
Cushion:     At the Snap a Loose End attacks and Maxes a TE or slotback, while
the 2L defender with mirror responsibility crashes outside-in.

Cushion is particularly effective against outside running plays -- sweeps, quick
pitches, options, fly/jet/speed sweeps, etc. Cushion is ONLY verified at the LOS
by a TE or slotback in the offensive formation.


                                   CUSHION

Switch:      Against TE/2 Backfielder formations, Switch crashes the End and a
             2L defender outside-in.

Switch is ONLY verified visually at the LOS by the presence of a TE and two
Backfield receivers (meaning two 2 Stacks by the defense, and a 2L defender in
position to Max the TE as the 2L defender who would normally do so crashes).


                                    SWITCH


                                       31
COVERAGES

Max (man) coverage is the heart and soul of the 2LD. I know of a number of
2LD coaches out there who only use Max and its variants. However, I have
always used, and recommend using, Coach Thomson's Cover (zone) scheme,
albeit with a few simplifications.

Max:         Tight man coverage on the five potential receivers by 2L defenders
             with the DS enforcing the end line at +18.

Variations include Max/Double, where the DS and a 2L defender double cover a
wide receiver, while other 2L defenders play loose man coverage from a depth of
+7 (with no end line in effect); and Max/Tight Cushion, where an End and a 2L
defender double a TE or slotback (with the DS end line in effect).


                                 3 LEFT MAX


                                      32
Max/Double calls the DS to provide "top cover" double coverage to a specified
wide receiver. It tells certain other 2L defenders they must play Max Soft (i.e.,
traditional man coverage) techniques from a depth of +7 or more. The
exceptions for playing Max Soft are for 2L defenders mirroring backfield receivers
and for the 2L defender mirroring the receiver being double covered. In order to
maintain integrity against the run, and because the deep passing threat is less
immediate, defenders mirroring backfield receivers stay at their normal depth;
however, they must always be aware that when Max/Double is called, there is no
end line in force. The 2L defender mirroring the called Max/Double receiver (the
1A receiver to the defensive right in the diagram below) will attack and funnel or
steer that receiver (depending on the game plan). The DS sprints forward at the
snap to provide double coverage over the top of any deep routes -- fades, posts,
etc.


                         11 MAX/DOUBLE 1A RIGHT


                                        33
Max/Tight Cushion is an excellent mechanism for double-covering a TE or tight
slotback. It requires an End aligned Loose next to an Open Tackle, who assumes
the End's contain responsibilities (see p. 14 -- with a TE on the defensive left,
this would limit potential 1L fronts to five choices: 11 as shown below, and "the
Lefts" -- 2 Left, 3 Left, 4 Left and 5 Left). At the snap, the End bumps the TE
and Maxes him from an underneath position; the 2L defender mirroring the
TE/slot then plays a Max Soft technique on the receiver, double covering him all
over the field. Because the DS end line is in operation, all other Max
assignments are executed as usual.


                          11 MAX/TIGHT CUSHION


                                       34
Cover:       Zone defense by the 2L, DS and Shortside End.

I have taken several of Coach Thomson's zone concepts and combined them.
His Cover is the basis for my zone coverage against normal (i.e., Iso or Twin --
no more than two immediate receivers on each side) offensive formations.

When the ball is scrimmaged from a hashmark, Cover becomes a four-under,
three-deep zone with four 1L defenders rushing the passer. The wide flat is
always left empty in Cover, which is a big reason we don't play a steady diet of
Cover -- we always mix it up with Max. Len, Ron and the DS cover the three
deep zones, while Sam, Mike, Will and the shortside End cover the Wide, Middle
and Short Hook and Short Flat zones, respectively. In the event of a 2B receiver
to the shortside (such as a back slotted to the defensive right), Will (in the
diagram below) would mirror that receiver before the snap and drop to Short Flat
after it, while the End would drop to Short Hook instead. This allows us to
maintain maximum disguise while not asking too much of the End's pass
coverage duties.


                         11 COVER (from right hash)


                                        35
From between the hashmarks, however, there is by definition no shortside on
the field -- so both wide flats are left open. This frees up both Ends to rush the
passer, but it also means quick flat and/or out routes have a much higher
completion possibility. One solution is to teach a “Cover-Middle” that drops the
strongside End to his flat and spreads Mike and Will from Middle Hook and Wide
Hook to Wide Hook and the weakside Wide Flat, respectively. Another is to
game-plan dropping one or both Ends to their respective flats when Cover is
called from between the hashmarks, turning flat coverage into a guessing game
for the offense. In any event, this has to be factored into the defensive game
plan, and makes it even more imperative that Max and Cover be mixed up when
the ball is scrimmaged from between the hashes.

Again, the information on Cover on pp. 35-36 applies only to offensive
formations with no more than 2 receivers deployed to each side. For formations
that line up in or motion to Trips or Quad sets wideside, see pp. 37-38.


                    3 LEFT COVER (between hashmarks)


                                        36
The diagram below shows the effect of the offense sending Trips receivers to the
wideside of the field. Even though Cover has been called, defenders respond to
Sam's call of "TRIPS WIDE! TRIPS WIDE!" by repeating the call, and by
executing their Trips assignments: Len drops to the deep outside 1/3 on the
Trips side, while Will, Mike and Sam drop to the Trips-side Wide Flat, Wide Hook
and Middle Hook, respectively. The DS moves up under control to cover the
remaining deep 2/3 of the field, while Ron Maxes the now-isolated backside wide
receiver. The backside End executes a technique which is not quite a zone,
called Shortside Square: if the remaining receiver who is in position to threaten
the shortside of the field, the fullback, releases shortside, the End drops and
plays his Square responsibilities (see pp. 23-24). Quad receivers would produce
the same result, whether the offense lines up that way, or shifts and/or motions
into a Quad formation wideside -- with the sole exception that the shortside End
would be freed from the possibility of a #2 receiver releasing to his side, and
could crash as usual. If crossing routes were causing problems, of course, we
could still game-plan dropping that End to Shortside Square to wall off crossing
receivers.


                5 LEFT COVER vs. WIDE TRIPS (right hash)


                                       37
Finally, if we call Cover against a team which motions to or lines up in a Trips or
Quad set from between the hashmarks, we end up with the situation
diagrammed below -- no shortside means no Shortside Square, so both Ends
crash; while Ron must (by rule) Max the isolated receiver he is mirroring.
Otherwise, the Cover Wideside Trips rule is in effect, so Len, Sam, Mike, Will and
the DS all maintain their same assignments against wide Trips.


               11 COVER vs. WIDE TRIPS (between hashes)


                                        38
Two-Deep: The insertion of a second DS (by removing one Tackle). Can be
          used with Max or Cover.

The Two-Deep adjustment is not a coverage per se, but it affects how you play
your coverages. Tactical use of a second DS should occur for sound defensive
reasons, since you are eliminating 20% of your 1L pass rush. Against some
teams, the use of a second DS or other variations (see spread offense
adjustments, page 93) can provide an entire range of tactical challenges for
offensive coordinators to meet -- from maximum pressure to dropping off 8
defenders.


                2 LEFT, MAX/DOUBLE 1B LEFT, TWO-DEEP


                                      39
In the above diagram, the left Tackle has been substituted with a second DS
who shares Max Double responsibilities with Len on the 1B receiver to the
(defensive) left of the formation. (Note: While it might seem logical to remove
the Nose in Two-Deep, it actually restricts the 1L alignments severely. Removing
one Tackle leaves the defense with many more 1L alignment options.) The other
DS enforces the end line across the entire field as usual. All other Max
techniques remain in force as usual.

Depending on whether you substitute a Right or Left Tackle for the second DS in
Two-Deep, three alignments are possible: If the Right Tackle is removed, you
can still line up in 4-Right, 5-Left or 5-Right; while if the Left Tackle is removed
in favor of a second DS, you can line up in 4-Left, 5-Left or 5-Right. If you
remove the Nose man, however, only one alignment is viable -- a 44 with no
stack by the Nose. This alignment is duplicated by the 4-Right and -Left
alignments anyway, and you can also use the 5's if you remove one Tackle.
(Using the 1L alignment rules on pp. 11-13, demonstrate for yourself that these
alignments are possible with one Tackle removed. Also, the diagram on page 39
shows Two-Deep from a 2 Left 1L front; while this can be used as a "prevent"
set-up in long yardage situations, it is not recommended as a base front for Two-
Deep.)

While none of the coverages above may seem extraordinary (with the exception
of the Deep Safety position, of course), it should be mentioned that the
uniqueness of the 2LD rests with techniques and alignments, as well as with
their application. In Max, for example, the 2L technique brings defenders
underneath receivers to take away short routes. Beyond that, the skilful
intermixing of Max and Cover with stunts, blitzes, and 2LD variations such as
Two-Deep and offense-specific adjustments (see pp. 77-94) make the 2LD a very
tricky proposition to attack. The game becomes a chess match between
offensive and defensive coordinators, with the advantages of surprise and
unfamiliarity almost always on the side of the defense.


                                         40
CONSOLIDATION: THE BASICS

I will attempt to consolidate information from certain sections before moving
ahead. It’s a habit I follow when installing the 2LD, and I recommend it to you
highly when dealing with any complex, new information.


                                       41
To review (see diagram on page 41):

The offense consists of the following elements:

5 STATIC personnel (linemen)
5 MOBILE personnel (backs/receivers)
1 QB

We define the offensive line gaps as those which separate the 5 STATIC
personnel ONLY. We only define A, B and C gaps to each side -- no D gap. (The
gaps in the diagram are numbered in red for illustrative purposes only -- we do
NOT number the gaps in our system.) The gaps are the primary responsibility of
the 1L to defend.

The Core is the area which contains the STATIC personnel and QB, as well as the
1L defenders -- it MAY also contain MOBILE personnel and their 2L mirrors.

The 2L will MIRROR the MOBILE personnel wherever they line up: if within the
Core, they will normally stack behind a 1L defender; outside the Core, they will
align in an Inside or Outside shade, at a Hard (+1), Medium (+3-5) or Soft (+7)
depth.

Normally, the DS deploys at a depth of +28 and enforces an End Line at +18. In
certain coverages, he may instead double cover a receiver, or cover a deep 1/3
or 2/3 of the field.

There are 13 1L alignments possible in the 2LD, and five possible locations for 2L
defenders to stack behind them. The combination yields a theoretical total of
242 possible 2LD fronts -- all from a two-digit (at most) 1L alignment call.

The 1L has three Stunts available to it -- the Slant and two Twists, TNT and TET.
The 2L can use three Blitzes -- Dog, Switch and Cushion.

Coverages fall in two types: Man (Max, Max/Double and Max/Tight Cushion) or
Zone (Cover). Cover changes depending on the lateral placement of the ball
(hashmark vs. middle) and on the offensive formation before the snap ("Normal"
-- Iso/Twin -- vs. Trips/Quad receivers).


                                        42
INSTALLATION: THE SCHEDULE
The following schedule is designed to get a bare-bones 2LD up and running
within two weeks, assuming 20 hours are available for defensive practice. (It is
even possible to do so in 5 days if four hours a day are available for defense.)

Special attention is given to the drills Coach Thomson invented to teach the
particular skills involved in playing the 2LD. Key practices are preceded by a
Chalk Talk script which covers the concepts to be taught on the field.

CHALK TALK BEFORE PRACTICE 1:

(Hand out diagram on page 41 before chalk talk)

Intro: "We'll teach you a new vocabulary, new positions, new drills. You are
learning something UNIQUE -- only a handful of teams in the country play this
defense, and most offenses have never even HEARD of it, much less faced it."

[Diagram 6-5 goal line defense. Demonstrate simplicity of concept: First level
(linemen) attacks their gaps, second level (linebackers/backs) mirrors receivers.
Show how the back of the End Zone forms an End Line behind which the offense
can’t operate -- it cuts down on offensive options.]

[Now move 6-5 to 50 yard line. Erase one nose guard, replace him with DS at
+28. Draw in End Line at +18. Explain that in theory the functions of the 2LD
and 6-5 are identical.]

[Define each position. First Level (1L): Nose and Tackles responsible for interior
(A and B) gaps. Ends crash through off-tackle (C) gaps.]

[Second Level (2L): Len and Ron always take #1 receivers to each side of
formation. Mike always takes #3 receiver. Sam aligns on strongside (as defined
by game plan -- pre-season, always on TE) #2 receiver; Will takes weakside #2.
Note 2L defenders may be called on to cover wide-outs AND stack in the core
behind 1L defender AND take on TE by themselves. They are LB/DB hybrids;
there is room for all types of players in the 2L, but they had better be quick.]

[Deep Safety (DS): A new position, and one that requires an absolute LOVE of
hitting -- we will choose our DS after we see who can deliver a ferocious hit, get
up, shake it off, and do it over and over again.]

[Defining the Offense: Show concepts of Core, line gaps, Backfield area, Area C,
Area B, Area A, and the numbering of Mobile personnel. (Refer to top diagram,
page 6, and diagram on page 41.)]


                                        43
[Two Key Concepts of 2LD: 1) Ten defenders ATTACK, one ENFORCES (1L
attacks gaps, 2L attacks and mirrors Mobile personnel, DS enforces end line).

2) 2LD shuts down 5 offensive threats: Inside/outside running; and quick, sprint
and dropback passing.]


                                       44
PRACTICE #1 SCHEDULE:

                        2-Level Defense Installation Practice #1 (Day 1 -- A.M.)
Time                1ST LEVEL                          2ND LEVEL                        DEEP SAFETIES
9:00        N/T: Stance, Power Move                   2-point stance
9:05          Key Drill: 1-on-1 lock*                Stack alignment                   Enforcement Drills I
9:10           E: Stance, alignment              Shiver/shed techniques                    (2LD p. 262)
9:15       Crash angle and technique           Scrape/cutback techniques
9:20       N/T: 1-, 2-Stack Drills w/2L              Unit Stack Drills:
9:25       E: Crash Drill (2 pt. stance)         1L+2L v. OL+back, lock                     Read Drills I
9:30        (basic principles/run keys)         (basic principles/run keys)                (2LD p. 265)
9:35                              N/S/M/W: 1-Stack Drill (2LD p. 162)                 Down-Out-Down Drill
9:40                            T/E/S/M/W: 2-Stack Drill                             Beaten Outfielder Drill
9:45                          E/S/M/W/L/R: C-Stack Drill                                 (Len/Ron rotate
9:50                        (Len/Ron rotate with DS drills)                              with C-stack drill)
9:55                                                      WATER
10:00        N/T/E: Stance (end 3 pt.)                 Lollipop Drill:
10:05          Review Power Move                     cuts 1, 2 & crack                 Enforcement Drills II
10:10       Intro Arm-Over rush move                   (2LD p. 246)
10:15                                            Mirror/Max Drill (1-on-1):
10:20      Intro Arm-Under rush move                   funnel, steer                       Read Drills II
10:25                                             (coverage to +7 yds.)
10:30        Key Drill: Intro pass key                               Down-Out- Down Drill (2LD p. 248)
10:35                                                               Beaten Out fielder Drill
10:40             N/T: Alley Drill                                 (S/M/W/L/R/ DS rotate)
10:45           N/T/E: 1/2-Line Drill                                     Mirror Drill (2LD p. 250)
10:50          Progress lock to thud                                 (Mirror Iso, Twin & Trips)
10:55             (N/T rotate)                             Max receivers for 7 yds - no ball
        *1-on-1 Key Drill, Crash Drill, 2LD p. 150

KEEP IT SHORT, STUPID!

I believe in keeping the players' attention span engaged at all times by the use
of short, intense learning sessions during installation (and for that matter, in any
practice). I have found short multiples of five-minute segments during two-hour
practices to be the best way to break down teaching time. There are very few
things in football that require more than 20 minutes at a time to focus on; my
normal maximum for teaching any one concept or technique is 15 minutes. See
diagrams on pages 44 and 60 for layout of practice workstations on the one-half
football field which is the minimum requirement for installing the 2LD. Drills
(keyed to the practice schedules on this and succeeding pages) are described
below. Ten new drills are covered at the first practice, so your schedule may slip
slightly at that one practice -- but they are simple, powerful drills for teaching
2LD fundamentals, so take the time to teach them right the first time.


                                                  45
PRACTICE #1:

FIRST LEVEL: Whether Nose, Tackle or End, the primary instruction tool for the
1L defender is the 1-on-1 key drill, followed closely in importance by the 3-on-1
drill. The 1L defender lines up opposite an "offensive" lineman (who can be
another 1L defender rotating through the drill station) in the 1-on-1 drill and
reads his primary key -- the lineman's helmet, either firing across the LOS or
retreating. Secondary keys are obtained during the 3-on-1 drill by reading the
"key triangle" -- the offensive lineman the 1L defender lines up across from, as
well as the offensive players immediately to each side. Thus, a fire-out (run) key
can be further distinguished by direction -- straight ahead, inside, outside or pull.
The 1L defender focuses on 2 things: his gap and the offensive keys. He must
not be blocked out of his assigned gap (established before the drill starts, and
changed frequently), and he must respond to his keys by throttling up to rush
the pass, breaking down to attack run blocks, and/or tearing laterally to pursue
the ball through the Core.


      ONE-ON-ONE                              THREE-ON-ONE

Defensive Ends use the identical 1-on-1 and 3-on-1 drills as the Tackles and
Noses when aligned Tight (outside shoulder of OT/5 technique). When they are
aligned Loose, however, Ends require a different drill, the Crash Drill.


                                   CRASH DRILL

In this drill, the End will take the same keys from the offensive linemen in his key
triangle as the other DL's do from their 3-on-1 drills (pp. 46, 47). The OL the


                                         46
End is lined up closest to will provide the strongest key, of course (OT when
aligned Loose or Tight, TE or tight slot when aligned Loose). After the initial 3-
on-1 drills, a blocking back can be added to attempt to kick out or log the End.
Finally, a running back can be added to the drill to run inside, off-tackle and
outside. Regardless of the specific parameters of the drill, the End must:

   Crash under control;
   Read his key triangle to anticipate what play is coming; and
   Stay on his feet.

In run drills, the End must either Crash or Trail; when pass drills are added, he
must also be prepared to Max a receiver, drop to a Cover zone, or defend his
Shortside Square (pp. 21-24).

ALLEY/HALF-LINE DRILLS

The purpose of these drills is to integrate 1L defenders in pass rush situations.
The Alley Drill can take several forms -- 2 on 2, 3 on 3, or 5 on 3 linemen
operating live (but under control -- i.e., lock-up to thud). With a live quarterback
and (optional) running back, the drill teaches 1L defenders to rush the passer
from within their gaps, which turn into pass-rush alleys as they read pass by the
offense.


                     ALLEY DRILL (Even Front vs. Sprint-Out)


                                         47
ALLEY DRILL (Odd Front vs. Drop-back)

The gray lines in the above diagrams represent the pass-rush alleys that 1L
defenders stay in as they attack the passer (dark offensive linemen represent
traffic cones). This serves as protection against draw plays by the QB or running
back, while allowing the defense to keep the pressure on the QB as he sets up to
throw. Note its use against both drop-back and sprint-out quarterbacks. When
running the drill, be sure to run all fronts against live counterparts -- 11 against
tackles and center as shown, 33 against guards and center, etc., and even fronts
against guards and/or tackles. The 5-on-3 format is especially useful for drilling
the shifts between fronts, and 1L stunts at the snap. In both formats, offensive
linemen should show three basic keys -- deep pass set, shallow set for quick
passing, and fire-out run blocking. 1L defenders learn to attack their gaps and
then pursue the ball.

The half-line drill (p. 49) is an extremely useful method to prepare 1L defenders
for drop-back, sprint-out, quick, and play-action passing actions by offenses. 1L
defenders practice shifts and stunts, based on the End's formation call.
Offensive players line up in one of the three formation variations shown, while
the 1L defenders have five different looks to switch between. This drill should


                                         48
HALF-LINE DRILL - FIVE FORMATS

proceed from lock-up to thud, except the End, who can be cut blocked live at
any time, and should anticipate this based on his keys. The diagrams illustrate
1&3) sprint-out action with cut-block on the End; 2) Drop-back action (with
screen or draw); 4) Quick passing action; and 5) Waggle or bootleg action.


                                       49
SECOND LEVEL

STACK DRILLS

We teach 2L defenders (specifically, Sam, Mike and Will) how to play within the
Core through repetition of a series of stack drills. The 1-stack drill teaches 2L
defenders how to read through the offensive line to the offensive back they are
mirroring (p. 50).


                                  1-STACK DRILL


In the diagram, the defender will key his mirror and follow him whether he is a
blocker or the ball carrier. He will plug if his mirror dives and scrape if he moves
laterally, transitioning to pursuit once the ball carrier leaves the core. In pursuit,
he will turn and sprint to the ball, but playing it inside-out to prevent cutbacks.
He will learn to face drive, trap and cut-off blocks, as well as outside pulls, by the
offensive linemen.

He will continue to follow his mirror, even if he is only a decoy who has been
faked to, until he reads run (when he will take a pursuit angle to the ball) or until
a play-action pass develops (when he will continue to mirror his receiver). If a
pass develops and zone defense (Cover) has been called, he will drop to the
appropriate zone (pp. 35-38). If Max (man) coverage has been called and his
mirror stays home and blocks, the 2L defender in a 1-stack will drop to the short
middle passing zone while continuing to read his mirror for draw or other
delayed run action. If the ball is passed to his area, he attacks through the
potential receiver to the ball.


                                          50
2-STACK DRILL

The 2-stack drill is most often run in tandem with another stack; usually another
2-stack, but we will also practice with a 1- and 2-stack combination, as well as a
2- and C-stack combo. In the diagram above, you can see that the
responsibilities of the 2L defender are very similar to those in a 1-stack. The
difference is the cutback responsibility, which we define for 2L defenders who
mirror a back who crosses behind the center toward the far side of the offensive
formation. In cutback, the 2L defender cautiously plays the ball inside-out – at
least a yard behind the ball carrier until he clears the core -- and guards against
the ball carrier cutting back against the grain.


                                 C-STACK DRILL

A C-stack places a 2L defender behind a 1L End in Area C (see pass defense area
designations, p. 6). From here, his responsibilities resemble those of 2L
defenders, with two important differences: the further outside stacked 2L
defenders are from the center, the more they must be aware of:

   1) cutback runs; and
   2) passes.

To that end, I should note that C-stacks are the only place you will find Len
and/or Ron personnel stacked in the defensive core. By definition, they must be
covering a TE. The additional responsibility they have is rotation, whereby 2L


                                         51
personnel in C-stacks take a deep pursuit angle to cut off the ball downfield – it
is a touchdown preventing technique as much as anything.

RUNNING STACK DRILLS/UNIT STACK DRILLS

To run 1-stack, 2-stack and/or C-stack drills, the appropriate 1L and 2L
defenders should line up against either offensive teammates rotating through the
drills, or against other defenders being used as offensive players for the
purposes of the drill. If defenders are used, the ball should not be snapped, but
simply held in the hands of the “quarterback” ready for handing off. The
blacked-out offensive players in the drills diagrams represent cones placed where
offensive linemen would be – this prevents needlessly wasting the time of
linemen who are not essential to the drill, but maintains the kind of spacing
defenders will see in game conditions. Note: Unit Stack Drills (p. 63,
spreadsheet) are identical in format to the stack drills diagramed above, but put
cones in place of 1L defenders -- they involve 2L defenders only against OL and
backs.

LOLLIPOP DRILL


                             LOLLIPOP DRILL SET-UP

This drill prepares 2L defenders to Max receivers by concentrating on 6 common
pass routes. The drill should begin with a traffic cone to give the 2L defender his


                                        52
location key; he works on his backpedal and turns his shoulders and breaks on
the ball as a coach calls out "Right", "Left", or "Deep". The QB in the drill should
start by lobbing the ball up in the air with lots of arc, then work on throwing a
faster, more direct ball. Finally, the drill should proceed to live WR's taking the
place of the cone and running the 6 pass routes shown in the drill. Motion
should then be added, but with the receiver always starting his route from the
original cone location. Only basic pass routes are run, with minimal faking by
the receiver. (Note: Study the 6 pass cuts defined by the diagram on page 52.
These should be introduced no more than two at a time during any one
practice.) During the season, only the final form with live receivers will be run.


                                         53
BEATEN-OUTFIELDER/DOWN-OUT-DOWN DRILLS


                        DEEP PASSING DRILLS FOR 2L/DS

In the Beaten Outfielder Drill (BOD), a receiver on a hash at the 5-yard line will
run a Go, Post, or Flag route. The 2L defender starts behind the receiver and
takes the correct pursuit angle to catch him. The QB will arc the ball over the
defender to the receiver; when the DS sees the ball in the air, he calls "BALL!
BALL!", at which point the 2L defender reads the receiver's eyes and hands.


                                         54
When the ball is imminent, the 2L defender will time his turn and leap into the
air with his hands held high. This screens the receiver from the ball (which
makes it imperative that the 2L defender turn and face the ball, to prevent pass
interference calls) and allows the 2L defender to either tip the ball up and over
the receiver into the hands of the DS who is closing fast, or else to intercept the
ball if it is underthrown. The 2L defender must be aware that the receiver can
sometimes break off his deep route to run a medium-depth route -- he must
adjust and cover the new route.

The Down-Out-Down (DOD) drill is run with a receiver within 5 yards of the
sideline on the inside of the goal line. A 2L defender aligns at a Hard depth,
either inside or outside the receiver. He will either steer the receiver outside or
funnel him inside (see p. 15). The receivers will usually run deep fade routes to
a depth of about 18 yards (i.e., the DS's end line). However, other routes can
and will be inserted into the drill with no warning to the 2L defender after all 2L
defenders have practiced defending the Fade a few times. Also, receivers may
illegally push off and even grab 2L defenders, but the defenders MUST play
"clean" and avoid interference penalties. As with the BOD, 2L defenders in the
DOD will turn and jump for the ball based on their visual keys and on the DS's
call of "BALL! BALL!" when the ball reaches its highest point in the air. The 2L
defender must concentrate on pinning the receiver against the sideline through
his body position, since this is the area of the field where the DS must run the
furthest to reach, and is thus the most vulnerable part of the Max defense
against the pass.

As the diagram on page 54 illustrates, the BOD and DOD drills should be run on
both sides of the filed simultaneously, meaning 4 quarterbacks or coaches (or
managers, etc.) who can throw the ball are needed. This will keep all 2L
defenders and DS's busy during this drill period.


                                         55
DEEP SAFETY:

ENFORCEMENT DRILLS


                             ENFORCEMENT DRILLS

These drills teach DS's how to judge the trajectory and landing points of footballs
when they are thrown -- they are the equivalent of fly-ball practice for baseball


                                        56
outfielders. The DS learns through repetition when and where he needs to be to
intersect ball and receiver.

The first phase is the bounce and glide drill, where the DS learns to read a QB
who is dropping back or sprinting out from behind the goal line, who is trying to
look off the DS, who pump-fakes and then throws the ball. The DS must
continue his low bounce and glide as he reads the QB, not breaking until the ball
is thrown. When the ball is launched, the DS SPRINTS along the appropriate
path (indicated by the traffic cones on the 25 yard line -- see diagram p. 56) and
calls out "BALL! BALL!" when the ball reaches its highest point. Once he knows
where the ball is heading, the DS looks to the coach who is standing to the side
just before the end line, who holds up 1-3 fingers, which the DS must yell out as
he closes on the end line. The majority of these reps should be in the Fade
danger area at the sideline from +15-18 yards deep, since this is the hardest
route for the DS to defend.

The next stage is to add a simulated receiver holding an air shield to protect
himself when the DS delivers a 3/4- to full-speed hit. First, two simulated
receivers stand holding air shields on the end line on either side of the two
hashmarks (i.e., about 18 yards apart). The end-zone QB drops as usual, looks
the DS off, etc., then throws in the general direction of one of the receivers. The
receivers look back at the QB until the ball is thrown, then turn to face the DS,
who starts his bounce and glide and then sprints to the ball. The receiver who is
"catching" the ball holds his shield up to chest height as the ball arrives, both to
cue the DS that the ball is arriving and to protect himself. Once this format is
mastered, the drill can be expanded to include the receiver running with his air
shield to simulate all possible pass routes the DS will face.

The next stage is to add a 2L defender to the drill to give the DS an additional
cue for his peripheral vision -- the 2L defender can leap and tip the ball over the
receiver, and must also be factored in when the DS decides to hit the receiver
rather than intercept the ball -- whenever possible, the DS should hit through the
shoulder of the receiver AWAY from the 2L defender.

The drill can also be run with a live receiver and 2L defender, with the DS either
bear-hugging the receiver or two-hand touching him if he decides to "hit" him.
Whatever the format, no one should ever be on the ground at the end of this
drill.


                                         57
READ DRILLS


              READ DRILLS


                  58
In the Read drills, the hitting portion of the Enforcement drills is always replaced
with bear-hug or two-hand touch. The object is for the DS to cover more and
more of the width of the field with his peripheral vision as he reads the QB and
backfield action. Live receivers run progressively more complicated pass route
packages, always involving one deep route. These start on one half of the field
(p. 58, top), but then progress to the entire width of the field, forcing the DS to
expand his peripheral read to eventually encompass all 53.33 yards of width of
the football field (p. 58, bottom).

The first phase involves the DS reading the QB, bouncing and gliding, and
breaking on the ball as it is thrown, then calling out the correct number of
fingers from the nearby coach. This phase should be very brief, no more than
one rep per DS. Then live receivers are added, running the basic pass route
packages (i.e., Flood -- #1 Fade, #2 Out, #3 Flat; Curl -- #1 Curl, #2 Flat; Cross
-- #1 Shallow Cross, #2 Post; etc.) These are only on one side of the field at a
time, involve only basic pass routes without elaborate fakes, and only have one
deep pass route. Finally the route packages are expanded to include 4 or 5
receivers across the entire width of the field, but still only running the basic route
packages to cue DS pattern recognition. Others are added as the pre-season
goes on -- Seam and Hook packages, and quick passing packages including
Slant, Pick and Circle, as well as Choice routes to an isolated backside receiver.

The final pre-season phase turns into pass skeleton drills with a complete 2L in
place, and using the actual pass route packages (i.e., Bunch, Kentucky Mesh, Go,
Smash, etc.) that opponents will run during the season. In-season practices, in
fact, will only use this final format.


                                          59
The above diagram illustrates that the 1L performs its pass drills between the 30
and 50 yard lines, while 2L and DS drills take place from the end zone to the 30
yard line.


                                       60
PRACTICE #2 SCHEDULE:

                       2-Level Defense Installation Practice #2 (Day 1 -- P.M.)
Time              1ST LEVEL                         2ND LEVEL                     DEEP SAFETIES
15:00         Alignment review                     Lollipop Drill:              Enforcement Drills III
15:05     Review Arm-Over, -Under                Review 1/2/crack
15:10       Intro Quick Arm-Over                  Intro cuts 3&4
15:15          Key Drill (1-on-1)                    Max Drill:                     Read Drills III
15:20    Review basic run, pass keys        Progress 7 yds to End-Line*
15:25     Alley Drill (3-on-3, 5-on-3)                             Down-Out- Down Drill
15:30    From 11, intro Link/Rip shift                           Beaten Out fielder Drill
15:35            (2LD p. 200)               (Add Out to D-O-D; Fade & Post to Beaten Outfield)
15:40             1/2-Line Drill                                     Mirror Drill:
15:45     Intro shift from 5-Rip/2-Link                 (Add I backs, Quad receivers, motion)
15:50             (2LD p. 202)
15:55                                                 WATER
16:00        N/T/E: Stance & align
16:05        N/T: Intro slant moves         Review stance/stacks/shiver         Enforcement Drills III
16:10       E: Review Power Move
16:15        N/T: Key Drill (1-on-1)
16:20        (review basic run key)           Review scrape & cutback               Read Drills III
16:25     E: Review crash tight/loose
16:30        N/T: Key Drill (3-on-1)
16:35          (Power Move only)                   Unit Stack Drills:           Down-Out-Down Drill
16:40          E: Crash Drill loose           1-, 2- and Area C-Stacks            (rotate Len/Ron)
16:45          N/T: Slant Key Drill                 (Cones for 1L)
16:50         (3-on-1 lock) slant-in               vs. QB/RB/OLx2              Beaten Outfielder Drill
16:55         E: Crash Drill tight                                                (rotate L/R/S/M/W)

The second practice introduces three new drills -- the 1L Slant Key drill for Noses
and Tackles, the 2L Unit Stack drills; and the 2L/DS Mirror drills, especially the I-
back format. In the Slant Key drills, (p. 62) both Nose and Tackles practice
against 3 OL's (or fellow 1L defenders playing OL's and read the keys given by
the OL as they slant one way or the other. Each 1L defender should practice all
six reads shown while slanting both in and out, meaning each 1L defender
should do a minimum of 12 reps of this drill -- preferably more early on in the
pre-season. Later on, the reps can be cut down.

In the Unit Stack drills (p. 63), a 2L defender faces two OL's and a back (a QB
can be added after several reps) with cones to show the 1L and as space-holders
for absent OL's. The 2L must read through the live OL's to the backfielder he is
mirroring for his basic keys. He should take on run blocks only in this practice.
(Later, he will key pass-blocks to practice his Cover pass drops, Max mirroring,
and/or draw and screen reads.)


                                             61
PRACTICE #2:


                3-ON-1 SLANT KEY


               N/T SLANT KEY READS


                       62
UNIT STACK DRILLS

The I-back drill (p. 64) is introduced early because this formation is so common,
and to give 2L defenders extra practice against its power, option and
misdirection variations.


                                        63
I-BACK MIRROR DRILLS

Note: This drill will only be run with two 2-Stacks (left side of diagram) -- the
double 1-Stack may be used by special game-plan during the season. Note the
progression from easy to hard reads for the 2L defenders reading the I-backs.


                                        64
PRACTICE #3 SCHEDULE:

                         2-Level Defense Installation Practice #3 (Day 2 -- A.M.)
Time               1ST LEVEL                         2ND LEVEL                     DEEP SAFETIES
 9:00    Basic technique; N/T eagle                    Stack Drills:
 9:05        N/T: Key Drill (3-on-1)              1-Stack: lock to thud           Enforcement Drills IV
 9:10         (Add new run keys)                         S/M/W
 9:15            E: Crash Drill                2-Stack: intro split backs
 9:20      N/T: Slant Key Drill (3/3)                    S/M/W                        Read Drills IV
 9:25         (Add new run keys)              C-Stack: intro I-backs, jam     Intro Seam, crossing routes
 9:30         E: Crash w/ I backs                      S/M/W/L/R
 9:35                           Unit Stack Drills                              Intro Cover, Cover/2 Deep
 9:40 1-Stack: N/M/S/W                     2-Stack: T(O)/E(T)/M/S/W*                Intro Max/Double,
 9:45   C-Stack:E(Loose)/S/M/W/L/R           (L in left C-stack; R in right)    variations (2 Deep, etc.)
 9:50 (Rotate Len/Ron to DS coverage reviews)                                       (Rotate Len/Ron)
 9:55                                                    WATER
10:00           N/T/E: Review                         Lollipop Drill:
10:05     alignment, pass rush tech.           Review 1-4, crack; intro 5         Enforcement Drills V
10:10
10:15        N/T: Key Drill (1-on-1)                    Max Drill:
10:20       E: Intro pass coverage                Review funnel/steer                  Read Drills V
10:25     (Max; Cushion; Short Flat)         Intro Max Soft/under zones            Review; add Flood
10:30              Alley Drill:                        Down-Out-Down Drill; Beaten Outfielder Drill
10:35       3-on-3 in 11; 5-on-3 shifts         Mirror Drill: I backs, motion to Trips; max to +7
10:40            (lock to thud)                 Drop-Off Drill Intro: Left E's, then Right; only 1 DS
10:45            1/2-line Drill:            Start vs. static O; progress to motion; receivers run +5-7
10:50        Use all alignment calls                then stop, defenders continue to zones.
10:55             (lock to thud)


        * Tackle (Open), End (Tight)


Chalk talk #2:
1) Terms: Offensive numbers/areas, formations, wideside/shortside.
2) Mirroring math -- the mental process of identifying any offensive formation.
3) The 13 1L alignments by rule; Eagle alignment (7-foot rule).
4) Max - allow no short or deep passes; Cover - no medium or deep. Mix them up.
5) Absolute concealment from offense; pre-snap 1L shifting.
6) 1L stunts; Max/Double pass coverage (introduce 2-Deep concept - one Tackle out).

           (This chalk talk should tale place the night before Practice #3.)


                                                65
PRACTICE #4 SCHEDULE:

                        2-Level Defense Installation Practice #4 (Day 2 -- P.M.)
Time            1ST LEVEL                           2ND LEVEL                     DEEP SAFETIES
15:00     N/T: Live pass rush 1/1                   Lollipop Drill:             Enforcement Drills VI
15:05      Intro Cone Signal Drill:           Review cuts 1-5, crack
15:10           Shift to Slant                        Max Drill:                    Read Drills VI
15:15    E: Max C, Short Flat/Hook          Funnel/steer/max double               Review; intro Curl
15:20   Crash Drill: Intro TET move                  Down-Out-Down Drill; Beaten Outfielder Drill
15:25         N/T: Alley Drill --
15:30      Progress 3-on-3 to 5/3              Mirror Drill: motion to new formation; I backs
15:35         intro 2-, 4-, TNT          Cover: Review; note 2B Short exception to rule*; add
15:40      N/T/E: 1/2-Line Drill --      motion, esp. to 2B Short; Intro Max/Double 1A Short;
15:45     Practice pre-snap shifts       Max/Double 1A Short&Wide/2 Deep; Max/Double 1A
15:50             Intro TET              Wideside/2 Deep; review differences in End Line for each
15:55                                                 WATER
16:00     N/T: Key Drills/Slant Key         Review Stack techniques:            Enforcement Drills VII
16:05     3/1, review slant, eagle       Align, shiver, scrape/cutback
16:10    E: Crash Drill - loose, tight                                             Read Drills VII
16:15     N/T/E: Cone Signal Drill          Unit Stack Drills: Combine          Review all envelopes
16:20    Slant from 2-/4-; shift/slant       2 2-Stacks, 2-Stack and         Review Cover/Max: 1 and 2
16:25        Review TNT/TET                         Area C-Stack                 DS; rotate Len/Ron
16:30           Integrated Stack Drills: 1, 2 and C-Stacks                     Intro Max/Double Wide
16:35            (both Jam and Stack); Lock-up to thud                            Receiver/2 Deep;
16:40                                                                                  Cover-A
16:45             Combined/Integrated Stack Drills:                               (Rotate Sam/Will)
16:50    2 2-Stacks (1L 11); 2- and C- Stacks; 1-&2- + C-Stacks
16:55 (Script TNT/TET); C-Stack add 1 DS (sweep/ HB option)


                                               66
PRACTICE #5 SCHEDULE:

                         2-Level Defense Installation Practice #5 (Day 3 -- A.M.)
Time              1ST LEVEL                           2ND LEVEL                    DEEP SAFETIES
 9:00      N/T: Key/Slant Key Drills*         Stack Drills: (lock to thud)       Enforcement Drills VIII
 9:05       E: Crash Drill - review           2-Stack: Crosskey vs. split
 9:10      N/T: Live 5/3 with OLine              C-Stack: review jam;                Read Drills VIII
 9:15      E: Crash Drill - power run           intro Cushion; double          review play-action crosses;
 9:20               at End                       coverage technique                Curl - out&up by 2B
 9:25    N/T: Cone Signal (slant/TNT)
 9:30       E: Crash Drill - I backs             Combined Stacks:             Review: Max, Max 2 Deep;
 9:35      flow away -- trailer tech.           2 2-Stacks cross key            Max Double, /2 Deep;
 9:40         N/T/E: Cone Signal               vs. split backs; 1-/2- +          Max/Tight Cushion;
 9:45        Slant/TNT/TET; then              C Stacks (jam and stack)         Max/Double Wide/2 Deep
 9:50        remove 1 T (2 Deep)                                                   (rotate S/M/W)
 9:55                                                    WATER
10:00 Integrated Stacks: Install Cushion, Max/Tight Cushion in C
10:05                                                                           Review: Cover, /2 Deep;
10:10                                                                                  Cover-A;
10:15 Combined/Integrated:2 2-Stacks - script cross-key in 11                    Intro Cover-A/2 Deep
10:20 1-&2-Stack + C: script Cushion on pass; limit TET; add
10:25 1 DS, script sweep/pitch/option w/ HB option pass                             (rotate Len/Ron)
10:30                                       Scripted Defensive Scrimmage:
10:35   1) Only Max coverage, 1 DS; limited dropback passing (emphasis on Run D)
10:40   2) No stunting; but script appropriate alignments against offensive plays
10:45   3) I formation - off-tackle/sweep only; backs must move together; may split to pass block
10:50   4) Every play is 2nd & Long (8-10); ball is at mid-field
10:55 5) Run half of scrimmage from each hashmark

        *3-on-1; stress secondary run responsibilities


Chalk talk #3:
1) Calling defensive signals.
2) 1L alignments in 2-Deep; 2L stunt "Cushion"; Max/Tight Cushion; Cover-A.
3) 2L stunts "Switch" and "Dog".
4) Review Max and Cover variations, 2-Deep.


             (Again, this chalk talk is given the night before this practice.)


                                                 67
PRACTICE #5


                       CROSS-KEY DRILLS -- RUN FORMAT

Practice 5 brings the last major drill to be introduced -- the run-format cross-key
drill. Even though 2L defenders have been practicing against I-backs cutting
back since Practice #2, they now work against Split and Pro backfields.


                                         68
PRACTICE #6 SCHEDULE:

                         2-Level Defense Installation Practice #6 (Day 3 -- P.M.)
Time              1ST LEVEL                            2ND LEVEL                        DEEP SAFETIES
15:00        N/T: Key Drill (1-on-1)                  Lollipop Drill:                 Enforcement Drills IX
15:05     Review basic tech, rush tech            Review cuts 1-5, crack
15:10        Intro screen/draw keys                     Max Drill:
15:15      E: Crash Drill: review tight,          Funnel, steer, double                  Read Drills IX
15:20     loose, Max, Cover, Cushion*               Mirror Drill: Max               Review Seam/Curl/Flood
15:25                N/T/E:                       Motion, Trips, Twinsx2                 Intro variations
15:30       Live pass rush w/ O-Line               Intro Pick patterns --
15:35           1/1, 3/3, 5/3, 5/5               FIGHT THROUGH picks
15:40       Practice pre-snap shifts,                Mirror Drill: Cover                 With 2L in drills
15:45           slant, TNT, TET                    Drop tech.; intro draw
15:50       Coach/mgr as drop QB               keys; Cover, -A, motion Trips
15:55                                                      WATER
16:00            Alley Drill (5/3)                               2L/DS/Shortside E -- Cover Integration
16:05      Live QB/HB, script draws,       Cover, Cover/2 Deep, Cover-A, Cover-A/2 Deep; start
16:10         slant, TNT, use shift        with static offensive formations & no ball; add motion to
16:15             1/2-Line Drill           Trips and 2 Twins, then add footballs
16:20      Live QB, HB blocks; sprint,
16:25        dash, TET/TNT w/ shift
16:30                                         Scripted Defensive Scrimmage:
16:35   1) Max, /Double, Cover, Cover-A, mostly 1 DS; limited running (emphasis on Pass D)
16:40   2) Script some slant, TNT & TET, Cushion; on offense, some screens/draws
16:45   3) I formation - off-tackle/sweep only; backs must move together; may split to pass block
16:50   4) Script Max vs. 3-step; Cover-A verify Trips or revert to Cover; /2 Deep vs. deep Seam
16:55 5) Every play 2nd & 8-10 from 50; run half of scrimmage from each hashmark


*Rotate S/M/W/L/R to Crash Drill to practice Cushion, Max/Tight Cushion; Shortside
Ends practice Shortside Square tech. For Cover-A


                                                  69
PRACTICE #7 SCHEDULE:

                            2-Level Defense Installation Practice #7 (Day 4 -- A.M.)
Time                 1ST LEVEL                         2ND LEVEL                       DEEP SAFETIES
 9:00     N/T: Key Drill/Slant Key (3/1)                 Stack Drills:                Enforcement Drills X
 9:05            Review techs, stress          1-: Intro Dog; find 6th gap
 9:10     "tear" (second. run respons.)        2-: Cross-key Split, Intro I               Read Drills X
 9:15       N/T: Live 5/3 with OLine              C-: Review jam/stack           review; stress End-Line
 9:20            run & pass blocking                                           enforcement vs. deep routes
 9:25         E: (From 0900) Crash                  Combine Stacks:                  Down-out-Down Drill:
 9:30        Drill - review, Intro Dog*            1-: 2 2L, stack vs. I             (Rotate 2L personnel)
 9:35        N/T/E: Cone Signal Drill            2x2-: Cross-key I backs
 9:40       shifts, post-snap moves;             1-/2-&C-: Intro Switch,                  Review Max:
 9:45       Intro Dog - rotate S/M/W          cancel Switch (i.e., vs. Ace)           /Double, 1 and 2 DS
 9:50                                                                                   (Rotate L/R/S/W)
 9:55                                                      WATER
10:00                  Integrated Combined Stack Drills: lock/thud                       Review Cover:
10:05 1 Stack: 2 2L defenders "stack" vs. I backs                                    /2 Deep; -A; -A/2 Deep
10:10 2x2-Stack: Cross-key I backs; 11 only; limit stunting                           For Cover-A, 50/50
10:15 1-/2-&C-Stacks: Script Cushion, Switch: limited TET; script                    verify/revert to Cover
10:20 Dog vs. dropback; rotate DS for sweep/pitch/option w/                          (i.e., 2 Twins vs. Trips)
10:25                      HB option pass                                               (rotate Len/Ron)
10:30            Scripted Defensive Scrimmage: Mainly run, intersperse some dropback
10:35 1) Ball at 50; rotate hashes; plays in following sequence: 3rd&9, 7, 5, 3; repeat seq.
10:40 2) Max, Max/2 Deep, Cover-A, Cover-A/2 Deep; non-verify -A half the time vs. passes
10:45 3) I Backs -- no limits (but don't intro new plays in scrimmage).
10:50 4) Scoring: Defense wins 1 pt when it prevents 1st down; offense 1 pt. per 1st down
10:55


        * Primary crash, secondary trailer responsibilities; in Dog, Max near back


Chalk talk #4:
1) Primary run responsibilities (1L gaps; 2L mirrors).
2) Secondary run responsibilities and pursuit.
3) Review stunts: 1L Slant/Twists; 2L Cushion, Switch and Dog.
4) Pass rush mechanisms: 5-man rush; outside rush & overload principles (2LD p. 120).
5) Pass coverage mechanisms: Max, /Double, /Tight Cushion, Cover, -A; also in 2-Deep.
6) Formation reading/pattern recognition/reading the QB.

                              (Chalk talk for before this practice.)


                                                  70
PRACTICE #7


                       I-BACKS CROSS-KEY - PASS KEYS

(See also I-back diagram p. 64, bottom and cross-key drill, p. 68). 2L defenders
must practice against backs splitting and/or crossing on counter plays and on
pass plays. This drill teaches 2L defenders to drop to their Cover assignments
while reading various backfield actions -- it prepares them for play-action pass
drops.


                                       71
2 Level Defense
2 Level Defense
2 Level Defense
2 Level Defense
2 Level Defense
2 Level Defense
2 Level Defense
2 Level Defense
2 Level Defense
2 Level Defense
2 Level Defense
2 Level Defense
2 Level Defense
2 Level Defense
2 Level Defense
2 Level Defense
2 Level Defense
2 Level Defense
2 Level Defense
2 Level Defense
2 Level Defense
2 Level Defense
2 Level Defense
2 Level Defense
2 Level Defense
2 Level Defense

Weitere ähnliche Inhalte

Was ist angesagt?

Pistol Intallation Revised
Pistol Intallation RevisedPistol Intallation Revised
Pistol Intallation RevisedTom Neuman
 
How to implement a red hot! youth spread offense
How to implement a red hot! youth spread offenseHow to implement a red hot! youth spread offense
How to implement a red hot! youth spread offenseMike Pope
 
Flexbone Offense
Flexbone OffenseFlexbone Offense
Flexbone OffenseTom Neuman
 
Bunch Passing In The Double Wing Offense
Bunch Passing In The Double Wing OffenseBunch Passing In The Double Wing Offense
Bunch Passing In The Double Wing OffenseTom Neuman
 
33 Defense - Understanding the Basics - John Rice
33 Defense - Understanding the Basics - John Rice33 Defense - Understanding the Basics - John Rice
33 Defense - Understanding the Basics - John RiceJohn Rice
 
A Complete Quads Package
A Complete Quads PackageA Complete Quads Package
A Complete Quads PackageJohn Rice
 
Clovis West High School Offense
Clovis West High School OffenseClovis West High School Offense
Clovis West High School OffenseTom Neuman
 
Urban Meyers Playbook
Urban Meyers PlaybookUrban Meyers Playbook
Urban Meyers PlaybookTom Neuman
 
The Spread Offense
The Spread OffenseThe Spread Offense
The Spread OffenseTom Neuman
 
Basic concepts of The Pistol Offense
Basic concepts of The Pistol OffenseBasic concepts of The Pistol Offense
Basic concepts of The Pistol OffenseLance Johnson
 
Multiple West Coast Offense
Multiple West Coast OffenseMultiple West Coast Offense
Multiple West Coast OffenseTom Neuman
 
Spin Offense Playbook
Spin Offense PlaybookSpin Offense Playbook
Spin Offense PlaybookTom Neuman
 
Offensive Line Drills`
Offensive Line Drills`Offensive Line Drills`
Offensive Line Drills`Tom Neuman
 
Chris Aults Nevada Pistol Offense
Chris Aults Nevada Pistol OffenseChris Aults Nevada Pistol Offense
Chris Aults Nevada Pistol OffenseBill Carroll
 
Lonesome Polecat Formation (2)
Lonesome Polecat Formation (2)Lonesome Polecat Formation (2)
Lonesome Polecat Formation (2)Tom Neuman
 
STEVEN CIOCCI PACE UNIVERSITY OFFENSIVE LINE MANUAL
STEVEN CIOCCI PACE UNIVERSITY OFFENSIVE LINE MANUALSTEVEN CIOCCI PACE UNIVERSITY OFFENSIVE LINE MANUAL
STEVEN CIOCCI PACE UNIVERSITY OFFENSIVE LINE MANUALSteven Ciocci
 
Urban Meyer Spread Explained
Urban Meyer Spread ExplainedUrban Meyer Spread Explained
Urban Meyer Spread ExplainedTom Neuman
 
Installation Day 1
Installation Day 1Installation Day 1
Installation Day 1Alex Kirby
 

Was ist angesagt? (20)

Pistol Intallation Revised
Pistol Intallation RevisedPistol Intallation Revised
Pistol Intallation Revised
 
How to implement a red hot! youth spread offense
How to implement a red hot! youth spread offenseHow to implement a red hot! youth spread offense
How to implement a red hot! youth spread offense
 
Flexbone Offense
Flexbone OffenseFlexbone Offense
Flexbone Offense
 
Bunch Passing In The Double Wing Offense
Bunch Passing In The Double Wing OffenseBunch Passing In The Double Wing Offense
Bunch Passing In The Double Wing Offense
 
33 Defense - Understanding the Basics - John Rice
33 Defense - Understanding the Basics - John Rice33 Defense - Understanding the Basics - John Rice
33 Defense - Understanding the Basics - John Rice
 
Multiple West Coast Offense Manual
Multiple West Coast Offense ManualMultiple West Coast Offense Manual
Multiple West Coast Offense Manual
 
A Complete Quads Package
A Complete Quads PackageA Complete Quads Package
A Complete Quads Package
 
Clovis West High School Offense
Clovis West High School OffenseClovis West High School Offense
Clovis West High School Offense
 
Urban Meyers Playbook
Urban Meyers PlaybookUrban Meyers Playbook
Urban Meyers Playbook
 
The Spread Offense
The Spread OffenseThe Spread Offense
The Spread Offense
 
Basic concepts of The Pistol Offense
Basic concepts of The Pistol OffenseBasic concepts of The Pistol Offense
Basic concepts of The Pistol Offense
 
Multiple West Coast Offense
Multiple West Coast OffenseMultiple West Coast Offense
Multiple West Coast Offense
 
Spin Offense Playbook
Spin Offense PlaybookSpin Offense Playbook
Spin Offense Playbook
 
Offensive Line Drills`
Offensive Line Drills`Offensive Line Drills`
Offensive Line Drills`
 
Chris Aults Nevada Pistol Offense
Chris Aults Nevada Pistol OffenseChris Aults Nevada Pistol Offense
Chris Aults Nevada Pistol Offense
 
Lonesome Polecat Formation (2)
Lonesome Polecat Formation (2)Lonesome Polecat Formation (2)
Lonesome Polecat Formation (2)
 
STEVEN CIOCCI PACE UNIVERSITY OFFENSIVE LINE MANUAL
STEVEN CIOCCI PACE UNIVERSITY OFFENSIVE LINE MANUALSTEVEN CIOCCI PACE UNIVERSITY OFFENSIVE LINE MANUAL
STEVEN CIOCCI PACE UNIVERSITY OFFENSIVE LINE MANUAL
 
Seattle defense final
Seattle defense finalSeattle defense final
Seattle defense final
 
Urban Meyer Spread Explained
Urban Meyer Spread ExplainedUrban Meyer Spread Explained
Urban Meyer Spread Explained
 
Installation Day 1
Installation Day 1Installation Day 1
Installation Day 1
 

Andere mochten auch

Cover 3 Zone, Coaching Youth Football Defense, Pass Coverage
Cover 3 Zone, Coaching Youth Football Defense, Pass CoverageCover 3 Zone, Coaching Youth Football Defense, Pass Coverage
Cover 3 Zone, Coaching Youth Football Defense, Pass CoverageWilliam Thompson
 
Jarní schéma Nova Action pro rok 2017
Jarní schéma Nova Action pro rok 2017Jarní schéma Nova Action pro rok 2017
Jarní schéma Nova Action pro rok 2017Jan Brychta
 
Jarní schéma Nova Sport 1 pro rok 2017
Jarní schéma Nova Sport 1 pro rok 2017Jarní schéma Nova Sport 1 pro rok 2017
Jarní schéma Nova Sport 1 pro rok 2017Jan Brychta
 
A Guide to SlideShare Analytics - Excerpts from Hubspot's Step by Step Guide ...
A Guide to SlideShare Analytics - Excerpts from Hubspot's Step by Step Guide ...A Guide to SlideShare Analytics - Excerpts from Hubspot's Step by Step Guide ...
A Guide to SlideShare Analytics - Excerpts from Hubspot's Step by Step Guide ...SlideShare
 
How to Make Awesome SlideShares: Tips & Tricks
How to Make Awesome SlideShares: Tips & TricksHow to Make Awesome SlideShares: Tips & Tricks
How to Make Awesome SlideShares: Tips & TricksSlideShare
 
Getting Started With SlideShare
Getting Started With SlideShareGetting Started With SlideShare
Getting Started With SlideShareSlideShare
 

Andere mochten auch (6)

Cover 3 Zone, Coaching Youth Football Defense, Pass Coverage
Cover 3 Zone, Coaching Youth Football Defense, Pass CoverageCover 3 Zone, Coaching Youth Football Defense, Pass Coverage
Cover 3 Zone, Coaching Youth Football Defense, Pass Coverage
 
Jarní schéma Nova Action pro rok 2017
Jarní schéma Nova Action pro rok 2017Jarní schéma Nova Action pro rok 2017
Jarní schéma Nova Action pro rok 2017
 
Jarní schéma Nova Sport 1 pro rok 2017
Jarní schéma Nova Sport 1 pro rok 2017Jarní schéma Nova Sport 1 pro rok 2017
Jarní schéma Nova Sport 1 pro rok 2017
 
A Guide to SlideShare Analytics - Excerpts from Hubspot's Step by Step Guide ...
A Guide to SlideShare Analytics - Excerpts from Hubspot's Step by Step Guide ...A Guide to SlideShare Analytics - Excerpts from Hubspot's Step by Step Guide ...
A Guide to SlideShare Analytics - Excerpts from Hubspot's Step by Step Guide ...
 
How to Make Awesome SlideShares: Tips & Tricks
How to Make Awesome SlideShares: Tips & TricksHow to Make Awesome SlideShares: Tips & Tricks
How to Make Awesome SlideShares: Tips & Tricks
 
Getting Started With SlideShare
Getting Started With SlideShareGetting Started With SlideShare
Getting Started With SlideShare
 

Kürzlich hochgeladen

Spain Vs Italy 20 players confirmed for Spain's Euro 2024 squad, and three po...
Spain Vs Italy 20 players confirmed for Spain's Euro 2024 squad, and three po...Spain Vs Italy 20 players confirmed for Spain's Euro 2024 squad, and three po...
Spain Vs Italy 20 players confirmed for Spain's Euro 2024 squad, and three po...World Wide Tickets And Hospitality
 
Croatia vs Albania Clash of Euro Cup 2024 Squad Preparations and Euro Cup Dre...
Croatia vs Albania Clash of Euro Cup 2024 Squad Preparations and Euro Cup Dre...Croatia vs Albania Clash of Euro Cup 2024 Squad Preparations and Euro Cup Dre...
Croatia vs Albania Clash of Euro Cup 2024 Squad Preparations and Euro Cup Dre...Eticketing.co
 
ALL NFL NETWORK CONTACTS- April 29, 2024
ALL NFL NETWORK CONTACTS- April 29, 2024ALL NFL NETWORK CONTACTS- April 29, 2024
ALL NFL NETWORK CONTACTS- April 29, 2024Brian Slack
 
JORNADA 4 LIGA MURO 2024TUXTEPEC1234.pdf
JORNADA 4 LIGA MURO 2024TUXTEPEC1234.pdfJORNADA 4 LIGA MURO 2024TUXTEPEC1234.pdf
JORNADA 4 LIGA MURO 2024TUXTEPEC1234.pdfArturo Pacheco Alvarez
 
Plan d'orientations stratégiques rugby féminin
Plan d'orientations stratégiques rugby fémininPlan d'orientations stratégiques rugby féminin
Plan d'orientations stratégiques rugby fémininThibaut TATRY
 
Jankipuram / Call Girls Lucknow | Whatsapp No 🫗 8923113531 🎳 VIP Escorts Serv...
Jankipuram / Call Girls Lucknow | Whatsapp No 🫗 8923113531 🎳 VIP Escorts Serv...Jankipuram / Call Girls Lucknow | Whatsapp No 🫗 8923113531 🎳 VIP Escorts Serv...
Jankipuram / Call Girls Lucknow | Whatsapp No 🫗 8923113531 🎳 VIP Escorts Serv...gurkirankumar98700
 
Tableaux 9ème étape circuit fédéral 2024
Tableaux 9ème étape circuit fédéral 2024Tableaux 9ème étape circuit fédéral 2024
Tableaux 9ème étape circuit fédéral 2024HechemLaameri
 
08448380779 Call Girls In IIT Women Seeking Men
08448380779 Call Girls In IIT Women Seeking Men08448380779 Call Girls In IIT Women Seeking Men
08448380779 Call Girls In IIT Women Seeking MenDelhi Call girls
 
ppt on Myself, Occupation and my Interest
ppt on Myself, Occupation and my Interestppt on Myself, Occupation and my Interest
ppt on Myself, Occupation and my InterestNagaissenValaydum
 
Chennai Call Girls Anna Nagar Phone 🍆 8250192130 👅 celebrity escorts service
Chennai Call Girls Anna Nagar Phone 🍆 8250192130 👅 celebrity escorts serviceChennai Call Girls Anna Nagar Phone 🍆 8250192130 👅 celebrity escorts service
Chennai Call Girls Anna Nagar Phone 🍆 8250192130 👅 celebrity escorts servicevipmodelshub1
 
Italy vs Albania Tickets: Italy's Quest for Euro Cup Germany History, Defendi...
Italy vs Albania Tickets: Italy's Quest for Euro Cup Germany History, Defendi...Italy vs Albania Tickets: Italy's Quest for Euro Cup Germany History, Defendi...
Italy vs Albania Tickets: Italy's Quest for Euro Cup Germany History, Defendi...Eticketing.co
 
Who Is Emmanuel Katto Uganda? His Career, personal life etc.
Who Is Emmanuel Katto Uganda? His Career, personal life etc.Who Is Emmanuel Katto Uganda? His Career, personal life etc.
Who Is Emmanuel Katto Uganda? His Career, personal life etc.Marina Costa
 
08448380779 Call Girls In Karol Bagh Women Seeking Men
08448380779 Call Girls In Karol Bagh Women Seeking Men08448380779 Call Girls In Karol Bagh Women Seeking Men
08448380779 Call Girls In Karol Bagh Women Seeking MenDelhi Call girls
 
( Sports training) All topic (MCQs).pptx
( Sports training) All topic (MCQs).pptx( Sports training) All topic (MCQs).pptx
( Sports training) All topic (MCQs).pptxParshotamGupta1
 
VIP Kolkata Call Girl Liluah 👉 8250192130 Available With Room
VIP Kolkata Call Girl Liluah 👉 8250192130  Available With RoomVIP Kolkata Call Girl Liluah 👉 8250192130  Available With Room
VIP Kolkata Call Girl Liluah 👉 8250192130 Available With Roomdivyansh0kumar0
 
08448380779 Call Girls In International Airport Women Seeking Men
08448380779 Call Girls In International Airport Women Seeking Men08448380779 Call Girls In International Airport Women Seeking Men
08448380779 Call Girls In International Airport Women Seeking MenDelhi Call girls
 
Croatia vs Italy Euro Cup 2024 Three pitfalls for Spalletti’s Italy in Group ...
Croatia vs Italy Euro Cup 2024 Three pitfalls for Spalletti’s Italy in Group ...Croatia vs Italy Euro Cup 2024 Three pitfalls for Spalletti’s Italy in Group ...
Croatia vs Italy Euro Cup 2024 Three pitfalls for Spalletti’s Italy in Group ...Eticketing.co
 

Kürzlich hochgeladen (20)

Spain Vs Italy 20 players confirmed for Spain's Euro 2024 squad, and three po...
Spain Vs Italy 20 players confirmed for Spain's Euro 2024 squad, and three po...Spain Vs Italy 20 players confirmed for Spain's Euro 2024 squad, and three po...
Spain Vs Italy 20 players confirmed for Spain's Euro 2024 squad, and three po...
 
Call Girls Service Noida Extension @9999965857 Delhi 🫦 No Advance VVIP 🍎 SER...
Call Girls Service Noida Extension @9999965857 Delhi 🫦 No Advance  VVIP 🍎 SER...Call Girls Service Noida Extension @9999965857 Delhi 🫦 No Advance  VVIP 🍎 SER...
Call Girls Service Noida Extension @9999965857 Delhi 🫦 No Advance VVIP 🍎 SER...
 
Croatia vs Albania Clash of Euro Cup 2024 Squad Preparations and Euro Cup Dre...
Croatia vs Albania Clash of Euro Cup 2024 Squad Preparations and Euro Cup Dre...Croatia vs Albania Clash of Euro Cup 2024 Squad Preparations and Euro Cup Dre...
Croatia vs Albania Clash of Euro Cup 2024 Squad Preparations and Euro Cup Dre...
 
ALL NFL NETWORK CONTACTS- April 29, 2024
ALL NFL NETWORK CONTACTS- April 29, 2024ALL NFL NETWORK CONTACTS- April 29, 2024
ALL NFL NETWORK CONTACTS- April 29, 2024
 
JORNADA 4 LIGA MURO 2024TUXTEPEC1234.pdf
JORNADA 4 LIGA MURO 2024TUXTEPEC1234.pdfJORNADA 4 LIGA MURO 2024TUXTEPEC1234.pdf
JORNADA 4 LIGA MURO 2024TUXTEPEC1234.pdf
 
Plan d'orientations stratégiques rugby féminin
Plan d'orientations stratégiques rugby fémininPlan d'orientations stratégiques rugby féminin
Plan d'orientations stratégiques rugby féminin
 
Jankipuram / Call Girls Lucknow | Whatsapp No 🫗 8923113531 🎳 VIP Escorts Serv...
Jankipuram / Call Girls Lucknow | Whatsapp No 🫗 8923113531 🎳 VIP Escorts Serv...Jankipuram / Call Girls Lucknow | Whatsapp No 🫗 8923113531 🎳 VIP Escorts Serv...
Jankipuram / Call Girls Lucknow | Whatsapp No 🫗 8923113531 🎳 VIP Escorts Serv...
 
Call Girls In RK Puram 📱 9999965857 🤩 Delhi 🫦 HOT AND SEXY VVIP 🍎 SERVICE
Call Girls In RK Puram 📱  9999965857  🤩 Delhi 🫦 HOT AND SEXY VVIP 🍎 SERVICECall Girls In RK Puram 📱  9999965857  🤩 Delhi 🫦 HOT AND SEXY VVIP 🍎 SERVICE
Call Girls In RK Puram 📱 9999965857 🤩 Delhi 🫦 HOT AND SEXY VVIP 🍎 SERVICE
 
Tableaux 9ème étape circuit fédéral 2024
Tableaux 9ème étape circuit fédéral 2024Tableaux 9ème étape circuit fédéral 2024
Tableaux 9ème étape circuit fédéral 2024
 
08448380779 Call Girls In IIT Women Seeking Men
08448380779 Call Girls In IIT Women Seeking Men08448380779 Call Girls In IIT Women Seeking Men
08448380779 Call Girls In IIT Women Seeking Men
 
ppt on Myself, Occupation and my Interest
ppt on Myself, Occupation and my Interestppt on Myself, Occupation and my Interest
ppt on Myself, Occupation and my Interest
 
Chennai Call Girls Anna Nagar Phone 🍆 8250192130 👅 celebrity escorts service
Chennai Call Girls Anna Nagar Phone 🍆 8250192130 👅 celebrity escorts serviceChennai Call Girls Anna Nagar Phone 🍆 8250192130 👅 celebrity escorts service
Chennai Call Girls Anna Nagar Phone 🍆 8250192130 👅 celebrity escorts service
 
Italy vs Albania Tickets: Italy's Quest for Euro Cup Germany History, Defendi...
Italy vs Albania Tickets: Italy's Quest for Euro Cup Germany History, Defendi...Italy vs Albania Tickets: Italy's Quest for Euro Cup Germany History, Defendi...
Italy vs Albania Tickets: Italy's Quest for Euro Cup Germany History, Defendi...
 
Call Girls In Vasundhara 📱 9999965857 🤩 Delhi 🫦 HOT AND SEXY VVIP 🍎 SERVICE
Call Girls In Vasundhara 📱  9999965857  🤩 Delhi 🫦 HOT AND SEXY VVIP 🍎 SERVICECall Girls In Vasundhara 📱  9999965857  🤩 Delhi 🫦 HOT AND SEXY VVIP 🍎 SERVICE
Call Girls In Vasundhara 📱 9999965857 🤩 Delhi 🫦 HOT AND SEXY VVIP 🍎 SERVICE
 
Who Is Emmanuel Katto Uganda? His Career, personal life etc.
Who Is Emmanuel Katto Uganda? His Career, personal life etc.Who Is Emmanuel Katto Uganda? His Career, personal life etc.
Who Is Emmanuel Katto Uganda? His Career, personal life etc.
 
08448380779 Call Girls In Karol Bagh Women Seeking Men
08448380779 Call Girls In Karol Bagh Women Seeking Men08448380779 Call Girls In Karol Bagh Women Seeking Men
08448380779 Call Girls In Karol Bagh Women Seeking Men
 
( Sports training) All topic (MCQs).pptx
( Sports training) All topic (MCQs).pptx( Sports training) All topic (MCQs).pptx
( Sports training) All topic (MCQs).pptx
 
VIP Kolkata Call Girl Liluah 👉 8250192130 Available With Room
VIP Kolkata Call Girl Liluah 👉 8250192130  Available With RoomVIP Kolkata Call Girl Liluah 👉 8250192130  Available With Room
VIP Kolkata Call Girl Liluah 👉 8250192130 Available With Room
 
08448380779 Call Girls In International Airport Women Seeking Men
08448380779 Call Girls In International Airport Women Seeking Men08448380779 Call Girls In International Airport Women Seeking Men
08448380779 Call Girls In International Airport Women Seeking Men
 
Croatia vs Italy Euro Cup 2024 Three pitfalls for Spalletti’s Italy in Group ...
Croatia vs Italy Euro Cup 2024 Three pitfalls for Spalletti’s Italy in Group ...Croatia vs Italy Euro Cup 2024 Three pitfalls for Spalletti’s Italy in Group ...
Croatia vs Italy Euro Cup 2024 Three pitfalls for Spalletti’s Italy in Group ...
 

2 Level Defense

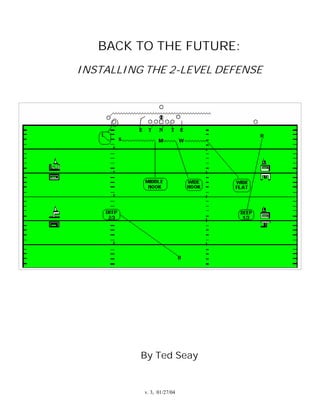
  • 1. BACK TO THE FUTURE: INSTALLING THE 2-LEVEL DEFENSE By Ted Seay v. 3, 01/27/04
  • 2. TABLE OF CONTENTS Introduction Page 3 The Concept: Buying -- and Selling -- the Idea Page 4 The Basics: Defining Terms Page 6 Position/Personnel Requirements Page 10 1L Alignments/2L Stacks and Positioning Page 12 Fundamentals by Position Page 18 Variations - 1L Stunts/2L Blitzes Page 29 Coverages/Two-Deep Page 32 The Basics II: Consolidation Page 41 The Schedule: Installing the 2LD in Two Weeks Page 43 The Game Plan: How to "Fine Tune" for an Opponent Page 77 Conclusion: JT and the Mouse Page 97 DEDICATION: To John M. Thomson, creator of the 2-Level Defense; and to Darrel "Mouse" Davis, the man who modernized the Run and Shoot offense: "When a true genius appears in the world, you may know him by this sign -- that the dunces are all in a confederacy against him" --Jonathan Swift NOTE: This document is in the public domain -- no copyright is claimed on any of the author's material herein. It is free, and freely distributed. 2
  • 3. INTRODUCTION This installation guide represents a labor of love -- an attempt to pass on my knowledge of the 2-Level Defense (2LD) to other coaches. Since I first purchased the 2LD textbook, Football Defense of the Future: The 2-Level Model by John M. Thomson and Bill Arnsparger (Englewood Cliffs, NJ: Prentice-Hall, Inc., 1988), I have tried to share this fascinating defense with others. The text and Teaching Supplement have been so hard to come by, however, that until fairly recently, my efforts have been limited to a small handful of coaches. In recent years, the Internet has given a new lease on life to a number of obscure football concepts from the Yale Formation direct-snap offense to the Gap-Air-Mirror (GAM) defense. This new medium for exchanging ideas has also revealed a 2LD "underground" -- a small but dedicated group of coaches who have kept Coach Thomson's concepts alive since the beginning. (I should note here that I mean no disrespect at all to Coach Arnsparger, one of the great defensive minds in football, but -- the 2LD is John Thomson's baby. You won’t find reference to the 2LD in any of Arnsparger's other publications, and for good reason: as John Thomson relates it, Coach Arnsparger called him shortly after publication of the 2LD text to say that coaches from all over were bugging him to death about the 2LD. Since he was still coaching at LSU, and attempting to recruit, he basically washed his hands of the whole thing and left the 2LD where it belonged, with its creator, John Thomson.) (On a related note, there are ridiculous rumors making their way around the Internet regarding why the 2LD is so little known. The most popular version is that a hit by a 2LD Deep Safety left a receiver paralyzed or dead, and a subsequent lawsuit forced the recall of the textbook and its destruction by the publisher. This is pure hogwash -- but it says a great deal about the reputation the 2LD developed in a very short time for ferocious hits by the deep safety. Prentice-Hall only ever published about 2,000 copies, according to Doctor Thomson, and most of those were snapped up by institutional buyers -- libraries and universities. I happened to receive a mailing from Prentice-Hall in 1988 offering a number of football texts, and the 2LD book immediately caught my eye. For those coaches interested in obtaining a copy, I suggest you try an inter-library loan and a trip to your local photocopy shop.) My intent with this installation guide is to pass on my version -- a simplified "subset" -- of the John Thomson 2-Level Defense. I outline the requirements for each position, then lay out key drills and an installation sequence. One word of warning, however: if you aren’t willing to line up your deep safety at a depth of +28 yards from the LOS, you should find another defense. 3
  • 4. THE CONCEPT: BUYING (AND SELLING) THE IDEA There is no way around it -- the 2LD is a startling defensive concept. The first time you see a safety lined up 28 yards deep, you react. Some coaches shake their heads, some blink very hard, and some laugh out loud. Reactions from the armchair intelligentsia (parents, "fans", etc.) can be even more vehement. "What the hell are you playing that kid so deep for? That quarterback can't even throw the ball that far!" Since this was actually one of the more intelligent comments I have heard regarding the 2LD, I just smiled politely. There is no substitute for belief in a system of offense or defense -- in order to "sell" it to assistants and players (much less parents and fans), you have to "buy" the concept yourself. With the 2LD, that means first and foremost buying into the use of a deep safety (or two!) at +28. (Note for youth coaches: this depth can be cut down in proportion to the speed and skills of your age group, just as you cut other dimensions down to suit, say, the 10-year-old player. What matters is the ability to enforce an "end line" beyond which the offense is not welcome to operate, not an exact adherence to the +28 depth.) Before I discuss the rationale behind the depth of the safety, I want to talk about the theoretical underpinnings of the 2LD. Coach Thomson has said that his impetus in designing a new defensive look was the success of the Mouse Davis Run and Shoot offense in the late 1970's and early '80s. Thomson saw the need for a defensive look that could cover the short receivers tightly without sacrificing the deep ball. He also saw that a model for such a defense existed in Bear Bryant's 6-5 goal- line defense. The six defensive linemen (the first level of the defense) attacked their gaps, while the defensive backs and linebackers (the second level) each "mirrored" a potential offensive receiver. The second level played tight man defense, for the most part, while the close proximity of the back of the end zone provided an "end line" beyond which the offense could not operate. The great leap Coach Thomson made was to imagine a safety placed so deep in "centerfield" that he could effectively intercept at a set depth anything the offense tried -- thus providing the same "end line" coverage that the 6-5 enjoyed from the back of the end zone. Through "extensive experimentation", Coach Thomson determined that a deep safety (DS) placed at +28 yards could enforce an end line at +18 that would eliminate the deep pass and force the offense to concentrate on medium-range routes. The factor that made this coverage possible was that the DS could cover much more ground than a traditional defensive back because he was running forward -- not back-pedalling meant he could effectively cover twice as much ground. 4
  • 5. The next step in the master 2LD design was the play of the second level of five pass defenders. Their basic concept was to play tight man-to-man defense on their respective "mirrors", denying the short pass by playing underneath the receiver after bumping him. This left the offense with a window of opportunity for passing the ball of between +15 and +18 -- the medium range passing game. However, because of the tight coverage by the second level defenders, the quarterback was forced to arc the ball in the air to drop it in between the second level and the deep safety. This is basic 2LD man or "Max" coverage. The chess game began in earnest with the other basic coverage, a zone scheme called "Cover". Here, the second level (2L) played the short zones at a depth of about +12 to +15, taking away the medium depth pass while conceding the quick stuff. Max coverage would normally dictate a "hard" alignment by the 2L defender on an outside receiver (up to +1, basically right in the receiver's face), while Cover would call for a medium depth deployment by the 2L defender (+3 - +5). If offenses start keying the depth of the 2L alignment, however, we can align them hard and run Cover, or medium and play Max -- giving no clue of our intentions before the snap. Combined with our bumping response to motion no matter what coverage we're in (page 9), we provide no pre-snap clues to the offense. They must decide -- are we taking the short pass or the medium pass away on this snap? Will we stunt and/or blitz? If so, what variation of Max coverage will we play behind it? Combined with 13 different defensive fronts which we can shift into just before the snap, and the automatic stacking of 2L defenders behind their 1L counterparts when they are mirroring an offensive backfielder in the box (or "Core", as we call it), we make pre-snap reads a nightmare for offensive coordinators and quarterbacks. I will detail alignments, stunts, blitzes and coverages in this guide, but I will make the point again -- the deep alignment of the DS is crucial to the operation of the 2LD. It is what allows the first and second levels to attack the offensive gaps and receivers with abandon, and to disguise what they are doing until the snap. In short, it is absolutely essential to the 2LD. Coach Thomson does allow for the re-alignment of the DS at free safety depth (+ 8 to +18 yards), but only in certain special circumstances. As a rule, the 2LD absolutely requires a truly DEEP Safety. Minor adjustments for slower or faster personnel, (i.e. from +25 to +30) are perfectly acceptable; however, if you are not willing to accept the basic concept of the deep safety, the 2LD is not for you. 5
  • 6. THE BASICS WORKING WITHIN THE SYSTEM: DEFINING TERMS Areas: By definition, the sections of the field on the offensive side of the ball where potential receivers are located. The area between the offensive tackles and 5-7 yards deep is the Backfield; Area C extends 5 yards outside the Backfield in each direction; Area B extends out from Area C a further 7 yards toward each sideline; and Area A extends from Area B to each sideline. Each Area A and C may contain only one receiver; receivers nearby are considered to be in Area B. Core: An area surrounding the static offensive personnel (i.e., the offensive 6
  • 7. line), the quarterback, and the First Level (1L) of the defense. It may also include mobile personnel (i.e., running backs, tight ends, slotbacks and/or wingbacks) and their Second Level (2L) "mirror" defenders. The core normally extends in an oval with a radius of 5-7 yards from the football. Numbering: Mobile offensive personnel (that is, potential receivers -- backs and ends) are given a number relative to their position. The receiver closest to each sideline is counted as #1; the next receivers in are #2; while the remaining receiver, regardless of position, is #3. Reading across the field in either direction, the numbering is always 1, 2 ,3, 2, 1. Stacked receivers are numbered from front to back: if the front receiver is #1, the one behind him would be #2, a third in the stack would be #3, and in a quad stack, the fourth receiver at the back would be #2. Offensive receivers are identified with reference to their number and area. By definition, there can be only one receiver in each Area A and C, so receivers stacked behind #1A are automatically #2B, followed by #3B, etc. Similarly, a TE/wingback combination will be numbered (assuming Area A to that side is empty) as #2C and #1B, respectively (see diagram next page). Two important points to note: backfield receivers are identified by number only; and quarterbacks (that is, the most likely passers) are not numbered at all, even in direct-snap (shotgun) formations. 7
  • 8. Formations with Area A receivers can be classed as spread formations, and we further identify the set by the number of receivers to one side: Iso, Twin, Trips or Quad. Since Len and Ron always mirror #1 to their side, and Mike mirrors #3, Sam and Will by definition mirror #2 to the strong and weakside respectively. If Sam, for example, is mirroring a slotback to his side, and he sees two backs in an I formation, he can deduce one remaining receiver on the other side of the formation. If his slotback goes in motion across the formation, Sam does two things: he bumps to the Core to stack behind a 1L defender and mirror one of the I-backs; and he calls out "Twin! Twin!" so that Will can be waiting on the other side of the Core to pick up the motion man. Our bump rules (see page 9) protect us if the ball is snapped when the motion man is in the backfield -- if the ball is handed to the motion man on a fly/jet/speed sweep, the 2L defender who has bumped to cover him will pursue him inside-out, while the defender who has switched to the fullback will mirror him for trap and belly plays. 8
  • 9. Bump: 2L defenders always react to motion the same way, regardless of the coverage we have called. If Len is mirroring a flanker who goes in motion, Len will follow him across the formation until he encounters another 2L defender -- let's say Sam. Len then physically tags Sam with his hand ands says "bump" -- Sam picks up the motion man, while Len now mirrors the receiver Sam had been covering. The key to effective coverage is that a 2L defender is ONLY responsible for his man unless and until someone comes along and bumps him to another receiver. In the diagram, Ron bumps left with motion until he contacts Sam; Sam in turn drops back at an angle as he approaches the Core (to avoid 1L defenders) and mirrors the motion man. If the ball is snapped for a fly/jet/speed sweep series play at the moment diagramed, Sam still has the motion back and will pass in front of Mike if necessary. If the motion man passes in front of the FB, on the other hand, Sam would bump him to Mike and mirror the FB himself. Wideside: If the ball is scrimmaged from a hashmark, the wide side of the field is obvious; however, by 2LD definition, if the ball is scrimmaged from BETWEEN the hashes, BOTH sides of the field are the wideside. This has distinct effects on several 2LD coverages (see pp. 32-40). 9
  • 10. THE 2LD BY POSITION Here are some thumbnail sketches of the requirements for the various 2LD positions. First Level (1L): Body mass is important, but quickness and agility are vital at Nose and Tackle. This is a fluid, swarming defense, so smaller/quicker personnel should be preferred at these positions to larger/slower (all other things being equal). The Ends should have speed, quickness, lean body mass, AND height. These are by far the best athletes in the First Level, and should be among the best on your team. Julius Peppers is the current prototype. (You've got a couple of those lying around, right?) The Ends are your principal pass rush threat, yet must be able to plug the off- tackle hole. They almost always crash, and are responsible for the C gaps; the 10
  • 11. other DL personnel usually have a one-gap responsibility as well, although we often give one Tackle or the Nose two-gap responsibility. Otherwise, we just move the unassigned gap around in a kind of shell game. The key to all 1L maneuvers is that they begin as pass rush -- everything else is a reaction. When you give the 1L that aggressive mindset, you can still channel that aggression into fighting through blocks to stop a running play coming at them, or tearing down the LOS to pursue. I've found it much easier to teach D- line techniques this way than to teach gap responsibilities first and then pass rush as a reaction. Second Level (2L): Speed kills, inside and out. A glue-footed Mike (what Coach Thomson calls Gael, the middle LB equivalent in the 2LD) can be caught in mismatches against speedy receivers any time the offense chooses, so you need foot speed at all five 2L positions. The two outside positions (I call them Len and Ron -- CB equivalents) must be burners with big egos -- think Deion. While we rarely hang them out to dry without top cover, these kids just have to be quick and cocky. The middle three positions (Sam, Mike and Will) are similar in requirement to the Ends, but don't have to be quite so genetically superior. Body mass for plugging the inside and height for staying with crossing TEs are important, but again, speed shouldn't be sacrificed for size. If you have to, you can play both a big LB type and a quicker SS type at one of the 2L positions, substituting them according to game plan. Deep Safety (DS): This can be one of the most average athletes on the team. Reasonable speed is an asset, but intelligence, timing and football sense are all very important. The only critical trait is that he must LOVE TO HIT. He will get opportunities to lay the leather on receivers who are stretched out reaching for passes while looking backward, and he will be expected to make the most of these opportunities. We see very few deep Post patterns by teams after a few good hits by the DS -- most teams stick to out routes and the shorter stuff after one or two "rifle shot" collisions. We don't coach brutality, and I certainly do NOT teach head shots, but the laws of physics dictate that a DS running forward can cover twice the ground of a FS backpedaling, and will arrive at the point of impact with twice the momentum -- which means twice the impact energy. 11
  • 12. ALIGNMENTS (Note: The Deep Safety aligns 28 yards deep at the midpoint between the two widest receivers, but always inside the {high school} hashmarks.) First Level: I'll give the two alignment rules for each 1L position, then demonstrate with diagrams. Nose: Rule #1: All odd-numbered calls -- 11, 3's (3 Left and 3 Right), 33, 5's, 55 -- the Nose aligns ODD, over the center. Rule #2: Even-numbered calls -- 2's, 22, 4's, 44 -- the Nose aligns EVEN, on the guard to his Left or Right, depending on the Ends' call. (Corollary: In 22 and 44, Nose aligns EVEN, but stacks behind a Tackle, again depending on the Ends' call.) Tackles: Rule #1: All double-digit calls, alignment is pre-determined: In 11, OPEN, over offensive tackle; in 22, 33, 44 or 55, CLOSED, over offensive guard. Rule #2: All single-digit calls, (2's, 3's, 4's or 5's), Tackles align according to the Ends' call at the LOS: "Left", left Tackle is OPEN and right Tackle is CLOSED (both aligned to the left); "Right", left Tackle is CLOSED and right Tackle is OPEN (both aligned to the right). 12
  • 13. Ends: Rule #1: All calls starting with a 1, 2 or 3 (11, 2's, 22, 3's, 33), Ends align LOOSE, outflanking the offensive core. Rule #2: All calls starting with a 4 or 5 (4's, 44, 5's, 55), Ends align TIGHT (outside eye on offensive tackle). Exception: When lining up next to an Open Tackle, the End aligns Loose. Note: When aligned opposite a tight end or tight slotback, a Loose End will play a standard 9 technique on the TE's outside shoulder, rather than the slanting stance shown in the diagram above, which is normal for a Loose End on the Split End side. We can also make a Wide call for the Ends, which would put them a yard outside a standard TE, or outside shoulder on a TE/WB combination. The Ends' Calls: As the offense breaks its huddle, both Ends will call out a directional indicator decided by game plan: "Left" or "Right" in response to formation strength, field width, and/or other factors. In order to give the defense as much flexibility as possible in aligning before the snap, we provide an additional bit of information in the huddle. When we call a single-digit front in the huddle, we may add the word "Away" -- for the benefit of the Ends only. Thus, if we call "5" in the huddle as the 1L alignment, and the offense lines up with its strength to the left (as previously defined by that weeks' game plan), the Ends would normally call out "Left! Left!" and the 1L would align in 5 Left (see diagram next page). If the huddle call was "5 Away", however, the Ends would call out "Right! Right!" -- AWAY from offensive strength -- at the LOS, and the 1L would align in 5 Right (see diagram next page). Thus all 13 alignments are available to the defense at all times, no matter how the offense lines up. 13
  • 14. In Odd fronts, the Nose has two-gap responsibility; in Even fronts, the Tackle opposite the Nose has both gaps. All other linemen have a single gap to defend. (Please excuse the quality of the diagram. Ends are further outside offensive tackles when aligned Loose than the pictures indicate, and the angle of slant is wrong, too.) 14
  • 15. Second Level: There are two basic areas where 2L defenders deploy: out wide mirroring immediate receivers (in Areas A and B); or mirroring backs, TE's or tight slot/wingbacks (in Area C or the Backfield). In the latter case, the 2L defenders are considered to be within the Core, and are almost always stacked behind 1L teammates at a depth of up to +5 yards. Unstacked: 2L alignment outside the Core consists of two components: shade (Inside or Outside the receiver) and depth (Hard, Medium or Soft). Shade: From an Outside shade, the 2L defender will aggressively FUNNEL his receiver to the inside, denying outside (i.e., Fade) routes; from Inside, he will STEER the receiver outside, denying the inside release and crossing routes. Depth: Hard: Up to +1 -- in the receiver's face; Medium: +3 - +5; Soft: +7 2L defenders in Area C may line up at a Hard (Outside shade) or Medium (either shade) depth; in Area B, all combinations of the three depths and two shades are possible; while in Area A, both shades are possible from a Hard depth alignment, but only an Inside shade is played from a Medium or Soft depth. The Hard Area C Outside shade results when a TE or slotback is present and the 1L End is aligned Tight (over the offensive tackle). If Mike, for example, is stacked behind that End in a 2 Stack, Sam (who has responsibility for the TE or slot) will AUTOMATICALLY move up to a Hard Area C Outside shade, which we call "JAM". The Jam position allows Mike to mirror his man outside without colliding with Sam. Stacked: 2L defenders will Stack in the Core at three possible locations: a 1 Stack over the center; one or two 2 Stacks over the offensive tackles; and one or two (Area) C Stacks over a TE or slotback. 1 Stack: The 2L defender stacks behind Nose in Odd alignment (over center). 15
  • 16. 2 Stacks: The defender stacks behind a Tackle or End opposite the offensive tackle, or behind a Tackle or Nose opposite an offensive guard. C Stacks: The 2L defender stacks behind an End opposite a tight end or slotback. (See explanation of Jam technique on page 15.) Obviously, combinations are possible. The following example shows how both 2L defenders are protected from offensive line blocks by the 1 and 2 Stacks. 16
  • 17. Some combinations of stacks and 1L alignments are shown below against different offensive formations. 5 LEFT vs. Wing-T 11 vs. Double Wing 4 LEFT vs. Single Wing 5 RIGHT vs. Tandem 33 vs. Run and Shoot 17
  • 18. FUNDAMENTALS: First Level Stance:  Nose and Tackles use a 3-point stance with a shoulder-width base and fairly minimal stagger -- must be ready to move laterally;  Down hand should be about 18 inches from LOS; off hand is partially extended, ready to deliver arm shiver;  Tackles and Ends should play with their inside hand down; left-handed personnel should play on right of defense;  Nose aligned Even and Tackles aligned Open or Closed must shift to an inside-eye (Eagle) position when the offensive lineman opposite them is split out more than two feet; otherwise alignment is always head-up on O- lineman;  Ends' stance is either two-point or three-point; two-point is mandatory when End has pass coverage responsibilities, three-point is mandatory when End is lined up Tight (inside TE) and is relieved of pass coverage responsibilities;  Ends' stagger is always inside foot slightly back, and initial step is always with inside foot, whether lined up Tight or Loose. Shifting:  We will shift from one 1L alignment to another to disguise our intentions, after the Ends' Left/Right offensive strength call and before the snap;  From 3-point stance, Nose and Tackles shuffle laterally to new position with hands skimming grass;  Ends start Loose, may/may shift inside to Tight 3-point stance;  Timing against opponent's cadence (including Ends' Left/Right call) must be practiced every week. Responsibilities: Against the run, Nose/Tackles' responsibility sequence is: Primary: Defend the assigned gap(s). Secondary: Assist with the gaps to either side. Pursuit: Locate the ball and execute tear technique (page 20). 18
  • 19. Against the pass, the Nose/Tackles sequence becomes: Primary: Line gap becomes pass rush alley, narrowing and converging at the passer; if blocked out of his alley, the pass rusher must work his way back. Secondary: React to screens, draws, delayed runs. Pursuit: Begins when QB escapes from core with the ball. Ends' responsibility sequence against the run is: Primary: Contain. Pursuit: Backside end must trail play at the same depth as the ball, always keeping the QB in sight. Secondary: Very limited responsibilities. Once containment is lost, End is almost always out of the play. Against the pass, the responsibility sequence becomes: Primary: Contain the QB -- rush him outside-in, cut off sprint- or roll-out. Secondary: React to screens outside the core, and contain draws, screens and shovels inside the core. Note: Ends have certain specified pass coverage responsibilities. They are detailed on pp. 21-24. Techniques: Nose/Tackles have two techniques, power move and slant; and two reflex reactions, breakdown and tear. Power Move: The N/T launches himself straight ahead at the blocker, striking blows on the upper arms just below the shoulder pads with the heels of the hands. The defender's helmet may also impact the blocker just above the numbers; in any case, the defender must maintain the flex in his knees and keep his back bent forward at the waist. He locks out with both arms without giving ground; even if he cannot completely lock out against larger opponents, he maintains separation from the blocker this way. Keeping his eyes on the ball- carrier, the defender pushes on one shoulder pad and pulls on the other to control the blocker and clear a path to the ball. If the blocker grabs a forearm or elbow, the defender pulls down through the blocker's thumb to clear his arm. Slant: Defender lead-steps (never use a cross-over step) into his assigned gap at a 45 degree angle. He simultaneously punches his opposite arm and shoulder across his body to deny the offensive lineman he lines up across from a clear shot at his chest. With his head and shoulders in the gap, he can now play the 19
  • 20. blocker: if the lineman he is slanting toward blocks down on him, he employs his power move techniques; if the lineman he originally aligned over attempts to reach-block him, the defender attacks the shoulder pad with his inside elbow, and hand-fights his way clear to secure the gap. Breakdown: The N/T always attacks, but this attack only continues at full throttle when confirmed by pass-blocking by the offensive line. If the O-line fires out, the defender immediately breaks down with shoulders square to the LOS -- the rule for breakdown is to penetrate no further than the heels of the offensive line. Tear: A pursuit reaction along the LOS by N/T's who have broken down from their initial pass rush attitude. The defender keeps the ball carrier in front of him without circling around blockers or getting blown off the line. He never overruns the ball, but adjusts his tear course to intersect the ball carrier. It is important to emphasize that a N/T's original intention is to ATTACK full speed ahead; he will continue to do so if his offensive line keys (see page 46) confirm pass blocking, and will only initiate breakdown and/or tear AS A REFLEXIVE ADJUSTMENT to aggressive blocking by his key triangle (see page 46). Ends have two run techniques, crash and trail. Crash: Aligned Loose, the End is free to crash into the offensive backfield. He penetrates aggressively through the C gap aiming at the near halfback (or at the spot where one would be). He maintains outside leverage on the ball while forcing it directly -- the End should NEVER allow a ball-carrier to cut back inside him untouched. From a Tight alignment, the crash technique is more difficult to initiate, but the End should fight through blocks by the offensive line to gain his crash leverage whenever possible. The End must stay on his feet, so the arm shiver technique is preferred, fighting through the head and neck of inside-out blockers, disengaging as soon as possible and keeping his feet clear. If an End aligned Loose reads an off-tackle play coming directly at him, however, he should engage the trap or kickout-blocker with his inside shoulder to maintain outside leverage. Aligned Tight, an End should fight outside-in pressure from a TE with his outside shoulder, stringing him along the LOS while being aware of cutback attempts by the ball-carrier. Trail: A natural extension of crash technique. If potential ball-carriers move away from him, and no blockers attack, the End immediately locates the QB and the football, trails AT FULL SPEED and expects a cutback, counter or reverse move by a ball-carrier. Reverses or bootlegs will almost always be preceded by 20
  • 21. blockers, telling the End he must maintain his primary contain responsibility rather than initiating trail. Ends also have three pass techniques to master: Max (man), Cover (zone), and Shortside Square. ENDS: MAX AND ZONE TECHNIQUES 21
  • 22. ENDS: COVER, SHORTSIDE SQUARE, AND STUNTS As indicated in the diagrams, the Ends have a few, very limited pass coverage responsibilities. They must be drilled relentlessly, however, if the 2LD is to succeed as a pass defense platform. Ends are called on to Max backfield receivers (p. 21, top, 22 bottom left, and see p. 29) when the 2L "Dog" blitz is verified; Max TE's or tight slotbacks (p. 21, middle, 22 bottom right, and see p. 31) when the 2L blitz "Cushion" or the coverage variant "Tight Cushion" (p. 34) is verified; drop to Shortside Hook or Flat zones in Cover (p. 21, bottom and p. 22, top and middle left); or drop to Shortside Square if Wideside Trips is 22
  • 23. authenticated from Cover (p. 22 middle right, and see pp. 23, 24, and 35). In addition, they must rush a sprintout pass in their direction even though "Cover" is called (p. 22 top right). SHORTSIDE SQUARE This is a unique feature of the 2LD. Neither man nor traditional zone coverage, SS is invoked from Cover when the ball is scrimmaged from a hashmark and the offense lines up in or motions to Trips or Quads to the Wideside of the field (p. 24). If (and only if) the remaining receiver to the shortside attacks the short side of the field as a pass receiver does the End drop to his SS responsibilities. If the receiver (usually a backfielder) sets to block shortside, the End can rush under control, but must be prepared to cover a delayed pass release to the shortside; if he sets up to block or releases for a pass to the wideside, the End is free to crash as normal. The Shortside Square extends from the LOS to the Deep Safety's end line at +18 yards, and from the shortside hashmark to the sideline. 23
  • 24. ENDS: SHORTSIDE SQUARE ASSIGNMENTS 24
  • 25. FUNDAMENTALS: Second Level Stance: Stacked in the core, 2L defenders require lateral mobility. Therefore, their two-point stance should have feet shoulder-width apart in a minimal heel- toe stagger, with weight forward over the toes, and knees and waist slightly bent. They should have a clear view into the backfield. In an Area C Jam technique over a TE or tight slotback, the 2L defender keeps his outside foot back, widening his stance slightly and keeping his center of gravity lower. Outside the core, covering an Area B or A receiver, the 2L defender keeps his inside foot forward and his body weight forward. (Exception: When playing a hard outside shade, the defender keeps his outside foot forward.) As a general rule, the closer the 2L defender mirrors his receiver, the more he lowers his center of gravity by lowering his hips and widening his stance (but never wider than shoulder width). Responsibilities: The basic responsibility of the 2L defender is the man he is mirroring. This is true whether the play develops as an inside run, outside run, dropback, action or screen pass. Mirroring a running back within the core, run defense is normally the primary responsibility for 2L defenders -- however, this may change in "sure" passing situations (i.e., 3rd and 15+). Outside the core in Area A or B, 2L defenders must play the pass first. In Area C, the 2L defender's primary versus secondary responsibilities may depend (according to game plan) on the type of receiver he is mirroring. Against a larger, slower TE, the 2L defender should play the run first; while against a smaller, faster slotback, the 2L defender should play pass responsibility first. Again, this will be controlled by the specific game plan for each opponent. Techniques: When mirroring in the core, the 2L defender stacks behind the 1L defender closest to his mirror. If no 1L defender is aligned within one offensive lineman of the mirror back, the 2L defender may align directly opposite his mirror unstacked. When receivers go in motion across the formation, 2L defenders shuffle between stacks, keeping their shoulders parallel to the LOS at all times. If the mirror back dives at the 2L defender, he fills aggressively. If the mirror moves outside the 2L defender, he scrapes down the LOS and plays the ball inside-out as long as it remains inside containment. He should meet blockers with a two-hand shiver to maintain separation while he keep his feet moving. If 25
  • 26. the ball moves across the core away from the 2L defender, he must play cutback responsibility, shuffling cautiously across the formation and keeping the ball in front of him laterally so he can play the cutback if it comes. When the ball clears the core, the 2L defender immediately institutes pursuit, accelerating to catch up with the ball (but not overrun it). From the backside of the play, pursuit takes a deep course called rotation. When the ball crosses the LOS, the rotating defender should be exactly in between the two hashmarks, and takes the best available angle to intercept the ball carrier. In an Area C Jam technique, the 2L defender may have to concentrate almost entirely on his primary responsibilities -- pass coverage or containment -- and ignore pursuit and rotation on plays away. Outside the core, the 2L defender aligned at hard depth will Steer his mirror outside or Funnel him inside; at soft depth he will employ positional technique to deny specific pass routes (i.e., aligning to the inside to take away the quick Slant and Post); and at medium depth he will employ both methods. Specific techniques are covered in the Installation/Drills section (page 43). FUNDAMENTALS: Deep Safety The Deep Safety (DS) position is unlike any other position in defensive football. He is not a defensive back. Defensive backs are trained to react instantly to offensive cues. The DS, however, must be trained NOT to react immediately to what he sees before or at the snap. Defensive backs must move rapidly and with great agility to prosecute their responsibilities. The DS is more like a military force being held in reserve until the crucial moment of battle. He tracks the offensive threats from long distance while pre-positioning himself during the first 1.5 to 2 seconds of any play -- then he strikes like a guillotine falling. Defensive backs read keys and react to them immediately. The DS eliminates possibilities based on keys -- he looks for what doesn't happen and eliminates it, leaving him always with only one course of action. His train of thought is like a flow chart: 26
  • 27. PRE-SNAP RUN PASS INSIDE SHORT/MEDIUM OUTSIDE DEEP The DS will position himself before the snap at the approximate mid-point of the offensive formation (but never wider than one of the hashmarks). He will note the location of all five potential receivers, how many are available for immediate release downfield (i.e., 2, 3, 4 or 5 receiver sets) and whether the formation is balanced (1x1 or 2x2) or unbalanced (1x2, 1x3, 1x4 or 2x3). At the snap, the DS will analyze the offensive play, eliminating possibilities by following the above flow chart. He does not give equal credence and weight to all possibilities, however. One key to the play of the DS is that he must assume that every play will be a deep pass -- to the end-line at +18 or beyond (note the stars in the flow chart). Any other offensive play becomes a reaction for the DS -- and his reaction is to secure the tackle without fail. Stance: The DS stands tall and relaxed, bouncing lightly on his toes (like a boxer, or a tennis player waiting to return a serve) as the ball is snapped, reading the quarterback. Responsibilities: In Max coverage, the DS will intercept the ball at the end-line (or deeper, in case of a deep pass). In Max/Double, he is responsible for double-covering a chosen receiver. In Cover, his responsibilities may include the deep middle 1/3 or a deep 2/3 of the field. Technique: The most important point to teach the DS is the correct path to intercept the ball at the end-line (see diagram next page). 27
  • 28. This is the DS "glide path". He should never head directly for the LOS, but should focus his attention on the offense after the snap and begin to move under control toward the likely point of intersection with the ball. If the DS first moves forward, and then is forced to sprint laterally, he will have lost all the advantage that his built-up momentum and kinetic energy would otherwise give him (i.e., intercept speed and force of impact). The DS "bounce and glide" is explained in greater detail in the Installation/Drills section (see page 57). By the time a ball is thrown, the DS should be well on his way toward the intended receiver. If the ball will land near or past the end-line at +18 yards, the DS has a decision to make -- should he collision the receiver, or attempt the interception? In almost every case, the preferred option is to HIT THE RECEIVER. Therefore, before the ball starts downward from the high point of its trajectory, the DS will have made his hit vs. intercept decision. If he decides to impact the receiver, he must factor in two things -- the timing of the hit vs. the ball's arrival; and the position of any 2L defenders who may be covering the receiver. Taking the latter point first, the DS should TRY to hit through the shoulder of the receiver opposite the 2L defender. Of course, if this proves too difficult, the DS must still deliver a maximum blow to the receiver. We give the DS the full benefit of the doubt on his timing. If he impacts the receiver a fraction of a second before the ball arrives, well and good. We will take the penalty under those circumstances, and work with the DS after the fact to prevent recurrences. Meanwhile, the receiver will clearly understand why we "play that kid so deep." Or, to quote Dr. Thomson: "...(T)he safety's transition from read to enforcement, from mental integration to physical action, involves a gradual commitment, a building of momentum: -- at the snap, mentally eliminating the offensive possibilities, starting with the various (short) patterns, while gliding slowly; -- as the moment of his action-decision approaches, accelerating his glide; -- as the pass rush closes in on the QB, never fully committing until cued." (By cued, Thomson means the ball crossing the LOS on the ground or in the air.) 28
  • 29. VARIATIONS: 1L Stunts We distinguish between Stunts by the 1L and Blitzes by the 2L, even though there is some overlap. Slant: Involves the Nose and one Tackle slanting in the same direction to disguise the final alignment of the 1L, even after the ball is snapped. From odd-numbered fronts (11, 3's or 5's), the Nose and the Tackle away from strength will Slant toward strength, aiming for the spot where the back foot of their target offensive lineman (the one toward whom they are slanting) is lined up before the snap. Even-numbered fronts (2's, 22, 4's or 44) mean that the Nose and the Tackle who is aligned Closed (in 22 and 44, the one the Nose is NOT stacked behind) Slant away from strength -- the Nose always toward the center, and the slanting Tackle away from him. 11 SLANT 2 or 4 RIGHT SLANT Twist: Two maneuvers involve changing gap responsibilities between 1L defenders: the Tackle-Nose Twist (TNT) and Tackle-End Twist (TET). These are not primarily pass-rush maneuvers, but we will use them to disrupt man-blocking schemes. TNT is executed by the Nose and an adjacent Tackle (either in Odd/Closed or Even/Open alignments). The Nose slants outside, away from the Center, then the Tackle crosses behind him. 3 LEFT TNT 2 or 4 RIGHT TNT 29
  • 30. TET similarly involves a Tackle and adjacent End, but requires an Open Tackle and Loose End. As with TNT, the inside 1L defender (the Tackle in this case) slants out, and the End loops behind him. 3 RIGHT TET Once again, combinations are possible. 5 LEFT SLANT TET 5 LEFT TNT TET VARIATIONS: 2L Blitzes Three 2L blitzes provide the DC with more means of disrupting offensive plans. Blitzes also complement 1L stunts for a very practical reason -- a stunting 1L defender may be assigned two gaps in a particular front, but can only fill one of them -- making 2L blitzes a practical way to fill the undefended gap at unexpected moments. All blitzes must be VISUALLY VERIFIED at the LOS. Dog: 2L defender mirroring a Backfield receiver MAY fire through a gap AT HIS DISCRETION. The Dogging 2L defender is never wasted on a futile blitz. If his mirror back sets up to pass-block or moves laterally toward the perimeter of the Core, the defender is free to fire IF HE THINKS IT WILL BE EFFECTIVE (his mirror will be picked up by an End -- see page 21). If his back dives ahead, however (either immediately or after starting across the formation laterally), he must continue to mirror until he is sure the back is neither carrying the ball nor sneaking out on a pass route. 30
  • 31. Cushion: At the Snap a Loose End attacks and Maxes a TE or slotback, while the 2L defender with mirror responsibility crashes outside-in. Cushion is particularly effective against outside running plays -- sweeps, quick pitches, options, fly/jet/speed sweeps, etc. Cushion is ONLY verified at the LOS by a TE or slotback in the offensive formation. CUSHION Switch: Against TE/2 Backfielder formations, Switch crashes the End and a 2L defender outside-in. Switch is ONLY verified visually at the LOS by the presence of a TE and two Backfield receivers (meaning two 2 Stacks by the defense, and a 2L defender in position to Max the TE as the 2L defender who would normally do so crashes). SWITCH 31
  • 32. COVERAGES Max (man) coverage is the heart and soul of the 2LD. I know of a number of 2LD coaches out there who only use Max and its variants. However, I have always used, and recommend using, Coach Thomson's Cover (zone) scheme, albeit with a few simplifications. Max: Tight man coverage on the five potential receivers by 2L defenders with the DS enforcing the end line at +18. Variations include Max/Double, where the DS and a 2L defender double cover a wide receiver, while other 2L defenders play loose man coverage from a depth of +7 (with no end line in effect); and Max/Tight Cushion, where an End and a 2L defender double a TE or slotback (with the DS end line in effect). 3 LEFT MAX 32
  • 33. Max/Double calls the DS to provide "top cover" double coverage to a specified wide receiver. It tells certain other 2L defenders they must play Max Soft (i.e., traditional man coverage) techniques from a depth of +7 or more. The exceptions for playing Max Soft are for 2L defenders mirroring backfield receivers and for the 2L defender mirroring the receiver being double covered. In order to maintain integrity against the run, and because the deep passing threat is less immediate, defenders mirroring backfield receivers stay at their normal depth; however, they must always be aware that when Max/Double is called, there is no end line in force. The 2L defender mirroring the called Max/Double receiver (the 1A receiver to the defensive right in the diagram below) will attack and funnel or steer that receiver (depending on the game plan). The DS sprints forward at the snap to provide double coverage over the top of any deep routes -- fades, posts, etc. 11 MAX/DOUBLE 1A RIGHT 33
  • 34. Max/Tight Cushion is an excellent mechanism for double-covering a TE or tight slotback. It requires an End aligned Loose next to an Open Tackle, who assumes the End's contain responsibilities (see p. 14 -- with a TE on the defensive left, this would limit potential 1L fronts to five choices: 11 as shown below, and "the Lefts" -- 2 Left, 3 Left, 4 Left and 5 Left). At the snap, the End bumps the TE and Maxes him from an underneath position; the 2L defender mirroring the TE/slot then plays a Max Soft technique on the receiver, double covering him all over the field. Because the DS end line is in operation, all other Max assignments are executed as usual. 11 MAX/TIGHT CUSHION 34
  • 35. Cover: Zone defense by the 2L, DS and Shortside End. I have taken several of Coach Thomson's zone concepts and combined them. His Cover is the basis for my zone coverage against normal (i.e., Iso or Twin -- no more than two immediate receivers on each side) offensive formations. When the ball is scrimmaged from a hashmark, Cover becomes a four-under, three-deep zone with four 1L defenders rushing the passer. The wide flat is always left empty in Cover, which is a big reason we don't play a steady diet of Cover -- we always mix it up with Max. Len, Ron and the DS cover the three deep zones, while Sam, Mike, Will and the shortside End cover the Wide, Middle and Short Hook and Short Flat zones, respectively. In the event of a 2B receiver to the shortside (such as a back slotted to the defensive right), Will (in the diagram below) would mirror that receiver before the snap and drop to Short Flat after it, while the End would drop to Short Hook instead. This allows us to maintain maximum disguise while not asking too much of the End's pass coverage duties. 11 COVER (from right hash) 35
  • 36. From between the hashmarks, however, there is by definition no shortside on the field -- so both wide flats are left open. This frees up both Ends to rush the passer, but it also means quick flat and/or out routes have a much higher completion possibility. One solution is to teach a “Cover-Middle” that drops the strongside End to his flat and spreads Mike and Will from Middle Hook and Wide Hook to Wide Hook and the weakside Wide Flat, respectively. Another is to game-plan dropping one or both Ends to their respective flats when Cover is called from between the hashmarks, turning flat coverage into a guessing game for the offense. In any event, this has to be factored into the defensive game plan, and makes it even more imperative that Max and Cover be mixed up when the ball is scrimmaged from between the hashes. Again, the information on Cover on pp. 35-36 applies only to offensive formations with no more than 2 receivers deployed to each side. For formations that line up in or motion to Trips or Quad sets wideside, see pp. 37-38. 3 LEFT COVER (between hashmarks) 36
  • 37. The diagram below shows the effect of the offense sending Trips receivers to the wideside of the field. Even though Cover has been called, defenders respond to Sam's call of "TRIPS WIDE! TRIPS WIDE!" by repeating the call, and by executing their Trips assignments: Len drops to the deep outside 1/3 on the Trips side, while Will, Mike and Sam drop to the Trips-side Wide Flat, Wide Hook and Middle Hook, respectively. The DS moves up under control to cover the remaining deep 2/3 of the field, while Ron Maxes the now-isolated backside wide receiver. The backside End executes a technique which is not quite a zone, called Shortside Square: if the remaining receiver who is in position to threaten the shortside of the field, the fullback, releases shortside, the End drops and plays his Square responsibilities (see pp. 23-24). Quad receivers would produce the same result, whether the offense lines up that way, or shifts and/or motions into a Quad formation wideside -- with the sole exception that the shortside End would be freed from the possibility of a #2 receiver releasing to his side, and could crash as usual. If crossing routes were causing problems, of course, we could still game-plan dropping that End to Shortside Square to wall off crossing receivers. 5 LEFT COVER vs. WIDE TRIPS (right hash) 37
  • 38. Finally, if we call Cover against a team which motions to or lines up in a Trips or Quad set from between the hashmarks, we end up with the situation diagrammed below -- no shortside means no Shortside Square, so both Ends crash; while Ron must (by rule) Max the isolated receiver he is mirroring. Otherwise, the Cover Wideside Trips rule is in effect, so Len, Sam, Mike, Will and the DS all maintain their same assignments against wide Trips. 11 COVER vs. WIDE TRIPS (between hashes) 38
  • 39. Two-Deep: The insertion of a second DS (by removing one Tackle). Can be used with Max or Cover. The Two-Deep adjustment is not a coverage per se, but it affects how you play your coverages. Tactical use of a second DS should occur for sound defensive reasons, since you are eliminating 20% of your 1L pass rush. Against some teams, the use of a second DS or other variations (see spread offense adjustments, page 93) can provide an entire range of tactical challenges for offensive coordinators to meet -- from maximum pressure to dropping off 8 defenders. 2 LEFT, MAX/DOUBLE 1B LEFT, TWO-DEEP 39
  • 40. In the above diagram, the left Tackle has been substituted with a second DS who shares Max Double responsibilities with Len on the 1B receiver to the (defensive) left of the formation. (Note: While it might seem logical to remove the Nose in Two-Deep, it actually restricts the 1L alignments severely. Removing one Tackle leaves the defense with many more 1L alignment options.) The other DS enforces the end line across the entire field as usual. All other Max techniques remain in force as usual. Depending on whether you substitute a Right or Left Tackle for the second DS in Two-Deep, three alignments are possible: If the Right Tackle is removed, you can still line up in 4-Right, 5-Left or 5-Right; while if the Left Tackle is removed in favor of a second DS, you can line up in 4-Left, 5-Left or 5-Right. If you remove the Nose man, however, only one alignment is viable -- a 44 with no stack by the Nose. This alignment is duplicated by the 4-Right and -Left alignments anyway, and you can also use the 5's if you remove one Tackle. (Using the 1L alignment rules on pp. 11-13, demonstrate for yourself that these alignments are possible with one Tackle removed. Also, the diagram on page 39 shows Two-Deep from a 2 Left 1L front; while this can be used as a "prevent" set-up in long yardage situations, it is not recommended as a base front for Two- Deep.) While none of the coverages above may seem extraordinary (with the exception of the Deep Safety position, of course), it should be mentioned that the uniqueness of the 2LD rests with techniques and alignments, as well as with their application. In Max, for example, the 2L technique brings defenders underneath receivers to take away short routes. Beyond that, the skilful intermixing of Max and Cover with stunts, blitzes, and 2LD variations such as Two-Deep and offense-specific adjustments (see pp. 77-94) make the 2LD a very tricky proposition to attack. The game becomes a chess match between offensive and defensive coordinators, with the advantages of surprise and unfamiliarity almost always on the side of the defense. 40
  • 41. CONSOLIDATION: THE BASICS I will attempt to consolidate information from certain sections before moving ahead. It’s a habit I follow when installing the 2LD, and I recommend it to you highly when dealing with any complex, new information. 41
  • 42. To review (see diagram on page 41): The offense consists of the following elements: 5 STATIC personnel (linemen) 5 MOBILE personnel (backs/receivers) 1 QB We define the offensive line gaps as those which separate the 5 STATIC personnel ONLY. We only define A, B and C gaps to each side -- no D gap. (The gaps in the diagram are numbered in red for illustrative purposes only -- we do NOT number the gaps in our system.) The gaps are the primary responsibility of the 1L to defend. The Core is the area which contains the STATIC personnel and QB, as well as the 1L defenders -- it MAY also contain MOBILE personnel and their 2L mirrors. The 2L will MIRROR the MOBILE personnel wherever they line up: if within the Core, they will normally stack behind a 1L defender; outside the Core, they will align in an Inside or Outside shade, at a Hard (+1), Medium (+3-5) or Soft (+7) depth. Normally, the DS deploys at a depth of +28 and enforces an End Line at +18. In certain coverages, he may instead double cover a receiver, or cover a deep 1/3 or 2/3 of the field. There are 13 1L alignments possible in the 2LD, and five possible locations for 2L defenders to stack behind them. The combination yields a theoretical total of 242 possible 2LD fronts -- all from a two-digit (at most) 1L alignment call. The 1L has three Stunts available to it -- the Slant and two Twists, TNT and TET. The 2L can use three Blitzes -- Dog, Switch and Cushion. Coverages fall in two types: Man (Max, Max/Double and Max/Tight Cushion) or Zone (Cover). Cover changes depending on the lateral placement of the ball (hashmark vs. middle) and on the offensive formation before the snap ("Normal" -- Iso/Twin -- vs. Trips/Quad receivers). 42
  • 43. INSTALLATION: THE SCHEDULE The following schedule is designed to get a bare-bones 2LD up and running within two weeks, assuming 20 hours are available for defensive practice. (It is even possible to do so in 5 days if four hours a day are available for defense.) Special attention is given to the drills Coach Thomson invented to teach the particular skills involved in playing the 2LD. Key practices are preceded by a Chalk Talk script which covers the concepts to be taught on the field. CHALK TALK BEFORE PRACTICE 1: (Hand out diagram on page 41 before chalk talk) Intro: "We'll teach you a new vocabulary, new positions, new drills. You are learning something UNIQUE -- only a handful of teams in the country play this defense, and most offenses have never even HEARD of it, much less faced it." [Diagram 6-5 goal line defense. Demonstrate simplicity of concept: First level (linemen) attacks their gaps, second level (linebackers/backs) mirrors receivers. Show how the back of the End Zone forms an End Line behind which the offense can’t operate -- it cuts down on offensive options.] [Now move 6-5 to 50 yard line. Erase one nose guard, replace him with DS at +28. Draw in End Line at +18. Explain that in theory the functions of the 2LD and 6-5 are identical.] [Define each position. First Level (1L): Nose and Tackles responsible for interior (A and B) gaps. Ends crash through off-tackle (C) gaps.] [Second Level (2L): Len and Ron always take #1 receivers to each side of formation. Mike always takes #3 receiver. Sam aligns on strongside (as defined by game plan -- pre-season, always on TE) #2 receiver; Will takes weakside #2. Note 2L defenders may be called on to cover wide-outs AND stack in the core behind 1L defender AND take on TE by themselves. They are LB/DB hybrids; there is room for all types of players in the 2L, but they had better be quick.] [Deep Safety (DS): A new position, and one that requires an absolute LOVE of hitting -- we will choose our DS after we see who can deliver a ferocious hit, get up, shake it off, and do it over and over again.] [Defining the Offense: Show concepts of Core, line gaps, Backfield area, Area C, Area B, Area A, and the numbering of Mobile personnel. (Refer to top diagram, page 6, and diagram on page 41.)] 43
  • 44. [Two Key Concepts of 2LD: 1) Ten defenders ATTACK, one ENFORCES (1L attacks gaps, 2L attacks and mirrors Mobile personnel, DS enforces end line). 2) 2LD shuts down 5 offensive threats: Inside/outside running; and quick, sprint and dropback passing.] 44
  • 45. PRACTICE #1 SCHEDULE: 2-Level Defense Installation Practice #1 (Day 1 -- A.M.) Time 1ST LEVEL 2ND LEVEL DEEP SAFETIES 9:00 N/T: Stance, Power Move 2-point stance 9:05 Key Drill: 1-on-1 lock* Stack alignment Enforcement Drills I 9:10 E: Stance, alignment Shiver/shed techniques (2LD p. 262) 9:15 Crash angle and technique Scrape/cutback techniques 9:20 N/T: 1-, 2-Stack Drills w/2L Unit Stack Drills: 9:25 E: Crash Drill (2 pt. stance) 1L+2L v. OL+back, lock Read Drills I 9:30 (basic principles/run keys) (basic principles/run keys) (2LD p. 265) 9:35 N/S/M/W: 1-Stack Drill (2LD p. 162) Down-Out-Down Drill 9:40 T/E/S/M/W: 2-Stack Drill Beaten Outfielder Drill 9:45 E/S/M/W/L/R: C-Stack Drill (Len/Ron rotate 9:50 (Len/Ron rotate with DS drills) with C-stack drill) 9:55 WATER 10:00 N/T/E: Stance (end 3 pt.) Lollipop Drill: 10:05 Review Power Move cuts 1, 2 & crack Enforcement Drills II 10:10 Intro Arm-Over rush move (2LD p. 246) 10:15 Mirror/Max Drill (1-on-1): 10:20 Intro Arm-Under rush move funnel, steer Read Drills II 10:25 (coverage to +7 yds.) 10:30 Key Drill: Intro pass key Down-Out- Down Drill (2LD p. 248) 10:35 Beaten Out fielder Drill 10:40 N/T: Alley Drill (S/M/W/L/R/ DS rotate) 10:45 N/T/E: 1/2-Line Drill Mirror Drill (2LD p. 250) 10:50 Progress lock to thud (Mirror Iso, Twin & Trips) 10:55 (N/T rotate) Max receivers for 7 yds - no ball *1-on-1 Key Drill, Crash Drill, 2LD p. 150 KEEP IT SHORT, STUPID! I believe in keeping the players' attention span engaged at all times by the use of short, intense learning sessions during installation (and for that matter, in any practice). I have found short multiples of five-minute segments during two-hour practices to be the best way to break down teaching time. There are very few things in football that require more than 20 minutes at a time to focus on; my normal maximum for teaching any one concept or technique is 15 minutes. See diagrams on pages 44 and 60 for layout of practice workstations on the one-half football field which is the minimum requirement for installing the 2LD. Drills (keyed to the practice schedules on this and succeeding pages) are described below. Ten new drills are covered at the first practice, so your schedule may slip slightly at that one practice -- but they are simple, powerful drills for teaching 2LD fundamentals, so take the time to teach them right the first time. 45
  • 46. PRACTICE #1: FIRST LEVEL: Whether Nose, Tackle or End, the primary instruction tool for the 1L defender is the 1-on-1 key drill, followed closely in importance by the 3-on-1 drill. The 1L defender lines up opposite an "offensive" lineman (who can be another 1L defender rotating through the drill station) in the 1-on-1 drill and reads his primary key -- the lineman's helmet, either firing across the LOS or retreating. Secondary keys are obtained during the 3-on-1 drill by reading the "key triangle" -- the offensive lineman the 1L defender lines up across from, as well as the offensive players immediately to each side. Thus, a fire-out (run) key can be further distinguished by direction -- straight ahead, inside, outside or pull. The 1L defender focuses on 2 things: his gap and the offensive keys. He must not be blocked out of his assigned gap (established before the drill starts, and changed frequently), and he must respond to his keys by throttling up to rush the pass, breaking down to attack run blocks, and/or tearing laterally to pursue the ball through the Core. ONE-ON-ONE THREE-ON-ONE Defensive Ends use the identical 1-on-1 and 3-on-1 drills as the Tackles and Noses when aligned Tight (outside shoulder of OT/5 technique). When they are aligned Loose, however, Ends require a different drill, the Crash Drill. CRASH DRILL In this drill, the End will take the same keys from the offensive linemen in his key triangle as the other DL's do from their 3-on-1 drills (pp. 46, 47). The OL the 46
  • 47. End is lined up closest to will provide the strongest key, of course (OT when aligned Loose or Tight, TE or tight slot when aligned Loose). After the initial 3- on-1 drills, a blocking back can be added to attempt to kick out or log the End. Finally, a running back can be added to the drill to run inside, off-tackle and outside. Regardless of the specific parameters of the drill, the End must:  Crash under control;  Read his key triangle to anticipate what play is coming; and  Stay on his feet. In run drills, the End must either Crash or Trail; when pass drills are added, he must also be prepared to Max a receiver, drop to a Cover zone, or defend his Shortside Square (pp. 21-24). ALLEY/HALF-LINE DRILLS The purpose of these drills is to integrate 1L defenders in pass rush situations. The Alley Drill can take several forms -- 2 on 2, 3 on 3, or 5 on 3 linemen operating live (but under control -- i.e., lock-up to thud). With a live quarterback and (optional) running back, the drill teaches 1L defenders to rush the passer from within their gaps, which turn into pass-rush alleys as they read pass by the offense. ALLEY DRILL (Even Front vs. Sprint-Out) 47
  • 48. ALLEY DRILL (Odd Front vs. Drop-back) The gray lines in the above diagrams represent the pass-rush alleys that 1L defenders stay in as they attack the passer (dark offensive linemen represent traffic cones). This serves as protection against draw plays by the QB or running back, while allowing the defense to keep the pressure on the QB as he sets up to throw. Note its use against both drop-back and sprint-out quarterbacks. When running the drill, be sure to run all fronts against live counterparts -- 11 against tackles and center as shown, 33 against guards and center, etc., and even fronts against guards and/or tackles. The 5-on-3 format is especially useful for drilling the shifts between fronts, and 1L stunts at the snap. In both formats, offensive linemen should show three basic keys -- deep pass set, shallow set for quick passing, and fire-out run blocking. 1L defenders learn to attack their gaps and then pursue the ball. The half-line drill (p. 49) is an extremely useful method to prepare 1L defenders for drop-back, sprint-out, quick, and play-action passing actions by offenses. 1L defenders practice shifts and stunts, based on the End's formation call. Offensive players line up in one of the three formation variations shown, while the 1L defenders have five different looks to switch between. This drill should 48
  • 49. HALF-LINE DRILL - FIVE FORMATS proceed from lock-up to thud, except the End, who can be cut blocked live at any time, and should anticipate this based on his keys. The diagrams illustrate 1&3) sprint-out action with cut-block on the End; 2) Drop-back action (with screen or draw); 4) Quick passing action; and 5) Waggle or bootleg action. 49
  • 50. SECOND LEVEL STACK DRILLS We teach 2L defenders (specifically, Sam, Mike and Will) how to play within the Core through repetition of a series of stack drills. The 1-stack drill teaches 2L defenders how to read through the offensive line to the offensive back they are mirroring (p. 50). 1-STACK DRILL In the diagram, the defender will key his mirror and follow him whether he is a blocker or the ball carrier. He will plug if his mirror dives and scrape if he moves laterally, transitioning to pursuit once the ball carrier leaves the core. In pursuit, he will turn and sprint to the ball, but playing it inside-out to prevent cutbacks. He will learn to face drive, trap and cut-off blocks, as well as outside pulls, by the offensive linemen. He will continue to follow his mirror, even if he is only a decoy who has been faked to, until he reads run (when he will take a pursuit angle to the ball) or until a play-action pass develops (when he will continue to mirror his receiver). If a pass develops and zone defense (Cover) has been called, he will drop to the appropriate zone (pp. 35-38). If Max (man) coverage has been called and his mirror stays home and blocks, the 2L defender in a 1-stack will drop to the short middle passing zone while continuing to read his mirror for draw or other delayed run action. If the ball is passed to his area, he attacks through the potential receiver to the ball. 50
  • 51. 2-STACK DRILL The 2-stack drill is most often run in tandem with another stack; usually another 2-stack, but we will also practice with a 1- and 2-stack combination, as well as a 2- and C-stack combo. In the diagram above, you can see that the responsibilities of the 2L defender are very similar to those in a 1-stack. The difference is the cutback responsibility, which we define for 2L defenders who mirror a back who crosses behind the center toward the far side of the offensive formation. In cutback, the 2L defender cautiously plays the ball inside-out – at least a yard behind the ball carrier until he clears the core -- and guards against the ball carrier cutting back against the grain. C-STACK DRILL A C-stack places a 2L defender behind a 1L End in Area C (see pass defense area designations, p. 6). From here, his responsibilities resemble those of 2L defenders, with two important differences: the further outside stacked 2L defenders are from the center, the more they must be aware of: 1) cutback runs; and 2) passes. To that end, I should note that C-stacks are the only place you will find Len and/or Ron personnel stacked in the defensive core. By definition, they must be covering a TE. The additional responsibility they have is rotation, whereby 2L 51
  • 52. personnel in C-stacks take a deep pursuit angle to cut off the ball downfield – it is a touchdown preventing technique as much as anything. RUNNING STACK DRILLS/UNIT STACK DRILLS To run 1-stack, 2-stack and/or C-stack drills, the appropriate 1L and 2L defenders should line up against either offensive teammates rotating through the drills, or against other defenders being used as offensive players for the purposes of the drill. If defenders are used, the ball should not be snapped, but simply held in the hands of the “quarterback” ready for handing off. The blacked-out offensive players in the drills diagrams represent cones placed where offensive linemen would be – this prevents needlessly wasting the time of linemen who are not essential to the drill, but maintains the kind of spacing defenders will see in game conditions. Note: Unit Stack Drills (p. 63, spreadsheet) are identical in format to the stack drills diagramed above, but put cones in place of 1L defenders -- they involve 2L defenders only against OL and backs. LOLLIPOP DRILL LOLLIPOP DRILL SET-UP This drill prepares 2L defenders to Max receivers by concentrating on 6 common pass routes. The drill should begin with a traffic cone to give the 2L defender his 52
  • 53. location key; he works on his backpedal and turns his shoulders and breaks on the ball as a coach calls out "Right", "Left", or "Deep". The QB in the drill should start by lobbing the ball up in the air with lots of arc, then work on throwing a faster, more direct ball. Finally, the drill should proceed to live WR's taking the place of the cone and running the 6 pass routes shown in the drill. Motion should then be added, but with the receiver always starting his route from the original cone location. Only basic pass routes are run, with minimal faking by the receiver. (Note: Study the 6 pass cuts defined by the diagram on page 52. These should be introduced no more than two at a time during any one practice.) During the season, only the final form with live receivers will be run. 53
  • 54. BEATEN-OUTFIELDER/DOWN-OUT-DOWN DRILLS DEEP PASSING DRILLS FOR 2L/DS In the Beaten Outfielder Drill (BOD), a receiver on a hash at the 5-yard line will run a Go, Post, or Flag route. The 2L defender starts behind the receiver and takes the correct pursuit angle to catch him. The QB will arc the ball over the defender to the receiver; when the DS sees the ball in the air, he calls "BALL! BALL!", at which point the 2L defender reads the receiver's eyes and hands. 54
  • 55. When the ball is imminent, the 2L defender will time his turn and leap into the air with his hands held high. This screens the receiver from the ball (which makes it imperative that the 2L defender turn and face the ball, to prevent pass interference calls) and allows the 2L defender to either tip the ball up and over the receiver into the hands of the DS who is closing fast, or else to intercept the ball if it is underthrown. The 2L defender must be aware that the receiver can sometimes break off his deep route to run a medium-depth route -- he must adjust and cover the new route. The Down-Out-Down (DOD) drill is run with a receiver within 5 yards of the sideline on the inside of the goal line. A 2L defender aligns at a Hard depth, either inside or outside the receiver. He will either steer the receiver outside or funnel him inside (see p. 15). The receivers will usually run deep fade routes to a depth of about 18 yards (i.e., the DS's end line). However, other routes can and will be inserted into the drill with no warning to the 2L defender after all 2L defenders have practiced defending the Fade a few times. Also, receivers may illegally push off and even grab 2L defenders, but the defenders MUST play "clean" and avoid interference penalties. As with the BOD, 2L defenders in the DOD will turn and jump for the ball based on their visual keys and on the DS's call of "BALL! BALL!" when the ball reaches its highest point in the air. The 2L defender must concentrate on pinning the receiver against the sideline through his body position, since this is the area of the field where the DS must run the furthest to reach, and is thus the most vulnerable part of the Max defense against the pass. As the diagram on page 54 illustrates, the BOD and DOD drills should be run on both sides of the filed simultaneously, meaning 4 quarterbacks or coaches (or managers, etc.) who can throw the ball are needed. This will keep all 2L defenders and DS's busy during this drill period. 55
  • 56. DEEP SAFETY: ENFORCEMENT DRILLS ENFORCEMENT DRILLS These drills teach DS's how to judge the trajectory and landing points of footballs when they are thrown -- they are the equivalent of fly-ball practice for baseball 56
  • 57. outfielders. The DS learns through repetition when and where he needs to be to intersect ball and receiver. The first phase is the bounce and glide drill, where the DS learns to read a QB who is dropping back or sprinting out from behind the goal line, who is trying to look off the DS, who pump-fakes and then throws the ball. The DS must continue his low bounce and glide as he reads the QB, not breaking until the ball is thrown. When the ball is launched, the DS SPRINTS along the appropriate path (indicated by the traffic cones on the 25 yard line -- see diagram p. 56) and calls out "BALL! BALL!" when the ball reaches its highest point. Once he knows where the ball is heading, the DS looks to the coach who is standing to the side just before the end line, who holds up 1-3 fingers, which the DS must yell out as he closes on the end line. The majority of these reps should be in the Fade danger area at the sideline from +15-18 yards deep, since this is the hardest route for the DS to defend. The next stage is to add a simulated receiver holding an air shield to protect himself when the DS delivers a 3/4- to full-speed hit. First, two simulated receivers stand holding air shields on the end line on either side of the two hashmarks (i.e., about 18 yards apart). The end-zone QB drops as usual, looks the DS off, etc., then throws in the general direction of one of the receivers. The receivers look back at the QB until the ball is thrown, then turn to face the DS, who starts his bounce and glide and then sprints to the ball. The receiver who is "catching" the ball holds his shield up to chest height as the ball arrives, both to cue the DS that the ball is arriving and to protect himself. Once this format is mastered, the drill can be expanded to include the receiver running with his air shield to simulate all possible pass routes the DS will face. The next stage is to add a 2L defender to the drill to give the DS an additional cue for his peripheral vision -- the 2L defender can leap and tip the ball over the receiver, and must also be factored in when the DS decides to hit the receiver rather than intercept the ball -- whenever possible, the DS should hit through the shoulder of the receiver AWAY from the 2L defender. The drill can also be run with a live receiver and 2L defender, with the DS either bear-hugging the receiver or two-hand touching him if he decides to "hit" him. Whatever the format, no one should ever be on the ground at the end of this drill. 57
  • 58. READ DRILLS READ DRILLS 58
  • 59. In the Read drills, the hitting portion of the Enforcement drills is always replaced with bear-hug or two-hand touch. The object is for the DS to cover more and more of the width of the field with his peripheral vision as he reads the QB and backfield action. Live receivers run progressively more complicated pass route packages, always involving one deep route. These start on one half of the field (p. 58, top), but then progress to the entire width of the field, forcing the DS to expand his peripheral read to eventually encompass all 53.33 yards of width of the football field (p. 58, bottom). The first phase involves the DS reading the QB, bouncing and gliding, and breaking on the ball as it is thrown, then calling out the correct number of fingers from the nearby coach. This phase should be very brief, no more than one rep per DS. Then live receivers are added, running the basic pass route packages (i.e., Flood -- #1 Fade, #2 Out, #3 Flat; Curl -- #1 Curl, #2 Flat; Cross -- #1 Shallow Cross, #2 Post; etc.) These are only on one side of the field at a time, involve only basic pass routes without elaborate fakes, and only have one deep pass route. Finally the route packages are expanded to include 4 or 5 receivers across the entire width of the field, but still only running the basic route packages to cue DS pattern recognition. Others are added as the pre-season goes on -- Seam and Hook packages, and quick passing packages including Slant, Pick and Circle, as well as Choice routes to an isolated backside receiver. The final pre-season phase turns into pass skeleton drills with a complete 2L in place, and using the actual pass route packages (i.e., Bunch, Kentucky Mesh, Go, Smash, etc.) that opponents will run during the season. In-season practices, in fact, will only use this final format. 59
  • 60. The above diagram illustrates that the 1L performs its pass drills between the 30 and 50 yard lines, while 2L and DS drills take place from the end zone to the 30 yard line. 60
  • 61. PRACTICE #2 SCHEDULE: 2-Level Defense Installation Practice #2 (Day 1 -- P.M.) Time 1ST LEVEL 2ND LEVEL DEEP SAFETIES 15:00 Alignment review Lollipop Drill: Enforcement Drills III 15:05 Review Arm-Over, -Under Review 1/2/crack 15:10 Intro Quick Arm-Over Intro cuts 3&4 15:15 Key Drill (1-on-1) Max Drill: Read Drills III 15:20 Review basic run, pass keys Progress 7 yds to End-Line* 15:25 Alley Drill (3-on-3, 5-on-3) Down-Out- Down Drill 15:30 From 11, intro Link/Rip shift Beaten Out fielder Drill 15:35 (2LD p. 200) (Add Out to D-O-D; Fade & Post to Beaten Outfield) 15:40 1/2-Line Drill Mirror Drill: 15:45 Intro shift from 5-Rip/2-Link (Add I backs, Quad receivers, motion) 15:50 (2LD p. 202) 15:55 WATER 16:00 N/T/E: Stance & align 16:05 N/T: Intro slant moves Review stance/stacks/shiver Enforcement Drills III 16:10 E: Review Power Move 16:15 N/T: Key Drill (1-on-1) 16:20 (review basic run key) Review scrape & cutback Read Drills III 16:25 E: Review crash tight/loose 16:30 N/T: Key Drill (3-on-1) 16:35 (Power Move only) Unit Stack Drills: Down-Out-Down Drill 16:40 E: Crash Drill loose 1-, 2- and Area C-Stacks (rotate Len/Ron) 16:45 N/T: Slant Key Drill (Cones for 1L) 16:50 (3-on-1 lock) slant-in vs. QB/RB/OLx2 Beaten Outfielder Drill 16:55 E: Crash Drill tight (rotate L/R/S/M/W) The second practice introduces three new drills -- the 1L Slant Key drill for Noses and Tackles, the 2L Unit Stack drills; and the 2L/DS Mirror drills, especially the I- back format. In the Slant Key drills, (p. 62) both Nose and Tackles practice against 3 OL's (or fellow 1L defenders playing OL's and read the keys given by the OL as they slant one way or the other. Each 1L defender should practice all six reads shown while slanting both in and out, meaning each 1L defender should do a minimum of 12 reps of this drill -- preferably more early on in the pre-season. Later on, the reps can be cut down. In the Unit Stack drills (p. 63), a 2L defender faces two OL's and a back (a QB can be added after several reps) with cones to show the 1L and as space-holders for absent OL's. The 2L must read through the live OL's to the backfielder he is mirroring for his basic keys. He should take on run blocks only in this practice. (Later, he will key pass-blocks to practice his Cover pass drops, Max mirroring, and/or draw and screen reads.) 61
  • 62. PRACTICE #2: 3-ON-1 SLANT KEY N/T SLANT KEY READS 62
  • 63. UNIT STACK DRILLS The I-back drill (p. 64) is introduced early because this formation is so common, and to give 2L defenders extra practice against its power, option and misdirection variations. 63
  • 64. I-BACK MIRROR DRILLS Note: This drill will only be run with two 2-Stacks (left side of diagram) -- the double 1-Stack may be used by special game-plan during the season. Note the progression from easy to hard reads for the 2L defenders reading the I-backs. 64
  • 65. PRACTICE #3 SCHEDULE: 2-Level Defense Installation Practice #3 (Day 2 -- A.M.) Time 1ST LEVEL 2ND LEVEL DEEP SAFETIES 9:00 Basic technique; N/T eagle Stack Drills: 9:05 N/T: Key Drill (3-on-1) 1-Stack: lock to thud Enforcement Drills IV 9:10 (Add new run keys) S/M/W 9:15 E: Crash Drill 2-Stack: intro split backs 9:20 N/T: Slant Key Drill (3/3) S/M/W Read Drills IV 9:25 (Add new run keys) C-Stack: intro I-backs, jam Intro Seam, crossing routes 9:30 E: Crash w/ I backs S/M/W/L/R 9:35 Unit Stack Drills Intro Cover, Cover/2 Deep 9:40 1-Stack: N/M/S/W 2-Stack: T(O)/E(T)/M/S/W* Intro Max/Double, 9:45 C-Stack:E(Loose)/S/M/W/L/R (L in left C-stack; R in right) variations (2 Deep, etc.) 9:50 (Rotate Len/Ron to DS coverage reviews) (Rotate Len/Ron) 9:55 WATER 10:00 N/T/E: Review Lollipop Drill: 10:05 alignment, pass rush tech. Review 1-4, crack; intro 5 Enforcement Drills V 10:10 10:15 N/T: Key Drill (1-on-1) Max Drill: 10:20 E: Intro pass coverage Review funnel/steer Read Drills V 10:25 (Max; Cushion; Short Flat) Intro Max Soft/under zones Review; add Flood 10:30 Alley Drill: Down-Out-Down Drill; Beaten Outfielder Drill 10:35 3-on-3 in 11; 5-on-3 shifts Mirror Drill: I backs, motion to Trips; max to +7 10:40 (lock to thud) Drop-Off Drill Intro: Left E's, then Right; only 1 DS 10:45 1/2-line Drill: Start vs. static O; progress to motion; receivers run +5-7 10:50 Use all alignment calls then stop, defenders continue to zones. 10:55 (lock to thud) * Tackle (Open), End (Tight) Chalk talk #2: 1) Terms: Offensive numbers/areas, formations, wideside/shortside. 2) Mirroring math -- the mental process of identifying any offensive formation. 3) The 13 1L alignments by rule; Eagle alignment (7-foot rule). 4) Max - allow no short or deep passes; Cover - no medium or deep. Mix them up. 5) Absolute concealment from offense; pre-snap 1L shifting. 6) 1L stunts; Max/Double pass coverage (introduce 2-Deep concept - one Tackle out). (This chalk talk should tale place the night before Practice #3.) 65
  • 66. PRACTICE #4 SCHEDULE: 2-Level Defense Installation Practice #4 (Day 2 -- P.M.) Time 1ST LEVEL 2ND LEVEL DEEP SAFETIES 15:00 N/T: Live pass rush 1/1 Lollipop Drill: Enforcement Drills VI 15:05 Intro Cone Signal Drill: Review cuts 1-5, crack 15:10 Shift to Slant Max Drill: Read Drills VI 15:15 E: Max C, Short Flat/Hook Funnel/steer/max double Review; intro Curl 15:20 Crash Drill: Intro TET move Down-Out-Down Drill; Beaten Outfielder Drill 15:25 N/T: Alley Drill -- 15:30 Progress 3-on-3 to 5/3 Mirror Drill: motion to new formation; I backs 15:35 intro 2-, 4-, TNT Cover: Review; note 2B Short exception to rule*; add 15:40 N/T/E: 1/2-Line Drill -- motion, esp. to 2B Short; Intro Max/Double 1A Short; 15:45 Practice pre-snap shifts Max/Double 1A Short&Wide/2 Deep; Max/Double 1A 15:50 Intro TET Wideside/2 Deep; review differences in End Line for each 15:55 WATER 16:00 N/T: Key Drills/Slant Key Review Stack techniques: Enforcement Drills VII 16:05 3/1, review slant, eagle Align, shiver, scrape/cutback 16:10 E: Crash Drill - loose, tight Read Drills VII 16:15 N/T/E: Cone Signal Drill Unit Stack Drills: Combine Review all envelopes 16:20 Slant from 2-/4-; shift/slant 2 2-Stacks, 2-Stack and Review Cover/Max: 1 and 2 16:25 Review TNT/TET Area C-Stack DS; rotate Len/Ron 16:30 Integrated Stack Drills: 1, 2 and C-Stacks Intro Max/Double Wide 16:35 (both Jam and Stack); Lock-up to thud Receiver/2 Deep; 16:40 Cover-A 16:45 Combined/Integrated Stack Drills: (Rotate Sam/Will) 16:50 2 2-Stacks (1L 11); 2- and C- Stacks; 1-&2- + C-Stacks 16:55 (Script TNT/TET); C-Stack add 1 DS (sweep/ HB option) 66
  • 67. PRACTICE #5 SCHEDULE: 2-Level Defense Installation Practice #5 (Day 3 -- A.M.) Time 1ST LEVEL 2ND LEVEL DEEP SAFETIES 9:00 N/T: Key/Slant Key Drills* Stack Drills: (lock to thud) Enforcement Drills VIII 9:05 E: Crash Drill - review 2-Stack: Crosskey vs. split 9:10 N/T: Live 5/3 with OLine C-Stack: review jam; Read Drills VIII 9:15 E: Crash Drill - power run intro Cushion; double review play-action crosses; 9:20 at End coverage technique Curl - out&up by 2B 9:25 N/T: Cone Signal (slant/TNT) 9:30 E: Crash Drill - I backs Combined Stacks: Review: Max, Max 2 Deep; 9:35 flow away -- trailer tech. 2 2-Stacks cross key Max Double, /2 Deep; 9:40 N/T/E: Cone Signal vs. split backs; 1-/2- + Max/Tight Cushion; 9:45 Slant/TNT/TET; then C Stacks (jam and stack) Max/Double Wide/2 Deep 9:50 remove 1 T (2 Deep) (rotate S/M/W) 9:55 WATER 10:00 Integrated Stacks: Install Cushion, Max/Tight Cushion in C 10:05 Review: Cover, /2 Deep; 10:10 Cover-A; 10:15 Combined/Integrated:2 2-Stacks - script cross-key in 11 Intro Cover-A/2 Deep 10:20 1-&2-Stack + C: script Cushion on pass; limit TET; add 10:25 1 DS, script sweep/pitch/option w/ HB option pass (rotate Len/Ron) 10:30 Scripted Defensive Scrimmage: 10:35 1) Only Max coverage, 1 DS; limited dropback passing (emphasis on Run D) 10:40 2) No stunting; but script appropriate alignments against offensive plays 10:45 3) I formation - off-tackle/sweep only; backs must move together; may split to pass block 10:50 4) Every play is 2nd & Long (8-10); ball is at mid-field 10:55 5) Run half of scrimmage from each hashmark *3-on-1; stress secondary run responsibilities Chalk talk #3: 1) Calling defensive signals. 2) 1L alignments in 2-Deep; 2L stunt "Cushion"; Max/Tight Cushion; Cover-A. 3) 2L stunts "Switch" and "Dog". 4) Review Max and Cover variations, 2-Deep. (Again, this chalk talk is given the night before this practice.) 67
  • 68. PRACTICE #5 CROSS-KEY DRILLS -- RUN FORMAT Practice 5 brings the last major drill to be introduced -- the run-format cross-key drill. Even though 2L defenders have been practicing against I-backs cutting back since Practice #2, they now work against Split and Pro backfields. 68
  • 69. PRACTICE #6 SCHEDULE: 2-Level Defense Installation Practice #6 (Day 3 -- P.M.) Time 1ST LEVEL 2ND LEVEL DEEP SAFETIES 15:00 N/T: Key Drill (1-on-1) Lollipop Drill: Enforcement Drills IX 15:05 Review basic tech, rush tech Review cuts 1-5, crack 15:10 Intro screen/draw keys Max Drill: 15:15 E: Crash Drill: review tight, Funnel, steer, double Read Drills IX 15:20 loose, Max, Cover, Cushion* Mirror Drill: Max Review Seam/Curl/Flood 15:25 N/T/E: Motion, Trips, Twinsx2 Intro variations 15:30 Live pass rush w/ O-Line Intro Pick patterns -- 15:35 1/1, 3/3, 5/3, 5/5 FIGHT THROUGH picks 15:40 Practice pre-snap shifts, Mirror Drill: Cover With 2L in drills 15:45 slant, TNT, TET Drop tech.; intro draw 15:50 Coach/mgr as drop QB keys; Cover, -A, motion Trips 15:55 WATER 16:00 Alley Drill (5/3) 2L/DS/Shortside E -- Cover Integration 16:05 Live QB/HB, script draws, Cover, Cover/2 Deep, Cover-A, Cover-A/2 Deep; start 16:10 slant, TNT, use shift with static offensive formations & no ball; add motion to 16:15 1/2-Line Drill Trips and 2 Twins, then add footballs 16:20 Live QB, HB blocks; sprint, 16:25 dash, TET/TNT w/ shift 16:30 Scripted Defensive Scrimmage: 16:35 1) Max, /Double, Cover, Cover-A, mostly 1 DS; limited running (emphasis on Pass D) 16:40 2) Script some slant, TNT & TET, Cushion; on offense, some screens/draws 16:45 3) I formation - off-tackle/sweep only; backs must move together; may split to pass block 16:50 4) Script Max vs. 3-step; Cover-A verify Trips or revert to Cover; /2 Deep vs. deep Seam 16:55 5) Every play 2nd & 8-10 from 50; run half of scrimmage from each hashmark *Rotate S/M/W/L/R to Crash Drill to practice Cushion, Max/Tight Cushion; Shortside Ends practice Shortside Square tech. For Cover-A 69
  • 70. PRACTICE #7 SCHEDULE: 2-Level Defense Installation Practice #7 (Day 4 -- A.M.) Time 1ST LEVEL 2ND LEVEL DEEP SAFETIES 9:00 N/T: Key Drill/Slant Key (3/1) Stack Drills: Enforcement Drills X 9:05 Review techs, stress 1-: Intro Dog; find 6th gap 9:10 "tear" (second. run respons.) 2-: Cross-key Split, Intro I Read Drills X 9:15 N/T: Live 5/3 with OLine C-: Review jam/stack review; stress End-Line 9:20 run & pass blocking enforcement vs. deep routes 9:25 E: (From 0900) Crash Combine Stacks: Down-out-Down Drill: 9:30 Drill - review, Intro Dog* 1-: 2 2L, stack vs. I (Rotate 2L personnel) 9:35 N/T/E: Cone Signal Drill 2x2-: Cross-key I backs 9:40 shifts, post-snap moves; 1-/2-&C-: Intro Switch, Review Max: 9:45 Intro Dog - rotate S/M/W cancel Switch (i.e., vs. Ace) /Double, 1 and 2 DS 9:50 (Rotate L/R/S/W) 9:55 WATER 10:00 Integrated Combined Stack Drills: lock/thud Review Cover: 10:05 1 Stack: 2 2L defenders "stack" vs. I backs /2 Deep; -A; -A/2 Deep 10:10 2x2-Stack: Cross-key I backs; 11 only; limit stunting For Cover-A, 50/50 10:15 1-/2-&C-Stacks: Script Cushion, Switch: limited TET; script verify/revert to Cover 10:20 Dog vs. dropback; rotate DS for sweep/pitch/option w/ (i.e., 2 Twins vs. Trips) 10:25 HB option pass (rotate Len/Ron) 10:30 Scripted Defensive Scrimmage: Mainly run, intersperse some dropback 10:35 1) Ball at 50; rotate hashes; plays in following sequence: 3rd&9, 7, 5, 3; repeat seq. 10:40 2) Max, Max/2 Deep, Cover-A, Cover-A/2 Deep; non-verify -A half the time vs. passes 10:45 3) I Backs -- no limits (but don't intro new plays in scrimmage). 10:50 4) Scoring: Defense wins 1 pt when it prevents 1st down; offense 1 pt. per 1st down 10:55 * Primary crash, secondary trailer responsibilities; in Dog, Max near back Chalk talk #4: 1) Primary run responsibilities (1L gaps; 2L mirrors). 2) Secondary run responsibilities and pursuit. 3) Review stunts: 1L Slant/Twists; 2L Cushion, Switch and Dog. 4) Pass rush mechanisms: 5-man rush; outside rush & overload principles (2LD p. 120). 5) Pass coverage mechanisms: Max, /Double, /Tight Cushion, Cover, -A; also in 2-Deep. 6) Formation reading/pattern recognition/reading the QB. (Chalk talk for before this practice.) 70
  • 71. PRACTICE #7 I-BACKS CROSS-KEY - PASS KEYS (See also I-back diagram p. 64, bottom and cross-key drill, p. 68). 2L defenders must practice against backs splitting and/or crossing on counter plays and on pass plays. This drill teaches 2L defenders to drop to their Cover assignments while reading various backfield actions -- it prepares them for play-action pass drops. 71